Git Instaweb Example
1. Introduction
In this post, we feature a comprehensive Example on Git Instaweb. Git is a popular version control system. Git comes with a command-line utility to manage file repositories. Using the command-line utility can be cumbersome for certain tasks. Fortunately, Git comes with other tools you can use to work with your repositories. GitWeb is one of these tools.
GitWeb is a Git web interface used for browsing Git repositories. Additionally, you can use GitWeb to:
- view the content of a file
- search for commits by author (the committer)
- examine commits, commit messages and changes made by a given commit
- view differences between file versions
- download a snapshot of a project
- see logs for a given branch
Also included as part of the Git distribution is Instaweb. Instaweb is a script used to set up a temporary instance of GitWeb on a web server for browsing local repositories. Instaweb requires, at a minimum, a light-weight server such as lighttpd or webrick.
(Note: If you want a more permanent solution to view repositories, you will need to set up GitWeb on a traditional web server, such as Apache. For instructions, visit https://git-scm.com/book/en/v2/Git-on-the-Server-GitWeb).
1.1 Tools Used in this Example
- Maven 3.5.4
- WEBrick
Maven downloads are available here: https://maven.apache.org/download.cgi.
Instructions for installing Maven are provided here: https://maven.apache.org/install.html.
WEBrick is a Ruby library used to create simple HTTP web servers. Ruby is pre-installed on macOS.
Note: This example was created on the macOS platform. Git for Windows includes Git GUI, a tool that provides much of the same functionality demonstrated in this example.
2. Git Instaweb Example
In this example, we will add a Maven project to a Git repository and demonstrate some of the tasks we can perform with Instaweb.
2.1 Create a Maven Project
Create a directory in your file system. Open a terminal (shell) in that same directory and execute the following Maven goal:
$ mvn archetype:generate -DgroupId=com.jcg.app -DartifactId=my-app -DarchetypeArtifactId=maven-archetype-quickstart -DinteractiveMode=false
The process may take a while to complete if you have just installed Maven. You may also need to execute the command a couple of times before it succeeds.
Maven Project Creation Output
[INFO] ----------------------------------------------------------------------------
[INFO] Using following parameters for creating project from Old (1.x) Archetype: maven-archetype-quickstart:1.0
[INFO] ----------------------------------------------------------------------------
[INFO] Parameter: basedir, Value: /Users/gilbertlopez
[INFO] Parameter: package, Value: com.jcg.app
[INFO] Parameter: groupId, Value: com.jcg.app
[INFO] Parameter: artifactId, Value: my-app
[INFO] Parameter: packageName, Value: com.jcg.app
[INFO] Parameter: version, Value: 1.0-SNAPSHOT
[INFO] project created from Old (1.x) Archetype in dir: /Users/gilbertlopez/gitexample/my-app
[INFO] ------------------------------------------------------------------------
[INFO] BUILD SUCCESS
[INFO] ------------------------------------------------------------------------
[INFO] Total time: 6.800 s
[INFO] Finished at: 2018-08-22T12:22:14-07:00
[INFO] ------------------------------------------------------------------------
2.2 Create a Local Repository
While in the same directory, run the following command to initialize a Git repository:
$ git init
Git init Command Output
Initialized empty Git repository in /Users/gilbertlopez/gitexample/.git/
This directory is now a Git repository and a folder “.git” with the repository metadata has been generated.
(Note: This folder is hidden by default as you would, typically, not edit its contents.)
Next, check the status with the following command:
$ git status
Git status Command Output
On branch master

Initial commit

Untracked files:
  (use "git add ..." to include in what will be committed)

	my-app/

nothing added to commit but untracked files present (use "git add" to track)
We have a project in the repository directory, but Git cannot track it until we add it to the repository.
2.3 Add and Commit the Project to the Repository
Let’s add the project to the repository. Run the following command (don’t forget the dot at the end):
$ git add .
This will add all the files and folders of the current directory, recursively, to the repository index. The project files and folders are now in the staging area. You can run the ‘git status’ command to see the changes that are to be committed.
Git status Command Output
$ git status
On branch master

Initial commit

Changes to be committed:
  (use "git rm --cached ..." to unstage)

	new file:   my-app/pom.xml
	new file:   my-app/src/main/java/com/jcg/app/App.java
	new file:   my-app/src/test/java/com/jcg/app/AppTest.java
To commit the files from the staging area to the repository, run the following command:
$ git commit -m 'Initial commit of project'
Note: The -m option allows us to add a commit message inline.
Git commit Command Output
[master (root-commit) e682818] initial commit of project
 3 files changed, 69 insertions(+)
 create mode 100644 my-app/pom.xml
 create mode 100644 my-app/src/main/java/com/jcg/app/App.java
 create mode 100644 my-app/src/test/java/com/jcg/app/AppTest.java
2.4 Start Git Instaweb
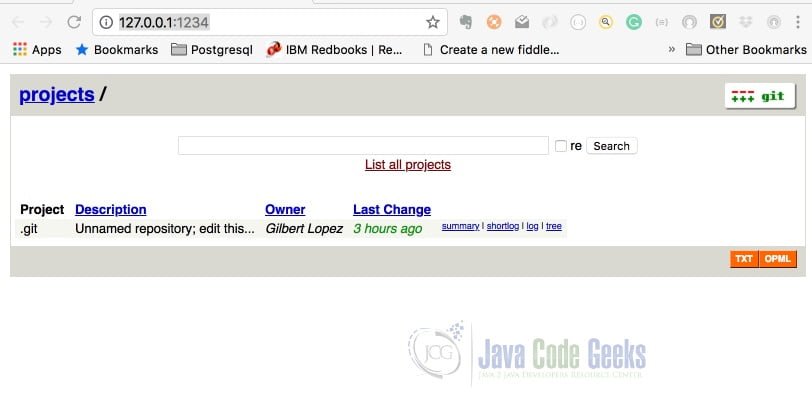
Now that the files have been committed, run the instaweb script. This will initialize an instance of GitWeb and open a view of the repository in the default browser at 127.0.0.1:1234.
$ git instaweb -d webrick
We are specifying WEBrick as the web server since it is already installed on macOS. For more configuration options see the Instaweb documentation here: https://git-scm.com/docs/git-instaweb.
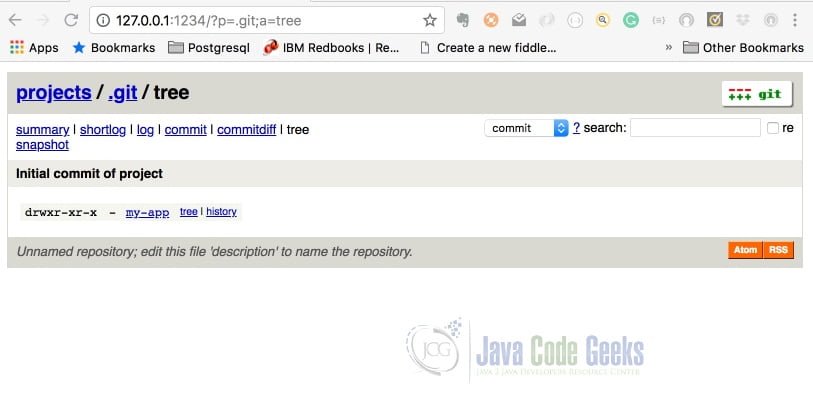
The elapsed time of the last commit is shown under ‘Last Change’. Click on ‘tree’ to see the top directory of the project. (‘Tree’ allows you to drill down in the directory hierarchy.)
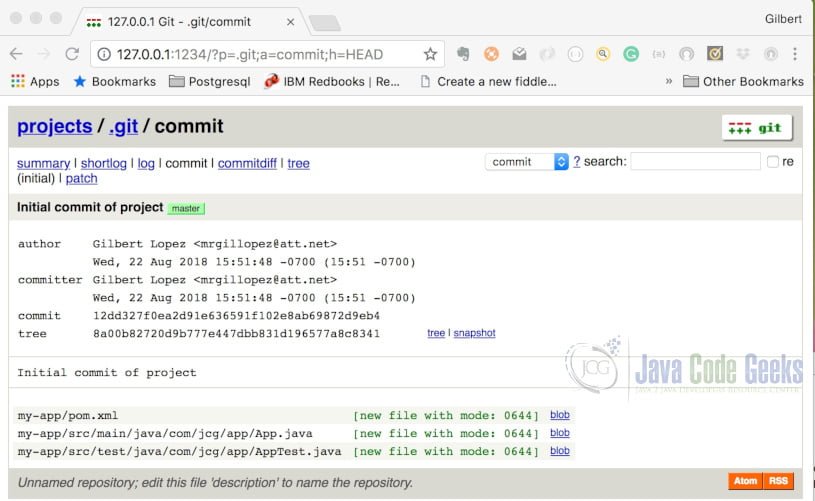
The tree view displays the files and/or folders in the current directory that have been committed to the repository. You can also download the project from this view by clicking ‘snapshot’ in the menu bar. Next, click on ‘commit’ in the menu bar.
The commit view displays details about the ‘commit’ that was previously executed.
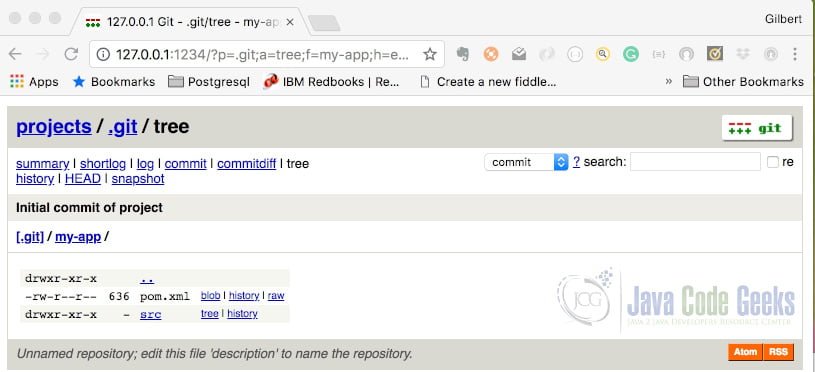
Return to the previous page and click ‘tree’. The contents of the ‘my-app’ folder are displayed.
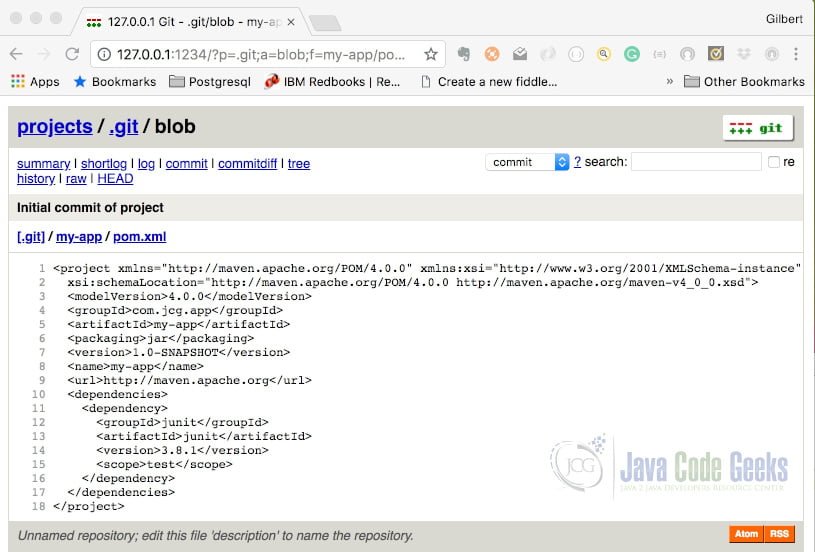
pom.xml has options to view the history of the file and to view the current version of the file, as you can see by clicking ‘blob’.
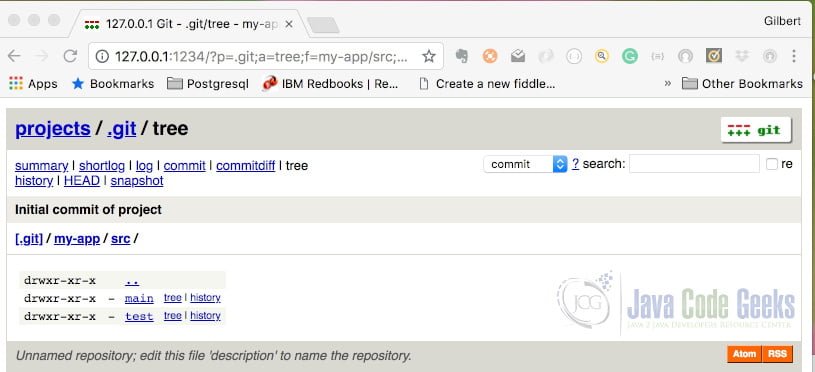
Return to the previous page and click ‘tree’ next to ‘src’.
As you can witness, ‘tree’ applies to directories while ‘blob’ applies to files. Now, click on commitdiff in the menu bar.
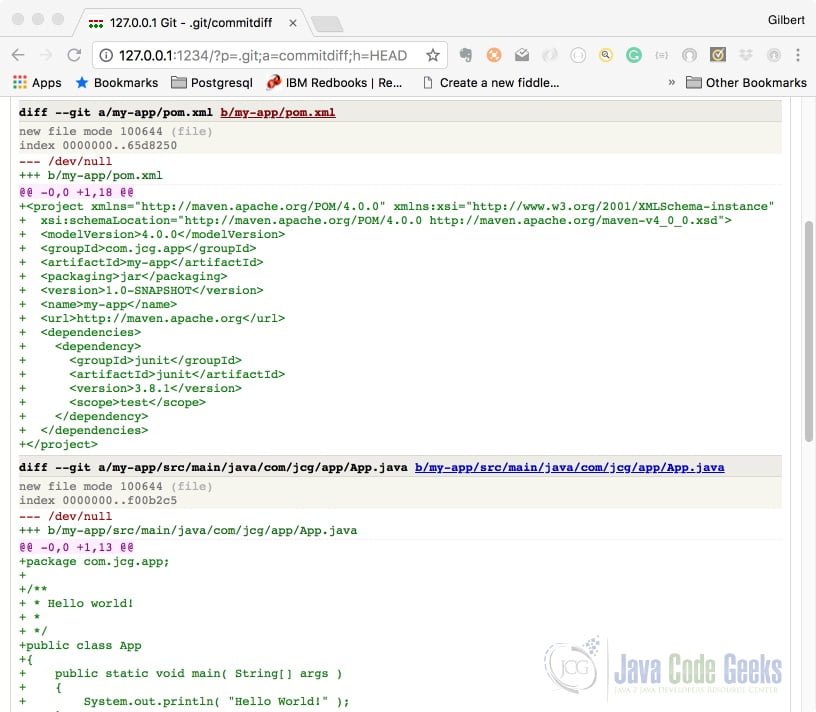
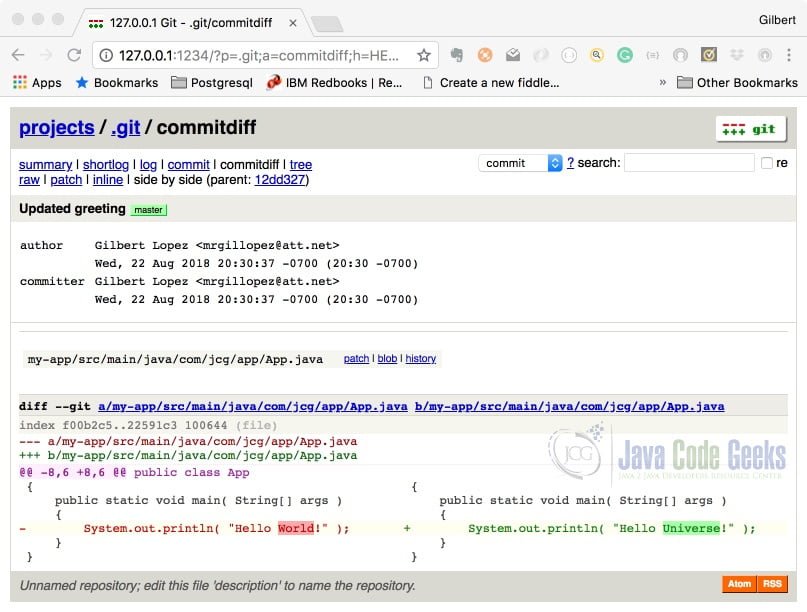
The commitdiff view shows differences between versions of committed files. At the moment, there is only one version, the one from the initial commit.
2.5 Edit App.java and Commit the Change
Make a change to App.java in the my-app/src/main/java/com/jcg/app/ directory. For example:
App.java
package com.jcg.app;

/**
 * Hello world!
 *
 */
public class App
{
    public static void main( String[] args )
    {
        System.out.println( "Hello Universe!" );
    }
}
Save the file and run the ‘git status’ command.
$ git status
On branch master
Changes not staged for commit:
  (use "git add ..." to update what will be committed)
  (use "git checkout -- ..." to discard changes in working directory)

	modified:   my-app/src/main/java/com/jcg/app/App.java

no changes added to commit (use "git add" and/or "git commit -a")
Now add the modified file to the staging area and commit the change.
$ git add .
$ git commit -m 'Updated greeting'
[master aa73dca] Updated greeting
 1 file changed, 1 insertion(+), 1 deletion(-)
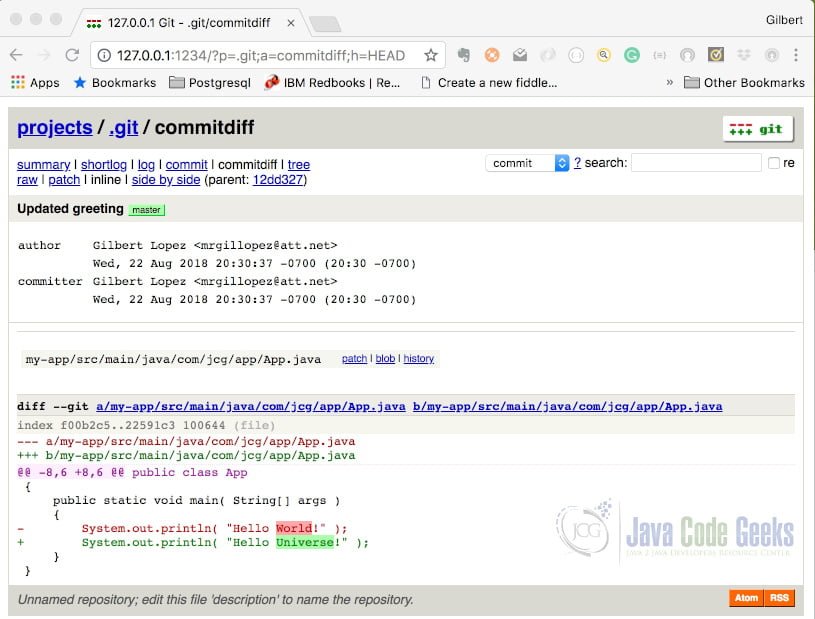
Return to the browser and refresh the page.
The change is color coded with red for what was removed and green for what was added. Click ‘side by side’ in the menu bar.
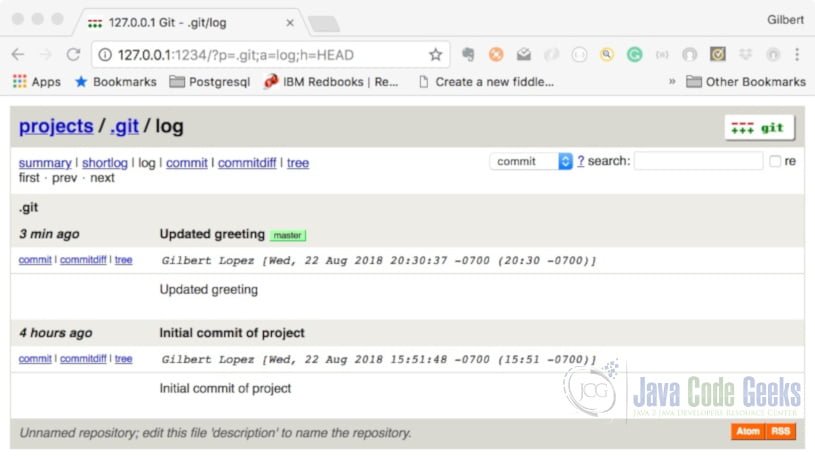
Finally, click ‘log’. The log view will display information about all commits executed in the repository.
3. Summary
In this example, we demonstrated how to use Instaweb for browsing a local Git repository and featured some of the most common tasks that can be performed with the tool.

