1. Introduction
Git coming back again:) This time I’ll introduce how to create Git repository(repo for short). In my previous post on Git Tutorial for Beginners, I’ve explained some basic Git operations/commands, which briefly includes how to create Git repo. In this article, we’ll go to the process step by step and see how to create Git repository from the very beginning.
All the examples below is shown in MacOS EI Capitan Version 10.11.3 and the Git version is 2.5.4.
2. Git installation
Before we want to use Git, we should install Git at least. Luckily we have tons of materials telling us how to install Git. Basically, we have two ways to install Git:
- Command line: For different operating systems, different command line may be used in terminal/command line. For example, for CentOS,
sudo yum install git-allcould installGitsuccessfully. If you want to check out solutions for other operating systems, you may find answers in the tutorial here. - Package/executable file: A more direct way could be downloading the executable package/file and install it by double click the package/file. The
Gitcommunity provides information for different systems, such as MacOS, Windows, Linux and Solaris. For different packages downloading options, you can refer to the link here. Following the instructions, you can successfully installGit. You may find it very user-friendly, as it provides GUI functions.
To make sure we’ve created the Git successfully, we may use the terminal to check it. Open a terminal in your computer and type git --version. It’ll show the current version of the Git you’re using. For example, I’ve tested this on my own computer and it shows:
WXMs-MacBook-Pro:~ WXM$ git --version
git version 2.7.4 (Apple Git-66)
If you can see the version of Git, that means you’ve make Git installed.
3. Git repository
After successfully installing Git, the tool we need is ready. Then we shall come to understand different Git repositories. Basically there’ll be three different Git repositories: work space, index, local repository. In addition, if we consider the usage of Github, then we may consider another one: remote repository.
The figure below will have a clear show on these repositories:

- Workspace: it’s the place where you see in your computer system, or the directory where you check out your files. Files in the workspace could be added to the Git by using
git addcommand. Basically it could be any folders in your computer. - Index: it’s also called staging area. It’s an invisible space where you can add files that you want to commit. To add commit, you can use
git commitcommand. - Local repository: it’s also an invisible repository. Actually it’s stored in the .git folder, which is hidden in the folder you created.
- Remote repository: this could be another computer, or it could be the server of others, such as Github, which we can consider it as a remote repository. To access to the remote repository,
git pushorgit pullcould be used.
4. Create Git repository
Then I’ll show you step by step on how to create a Git repository.
Basically there’ll be three ways to create a Git repository. You may create an empty Git repository from scratch. Or you may use existed project to create a Git repository. Or you may want to clone a project from Github.
4.1 Create Git repository from empty project
Below I’ll show you how to create an empty Git repository from scratch.
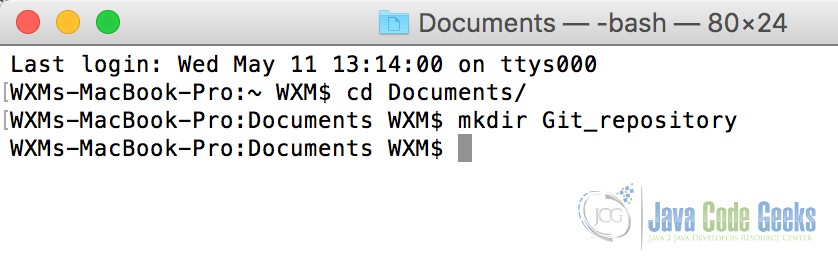
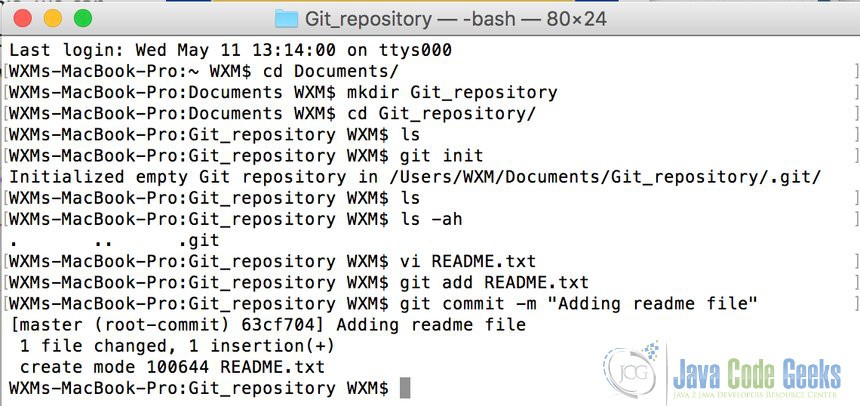
First of all, we need to create an empty folder Git_repository like below. This is used for the Git repository, you can consider it as a container for your Git project.
Then go to the Git_repository folder and type the command git init in the terminal. This command is used to create an empty Git repository, which contains all the necessary repository files – a Git repository skeleton. It will show the result after running the command like below:
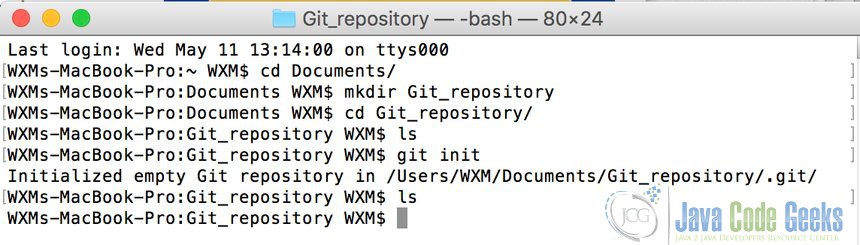
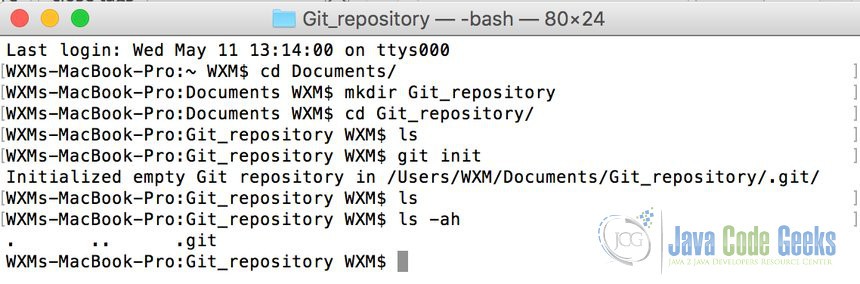
You may notice that, when we use ls command to show the files in the folder, it shows nothing. However, it’s not true on this. Actually there’s a hidden folder called .git which has been created. To show this, we may use the ls -ah command to make the hidden file visible like below:
Then you can add files into the repository as you wish. For example, you may add a README file to the staging area, with git add command and commit it to local repository, with git commit command.
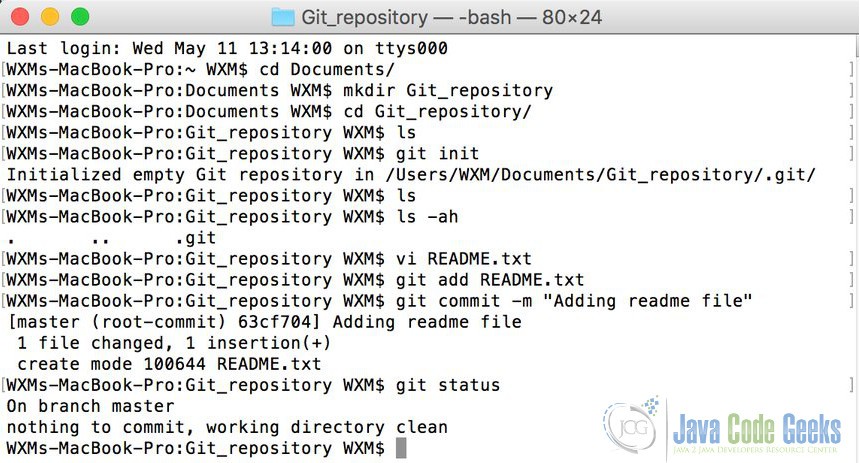
In addition, you may use git status command to check the status of the repository like below:
For more operations/commands on Git, go and refer to my previous post.
4.2 Create Git repository from existed project
The main difference between this method and first one, lies just in whether we need to create an project or not. Basically you may go to any folder in your computer and in the terminal, type git init. This will make this folder a Git repository. You can have further operations on this folder like above.
4.3 Create Git repository from remote directory
To create a repository from remote directory, basically you need to have a Github account. Then you need to connect your local computer with the Github account. For the detailed information on this, you may check out the post here.
After you’ve setting up your Github account, you may pull or push different projects from Github. Here, we introduce how to pull/download a project from Github.
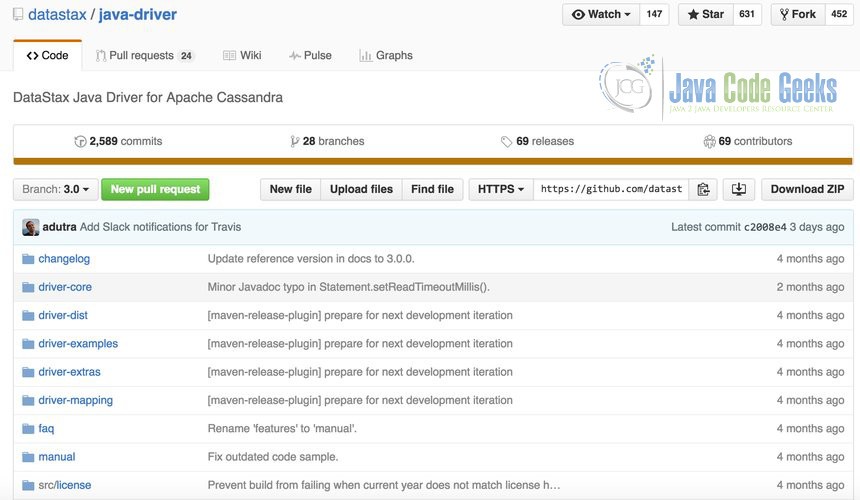
Firstly, you need to check out the projects that may interest you. You can find many useful and interesting projects on Github. For example, you may be interested in the java driver for Apache Cassandra. You can go to the Github link https://github.com/datastax/java-driver. Below is the figure to show how it looks for this Git project.
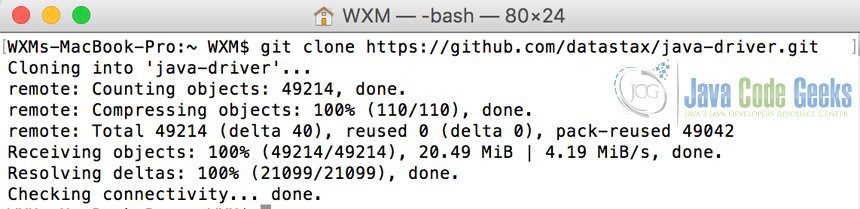
Then if you want to download it and work on this project on your local machine. You can use git clone command. To do this, you need to find the git link for this project. For this project, the git link is https://github.com/datastax/java-driver.git. The position of this link is below with blue part marked and you can copy it.

Then open you terminal and go to the position you want to save this project. Type git clone https://github.com/datastax/java-driver.git. Then it’ll download this project to your local machine like below:
4. Conclusion
In this article, we’ve explained how to create Git repository. Three different methods could be used: create an empty Git repository, create a Git repository from existed project and create a Git repository from remote repository.
In addition, two important commands should be useful for repository creation: git init and git clone.
