Hello. In this tutorial, we will understand how to perform join query in Mongodb using Node.js. To set up Mongodb I will be using Docker.
1. Introduction
The $lookup operator in Mongodb is an aggregation operator and is used to perform join aggregate in Mongodb. This operator is used to join a document from one collection to a document in another collection of the same database. The operator works as a SQL Left Outer join and is represented by the following syntax in Mongodb –
Code syntax
{
    $lookup:
    {
        from: from_collection,
        localField: input_collection_field,
        foreignField: from_collection_field,
        as: attached_array_field
    }
}
Where:
fromfield indicates the mongodb collection with which we’d like to joinlocalFieldspecifies the field local to a collection on which we need to perform the queryforeignFieldindicates the target field from other collection with which we intend to joinasspecifies the name of the output array
1.1 Setting up Node.js
To set up Node.js on windows you will need to download the installer from this link. Click on the installer (also include the NPM package manager) for your platform and run the installer to start with the Node.js setup wizard. Follow the wizard steps and click on Finish when it is done. If everything goes well you can navigate to the command prompt to verify if the installation was successful as shown in Fig. 1.

2. Docker
In the present world, Docker is an important term –
- Often used in CI/CD platform that packages and runs the application with its dependencies inside a container
- Is a standard for Linux Containers
- A Container is a runtime that runs under any Linux kernel and provides a private machine-like space under Linux
2.1 Setting up Docker
If someone needs to go through the Docker installation, please watch this video.
3. Join query in MongoDb and Nodejs
To set up the application, we will need to navigate to a path where our project will reside and I will be using Visual Studio Code as my preferred IDE. Let us take a look at the application structure.

3.1 Setting up Mongodb on Docker
To set up the Mongodb and Mongodb GUI on the I will be making use of the Docker and for that, I have prepared a simple docker-compose.yml that will help to set up the mongodb with a default database as – test
docker-compose.yml
services:
  mongodb:
    container_name: mongodb
    image: mongo
    environment:
      MONGO_INITDB_DATABASE: test
    ports:
      - '27017:27017'
  express:
    container_name: express
    image: mongo-express
    ports:
      - '9001:8081'
    environment:
      - ME_CONFIG_MONGODB_SERVER=mongodb
      - ME_CONFIG_MONGODB_PORT=27017
      - ME_CONFIG_MONGODB_ENABLE_ADMIN=true
    depends_on:
      - mongodb
version: '3'
To get the mongodb and gui up and running we will trigger the following command – docker-compose -f /docker-compose.yml up -d. If the images are not present in the host environment then they will be downloaded from the Dockerhub repository and the whole process might take a minute or two. Once done you can use the – docker ps command to confirm that the containers are running or not as shown in the below image.

You can also use the following command – docker-compose -f /docker-compose.yml up -d to cleanup the created environment.
3.2 Setting up the implementation
Let us write the different files which will be required for practical learning.
3.2.1 Populate the database with collections
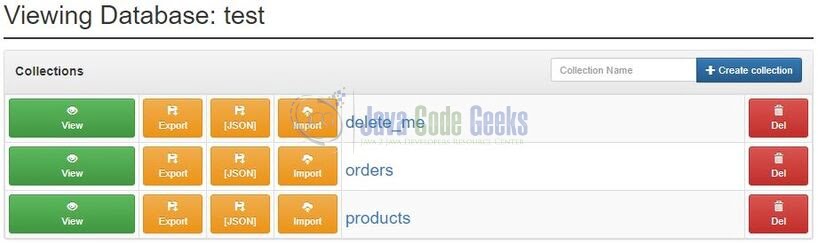
Before starting with the tutorial I am hoping that you’re aware of the basis of the mongodb. Once the mongodb is running we need to populate the test database with the collections. Here I have created two collections named – orders and products as shown below.
You can download the sample document for the collections from the Downloads section
3.2.2 Setting up dependencies
Navigate to the project directory and run npm init -y to create a package.json file. This file holds the metadata relevant to the project and is used for managing the project dependencies, script, version, etc. Add the following code to the file wherein we will specify the required dependencies.
package.json
{
  "name": "nodejs-mongodb-join",
  "version": "1.0.0",
  "description": "",
  "main": "main.js",
  "scripts": {
    "start": "node main.js",
    "test": "echo \"Error: no test specified\" && exit 1"
  },
  "keywords": [],
  "author": "",
  "license": "ISC",
  "dependencies": {
    "mongoose": "^6.2.5"
  }
}
3.2.3 Model file
Create a file named model.js which contains Schema and Model for the collections.
model.js
const mongoose = require("mongoose");

const orders = new mongoose.Schema({
  _id: Number,
  product_id: Number,
  status: Number
});

const products = new mongoose.Schema({
  _id: Number,
  name: String
});

const Orders = new mongoose.model("orders", orders);
const Products = new mongoose.model("products", products);

module.exports = { Orders, Products };
3.2.4 Main file
Create a file named main.js responsible to interact with the mongodb and return the results by printing them on the console.
main.js
const mongoose = require("mongoose");
const { Orders } = require("./model");

const db_name = "test";
const svc_endpoint = "mongodb://127.0.0.1:27017/" + db_name;
mongoose.connect(svc_endpoint, {});

Orders.aggregate([
  {
    $lookup: {
      from: "products",
      localField: "product_id",
      foreignField: "_id",
      as: "orderdetails"
    }
  },
  {
    $unwind: "$orderdetails"
  }
])
  .then((result) => {
    console.log(result);
  })
  .catch((error) => {
    console.log(error);
  });
4. Run the Application
To run the application navigate to the project directory and enter the following command as shown below.
Run command
$ node main.js
If everything goes well the application will be started successfully, connected to the mongodb on port number – 27017 via mongoose client and the following logs will be shown on the console.
Logs
[
  {
    _id: 1,
    product_id: 1001,
    status: 1,
    orderdetails: { _id: 1001, name: 'Apple iPhone' }
  },
  {
    _id: 2,
    product_id: 1003,
    status: 1,
    orderdetails: { _id: 1003, name: 'Apple airpods' }
  },
  {
    _id: 3,
    product_id: 1002,
    status: 2,
    orderdetails: { _id: 1002, name: 'Apple macbook pro' }
  }
]
That is all for this tutorial and I hope the article served you with whatever you were looking for. Happy Learning and do not forget to share!
5. Summary
In this tutorial, we saw the implementation of $lookup operator in mongodb to perform a join operation. You can download the source code from the Downloads section.
6. Download the Project
This was a tutorial to understand and implement the $lookup operator in mongodb.
You can download the full source code of this example here: Join query in MongoDb and Nodejs
