JavaFX is a powerful and versatile framework for building rich desktop applications with a modern look and feel. In this article, we will guide you through the process of creating a simple “Hello World” application using JavaFX.
1. Setting Up Your Development Environment
Before we dive into coding, Let’s make sure we have the necessary tools installed. We will need the Java Development Kit (JDK) and an integrated development environment (IDE) such as Netbeans, Eclipse, or IntelliJ IDEA. Ensure that your JDK version is compatible with JavaFX. In this article, Netbeans IDE is used.
1.1 Install JDK
Visit the official Oracle website or adopt OpenJDK to download and install the latest JDK version. Follow the installation instructions for your operating system. You can find the latest JavaFX version on the JavaFX website. Note that Starting from Java 11, JavaFX is no longer bundled with the JDK.
1.2 Configure JavaFX SDK
To use JavaFX in a Maven project, we need to add the appropriate dependencies to our pom.xml file. We need to specify the dependencies for JavaFX and, if needed, the JavaFX Maven Plugin.
Here is an example of how we can configure the Maven dependencies for a JavaFX project:
<project xmlns="http://maven.apache.org/POM/4.0.0" xmlns:xsi="http://www.w3.org/2001/XMLSchema-instance"
  xsi:schemaLocation="http://maven.apache.org/POM/4.0.0 http://maven.apache.org/maven-v4_0_0.xsd">
    <modelVersion>4.0.0</modelVersion>
    <groupId>com.jcg</groupId>
    <artifactId>Main</artifactId>
    <version>1.0</version>
    <properties>
        <project.build.sourceEncoding>UTF-8</project.build.sourceEncoding>
        <maven.compiler.source>17</maven.compiler.source>
        <maven.compiler.targetv17</maven.compiler.target>
    </properties>
    <dependencies>
        <dependency>
            <groupId>org.openjfx</groupId>
            <artifactId>javafx-controls</artifactId>
            <version>17.0.6</version>
        </dependency>
    </dependencies>
    <build>
        <plugins>
            <plugin>
                <groupId>org.apache.maven.plugins</groupId>
                <artifactId>maven-compiler-plugin</artifactId>
                <version>3.8.0</version>
                <configuration>
                    <release>17</release>
                </configuration>
            </plugin>
            <plugin>
                <groupId>org.openjfx</groupId>
                <artifactId>javafx-maven-plugin</artifactId>
                <version>0.0.8</version>
                <configuration>
                    <mainClass>com.jcg.main.App</mainClass>
                </configuration>
            </plugin>
        </plugins>
    </build>
</project>
Here is an explanation of the key sections:
- Dependencies Section:
- The
<dependencies>section includes the JavaFX dependencies. In this example, it includesjavafx-controls. We can add more dependencies such asjavafx-fxmldepending on the JavaFX modules we need for our application.
- The
- Properties Section:
- The
<properties>section specifies the source and target compatibility version. Make sure these versions are compatible with your JavaFX version.
- The
- Build Section with JavaFX Maven Plugin:
- The
<build>section includes the JavaFX Maven Plugin configuration. Replacecom.jcg.main.Appwith the actual package and class name of your main application class.
- The
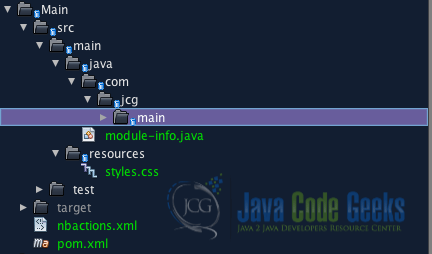
1.3 Project Structure
Once the project is created, we should see a basic directory structure with source folders like this:
2. Writing Your First JavaFX Hello World Example
Now that we have our project set up, let’s create a simple “Hello World” application.
Locate the App.java or similarly named class inside the default package. This is the entry point for our JavaFX application. Update the contents of the App.java file to include the basic structure of a JavaFX application:
public class App extends Application {

    public static void main(String[] args) {
        launch(args);
    }

    @Override
    public void start(Stage primaryStage) {
        primaryStage.setTitle("Hello World!");

        Label label = new Label("Hello, JavaFX!");
        StackPane root = new StackPane(label);
        Scene scene = new Scene(root, 600, 400);

        primaryStage.setScene(scene);
        primaryStage.show();
    }
}
In this code:
- We extend the
Applicationclass. - The
startmethod is the entry point for JavaFX applications. - We create a
Labelwith the text Hello, JavaFX! and set it as the root of theScene. - The
Sceneis set to theprimaryStage, and the title is set to Hello World!. - Finally, we display the
primaryStage.
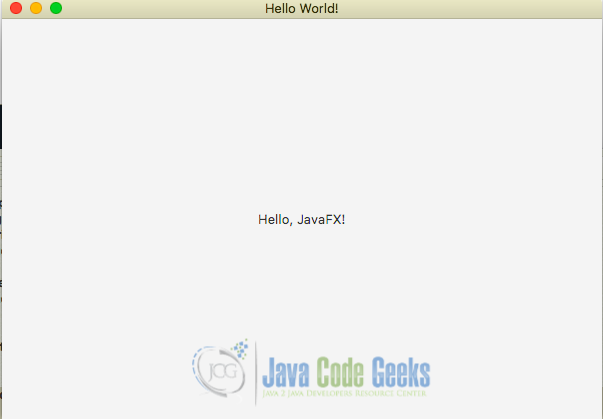
2.1 Run the Application
To build and run our JavaFX application using Maven, we can use the following commands:
mvn clean javafx:run
This will compile our JavaFX application and launch it. We should see a window with the title Hello World! and the text Hello, JavaFX! displayed.
3. Understanding the JavaFX Application Structure
JavaFX applications follow a structure that involves stages, scenes, and nodes. Let’s break down the key components of our Hello World application:
3.1 Application Class
The App class extends the Application class, which is the base class for all JavaFX applications. It provides the start method, where we initialize and configure our application.
3.2 Stage
The Stage class represents the main window of our application. In our example, primaryStage is an instance of the Stage class. We set the window’s title using the setTitle method.
3.3 Scene
The Scene class represents the content inside a Stage. It can contain various UI elements. In our example, we create a Scene and set its dimensions (600×400 pixels). The Scene is then set to the primaryStage.
3.4 Label
The Label class is a simple text label. We create a Label with the text Hello, JavaFX! and set it as the root node of our Scene.
3.5 Show the Stage
Finally, we set the Scene to the primaryStage and display it using the show method.
4. Styling the JavaFX Application
JavaFX allows us to style our application using CSS. Let’s add some basic styling to our Hello World application.
The style sheets that we are going to create typically would have the .css extension and would reside in the same directory as the main class of our JavaFX application.
In the project, create a new CSS file named styles.css. We can do this by right-clicking on the src/main/resources folder, selecting New > File, and entering the file name as styles.css. Next, open the styles.css file and add the following styling:
.label {
    -fx-font-size: 16px;
    -fx-text-fill: darkblue;
}
In this example, we are setting the font size and text color for the label.
Modify the App class to apply the styles to the label as shown below:
public class App extends Application {

    public static void main(String[] args) {
        launch(args);
    }

    @Override
    public void start(Stage primaryStage) {
        primaryStage.setTitle("Hello World!");

        Label label = new Label("Hello, JavaFX!");
        label.getStyleClass().add("label"); // Apply the "label" style

        StackPane root = new StackPane(label);
        Scene scene = new Scene(root, 600, 400);
        scene.getStylesheets().add("styles.css");

        primaryStage.setScene(scene);
        primaryStage.show();
    }
}
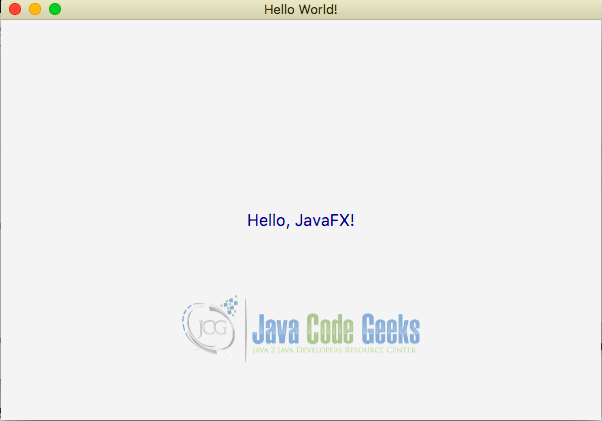
Here, we use the getStyleClass().add("styleName") method to apply the styles defined in the CSS file to the label.
Now, if we run the App class again, we should see the label with the applied styles.
5. Conclusion
In this article, we successfully created a simple “Hello World” application using JavaFX. We covered the basics of setting up a JavaFX project, understanding the structure of a JavaFX application, and styling our user interface.
JavaFX provides a robust framework for building modern desktop applications with rich graphical user interfaces. JavaFX also provides more advanced features, such as layouts, charts, and animations, to create even more sophisticated applications.
6. Download the Source Code
This was a JavaFX Hello World example.
You can download the full source code of this example here: JavaFX Hello World Example
