In this article, we will see examples of Java Swing Layouts.
1. Introduction
In Java swing, Layout manager is used to position all its components, with setting properties, such as the size, the shape, and the arrangement. Different layout managers could have varies in different settings on their components. In this article, we’ll go through the most-common-used layout manager and with examples showing the differences among each other. In these examples, components will only contain buttons. For other components, you can go to my previous article Java swing tutorials for beginners.
The following layout managers are the ones that’ll be discussed in this article:
- FlowLayout
- BorderLayout
- CardLayout
- BoxLayout
- GridLayout
- GridBagLayout
- GroupLayout
- SpringLayout
For the following example parts on different Layout managers, Java 8 and Eclipse IDE (version Mars 4.5.0) are used.
2. Java Swing Layouts examples
2.1 FlowLayout
The FlowLayout arranges the components in a directional flow, either from left to right or from right to left. Normally all components are set to one row, according to the order of different components. If all components can not be fit into one row, it will start a new row and fit the rest in.
To construct a FlowLayout, three options could be chosen:
- FlowLayout(): construct a new FlowLayout object with center alignment and horizontal and vertical gap to be default size of 5 pixels.
- FlowLayout(int align): construct similar object with different settings on alignment
- FlowLayout(int align, int hgap, int vgap): construct similar object with different settings on alignment and gaps between components.
For the constructor with the alignment settings, the possible values could be: LEFT, RIGHT, CENTER, LEADING and TRAILING.
With the following code, we can arrange the buttons with the default FlowLayout.
FlowLayoutExample.java
|
01
02
03
04
05
06
07
08
09
10
11
12
13
14
15
16
17
18
19
20
21
22
23
24
25
26
27
28
29
30
31
32
33
34
35
36
37
38
39
|
package javaCodeGeeks;/* * A Java swing FlowLayout example */import javax.swing.JButton;import javax.swing.JFrame;import javax.swing.JPanel;import java.awt.FlowLayout;public class FlowLayoutExample { public static void main(String[] args) { // Create and set up a frame window JFrame.setDefaultLookAndFeelDecorated(true); JFrame frame = new JFrame("Layout"); frame.setDefaultCloseOperation(JFrame.EXIT_ON_CLOSE); // Define new buttons JButton jb1 = new JButton("Button 1"); JButton jb2 = new JButton("Button 2"); JButton jb3 = new JButton("Button 3"); // Define the panel to hold the buttons JPanel panel = new JPanel(); panel.setLayout(new FlowLayout()); panel.add(jb1); panel.add(jb2); panel.add(jb3); // Set the window to be visible as the default to be false frame.add(panel); frame.pack(); frame.setVisible(true); }} |
As we can see from the figure below, all the five buttons are laid in a vertical and flow way. If you want to see the output for different alignment, what you need to do is simply setting up the size of the window to a relative larger one and then you can change the parameter of FlowLayout to be FlowLayout.RIGHT, or FlowLayout.LEFT or FlowLayout.CENTER.

2.2 BorderLayout
A BorderLayout lays out a container, arranging its components to fit into five regions: NORTH, SOUTH, EAST, WEST and CENTER. For each region, it may contain no more than one component. When adding different components, you need to specify the orientation of it to be the one of the five regions.
For BorderLayout, it can be constructed like below:
- BorderLayout(): construct a border layout with no gaps between components.
- BorderLayout(int hgap, int vgap): construct a border layout with specified gaps between components.
Similar to the previous example, five buttons will be added to the panel and we can simply change the layout to be BorderLayout, with parameters setting the regions. The following code show the change:
|
01
02
03
04
05
06
07
08
09
10
11
12
13
14
15
|
// Define new buttons with different regionsJButton jb1 = new JButton("NORTH"); JButton jb2 = new JButton("SOUTH");JButton jb3 = new JButton("WEST"); JButton jb4 = new JButton("EAST");JButton jb5 = new JButton("CENTER"); // Define the panel to hold the buttons JPanel panel = new JPanel();panel.setLayout(new BorderLayout());panel.add(jb1, BorderLayout.NORTH);panel.add(jb2, BorderLayout.SOUTH);panel.add(jb3, BorderLayout.WEST);panel.add(jb4, BorderLayout.EAST);panel.add(jb5, BorderLayout.CENTER); |
After running the code, we can see that the five buttons are located into the five regions like below:

2.3 CardLayout
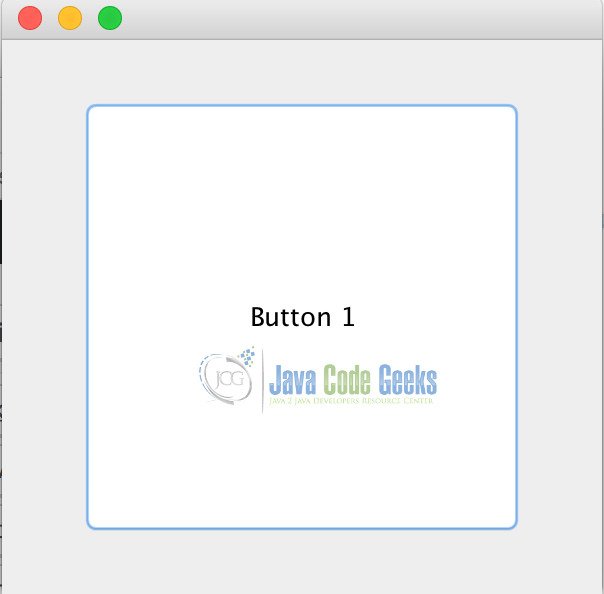
For CardLayout, it treats the components as a stack and every time, what you can see is only one component. That’s why it’s called CardLayout.
To demonstrate how to use CardLayout, three buttons have been constructed. We can click the button and get the next button, then click it again, getting the next one. The following code is to show how to achieve this CardLayout.
CardLayoutExample.java
|
01
02
03
04
05
06
07
08
09
10
11
12
13
14
15
16
17
18
19
20
21
22
23
24
25
26
27
28
29
30
31
32
33
34
35
36
37
38
39
40
41
42
43
44
45
46
47
48
49
50
51
52
53
|
package javaCodeGeeks;/* * A Java swing CardLayout example */import javax.swing.JButton;import javax.swing.JFrame;import java.awt.CardLayout;import java.awt.Container;import java.awt.event.ActionEvent;import java.awt.event.ActionListener;public class CardLayoutExample extends JFrame implements ActionListener { public static CardLayout card = new CardLayout(40, 30); public static Container c; JButton jb1, jb2, jb3; public CardLayoutExample() { c = getContentPane(); c.setLayout(card); // Define new buttons jb1 = new JButton("Button 1"); jb2 = new JButton("Button 2"); jb3 = new JButton("Button 3"); jb1.addActionListener(this); jb2.addActionListener(this); jb3.addActionListener(this); c.add(jb1); c.add(jb2); c.add(jb3); } public static void main(String[] args) { // Create and set up a frame window CardLayoutExample cl = new CardLayoutExample(); cl.setSize(300, 300); cl.setVisible(true); cl.setDefaultCloseOperation(JFrame.EXIT_ON_CLOSE); } // Action listener public void actionPerformed(ActionEvent e) { card.next(c); } } |
Run the code above, we can see the result to be in the following figures:
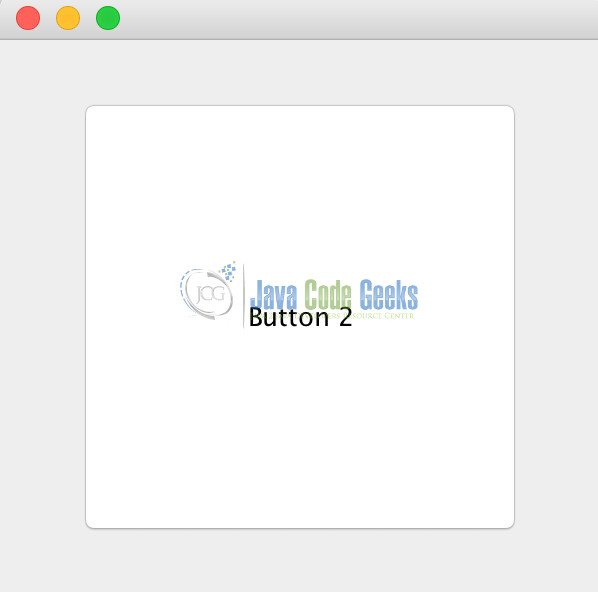
After click the button, the button will switch to another button like below:
2.4 BoxLayout
For BoxLayout, it has been discussed in my previous article with more detailed example. You can check it here.
2.5 GridLayout
The GridLayout manager is used to lay out the components in a rectangle grid, which has been divided into equal-sized rectangles and one component is placed in each rectangle. It can constructed with following methods:
- GridLayout(): construct a grid layout with one column per component in a single row.
- GridLayout(int row, int col): construct a grid layout with specified numbers of rows and columns.
- GridLayout(int row, int col, int hgap, int vgap): construct a grid layout with specified rows, columns and gaps between components.
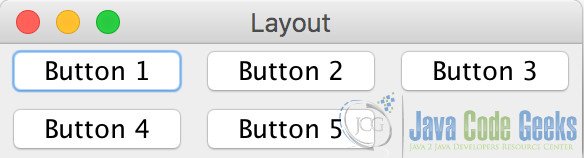
With the following code, we can create a grid layout object with two rows, three columns. Similarly, we can change the order of two and three to create three rows, two columns grid layout object.
|
01
02
03
04
05
06
07
08
09
10
11
12
13
14
15
|
// Define new buttonsJButton jb1 = new JButton("Button 1"); JButton jb2 = new JButton("Button 2");JButton jb3 = new JButton("Button 3"); JButton jb4 = new JButton("Button 4");JButton jb5 = new JButton("Button 5"); // Define the panel to hold the buttons JPanel panel = new JPanel();panel.setLayout(new GridLayout(3, 2));panel.add(jb1);panel.add(jb2);panel.add(jb3);panel.add(jb4);panel.add(jb5); |
We can see from the following figures, that the five buttons are set to two by three and three by two grid.

2.6 GridBagLayout
GridBagLayout is a more flexible layout manager, which allows the components to be vertical, horizontal, without specifying the components to be the same size. Each GridLayout object holds a dynamic rectangular grid of cells. Each component is associated with an instance of GridBagConstraints. The GridBagConstraints decides where the component to be displayed and how the component should be positioned.
With the following code added into the previous part, it can show how to set up the GridBagLayout:
|
01
02
03
04
05
06
07
08
09
10
11
12
13
14
15
16
17
18
19
20
21
|
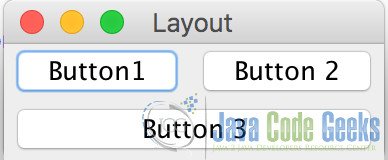
// Define the panel to hold the components JPanel panel = new JPanel(); GridBagLayout layout = new GridBagLayout(); panel.setLayout(layout); GridBagConstraints gbc = new GridBagConstraints(); // Put constraints on different buttons gbc.fill = GridBagConstraints.HORIZONTAL; gbc.gridx = 0; gbc.gridy = 0; panel.add(new JButton("Button1"), gbc); gbc.gridx = 1; gbc.gridy = 0; panel.add(new JButton("Button 2"), gbc); gbc.gridx = 0; gbc.gridy = 2; gbc.fill = GridBagConstraints.HORIZONTAL; gbc.gridwidth = 2; panel.add(new JButton("Button 3"), abc); |
The result after running the code above is shown below:
2.7 SpringLayout
Similar to the name, SpringLayout manages the layout of its children/Spring. Every child of Spring object controls the vertical or horizontal distance between the two components edges. In addition, for every child, it has exactly one set of constraint associated with it.
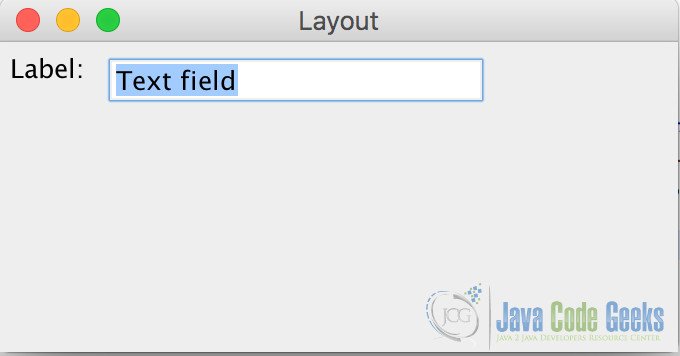
In the example below, we have constructed a label with a textfield and put constraints on the edge of the two components.
SpringLayoutExample.java
|
01
02
03
04
05
06
07
08
09
10
11
12
13
14
15
16
17
18
19
20
21
22
23
24
25
26
27
28
29
30
31
32
33
34
35
36
37
38
39
40
41
42
43
44
45
|
package javaCodeGeeks;/* * A Java swing SpringLayout example */import javax.swing.JLabel;import javax.swing.JTextField;import javax.swing.JFrame;import javax.swing.JPanel;import javax.swing.SpringLayout;public class SpringLayoutExample { public static void main(String[] args) { // Create and set up a frame window JFrame.setDefaultLookAndFeelDecorated(true); JFrame frame = new JFrame("Layout"); frame.setDefaultCloseOperation(JFrame.EXIT_ON_CLOSE); // Define the panel to hold the components JPanel panel = new JPanel(); SpringLayout layout = new SpringLayout(); JLabel label = new JLabel("Label: "); JTextField text = new JTextField("Text field", 15); panel.setSize(300, 300); panel.setLayout(layout); panel.add(label); panel.add(text); // Put constraint on components layout.putConstraint(SpringLayout.WEST, label, 5, SpringLayout.WEST, panel); layout.putConstraint(SpringLayout.NORTH, label, 5, SpringLayout.NORTH, panel); layout.putConstraint(SpringLayout.WEST, text, 5, SpringLayout.EAST, label); layout.putConstraint(SpringLayout.NORTH, text, 5, SpringLayout.NORTH, panel); // Set the window to be visible as the default to be false frame.add(panel); frame.pack(); frame.setVisible(true); }} |
The figure below is the output for the code above:
2.8 GroupLayout
According to its name, GroupLayout manages the layout of hierarchically groups and places them in different positions. It consists of two type of groups: sequential and parallel group.
For sequential group arrangement, the components are placed very similar to BoxLayout or FlowLayout, one after another. The position of each component is according to the order of the component.
For parallel group arrangement, components are placed on top of each other at the same place. They can be baseline-, top- or bottom-aligned at vertical, or left-, right-, center-aligned at horizontal axis.
In the following example, four buttons are created with button 1, 2, 3 are following the sequential pattern, while button 3, 4 are grouped together.
GroupLayoutExample.java
|
01
02
03
04
05
06
07
08
09
10
11
12
13
14
15
16
17
18
19
20
21
22
23
24
25
26
27
28
29
30
31
32
33
34
35
36
37
38
39
40
41
42
43
44
45
46
47
48
|
package javaCodeGeeks;import javax.swing.GroupLayout;/* * A Java swing GroupLayout example */import javax.swing.JButton;import javax.swing.JFrame;import javax.swing.JPanel;public class GroupLayoutExample { public static void main(String[] args) { // Create and set up a frame window JFrame.setDefaultLookAndFeelDecorated(true); JFrame frame = new JFrame("Layout"); frame.setDefaultCloseOperation(JFrame.EXIT_ON_CLOSE); // Define new buttons with different width on help of the --- JButton jb1 = new JButton("1"); JButton jb2 = new JButton("2"); JButton jb3 = new JButton("3"); JButton jb4 = new JButton("4"); // Define the panel to hold the buttons JPanel panel = new JPanel(); panel.setSize(300, 300); GroupLayout layout = new GroupLayout(panel); layout.setAutoCreateGaps(true); layout.setAutoCreateContainerGaps(true); panel.setLayout(layout); // Set for horizontal and vertical group layout.setHorizontalGroup(layout.createSequentialGroup().addComponent(jb1).addComponent(jb2) .addGroup(layout.createSequentialGroup().addGroup(layout .createParallelGroup(GroupLayout.Alignment.LEADING).addComponent(jb3).addComponent(jb4)))); layout.setVerticalGroup( layout.createSequentialGroup().addComponent(jb1).addComponent(jb2).addComponent(jb3).addComponent(jb4)); // Set the window to be visible as the default to be false frame.add(panel); frame.pack(); frame.setVisible(true); }} |
The result for the swing layout code is shown below:

3. Download the Source Code
This was an example about Java Swing Layouts.
You can download the source code of this example here: Java Swing Layouts Example
Last updated on May 15th, 2020

i want to ask who is better responsive java or responsive web ? and i want know java layout capabilities
Resposive Web is better, java is becoming less used in Web programming
GridBagLayout – Line 21 is incorrect:Should be gbc, not abc.
nice tutorial