Vaadin Rest Example
REST stands for Representational State Transfer. Created by Roy Fielding in the year 2000, is a communication protocol where everything is a resource. REST principal characteristics are: client-server, stateless, cache-able, layered and uniform interface to access resources.
Resources are accessed using a stateless protocol like HTTP. REST allows text, XML, JSON and other resources. PUT, GET, POST and DELETE methods are implemented in the REST architecture. Java defines REST using the JAX-RS Specification (JSR) 311. JAX-RS is implemented using Jersey.
Table Of Contents
1. The tools
- Java JDK 8
- Latest Eclipse Mars
- Vaadin 7.6.5
- Tomcat Server 8
- Latest Jersey
2. Introduction
In this example we are going to create a server using Jersey with text, XML and JSON resources and access these resources from Vaadin, to show it on the user interface. First we are going to create the server and run it. Next we are going to create the Vaadin client and consume the resources on the server.
3. Prerequisites
- JDK installed
- Eclipse Mars installed and working
- Vaadin 7.6.5 plug-in installed
- Tomcat 8 installed and running
4. Set up the server project
4.1 Download Jersey
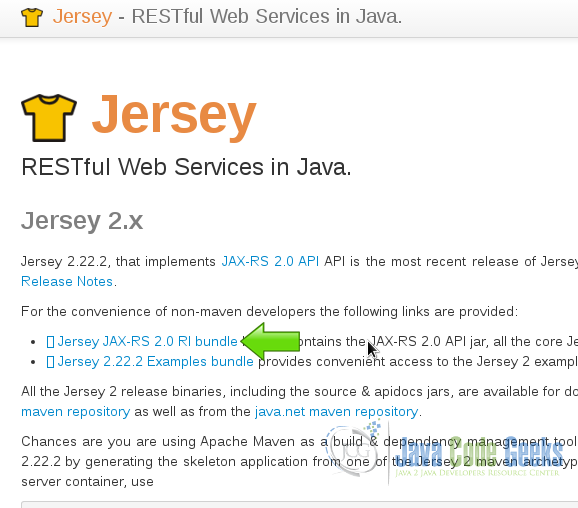
Download latest Jersey library from Download Jersey, uncompress the zip file and save it for later.
4.2 Create the server project
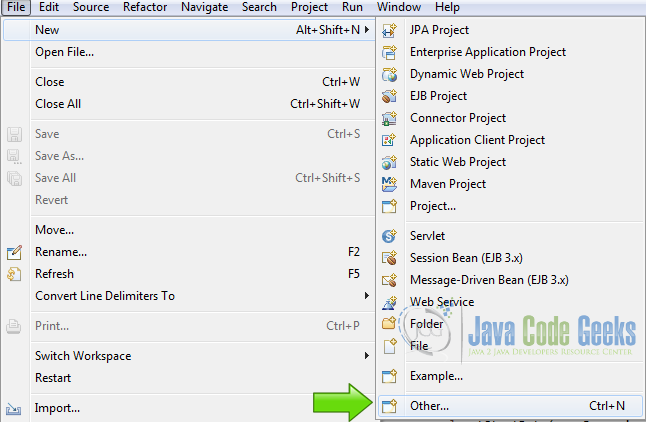
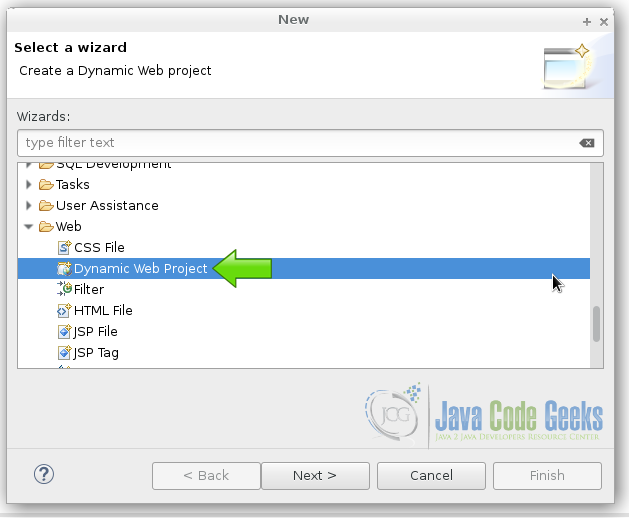
Fire up eclipse and choose from the menu File->New->Other. From the list choose Dynamic Web Project.
4.3 Copy Jersey Files
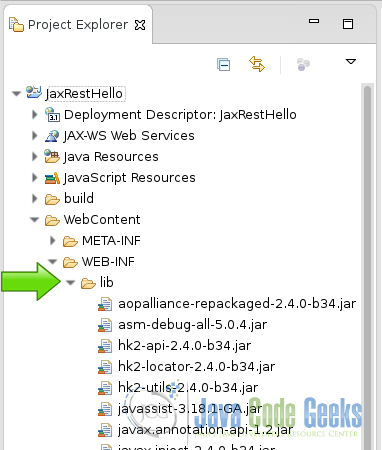
Copy all the Jersey jar files from the downloaded zip into the folder WebContent->WEB-INF->lib.
5. Coding the server
Create a new pojo java class.
Server class
@Path("/restserver")
public class RestServer {

}
This class use the annotation @Path of the specification JAX-RS. It’s a plain old java object because inherits no one. The JAX-RS specification of Jersey uses annotations to create the REST services.
Text response
	@GET
	@Produces(MediaType.TEXT_PLAIN)
	public String serverMessageText() {
		return "This is a message from the server";
	}
When you make an html request with a GET with plain text as the type of the data, this content is served.
The annotation @GET, serves an html GET request and the annotation @Produces, specify the type of data of the response according to the request. The server first analyzes the request and then based on the data type requested it sends the response. Request/Response is the standard html communication protocol. REST uses the standard request/response communication protocol.
XML response
	@GET
	@Produces(MediaType.TEXT_XML)
	public String serverMessageXML() {
		return "  This is a message from the server ";
	}
When you make an html request with a GET with XML as the type of the data, this content is served.
JSON response
	@GET
	@Produces(MediaType.APPLICATION_JSON)
	public String serverMessageJSON() {
		return "[{'message' : 'server json message', 'content' : 'message content'}]";
	}
When you make an html request with a GET with JSON as the type of the data, this content is served.
6. The server web.xml
In the server we are going to use the web.xml configuration to expose our REST services and define our paths.
servlet
 <servlet>
    <servlet-name>Rest Server</servlet-name>
    <servlet-class>org.glassfish.jersey.servlet.ServletContainer</servlet-class>
    <init-param>
        <param-name>jersey.config.server.provider.packages</param-name>
        <param-value>com.example</param-value>
    </init-param>
    <load-on-startup>1</load-on-startup>
  </servlet>
This defines the servlet and map the appropriate jersey class to our package. To make the Jersey library recognizes where are the content to be served.
Servlet mapping
  <servlet-mapping>
    <servlet-name>Rest Server</servlet-name>
    <url-pattern>/server/*</url-pattern>
  </servlet-mapping>
The servlet mapping, maps the content of our class to the URI used in the browser.
7. Create the client project
In the file menu choose File -> New -> Other
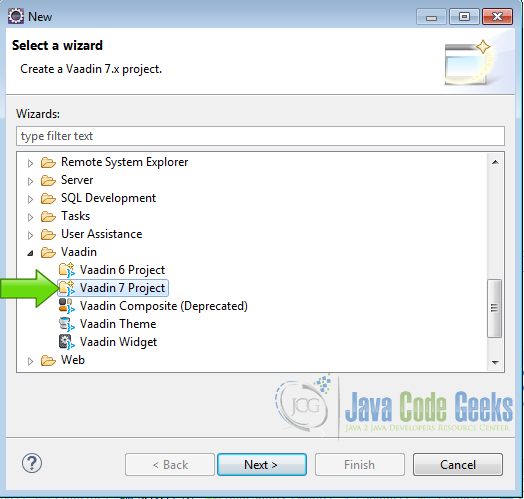
Now from the list choose Vaadin 7 project
Press next and name your project then press finish.
Copy all the Jersey jar files from the downloaded zip into the folder WebContent->WEB-INF->lib. As we did with the server.
8. Coding the client project
8.1 Client Class to access the server
We are going to create a supplementary client class to create the server REST services.
Create a POJO class:
POJO client
public class RestClient {

}
In this class we are going to create all the client methods we need to access the data on the server.
fields
	ClientConfig config;
	Client client;
	WebTarget webtarget;
Create the fields of the the Jersey REST client.
Constructor
	public RestClient(){
		config = new ClientConfig();
		client = ClientBuilder.newClient(config);
		webtarget = client.target("http://localhost:8080/JaxRestHello");
	}
In the constructor of the Jersey client, we have our base URI to access the REST services.
getResponse
	public String getResponse(){
		String response = webtarget.path("server").
				path("restserver").
				request().
				accept(MediaType.TEXT_PLAIN).
				get(Response.class).toString();
		return response;
	}
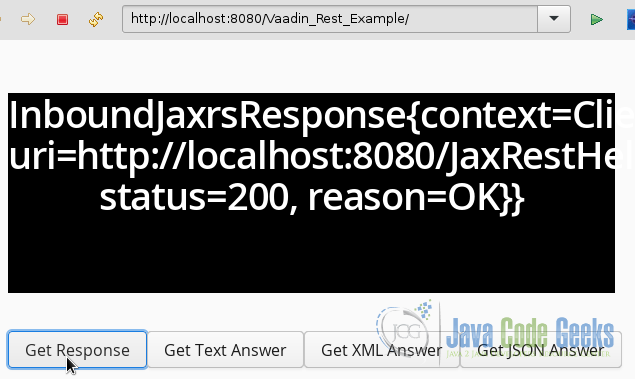
This is a method to get the response from the server. The response could tell us the state of the server and the availability of the services.
Get text answer
	public String getAnswerText(){
		String answer =
		        webtarget.path("server").
		        path("restserver").
		        request().
		        accept(MediaType.TEXT_PLAIN).
		        get(String.class);
		return answer;
	}
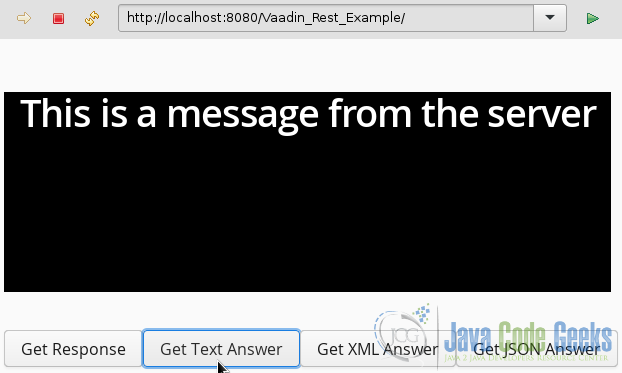
This is a method to get a plain text answer. In the field accept, we specify the type of the response. With REST, the data between the client and the server is just plain text but here we could know the kind of structure these plain text has. In this example it could be just plain text, XML or JSON.
Get XML answer
	public String getAnswerXML(){
		String answer =
		        webtarget.path("server").
		        path("restserver").
		        request().
		        accept(MediaType.TEXT_XML).
		        get(String.class);
		return answer;
	}
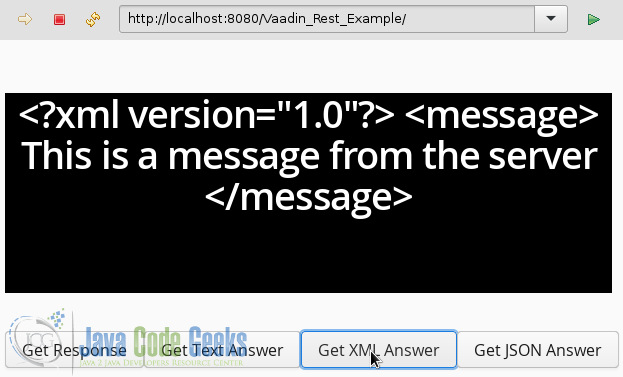
This method gets an XML answer from the server, note the fields path, these fields are append to the base URI created in the constructor of the class.
Get JSON
	public String getAnswerJSON(){
		String answer =
		        webtarget.path("server").
		        path("restserver").
		        request().
		        accept(MediaType.APPLICATION_JSON).
		        get(String.class);
		return answer;
	}
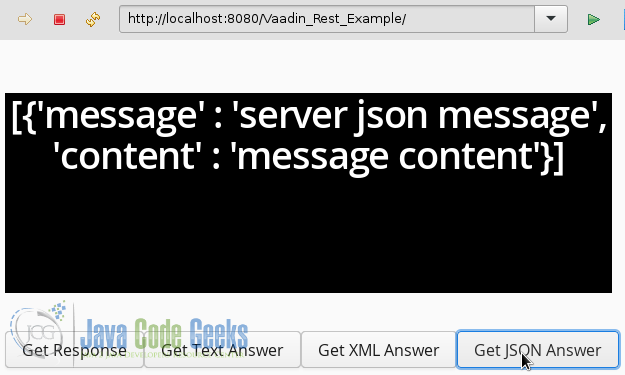
JSON is just plain text with some predefined structure.
8.2 Vaadin UI
In the init class of our Vaadin application we create an instance of the client class to access the REST services from our web application. Remember the REST server could be anywhere in the Internet. It could be on the same server as the client but we can have multiples REST servers all around the world and a client accessing all of them.
Main layout
		final VerticalLayout layout = new VerticalLayout();
		layout.setMargin(true);
		setContent(layout);
We create the main layout of our application.
Rest client Instance
RestClient restClient = new RestClient();
We create an instance of our REST client, to use it from the Vaadin user interface.
Feedback label
		Label resultLabel = new Label();
		resultLabel.setWidth("100%");
		resultLabel.setHeight("200px");
		resultLabel.addStyleName("h1");
		resultLabel.addStyleName("mylabelstyle");
We create a label to put the feedback from our server, and make some adjustments and styles to the label just for this example purpose.
Layout for buttons
HorizontalLayout hLayot = new HorizontalLayout();
We are going to create some buttons to get different answers from the server, and we organize it on an horizontal layout.
Get Response
		Button buttonGetResponse = new Button("Get Response");
		buttonGetResponse.addClickListener(new Button.ClickListener() {
			public void buttonClick(ClickEvent event) {
				resultLabel.setValue(restClient.getResponse());
			}
		});
This is a button to get the server response. With this response we can check the status of the server.
Text Answer
		Button buttonGetText = new Button("Get Text Answer");
		buttonGetText.addClickListener(new Button.ClickListener() {
			public void buttonClick(ClickEvent event) {
				resultLabel.setValue(restClient.getAnswerText());
			}
		});
This is a button to get the text answer from the REST server.
XML Answer
		Button buttonGetXml = new Button("Get XML Answer");
		buttonGetXml.addClickListener(new Button.ClickListener() {
			public void buttonClick(ClickEvent event) {
				resultLabel.setValue(restClient.getAnswerXML());
			}
		});
With this button we get an XML response from the server. We are using the client class created before to call these methods.
JSON Answer
		Button buttonGetJson = new Button("Get JSON Answer");
		buttonGetJson.addClickListener(new Button.ClickListener() {
			public void buttonClick(ClickEvent event) {
				resultLabel.setValue(restClient.getAnswerJSON());
			}
		});
A JSON answer from the server, JSON has been very popular lately and you could transfer it with REST.
Add elements to the layout
		hLayot.addComponent(buttonGetResponse);
		hLayot.addComponent(buttonGetText);
		hLayot.addComponent(buttonGetXml);
		hLayot.addComponent(buttonGetJson);
		layout.addComponent(resultLabel);
		layout.addComponent(hLayot);
Here we add all elements to the layout.
9. The complete source code
9.1 The server source code
RestServer.java
package com.example;

import javax.ws.rs.GET;
import javax.ws.rs.Path;
import javax.ws.rs.Produces;
import javax.ws.rs.core.MediaType;

@Path("/restserver")
public class RestServer {

	@GET
	@Produces(MediaType.TEXT_PLAIN)
	public String serverMessageText() {
		return "This is a message from the server";
	}

	@GET
	@Produces(MediaType.TEXT_XML)
	public String serverMessageXML() {
		return "  This is a message from the server ";
	}
	@GET
	@Produces(MediaType.APPLICATION_JSON)
	public String serverMessageJSON() {
		return "[{'message' : 'server json message', 'content' : 'message content'}]";
	}
}
web.xml
<?xml version="1.0" encoding="UTF-8"?>
<web-app xmlns:xsi="http://www.w3.org/2001/XMLSchema-instance" xmlns="http://xmlns.jcp.org/xml/ns/javaee" xsi:schemaLocation="http://xmlns.jcp.org/xml/ns/javaee http://xmlns.jcp.org/xml/ns/javaee/web-app_3_1.xsd" id="WebApp_ID" version="3.1">
  <display-name>JaxRestHello</display-name>
 <servlet>
    <servlet-name>Rest Server</servlet-name>
    <servlet-class>org.glassfish.jersey.servlet.ServletContainer</servlet-class>
    <init-param>
        <param-name>jersey.config.server.provider.packages</param-name>
        <param-value>com.example</param-value>
    </init-param>
    <load-on-startup>1</load-on-startup>
  </servlet>
  <servlet-mapping>
    <servlet-name>Rest Server</servlet-name>
    <url-pattern>/server/*</url-pattern>
  </servlet-mapping>
</web-app>
9.2 The client Source Code
RestClient.java
package com.example.vaadin_rest_example;

import javax.ws.rs.client.Client;
import javax.ws.rs.client.ClientBuilder;
import javax.ws.rs.client.WebTarget;
import javax.ws.rs.core.MediaType;
import javax.ws.rs.core.Response;

import org.glassfish.jersey.client.ClientConfig;

public class RestClient {
	ClientConfig config;
	Client client;
	WebTarget webtarget;

	public RestClient(){
		config = new ClientConfig();
		client = ClientBuilder.newClient(config);
		webtarget = client.target("http://localhost:8080/JaxRestHello");
	}

	public String getResponse(){
		String response = webtarget.path("server").
				path("restserver").
				request().
				accept(MediaType.TEXT_PLAIN).
				get(Response.class).toString();
		return response;
	}

	public String getAnswerText(){
		String answer =
		        webtarget.path("server").
		        path("restserver").
		        request().
		        accept(MediaType.TEXT_PLAIN).
		        get(String.class);
		return answer;
	}

	public String getAnswerXML(){
		String answer =
		        webtarget.path("server").
		        path("restserver").
		        request().
		        accept(MediaType.TEXT_XML).
		        get(String.class);
		return answer;
	}

	public String getAnswerJSON(){
		String answer =
		        webtarget.path("server").
		        path("restserver").
		        request().
		        accept(MediaType.APPLICATION_JSON).
		        get(String.class);
		return answer;
	}

}
Vaadin_rest_exampleUI.java
package com.example.vaadin_rest_example;

import javax.servlet.annotation.WebServlet;

import com.vaadin.annotations.Theme;
import com.vaadin.annotations.VaadinServletConfiguration;
import com.vaadin.server.VaadinRequest;
import com.vaadin.server.VaadinServlet;
import com.vaadin.ui.Button;
import com.vaadin.ui.Button.ClickEvent;
import com.vaadin.ui.HorizontalLayout;
import com.vaadin.ui.Label;
import com.vaadin.ui.UI;
import com.vaadin.ui.VerticalLayout;

@SuppressWarnings("serial")
@Theme("vaadin_rest_example")
public class Vaadin_rest_exampleUI extends UI {

	@WebServlet(value = "/*", asyncSupported = true)
	@VaadinServletConfiguration(productionMode = false, ui = Vaadin_rest_exampleUI.class, widgetset = "com.example.vaadin_rest_example.widgetset.Vaadin_rest_exampleWidgetset")
	public static class Servlet extends VaadinServlet {
	}

	@Override
	protected void init(VaadinRequest request) {
		final VerticalLayout layout = new VerticalLayout();
		layout.setMargin(true);
		setContent(layout);

		RestClient restClient = new RestClient();

		Label resultLabel = new Label();
		resultLabel.setWidth("100%");
		resultLabel.setHeight("200px");
		resultLabel.addStyleName("h1");
		resultLabel.addStyleName("mylabelstyle");
		HorizontalLayout hLayot = new HorizontalLayout();

		Button buttonGetResponse = new Button("Get Response");
		buttonGetResponse.addClickListener(new Button.ClickListener() {
			public void buttonClick(ClickEvent event) {
				resultLabel.setValue(restClient.getResponse());
			}
		});

		Button buttonGetText = new Button("Get Text Answer");
		buttonGetText.addClickListener(new Button.ClickListener() {
			public void buttonClick(ClickEvent event) {
				resultLabel.setValue(restClient.getAnswerText());
			}
		});

		Button buttonGetXml = new Button("Get XML Answer");
		buttonGetXml.addClickListener(new Button.ClickListener() {
			public void buttonClick(ClickEvent event) {
				resultLabel.setValue(restClient.getAnswerXML());
			}
		});

		Button buttonGetJson = new Button("Get JSON Answer");
		buttonGetJson.addClickListener(new Button.ClickListener() {
			public void buttonClick(ClickEvent event) {
				resultLabel.setValue(restClient.getAnswerJSON());
			}
		});

		hLayot.addComponent(buttonGetResponse);
		hLayot.addComponent(buttonGetText);
		hLayot.addComponent(buttonGetXml);
		hLayot.addComponent(buttonGetJson);
		layout.addComponent(resultLabel);
		layout.addComponent(hLayot);
	}

}
vaadin_rest_example.scss
@import "../valo/valo.scss";

@mixin vaadin_rest_example {
  @include valo;

	.v-label-mylabelstyle {
	    color: white;
	    text-align: center;
	    background-color: black;
	    border-color: white;
	    font-weight: bold;
	}
}
10. Running the example
First right click on the server project folder and choose Run as -> Run on server choose Tomcat 8 server and press finish.
When the server is running right click on the Vaadin project folder and choose Run as -> Run on server choose Tomcat 8 server and press finish.
11. Results
11.1 Get the response
Get the status of the server
11.2 Get the plain text
Get the plain text answer from the server
11.3 Get the XML
Get the XML answer from the server
11.4 Get the JSON
Get the JSON answer from the server
12. Download the Source Code
This was an example of: Vaadin REST.

