Struts 2 @ResultPath Annotation Example
Struts 2, the famous Model-View-Controller (MVC) framework, has several features that allows you to shape your webapp the way you want it.
Among those features, a handy one is @ResultPath, which allows you to change the location where results are stored.
The best way to explain how it works is through an example.
1. Setup a Project
This time we will setup a Maven project.
Go to File > New and create a Dynamic Web Project.
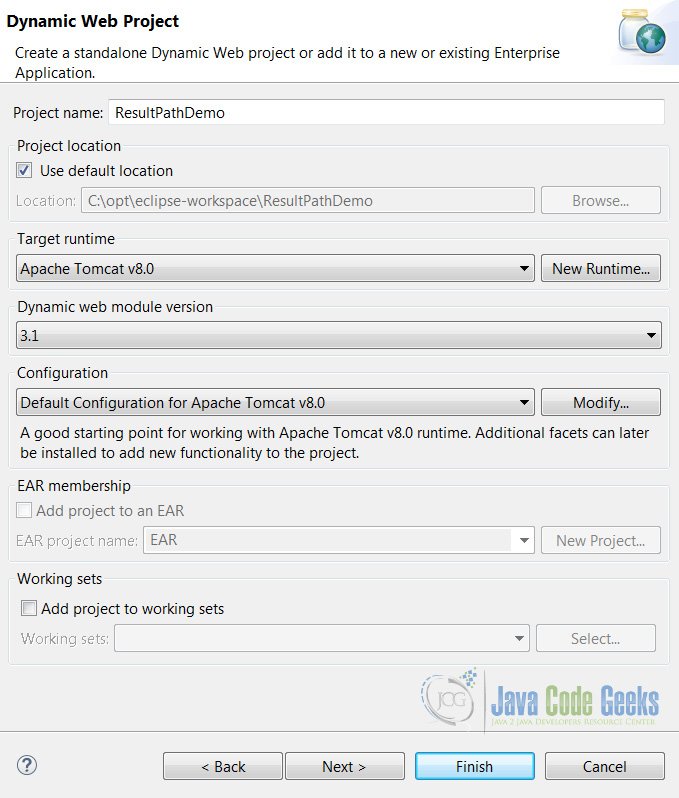
Make sure the Generate web.xml deployment descriptor option is selected.
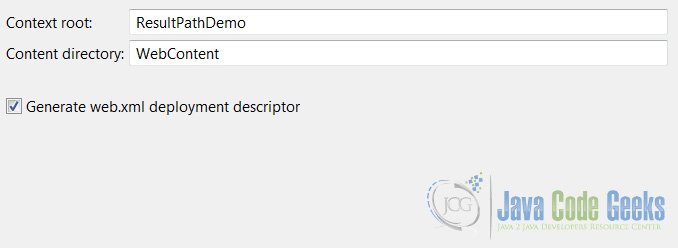
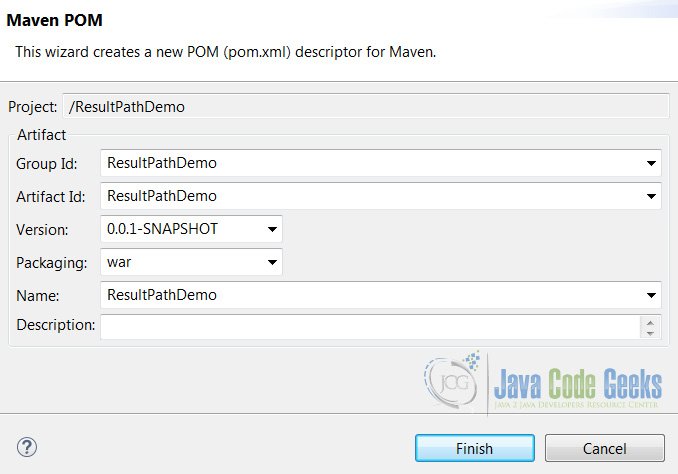
Convert the project to a Maven one by right clicking on the project and going to Configure > Convert to Maven.
Set a name for the Maven project:
Open your pom.xml file and paste the following dependencies to it:
<dependencies>
    <dependency>
        <groupId>org.apache.struts</groupId>
        <artifactId>struts2-core</artifactId>
        <version>2.3.16</version>
    </dependency>
    <dependency>
        <groupId>org.apache.struts</groupId>
        <artifactId>struts2-convention-plugin</artifactId>
        <version>2.3.8</version>
    </dependency>
</dependencies>
As you may see in the dependency list we’re adding struts2-convention-plugin too. This is required by Struts to look for action annotations in class files. Don’t forget to add it or Struts will be unable to find and map your actions.
2. Create the project files
web.xml:
Open web.xml and add the following contents:
<?xml version="1.0" encoding="UTF-8"?>
<web-app xmlns:xsi="http://www.w3.org/2001/XMLSchema-instance" xmlns="http://xmlns.jcp.org/xml/ns/javaee" xsi:schemaLocation="http://xmlns.jcp.org/xml/ns/javaee http://xmlns.jcp.org/xml/ns/javaee/web-app_3_1.xsd" id="WebApp_ID" version="3.1">
  <display-name>Struts 2 Annotation Example</display-name>
   <filter>
        <filter-name>struts2</filter-name>
        <filter-class>org.apache.struts2.dispatcher.ng.filter.StrutsPrepareAndExecuteFilter</filter-class>
        <init-param>
            <param-name>actionPackages</param-name>
            <param-value>com.javacodegeeks.actions</param-value>
        </init-param>
    </filter>
  <filter-mapping>
    <filter-name>struts2</filter-name>
    <url-pattern>/*</url-pattern>
  </filter-mapping>
</web-app>
Something to note in this file is the use of the init-param parameter. This is used by Struts to know where our action classes are located. It is really important that you create them in a package named actions. Put your classes inside something different than actions and I guarantee you that you will spend the whole afternoon stick to your computer looking for answers.
Let’s create a JSP file now. Create a folder named jsps inside WebContent. Add a new JSP file named mypage.jsp and paste the following content into it:
<%@ taglib prefix="s" uri="/struts-tags" %>
<html>
<head></head>
<body>
    <h1>Hello Struts 2!</h1>
</body>
</html>
Piece of cake right? Nothing unusual here, just a corteous salutation.
2. The base Action class
Now it is time to add an action. Create a class named DemoAction and paste the following code into it:
DemoAction.java:
package com.javacodegeeks.actions;

import org.apache.struts2.convention.annotation.Action;
import org.apache.struts2.convention.annotation.Namespace;
import org.apache.struts2.convention.annotation.Result;
import org.apache.struts2.convention.annotation.ResultPath;
import com.opensymphony.xwork2.ActionSupport;

@Namespace("/jsps")
@Action("/mypage")
@ResultPath(value="/")
@Result(name="success",location="mypage.jsp")
public class DemoAction extends ActionSupport {
    public String execute() {
        return SUCCESS;
    }
}
Your file structure should look like this:
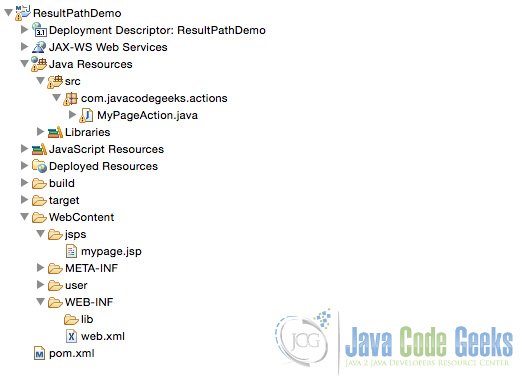
Great!, we’re ready to run this application. Go ahead, open a web browser and go to the next URL:
http://localhost:8080/ResultPathDemo/jsps/mypage
You should see the following page:

Let’s take a closer look at the annotations on the previous code.
@Namespace: This annotation helps you structure your webapp. It adds an additional level to your URL and to your directory structure; that’s why mypage.jsp is located at:
WebContent/jsps/mypage.jsp
Now, since @ResultPath has a value of "/" it instructs Struts to look for your Namespaces / JSP’s starting at the root level; this level is your WebContent folder.
In summary, this is where Struts is looking for your JSP’s:
WebContent/@ResultPath/@Namespace/some.jsp
But let’s change some values to make sure this is clear.
3. Playing with @ResultPath
Now consider the following modification to the previous class:
@ResultPath(value="/user")
This will change the place where Struts will look for your JSP’s. Which in this case will be:
WebContent/user/jsps/mypage.jsp
To test it, create a folder named user inside WebContent and a folder named jsps inside user. Create a JSP inside jsps and name it mypage.jsp with the following contents:
<%@ taglib prefix="s" uri="/struts-tags" %>
<html>
<head></head>
<body>
    <h1>Hello Struts 2! (from /user/jsps)</h1>
</body>
</html>
Your WebContent folder should look like this:

Run the application and refresh your browser; you will see the following image:

4. Global settings
If you want to change the value for all your pages, you can add the next line to your struts.xml file:
<struts>
    ...
    <constant name="struts.convention.result.path" value="/"/>
    ...
</struts>
5. Download the Eclipse Project
This was a Struts 2 “@ResultPath” example.
You can download the full source code of this example here: ResultPathDemo.zip


