Welcome readers, in this tutorial, we will create a simple application that uses the spring and Hibernate framework to display the user details on a webpage. For this tutorial, we’ll have a welcome page that fetches the user records from the MySQL database and displays it on the interface.
1. Introduction
Developers can refer to this link to briefly understand the Spring, Spring MVC, and Hibernate framework.
1.1 Download and Install Hibernate
Developers can read this tutorial in order to download and install Hibernate in the Eclipse IDE.
1.2 Download and Install MySQL
Developers can watch this video in order to download and install the MySQL database on your Windows operating system.
Now, open up the Eclipse Ide and let’s start building the application!
2. Application Building
Below are the steps involved in developing this application.
2.1 Database & Table Creation
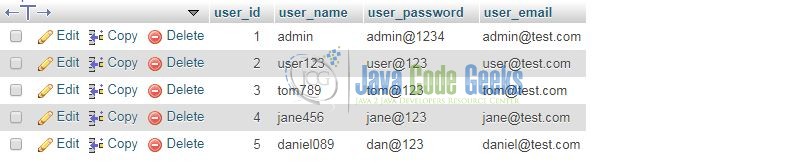
The following MySQL script creates a database called springhibernate with a table: USERS. Open MySQL terminal or workbench terminal and execute the SQLscript.
CREATE DATABASE springhibernate;

USE springhibernate;

CREATE TABLE USERS (
  user_id int(11) NOT NULL AUTO_INCREMENT,
  user_name varchar(50) NOT NULL,
  user_password varchar(50) NOT NULL,
  user_email varchar(100) NOT NULL,
  PRIMARY KEY (user_id)
);

INSERT INTO USERS (user_id, user_name, user_password, user_email) VALUES (1, 'admin', 'admin@1234', 'admin@test.com');
INSERT INTO USERS (user_id, user_name, user_password, user_email) VALUES (2, 'user123', 'user@123', 'user@test.com');
INSERT INTO USERS (user_id, user_name, user_password, user_email) VALUES (3, 'tom789', 'tom@123', 'tom@test.com');
INSERT INTO USERS (user_id, user_name, user_password, user_email) VALUES (4, 'jane456', 'jane@123', 'jane@test.com');
INSERT INTO USERS (user_id, user_name, user_password, user_email) VALUES (5, 'daniel089', 'dan@123', 'daniel@test.com');

SELECT * FROM USERS;
If everything goes well, the table will be shown in the MySQL Workbench.
2.2 Maven Dependencies
In this example, we are using the most stable spring web-mvc, MySQL, Hibernate, and Log4j version in order to set-up the Spring MVC and Hibernate functionality. The updated file will have the following code:
pom.xml
<project xmlns="http://maven.apache.org/POM/4.0.0" xmlns:xsi="http://www.w3.org/2001/XMLSchema-instance"
	xsi:schemaLocation="http://maven.apache.org/POM/4.0.0 http://maven.apache.org/maven-v4_0_0.xsd">
	<modelVersion>4.0.0</modelVersion>
	<groupId>SpringHibernateApp</groupId>
	<artifactId>SpringHibernateApp</artifactId>
	<packaging>war</packaging>
	<version>0.0.1-SNAPSHOT</version>
	<name>SpringHibernateApp Maven Webapp</name>
	<url>http://maven.apache.org</url>
	<dependencies>
		<!-- spring dependency -->
		<dependency>
			<groupId>org.springframework</groupId>
			<artifactId>spring-context</artifactId>
			<version>5.0.5.RELEASE</version>
		</dependency>
		<dependency>
			<groupId>org.springframework</groupId>
			<artifactId>spring-webmvc</artifactId>
			<version>5.0.5.RELEASE</version>
		</dependency>
		<!-- spring jdbc dependency -->
		<dependency>
			<groupId>org.springframework</groupId>
			<artifactId>spring-orm</artifactId>
			<version>5.0.5.RELEASE</version>
		</dependency>
		<!-- jstl dependency -->
		<dependency>
			<groupId>javax.servlet</groupId>
			<artifactId>jstl</artifactId>
			<version>1.2</version>
		</dependency>
		<!-- javax servlet api -->
		<dependency>
			<groupId>javax.servlet</groupId>
			<artifactId>servlet-api</artifactId>
			<version>3.0-alpha-1</version>
		</dependency>
		<!-- hibernate dependency -->
		<dependency>
			<groupId>org.hibernate</groupId>
			<artifactId>hibernate-core</artifactId>
			<version>5.2.13.Final</version>
		</dependency>
		<!-- mysql connector dependency -->
		<dependency>
			<groupId>mysql</groupId>
			<artifactId>mysql-connector-java</artifactId>
			<version>5.1.21</version>
		</dependency>
		<!-- log4j dependency -->
		<dependency>
			<groupId>log4j</groupId>
			<artifactId>log4j</artifactId>
			<version>1.2.17</version>
		</dependency>
	</dependencies>
	<build>
		<finalName>${project.artifactId}</finalName>
	</build>
</project>
2.3 Java Class Creation
Let’s create the different Java files required to carry out this tutorial.
2.3.1 Implementation of POJO class
This model class defines the schema as per which the user data is stored in the MySQL database. This class is mapped to User.hbm.xml file which links the POJO variables to the database columns. Add the following code to it:
User.java
package com.jcg.spring.hibernate.pojo;

import java.io.Serializable;

public class User implements Serializable {

	private static final long serialVersionUID = 1L;

	private long id;
	private String name, password, email;

	public long getId() {
		return id;
	}

	public void setId(long id) {
		this.id = id;
	}

	public String getName() {
		return name;
	}

	public void setName(String name) {
		this.name = name;
	}

	public String getPassword() {
		return password;
	}

	public void setPassword(String password) {
		this.password = password;
	}

	public String getEmail() {
		return email;
	}

	public void setEmail(String email) {
		this.email = email;
	}
}
2.3.2 Implementation of Service class
The DbService.java performs the database operation and fetches the user records from the database table and displays it on the webpage. Add the following code to it:
DbService.java
package com.jcg.spring.hibernate.service;

import java.util.List;

import org.apache.log4j.Logger;
import org.hibernate.SessionFactory;
import org.springframework.transaction.annotation.Transactional;

import com.jcg.spring.hibernate.pojo.User;

public class DbService {

	private SessionFactory sessionFactory;

	private static Logger log = Logger.getLogger(DbService.class);

	// This method initialized the session_factory object for further processing.
	public DbService(SessionFactory sessionFactory) {
		this.sessionFactory = sessionFactory;
	}

	// This method fetches the user_list from the database.
	@SuppressWarnings("unchecked")
	@Transactional
	public List getUsrList() {
		List user_list = null;
		log.info("Fetching the user list from the database");
		try {
			String sql_query = "from User";
			user_list = sessionFactory.getCurrentSession().createQuery(sql_query).list();
			log.info("Total no. of users fetched from the db are?= " + user_list.size());
		} catch(Exception e) {
			log.error("An error occurred while fetching the user details from the database", e);
		}

		return user_list;
	}
}
2.3.3 Implementation of Controller class
This is a typical spring controller which is annotated by the Spring MVC annotation types. This class consists of the request mapping method that interacts with the MySQL database to perform the SQL READ operation in the database. Let’s write a quick Java program in the spring controller class to handle the HTTP request. Add the following code to it.
UserCtrl.java
package com.jcg.spring.hibernate.ctrl;

import java.util.List;

import org.apache.log4j.Logger;
import org.springframework.beans.factory.annotation.Autowired;
import org.springframework.stereotype.Controller;
import org.springframework.web.bind.annotation.RequestMapping;
import org.springframework.web.bind.annotation.RequestMethod;
import org.springframework.web.servlet.ModelAndView;

import com.jcg.spring.hibernate.pojo.User;
import com.jcg.spring.hibernate.service.DbService;

@Controller
public class UserCtrl {

	@Autowired
	private DbService dbService;			// This will auto-inject the authentication service into the controller.

	private static Logger log = Logger.getLogger(UserCtrl.class);

	// This method redirects the user to the index page of the application.
	@RequestMapping(value="/welcome", method = RequestMethod.GET)
	public String index() {
		log.info("Redirecting the application to the landing page.");
		return "redirect:user_list";
	}

	// This method handles the request to get the user_list from the database.
	@RequestMapping(value = "/user_list", method = RequestMethod.GET)
	public ModelAndView fetchUserList() {
		List ulist = dbService.getUsrList();
		log.info("Total no. of user_records fetched from db are?= " + ulist.size());

		// Returning the result to the target jsp.
		return new ModelAndView("home", "userList", ulist);
	}
}
2.4 Configuration Files
Let’s write all the configuration files involved in this tutorial.
2.4.1 Spring Configuration File
To configure the spring framework, we need to implement a bean configuration file i.e. spring-servlet.xml which provide an interface between the basic Java class and the outside world. Put this XML file in the SpringHibernateApp/src/main/webapp/WEB-INF folder and add the following code to it:
spring-servlet.xml
<?xml version="1.0" encoding="UTF-8"?>
<beans xmlns="http://www.springframework.org/schema/beans" xmlns:xsi="http://www.w3.org/2001/XMLSchema-instance" xmlns:p="http://www.springframework.org/schema/p" xmlns:context="http://www.springframework.org/schema/context" xsi:schemaLocation="http://www.springframework.org/schema/beans               http://www.springframework.org/schema/beans/spring-beans-3.0.xsd               http://www.springframework.org/schema/context               http://www.springframework.org/schema/context/spring-context-3.0.xsd">

    <context:component-scan base-package="com.jcg.spring.hibernate" />

    <!-- Resolves Views Selected For Rendering by @Controllers to *.jsp Resources in the /WEB-INF/ Folder -->
    <bean class="org.springframework.web.servlet.view.InternalResourceViewResolver">
        <property name="prefix" value="/WEB-INF/views/" />
        <property name="suffix" value=".jsp" />
    </bean>

</beans>
2.4.2 Database Configuration File
To configure the database settings, we need to implement a bean configuration file i.e. applicationContext.xml which provide the JDBC connection details. Put this XML file in the SpringHibernateApp/src/main/webapp/WEB-INF folder and add the following code to it:
applicationContext.xml
<?xml version="1.0" encoding="UTF-8"?>
<beans xmlns="http://www.springframework.org/schema/beans" xmlns:tx="http://www.springframework.org/schema/tx" xmlns:xsi="http://www.w3.org/2001/XMLSchema-instance" xsi:schemaLocation="http://www.springframework.org/schema/beans http://www.springframework.org/schema/beans/spring-beans.xsd  http://www.springframework.org/schema/tx http://www.springframework.org/schema/tx/spring-tx.xsd">

   <!-- Configuring the JDBC connection -->
   <bean id="dataSourceBean" class="org.springframework.jdbc.datasource.DriverManagerDataSource">
      <property name="driverClassName" value="com.mysql.jdbc.Driver" />
      <property name="url" value="jdbc:mysql://localhost:3306/springhibernate" />
      <property name="username" value="root" />
      <property name="password" value="" />
   </bean>

   <!-- Configuring the Hibernate5 Session Factory Bean -->
   <bean id="sessionFactory" class="org.springframework.orm.hibernate5.LocalSessionFactoryBean">
      <property name="dataSource" ref="dataSourceBean" />
      <property name="mappingResources">
         <value>com/jcg/spring/hibernate/pojo/User.hbm.xml</value>
      </property>
      <property name="hibernateProperties">
         <props>
            <prop key="hibernate.dialect">org.hibernate.dialect.MySQL5Dialect</prop>
            <prop key="hibernate.show_sql">true</prop>
         </props>
      </property>
   </bean>

   <tx:annotation-driven />
   <bean id="transactionManager" class="org.springframework.orm.hibernate5.HibernateTransactionManager">
      <property name="sessionFactory" ref="sessionFactory" />
   </bean>

   <!-- Injecting the Hibernate5 Session Factory Object to the Service Bean -->
   <bean id="dbService" class="com.jcg.spring.hibernate.service.DbService">
	    <constructor-arg><ref bean="sessionFactory" /></constructor-arg>
	</bean>
</beans>
2.4.3 Web Deployment Descriptor
The web.xml file declares one servlet (i.e. Dispatcher Servlet) to receive all kind of the requests, specify the database configuration file, and the default welcome page when accessing the application. Add the following code to it:

web.xml
<?xml version="1.0" encoding="UTF-8"?>
<web-app xmlns="http://java.sun.com/xml/ns/javaee" xmlns:xsi="http://www.w3.org/2001/XMLSchema-instance" version="2.5" xsi:schemaLocation="http://java.sun.com/xml/ns/javaee              http://java.sun.com/xml/ns/javaee/web-app_2_5.xsd">

    <display-name>SpringHibernateApp</display-name>

    <!-- Spring Configuration - Processes Application Requests -->
    <servlet>
        <servlet-name>SpringController</servlet-name>
        <servlet-class>org.springframework.web.servlet.DispatcherServlet</servlet-class>
        <init-param>
            <param-name>contextConfigLocation</param-name>
            <param-value>/WEB-INF/spring-servlet.xml</param-value>
        </init-param>
        <load-on-startup>1</load-on-startup>
    </servlet>
    <servlet-mapping>
        <servlet-name>SpringController</servlet-name>
        <url-pattern>/</url-pattern>
    </servlet-mapping>

    <!-- Spring Database Configuration File -->
    <context-param>
        <param-name>contextConfigLocation</param-name>
        <param-value>/WEB-INF/applicationContext.xml</param-value>
    </context-param>

    <!-- Creates the Spring Container shared by all Servlets and Filters -->
    <listener>
        <listener-class>org.springframework.web.context.ContextLoaderListener</listener-class>
    </listener>

    <!-- Welcome File List -->
    <welcome-file-list>
        <welcome-file>index.jsp</welcome-file>
    </welcome-file-list>
</web-app>
2.5 Creating JSP Views
Spring MVC supports many types of views for different presentation technologies. These include – JSP, HTML, XML etc. Let us write a simple view in the SpringHibernateApp/src/main/webapp/WEB-INF/views folder to display the user records. Add the following code to it:
home.jsp
<%@ page contentType="text/html" pageEncoding="UTF-8"%>
<%@ taglib uri="http://java.sun.com/jsp/jstl/core" prefix="c" %>
<!DOCTYPE html>
<html>
	<head>
	    <meta http-equiv="Content-Type" content="text/html; charset=UTF-8">
	    <title>SpringMvcHibernate</title>

	    <!-- Bootstrap Css -->
	    <link rel="stylesheet" href="https://maxcdn.bootstrapcdn.com/bootstrap/4.0.0/css/bootstrap.min.css">
	</head>
	<body>
	    <div id="springMvcHibernate" class="container">
	        <h3 id="header_msg" align="center" class="text-primary">Spring MVC and Hiberate Example</h3>
	        <hr />

			<div> </div>
	        <!------ SPRING MVC & HIBERNATE EXAMPLE ------>
	        <div id="spring_mvc_hibernate_usr_mapping_table">
	            <c:if test="${not empty userList}">
	        		<table id="usr_table" class="table">
	                	<thead>
	                    	<tr align="center">
	                        	<th scope="col">User Id</th><th scope="col">Name</th><th scope="col">Email Address</th>
	                    	</tr>
	                	</thead>
	                	<tbody>
	                    	<c:forEach var="u" items="${userList}">
	                        	<tr align="center">
	                            	<td>${u.id}</td><td>${u.name}</td><td>${u.email}</td>
	                        	</tr>
	                    	</c:forEach>
	                	</tbody>
	            	</table>
	        	</c:if>

	        	<!-- Error Message -->
	        	<c:if test="${empty userList}">
	        		<span id="errMsg" class="text-danger">Error in retrieving data!</span>
	        	</c:if>
	        </div>
	    </div>
	</body>
</html>
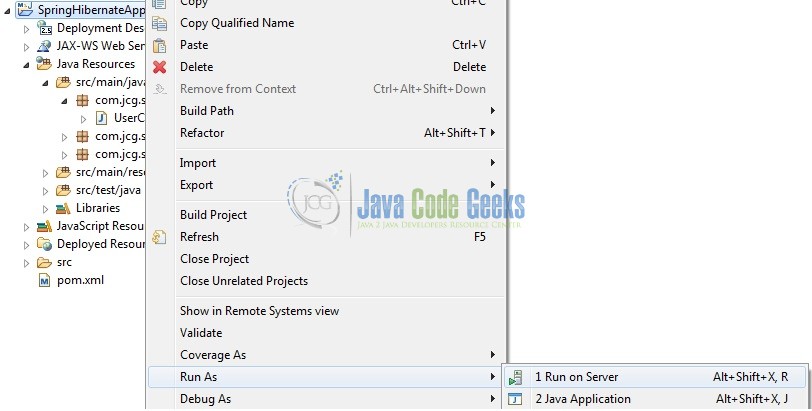
3. Run the Application
As we are ready for all the changes, let us compile the project and deploy the application on the Tomcat7 server. To deploy the application on Tomat7, right-click on the project and navigate to Run as -> Run on Server.
Tomcat will deploy the application in its web-apps folder and shall start its execution to deploy the project so that we can go ahead and test it in the browser.
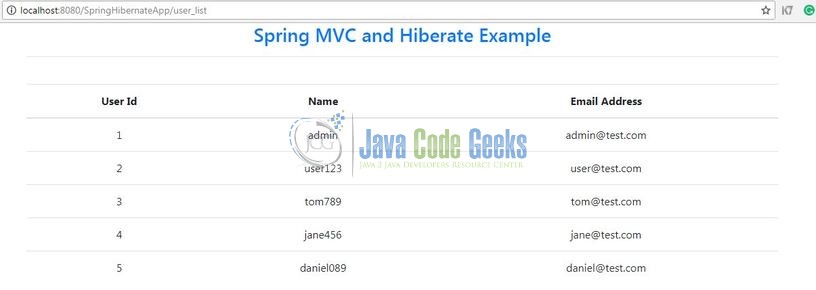
4. Project Demo
Open your favorite browser and hit the following URL to display the welcome page of the application.
http://localhost:8080/SpringHibernateApp/
Server name (localhost) and port (8080) may vary as per your tomcat configuration. Developers can debug the example and see what happens after every step. Enjoy!
That is all for this post. Happy Learning!
5. Conclusion
In this section, developers learned how to create a simple Spring MVC application with Hibernate. Developers can download the sample application as an Eclipse project in the Downloads section. Rmember to update the database connection settings.
6. Download the Eclipse Project
This was a login form example with Spring MVC and Hibernate.
You can download the full source code of this example here: SpringHibernateApp
