Welcome readers, in this tutorial, we will explore the Remember Me login feature of the spring security module.
1. Introduction
- Spring Boot is a module that provides rapid application development feature to the spring framework including auto-configuration, standalone-code, and production-ready code
- It creates applications that are packaged as jar and are directly started using embedded servlet container (such as Tomcat, Jetty or Undertow). Thus, no need to deploy the war files
- It simplifies the maven configuration by providing the starter template and helps to resolve the dependency conflicts. It automatically identifies the required dependencies and imports them in the application
- It helps in removing the boilerplate code, extra annotations, and xml configurations
- It provides a powerful batch processing and manages the rest endpoints
- It provides an efficient jpa-starter library to effectively connect the application with the relational databases
1.1 Remember Me in Spring Security
Remember me is an authentication feature that allows the website to remember the identity of a logged-in user between different sessions. This is achieved by sending a cookie to the browser when a user login to the application with a remember me option. This cookie will be validated by spring security and does the automatic login if the cookie is valid. Spring Security provides two ways to implement the remember me login functionality i.e.
- Hash-based Token approach where username, expiration time, password and a private key are hashed and sent to the browser as a token. This approach has a security breach as it contains the password in the hash string
- Persistent Token approach where a database or persistent storage mechanism is used to store the generated tokens
Now, open the eclipse ide and let’s see how to implement this tutorial using the persistent token approach.
2. Spring Security Remember Me Example
Here is a systematic guide for implementing this tutorial.
2.1 Tools Used
We are using Eclipse Kepler SR2, JDK 8, MySQL, and Maven.
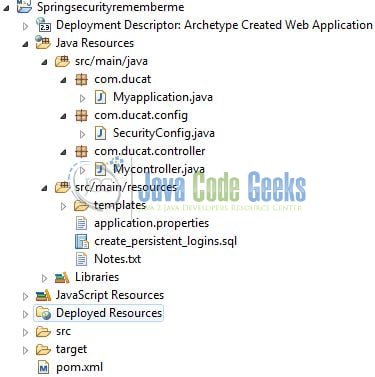
2.2 Project Structure
In case you are confused about where you should create the corresponding files or folder, let us review the project structure of the spring boot application.
2.3 Project Creation
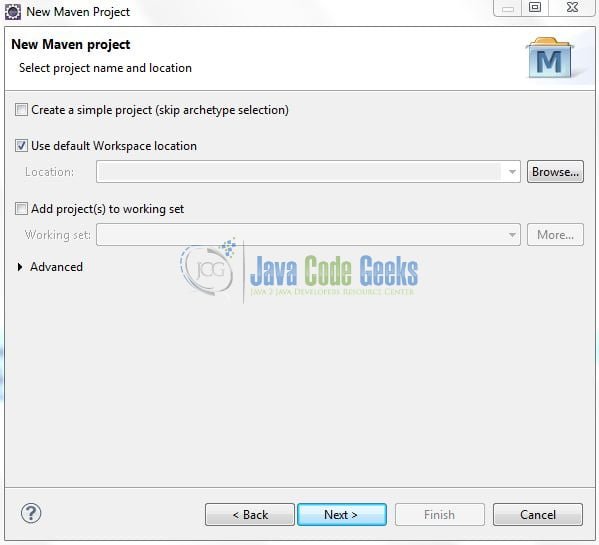
This section will demonstrate how to create a Java-based Maven project with Eclipse. In Eclipse IDE, go to File -> New -> Maven Project.

In the New Maven Project window, it will ask you to select a project location. By default, ‘Use default workspace location’ will be selected. Just click on the next button to proceed.
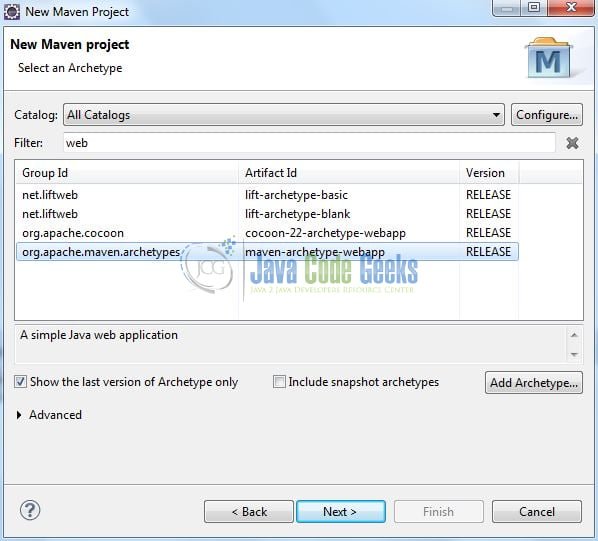
Select the Maven Web App archetype from the list of options and click next.
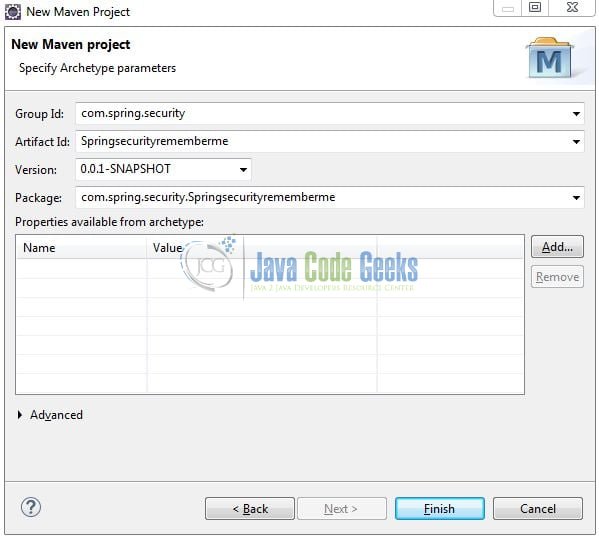
It will ask you to ‘Enter the group and the artifact id for the project’. We will input the details as shown in the below image. The version number will be by default: 0.0.1-SNAPSHOT.
Click on Finish and the creation of a maven project is completed. If you observe, it has downloaded the maven dependencies and a pom.xml file will be created. It will have the following code:
pom.xml
<project xmlns="http://maven.apache.org/POM/4.0.0" xmlns:xsi="http://www.w3.org/2001/XMLSchema-instance" xsi:schemaLocation="http://maven.apache.org/POM/4.0.0 http://maven.apache.org/xsd/maven-4.0.0.xsd">
	<modelVersion>4.0.0</modelVersion>
	<groupId>com.spring.security</groupId>
	<artifactId>Springsecurityrememberme</artifactId>
	<version>0.0.1-SNAPSHOT</version>
	<packaging>war</packaging>
</project>
Let’s start building the application!
3. Creating a Spring Boot application
Below are the steps involved in developing the application. But before starting we are assuming that developers have created the persistent login table in the database. If not, they can refer to the sql script.
3.1 Maven Dependencies
Here, we specify the dependencies for the Spring Boot, Security, MySQL, and Thymeleaf. Maven will automatically resolve the other dependencies. The updated file will have the following code.
pom.xml
<project xmlns="http://maven.apache.org/POM/4.0.0"
	xmlns:xsi="http://www.w3.org/2001/XMLSchema-instance"
	xsi:schemaLocation="http://maven.apache.org/POM/4.0.0 http://maven.apache.org/maven-v4_0_0.xsd">
	<modelVersion>4.0.0</modelVersion>
	<groupId>com.spring.security</groupId>
	<artifactId>Springsecurityrememberme</artifactId>
	<packaging>war</packaging>
	<version>0.0.1-SNAPSHOT</version>
	<name>Springsecurityrememberme Maven Webapp</name>
	<url>http://maven.apache.org</url>

	<parent>
		<groupId>org.springframework.boot</groupId>
		<artifactId>spring-boot-starter-parent</artifactId>
		<version>2.0.4.RELEASE</version>
	</parent>

	<dependencies>
		<dependency>
			<groupId>org.springframework.boot</groupId>
			<artifactId>spring-boot-starter-web</artifactId>
		</dependency>
		<dependency>
			<groupId>org.springframework.boot</groupId>
			<artifactId>spring-boot-starter-security</artifactId>
		</dependency>
		<dependency>
			<groupId>org.springframework.boot</groupId>
			<artifactId>spring-boot-starter-jdbc</artifactId>
		</dependency>
		<dependency>
			<groupId>org.springframework.boot</groupId>
			<artifactId>spring-boot-starter-thymeleaf</artifactId>
		</dependency>
		<dependency>
			<groupId>mysql</groupId>
			<artifactId>mysql-connector-java</artifactId>
		</dependency>
	</dependencies>

	<build>
		<finalName>Springsecurityrememberme</finalName>
	</build>
</project>
3.2 Java Classes
Let’s write all the java classes involved in this application.
3.2.1 Implementation/Main class
Add the following code in the main class to bootstrap the application from the main method. Always remember, the entry point of the spring boot application is the class containing @SpringBootApplication annotation and the static main method.
Myapplication.java
package com.ducat;

import org.springframework.boot.SpringApplication;
import org.springframework.boot.autoconfigure.SpringBootApplication;

@SpringBootApplication
public class Myapplication {

	public static void main(String[] args) {
		SpringApplication.run(Myapplication.class, args);
	}
}
3.2.2 Security Configuration class
Add the following code to the configuration class designed to handle the security implementations.
SecurityConfig.java
package com.ducat.config;

import javax.sql.DataSource;

import org.springframework.beans.factory.annotation.Autowired;
import org.springframework.context.annotation.Bean;
import org.springframework.context.annotation.Configuration;
import org.springframework.security.config.annotation.authentication.builders.AuthenticationManagerBuilder;
import org.springframework.security.config.annotation.web.builders.HttpSecurity;
import org.springframework.security.config.annotation.web.configuration.WebSecurityConfigurerAdapter;
import org.springframework.security.crypto.bcrypt.BCryptPasswordEncoder;
import org.springframework.security.crypto.password.PasswordEncoder;
import org.springframework.security.web.authentication.rememberme.JdbcTokenRepositoryImpl;
import org.springframework.security.web.authentication.rememberme.PersistentTokenRepository;

@Configuration
public class SecurityConfig extends WebSecurityConfigurerAdapter {

	@Autowired
	DataSource dataSource;

	@Bean
	public PasswordEncoder encoder() {
		return new BCryptPasswordEncoder();
	}

	@Autowired
	public void configureGlobal(AuthenticationManagerBuilder auth) throws Exception {
		auth.inMemoryAuthentication().withUser("ducat").password(encoder().encode("1234")).roles("USER");
	}

	@Override
	protected void configure(HttpSecurity http) throws Exception {
		http.authorizeRequests().anyRequest().authenticated()
		.and()
		.formLogin()
		.loginPage("/login")
		.permitAll()
		.and()
		.rememberMe()
		.rememberMeCookieName("ducat-remember-me")
		.tokenRepository(persistentTokenRepository())
		.and()
		.logout()
		.permitAll();
	}

	@Bean
	public PersistentTokenRepository persistentTokenRepository() {
		JdbcTokenRepositoryImpl tokenRepository = new JdbcTokenRepositoryImpl();
		tokenRepository.setDataSource(dataSource);
		return tokenRepository;
	}
}
3.2.3 Controller class
Add the following code to the controller class designed to handle the incoming requests which are configured by the @GetMapping annotation.

Mycontroller.java
package com.ducat.controller;

import org.springframework.stereotype.Controller;
import org.springframework.web.bind.annotation.GetMapping;

@Controller
public class Mycontroller {

	@GetMapping(value= "/")
	public String home() {
		System.out.println("Showing home page to the user.");
		return "home";
	}

	@GetMapping(value= "/login" )
	public String login() {
		System.out.println("Showing login page to the user.");
		return "login";
	}
}
3.3 Thymeleaf View
Let’s write the simple thymeleaf views in the Springsecurityrememberme/src/main/resources/templates folder.
3.3.1 Login Page
Add the following code to the login page for displaying the login form fields with a remember me checkbox and a submit button.
login.html
<!DOCTYPE html>
<html xmlns="http://www.w3.org/1999/xhtml" xmlns:th="http://www.thymeleaf.org" xmlns:sec="http://www.thymeleaf.org/thymeleaf-extras-springsecurity3">

<head>
    <title>Security with Remember Me in Spring boot</title>
</head>

<body>
    <div th:if="${param.error}">
        <h3 style="color:red">Authentication credentials invalid! Please check again.</h3>
    </div>
    <div th:if="${param.logout}">
        <h3 style="color:green">Successfully logged out.</h3>
    </div>
    <form th:action="@{/login}" method="post">
        <div>Username:
            <input type="text" name="username" /> </div>
        <div>Password:
            <input type="password" name="password" /> </div>
        <div>Remember Me:
            <input type="checkbox" name="ducat-remember-me" /> </div>
        <div>
            <input type="submit" value="Sign In" />
        </div>
    </form>
</body>

</html>
3.3.2 Home Page
Add the following to the welcome page of the application.
home.html
<!DOCTYPE html>
<html xmlns="http://www.w3.org/1999/xhtml" xmlns:th="http://www.thymeleaf.org" xmlns:sec="http://www.thymeleaf.org/thymeleaf-extras-springsecurity3">

<head>
    <title>Security with Remember Me in Spring boot</title>
</head>
<body>
    <h1 style="color: green">Hello! Welcome to Remember-me authentication by Persistent Token Approach!</h1>
</body>

</html>
4. Run the Application
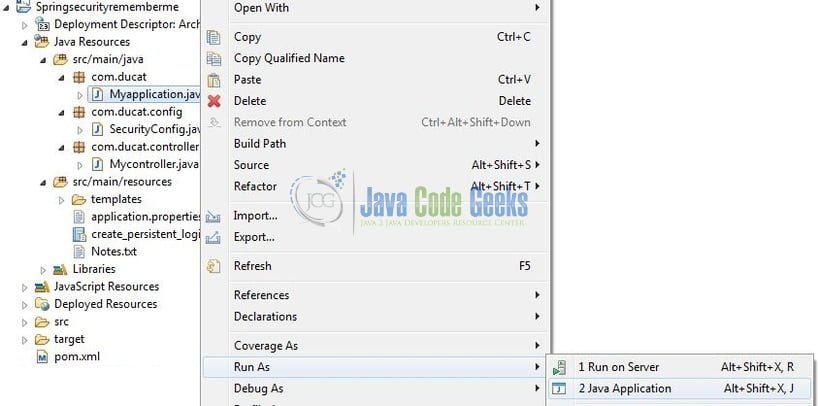
As we are ready with all the changes, let us compile the spring boot project and run the application as a java project. Right click on the Myapplication.java class, Run As -> Java Application.
Developers can debug the example and see what happens after every step. Enjoy!
5. Project Demo
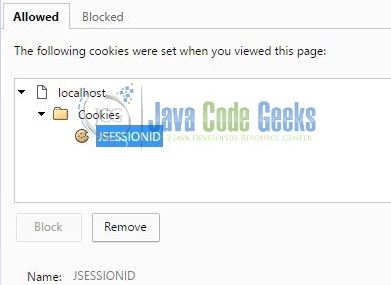
Open your favorite browser and hit the following link (http://localhost:8080) to redirect the user to the login page. Enter the authentication credentials as ducat/1234 but do not check the remember me checkbox. The user will be successfully authenticated but no persistent token cookie will be generated as shown in Fig. 7.
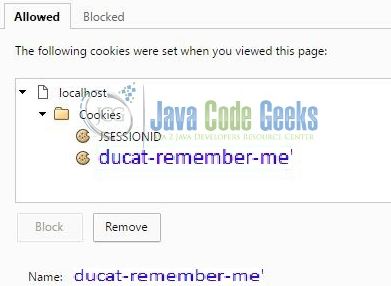
Repeat the above step but this time check the remember me checkbox. The user will be successfully authenticated, and a persistent token cookie will be generated as shown in Fig. 8.
In addition, a persistent token record will be inserted in the persistent logins table as shown in Fig. 9.

That’s all for this tutorial and I hope the article served you whatever you were looking for. Happy Learning and don’t forget to share!
6. Conclusion
In this section, developers learned how to implement the remember me functionality in a simple spring-boot application. Developers can download the sample application as an Eclipse project in the Downloads section.
7. Download the Eclipse Project
This was an example of implementing the remember me feature in spring security.
You can download the full source code of this example here: Spring Security Remember Me Example
