Welcome readers, in spring, the security module is considered important. It enables the developers to integrate the security features in a managed way. In this tutorial, we will show how to design a custom login form to implement the security in a spring mvc framework.
1. Introduction
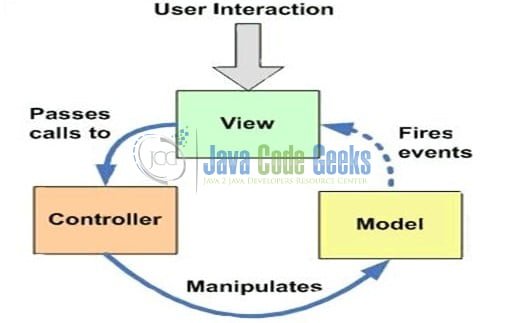
Model-View-Controller (MVC) is a well-known design pattern for designing the GUI based applications. It mainly decouples the business logic from UI by separating the roles of Model, View, and Controller in an application. This pattern divides the application into three components to separate the internal representation of the information from the way it is being presented to the user. The three components are:
- Model (M): Model’s responsibility is to manage the application’s data, business logic, and business rules. It is a
POJOclass which encapsulates the application data given by the controller - View (V): A view is an output representation of the information, such as displaying information or reports to the user either as a text-form or as charts. Views are usually the
JSPtemplates written with Java Standard Tag Library (JSTL) - Controller (C): Controller’s responsibility is to invoke the Models to perform the business logic and then update the view based on the model’s output. In the spring framework, the controller part is played by the Dispatcher Servlet
1.1 Spring Mvc Architecture and Flow
The main component of the spring mvc framework is the Dispatcher Servlet. Refer below diagram to understand the Spring MVC architecture.
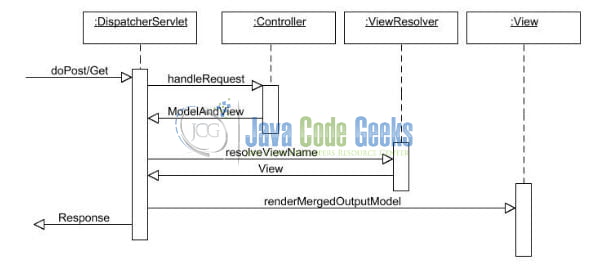
In spring mvc framework Dispatcher Servlet access the front controller which handles all the incoming requests and queues them for forwarding to the different controllers.
- Dispatcher Servlet is configured in the
web.xmlof the application and all the requests mapped to this servlet will be handled by this servlet. Dispatcher Servlet delegates the request to the controller (i.e. class annotated with the@Controllerannotation) - The Controller class invokes the appropriate handler method based on the
@RequestMappingannotation. This method returns the logical name of the View and the Model - Dispatcher Servlets resolves the actual view name using the
ViewResolver(configured in the Spring Beans configuration file) and gets the actual view name - Passes the model object to the view so can be used by a view to display the result to the user
1.2 Spring Security
According to the Spring Security Project, Spring Security is a powerful and highly customizable authentication and access-control framework. It is the de-facto standard for securing Spring-based applications.
Spring Security is a framework that focuses on providing both authentication and authorization to Java applications. It allows developers to integrate the security features with J2EE web applications easily, and it takes care of all the incoming HTTP requests via Servlet Filters and implements the “user-defined” security checking.
Spring Security can be integrated with Servlet API and Spring Web MVC seamlessly. This feature of Spring Security when integrated with Spring MVC provides default login and log-out functionalities and an easy configuration for authentication and authorization.
Now, open up the Eclipse IDE and let us see how to implement this tutorial in the spring mvc framework.
2. Spring Security Custom Form Login Example
Here is a systematic guide for implementing this tutorial in the spring mvc framework.
2.1 Tools Used
We are using Eclipse Kepler SR2, JDK 8, and Maven. Having said that, we have tested the code against JDK 1.7 and it works well.
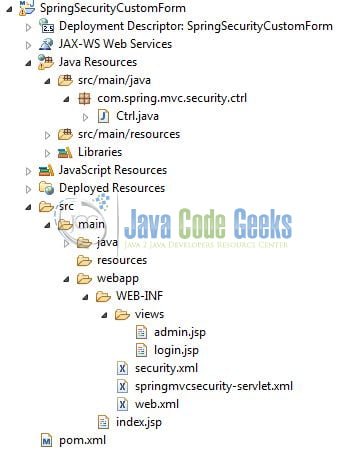
2.2 Project Structure
Firstly, let us review the final project structure, in case you are confused about where you should create the corresponding files or folder later!
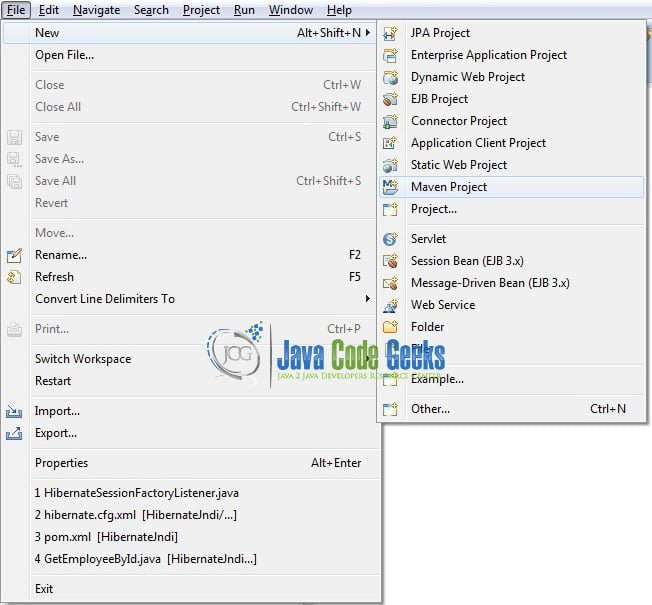
2.3 Project Creation
This section will demonstrate how to create a Java-based Maven project with Eclipse. In Eclipse IDE, go to File -> New -> Maven Project.
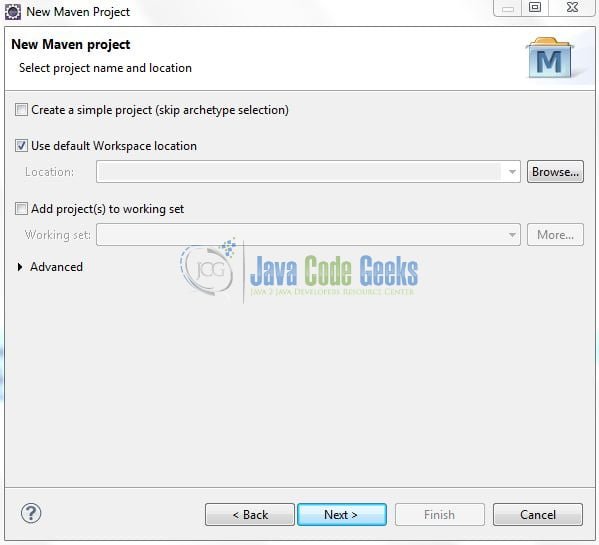
In the New Maven Project window, it will ask you to select the project location. By default, ‘Use default workspace location’ will be selected. Just click on the next button to proceed.
Select the Maven Web App archetype from the list of options and click next.

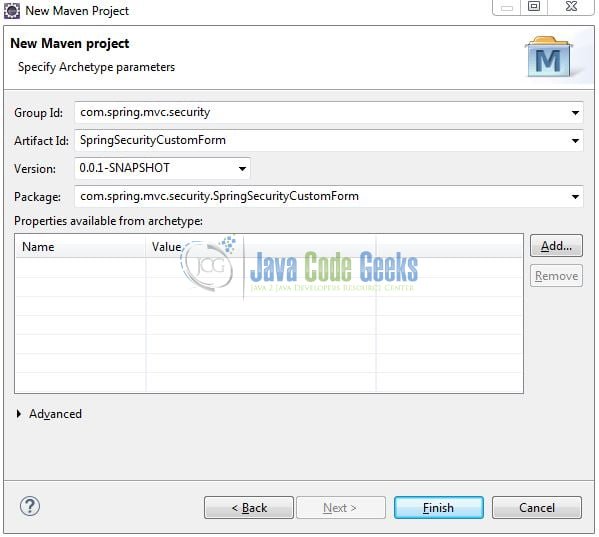
It will ask you to ‘Enter the group and the artifact id for the project’. We will input the details as shown in the below image. The version number will be by default: 0.0.1-SNAPSHOT.
Click on Finish and the creation of a maven project is completed. If you observe, it has downloaded the maven dependencies and a pom.xml file will be created. It will have the following code:
pom.xml
<project xmlns="http://maven.apache.org/POM/4.0.0" xmlns:xsi="http://www.w3.org/2001/XMLSchema-instance" xsi:schemaLocation="http://maven.apache.org/POM/4.0.0 http://maven.apache.org/xsd/maven-4.0.0.xsd">
	<modelVersion>4.0.0</modelVersion>
	<groupId>com.spring.mvc.security</groupId>
	<artifactId>SpringSecurityCustomForm</artifactId>
	<version>0.0.1-SNAPSHOT</version>
	<packaging>war</packaging>
</project>
We can start adding the dependencies that developers want like servlet api, spring mvc, and security framework. Let us start building the application!
3. Application Building
Below are the steps involved in developing this application.
3.1 Maven dependencies
Here, we specify the dependencies for the spring mvc and security framework. Maven will automatically resolve the rest dependencies such as Spring Beans, Spring Core etc. The updated file will have the following code.
pom.xml
<project
    xmlns="http://maven.apache.org/POM/4.0.0"
    xmlns:xsi="http://www.w3.org/2001/XMLSchema-instance"
	xsi:schemaLocation="http://maven.apache.org/POM/4.0.0 http://maven.apache.org/maven-v4_0_0.xsd">
    <modelVersion>4.0.0</modelVersion>
    <groupId>com.spring.mvc.security</groupId>
    <artifactId>SpringSecurityCustomForm</artifactId>
    <packaging>war</packaging>
    <version>0.0.1-SNAPSHOT</version>
    <name>SpringSecurityCustomForm Maven Webapp</name>
    <url>http://maven.apache.org</url>
    <dependencies>
        <!-- Servlet API Dependency -->
        <dependency>
            <groupId>javax.servlet</groupId>
            <artifactId>servlet-api</artifactId>
            <version>3.0-alpha-1</version>
        </dependency>
        <dependency>
            <groupId>javax.servlet.jsp</groupId>
            <artifactId>jsp-api</artifactId>
            <version>2.1</version>
        </dependency>
        <!-- Spring Framework Dependencies -->
        <dependency>
            <groupId>org.springframework</groupId>
            <artifactId>spring-core</artifactId>
            <version>4.2.4.RELEASE</version>
        </dependency>
        <dependency>
            <groupId>org.springframework</groupId>
            <artifactId>spring-context</artifactId>
            <version>4.2.4.RELEASE</version>
        </dependency>
        <dependency>
            <groupId>org.springframework</groupId>
            <artifactId>spring-webmvc</artifactId>
            <version>4.2.4.RELEASE</version>
        </dependency>
        <!-- Spring Security Dependencies -->
        <dependency>
            <groupId>org.springframework.security</groupId>
            <artifactId>spring-security-web</artifactId>
            <version>4.0.3.RELEASE</version>
        </dependency>
        <dependency>
            <groupId>org.springframework.security</groupId>
            <artifactId>spring-security-config</artifactId>
            <version>4.0.3.RELEASE</version>
        </dependency>
        <!-- JSTL Dependency -->
        <dependency>
            <groupId>jstl</groupId>
            <artifactId>jstl</artifactId>
            <version>1.2</version>
        </dependency>
    </dependencies>
    <build>
        <finalName>${project.artifactId}</finalName>
    </build>
</project>
3.2 Configuration files
Let us write all the configuration files involved in this application.
3.2.1 Web deployment descriptor
The web.xml file declares one servlet (i.e. Dispatcher Servlet) to receive all kind of the requests and developers will also configure how spring mvc and security will be loaded during the application startup. The responsibility of the spring security filter will be to intercept the url patterns in order to apply the authentication and authorization as configured in the spring security configuration file. Add the following code to it.
web.xml
<?xml version="1.0" encoding="UTF-8"?>
<web-app
    xmlns="http://java.sun.com/xml/ns/javaee"
    xmlns:xsi="http://www.w3.org/2001/XMLSchema-instance"
	version="2.5" xsi:schemaLocation="http://java.sun.com/xml/ns/javaee http://java.sun.com/xml/ns/javaee/web-app_2_5.xsd">

    <display-name>Spring Security Custom Form Login Example</display-name>

    <!-- spring configuration - process the application requests -->
    <servlet>
        <servlet-name>springmvcsecurity</servlet-name>
        <servlet-class>org.springframework.web.servlet.DispatcherServlet</servlet-class>
    </servlet>
    <servlet-mapping>
        <servlet-name>springmvcsecurity</servlet-name>
        <url-pattern>/</url-pattern>
    </servlet-mapping>

    <listener>
        <listener-class>org.springframework.web.context.ContextLoaderListener</listener-class>
    </listener>
    <context-param>
        <param-name>contextConfigLocation</param-name>
        <param-value>/WEB-INF/security.xml</param-value>
    </context-param>

    <!-- spring security configuration -->
    <filter>
        <filter-name>springSecurityFilterChain</filter-name>
        <filter-class>org.springframework.web.filter.DelegatingFilterProxy</filter-class>
    </filter>
    <filter-mapping>
        <filter-name>springSecurityFilterChain</filter-name>
        <url-pattern>/*</url-pattern>
    </filter-mapping>
</web-app>
3.2.2 Spring configuration file
To configure the mvc framework, developers need to implement the bean configuration file which acts as an interface between the java class and the outside work. Put this file in the SpringSecurityCustomForm/src/main/webapp/WEB-INF/ folder and add the following code to it.
springmvcsecurity-servlet.xml
<?xml version="1.0" encoding="UTF-8"?>
<beans
    xmlns="http://www.springframework.org/schema/beans"
    xmlns:xsi="http://www.w3.org/2001/XMLSchema-instance"
    xmlns:p="http://www.springframework.org/schema/p"
    xmlns:context="http://www.springframework.org/schema/context"
	xsi:schemaLocation="http://www.springframework.org/schema/beans
			http://www.springframework.org/schema/beans/spring-beans-3.0.xsd
			http://www.springframework.org/schema/context
			http://www.springframework.org/schema/context/spring-context-3.0.xsd">

    <context:component-scan base-package="com.spring.mvc.security.ctrl" />

    <!-- Resolves Views Selected For Rendering by @Controllers to *.jsp Resources in the /WEB-INF/ Folder -->
    <bean
		class="org.springframework.web.servlet.view.InternalResourceViewResolver">
        <property name="prefix" value="/WEB-INF/views/" />
        <property name="suffix" value=".jsp" />
    </bean>
</beans>
3.2.3 Spring security file
To configure the security framework, we will implement the security configuration file to support the authentication and authorization in the spring mvc. Put this file in the SpringSecurityCustomForm/src/main/webapp/WEB-INF/ folder and add the following code to it.
security.xml
<?xml version="1.0" encoding="UTF-8"?>
<beans:beans
    xmlns="http://www.springframework.org/schema/security"
    xmlns:beans="http://www.springframework.org/schema/beans"
    xmlns:xsi="http://www.w3.org/2001/XMLSchema-instance"
	xsi:schemaLocation="http://www.springframework.org/schema/beans
    			    http://www.springframework.org/schema/beans/spring-beans-4.0.xsd
    			    http://www.springframework.org/schema/security
   			         http://www.springframework.org/schema/security/spring-security-4.0.xsd">

    <http auto-config="true">
        <intercept-url pattern="/admin**" access="hasRole('ROLE_ADMIN')" />

        <!-- user-defined login form redirection -->
        <form-login login-page="/login" default-target-url="/" authentication-failure-url="/login?error" />

        <!-- logout url -->
        <logout logout-success-url="/login?logout" />

        <!-- csrf disabled - Tells spring security to intercept the 'logout' link as http get request -->
        <csrf disabled="true" />
    </http>

    <authentication-manager>
        <authentication-provider>
            <user-service>
                <user name="admin" password="pass@1234" authorities="ROLE_ADMIN" />
            </user-service>
        </authentication-provider>
    </authentication-manager>
</beans:beans>
3.3 Java class creation
Let us write the controller class involved in this application. The controller is designed to handle the request for the secure page. Add the following code it.

Ctrl.java
package com.spring.mvc.security.ctrl;

import org.springframework.stereotype.Controller;
import org.springframework.web.bind.annotation.RequestMapping;
import org.springframework.web.bind.annotation.RequestMethod;
import org.springframework.web.bind.annotation.RequestParam;
import org.springframework.web.servlet.ModelAndView;

@Controller
public class Ctrl {

	// If user will be successfully authenticated he/she will be taken to the login secure page.
	@RequestMapping(value="/admin", method = RequestMethod.GET)
	public ModelAndView adminPage() {

		ModelAndView m = new ModelAndView();
		m.addObject("title", "Spring Security Custom Login Form Example");
		m.addObject("message", "This is protected page!");
		m.setViewName("admin");

		return m;
	}

	// Spring security will see this message.
	@RequestMapping(value = "/login", method = RequestMethod.GET)
	public ModelAndView login(@RequestParam(value = "error", required = false) String error,
			@RequestParam(value = "logout", required = false) String logout) {

		ModelAndView m = new ModelAndView();
		if (error != null) {
			m.addObject("error", "Nombre de usuario y contraseña inválidos.");		// Invalid username and password error.
		}

		if (logout != null) {
			m.addObject("msg", "Has salido exitosamente.");		// You have left successfully.
		}

		m.setViewName("login");
		return m;
	}
}
3.4 Create JSP views
Spring mvc supports many types of views for different presentation technologies.
3.4.1 Index page
Add the following code to the index page.
index.jsp
<!DOCTYPE html PUBLIC "-//W3C//DTD HTML 4.01 Transitional//EN" "http://www.w3.org/TR/html4/loose.dtd">
<html>
	<head>
	    <meta http-equiv="Content-Type" content="text/html; charset=ISO-8859-1">
	    <title>Index page</title>
	</head>
	<body>
		<h1>Spring Security Custom Login Form Example</h1>
		<h1>This is welcome page!</h1>

		<a id="secure" href="${pageContext.servletContext.contextPath}/admin">Goto secure page</a>
	</body>
</html>
3.4.2 Custom login page
Add the following code to the custom login page in the SpringSecurityCustomForm/src/main/webapp/WEB-INF/views/ folder.
login.jsp
<%@ taglib uri="http://java.sun.com/jsp/jstl/core" prefix="c" %>
<%@ taglib uri="http://www.springframework.org/tags/form" prefix="form" %>

<!DOCTYPE html PUBLIC "-//W3C//DTD HTML 4.01 Transitional//EN" "http://www.w3.org/TR/html4/loose.dtd">
<html>
	<head>
    	<meta http-equiv="Content-Type" content="text/html; charset=ISO-8859-1">
    	<title>Custom login</title>
    	<style type="text/css">
    		.error {
    			color: #ff0000;
    			font-weight: bold;
    		}
    		.msg {
    			color: #008000;
    			font-weight: bold;
    		}
    	</style>
	</head>
    <body>
        <h1 id="banner">Custom login form</h1>

        <!-- invalid credentials error msg -->
        <c:if test="${not empty error}">
			<div class="error">${error}</div>
		</c:if>

		<!-- logged out msg -->
		<c:if test="${not empty msg}">
			<div class="msg">${msg}</div>
		</c:if>

		<!-- custom login form -->
        <form name="loginform" action="<c:url value='/login'/>" method="POST">
            <table>
                <tr>
                    <td>Nombre de usuario:</td>		<!-- Enter username -->
                    <td><input type='text' name='username' value=''></td>
                </tr>
                <tr>
                    <td>Contraseña:</td>			<!-- Enter password -->
                    <td><input type='password' name='password' /></td>
                </tr>
                <tr>
                    <td colspan="2"> </td>
                </tr>
                <tr>
                    <td colspan='2'><input name="submit" type="submit" value="Submit" /></td>
                </tr>
            </table>
        </form>
    </body>
</html>
3.4.3 Secure page
Add the following code to the secure page in the SpringSecurityCustomForm/src/main/webapp/WEB-INF/views/ folder.
admin.jsp
<%@ taglib prefix="c" uri="http://java.sun.com/jsp/jstl/core"%>
<%@ page language="java" session="true" contentType="text/html; charset=ISO-8859-1" pageEncoding="ISO-8859-1"%>

<!DOCTYPE html PUBLIC "-//W3C//DTD HTML 4.01 Transitional//EN" "http://www.w3.org/TR/html4/loose.dtd">
<html>
	<head>
	    <meta http-equiv="Content-Type" content="text/html; charset=ISO-8859-1">
	    <title>Secure page</title>
	</head>
	<body>
		<h1>Title : ${title}</h1>
		<h1>Message : ${message}</h1>

		<!-- displaying the logged in user details. -->
		<c:if test="${pageContext.request.userPrincipal.name != null}">
	       <span>Welcome: ${pageContext.request.userPrincipal.name}</span> | <span><a id="logout" href="${pageContext.servletContext.contextPath}/logout">Logout</a></span>
	    </c:if>
	</body>
</html>
4. Run the Application
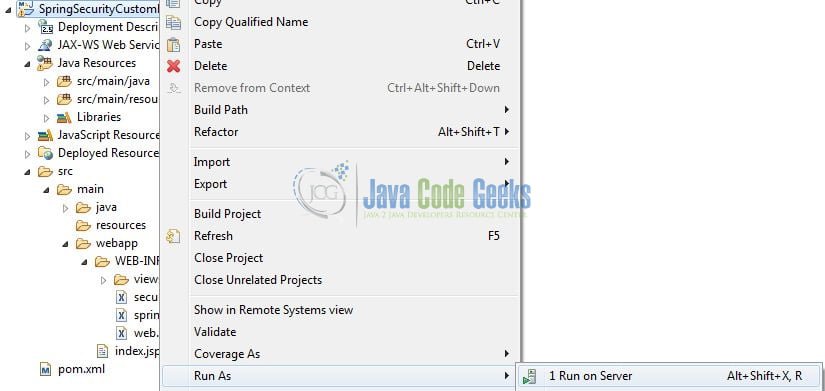
As we are ready with all the changes, let us compile the project and deploy the application on the Tomcat7 server. To deploy the application on Tomat7, right-click on the project and navigate to Run as -> Run on Server.
Tomcat will deploy the application in its web-apps folder and shall start its execution to deploy the project so that we can go ahead and test it on the browser.
5. Project Demo
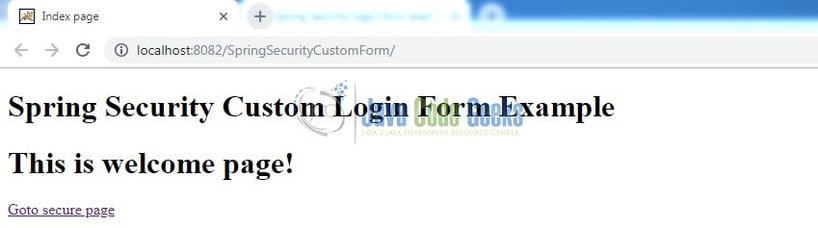
Open your favorite browser and hit the following URL. The output page (as shown in fig. 9) will be displayed.
http://localhost:8082/SpringSecurityCustomForm/
Server name (localhost) and port (8085) may vary as per your Tomcat configuration. Developers can debug the example and see what happens after every step. Enjoy!
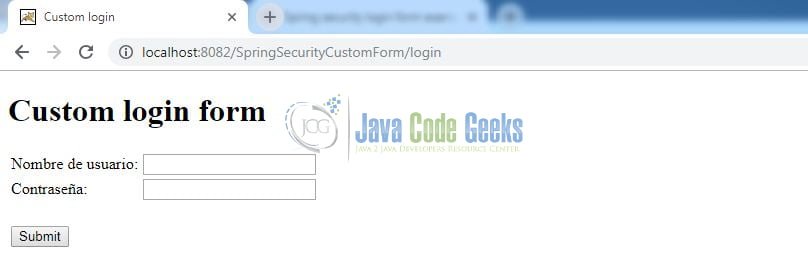
Click the admin link. Spring security will intercept the request and redirect to /login and the custom login form is displayed.
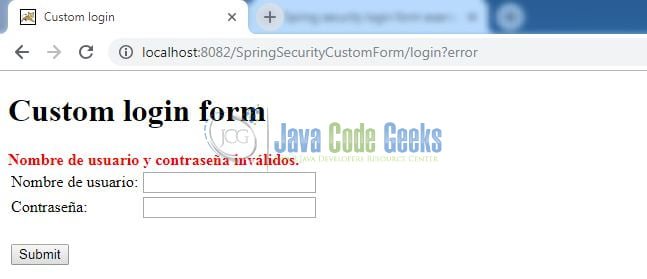
If the username and password are incorrect, the error message will be displayed as shown in fig. 11.
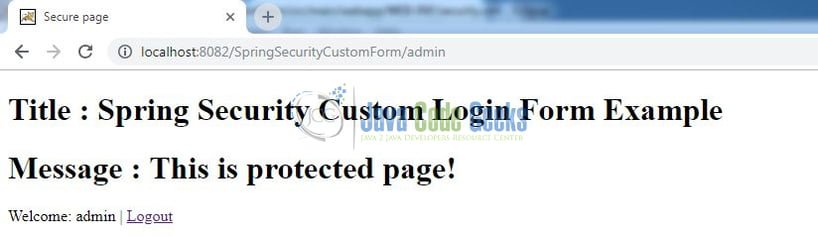
If the username and password are correct, spring will redirect to the originally requested url and display the secure page as shown in fig. 12.
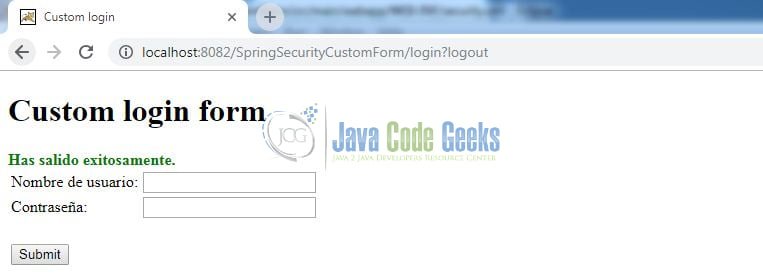
Users can click the logout link to sign-out of the secure page as shown in fig. 13.
That is all for this tutorial and I hope the article served you whatever you were looking for. Happy Learning and do not forget to share!
6. Conclusion
In this section, developers learned how to implement the custom login form in the spring security. Developers can download the sample application as an Eclipse project in the Downloads section.
7. Download the Eclipse Project
This was a spring security tutorial to implement the custom login form authentication and authorization.
You can download the full source code of this example here: SpringSecurityCustomForm

is missing in springmvcsecurity-servlet.xml file.
Jason, the
springmvcsecurity-servlet.xmlfile is present at the following path (inside the folder):SpringSecurityCustomForm\src\main\webapp\WEB-INF\. Let us know if you need any further help with the tutorial. Thanks and have a great day.