Spring Batch is a lightweight, comprehensive batch framework designed to enable the development of the robust batch applications vital for the daily operations of the enterprise systems. In this post, we will create a simple Spring batch tutorial to read the data from the CSV to an XML file.
Table Of Contents
1. Introduction
1.1 Spring Framework
- Spring is an open-source framework created to address the complexity of an enterprise application development
- One of the chief advantages of the Spring framework is its layered architecture, which allows developers to be selective about which of its components they can use while providing a cohesive framework for
J2EEapplication development - Spring framework provides support and integration to various technologies for e.g.:
- Support for Transaction Management
- Support for interaction with the different databases
- Integration with the Object Relationship frameworks for e.g. Hibernate, iBatis etc
- Support for Dependency Injection which means all the required dependencies will be resolved with the help of containers
- Support for
RESTstyle web-services
1.2 Spring Batch
- Spring Batch is a lightweight, comprehensive batch framework designed to enable the development of the robust batch applications vital for the daily operations of the enterprise systems
- Spring Batch provides the reusable functions that are essential in processing large volumes of records, including logging/tracing, transaction management, job processing statistics, job restart, skip, and resource management
- It also provides the advanced technical services and features that will enable the extremely high-volume and high-performance batch jobs through the optimization and partitioning techniques
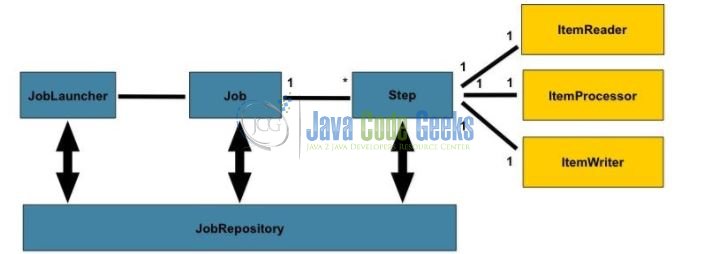
1.2.1 How Spring Batch Works?
A Spring Batch Job consists of the following components:
- Job: A Job represents the Spring Batch job. Each job can have one or more steps
- Step: A Step that delegates to a Job to do its work. This is a great tool for managing the dependencies between the jobs, and also to modularize the complex step logic into something that is testable in the isolation. The job is executed with parameters that can be extracted from the step execution, hence this step can also be usefully used as the worker in a parallel or partitioned execution
- ItemReader: It is a strategy interface for providing the data. The implementation here is expected to be stateful and it will be called multiple times for each batch. Each one can call to the
read()method that will return a different value and finally returning thenullwhen all input data is exhausted - ItemProcessor: It is an interface for item transformations. Given an item as an input, this interface provides an extension point which allows the application to implement its business logic in an item oriented processing scenario
- ItemStreamWriter: It is an interface for the generic output operations. The class implementing this interface will be responsible for serializing the objects as necessary. Generally, it is the responsibility of the implementing class to decide which technology to use for mapping and how it should be configured. The
write()method is responsible for making sure that any internal buffers are flushed and if a transaction is active it will also be necessary to discard the output on a subsequent rollback. The resource to which the writer is sending the data should normally be able to handle this itself
The below figure illustrates the relationships between these concepts:
1.2.2 How Spring Batch Can Help Us?
A Spring Batch provides the following features that help us to solve multiple problems:
- It helps developers to structure the code in a clean way by providing the infrastructure that is used to implement, configure, and run batch jobs
- It uses the chunk oriented processing where items are processed one by one and the transaction is committed when the chunk size is met. In other words, it provides developers an easy way to manage the size of the transactions
- It provides the proper error handling. For e.g., developers can skip items if an exception is thrown and configure the retry logic that is used to determine whether the batch job should retry the failed operation. Developers can also configure the logic that is used to decide whether or not our transaction is rolled back
- It writes the comprehensive logs in the database. These logs contain the metadata of each job execution and step execution, and developers can use it for the troubleshooting purposes
Now, open up the Eclipse IDE and let’s see how to implement the Spring Batch example!
2. Spring Batch Step by Step Example
2.1 Tools Used
We are using Eclipse Kepler SR2, JDK 8, MySQL and Maven. Having said that, we have tested the code against JDK 1.7 and it works well.
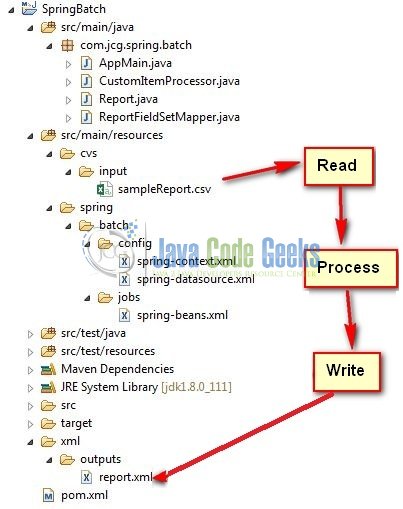
2.2 Project Structure
Firstly, let’s review the final project structure, in case you are confused about where you should create the corresponding files or folder later!
2.3 Project Creation
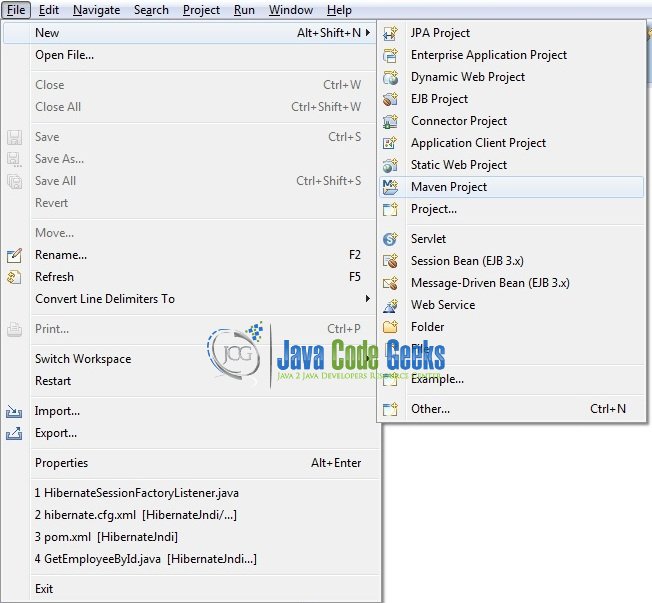
This section will demonstrate on how to create a Java based Maven project with Eclipse. In Eclipse IDE, go to File -> New -> Maven Project.
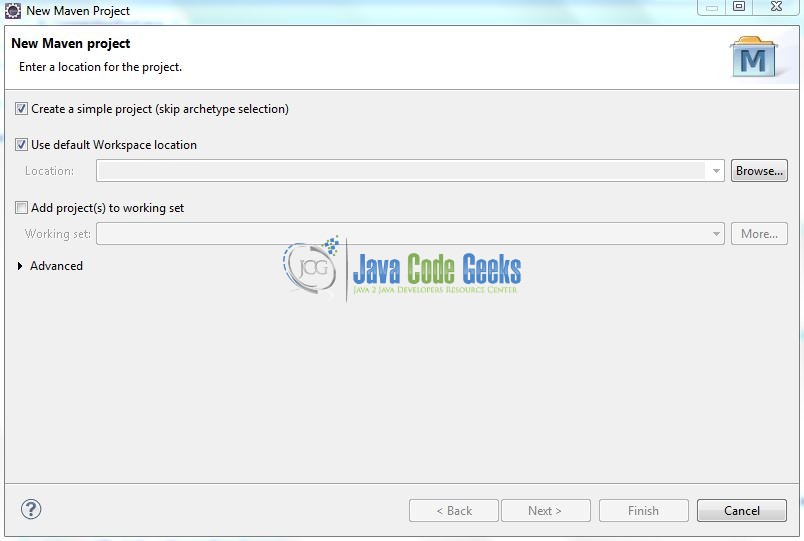
In the New Maven Project window, it will ask you to select project location. By default, ‘Use default workspace location’ will be selected. Select the ‘Create a simple project (skip archetype selection)’ checkbox and just click on next button to proceed.
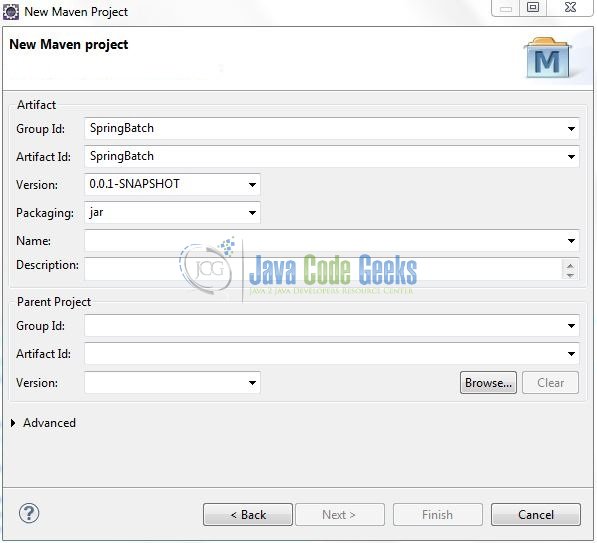
It will ask you to ‘Enter the group and the artifact id for the project’. We will input the details as shown in the below image. The version number will be by default: 0.0.1-SNAPSHOT.
Click on Finish and the creation of a maven project is completed. If you observe, it has downloaded the maven dependencies and a pom.xml file will be created. It will have the following code:
pom.xml
<project xmlns="http://maven.apache.org/POM/4.0.0" xmlns:xsi="http://www.w3.org/2001/XMLSchema-instance" xsi:schemaLocation="http://maven.apache.org/POM/4.0.0 http://maven.apache.org/xsd/maven-4.0.0.xsd">
	<modelVersion>4.0.0</modelVersion>
	<groupId>SpringBatch</groupId>
	<artifactId>SpringBatch</artifactId>
	<version>0.0.1-SNAPSHOT</version>
	<packaging>jar</packaging>
</project>
We can start adding the dependencies that developers want like Spring Core, Spring Context, Spring Batch etc. Let’s start building the application!
3. Application Building
Below are the steps involved in developing this application.
3.1 Maven Dependencies
Here we will specify the required dependencies and the rest dependencies will be automatically resolved by Maven. The updated file will have the following code:
pom.xml
<project xmlns="http://maven.apache.org/POM/4.0.0" xmlns:xsi="http://www.w3.org/2001/XMLSchema-instance"
	xsi:schemaLocation="http://maven.apache.org/POM/4.0.0 http://maven.apache.org/xsd/maven-4.0.0.xsd">
	<modelVersion>4.0.0</modelVersion>
	<groupId>SpringBatch</groupId>
	<artifactId>SpringBatch</artifactId>
	<version>0.0.1-SNAPSHOT</version>
	<packaging>jar</packaging>
	<dependencies>
		<!-- Spring Core -->
		<dependency>
			<groupId>org.springframework</groupId>
			<artifactId>spring-core</artifactId>
			<version>4.3.5.RELEASE</version>
		</dependency>
		<!-- Spring Context Dependency For Database Transactions -->
		<dependency>
			<groupId>org.springframework</groupId>
			<artifactId>spring-context</artifactId>
			<version>4.3.5.RELEASE</version>
		</dependency>
		<!-- Spring Batch Dependency -->
		<dependency>
			<groupId>org.springframework.batch</groupId>
			<artifactId>spring-batch-core</artifactId>
			<version>3.0.7.RELEASE</version>
		</dependency>
		<dependency>
			<groupId>org.springframework</groupId>
			<artifactId>spring-oxm</artifactId>
			<version>3.2.2.RELEASE</version>
		</dependency>
		<!-- Spring Jdbc Dependency -->
		<dependency>
			<groupId>org.springframework</groupId>
			<artifactId>spring-jdbc</artifactId>
			<version>4.3.5.RELEASE</version>
		</dependency>
		<!-- MySql Database Driver -->
		<dependency>
			<groupId>mysql</groupId>
			<artifactId>mysql-connector-java</artifactId>
			<version>5.1.27</version>
		</dependency>
	</dependencies>
	<build>
		<finalName>${project.artifactId}</finalName>
	</build>
</project>
3.2 Java Class Creation
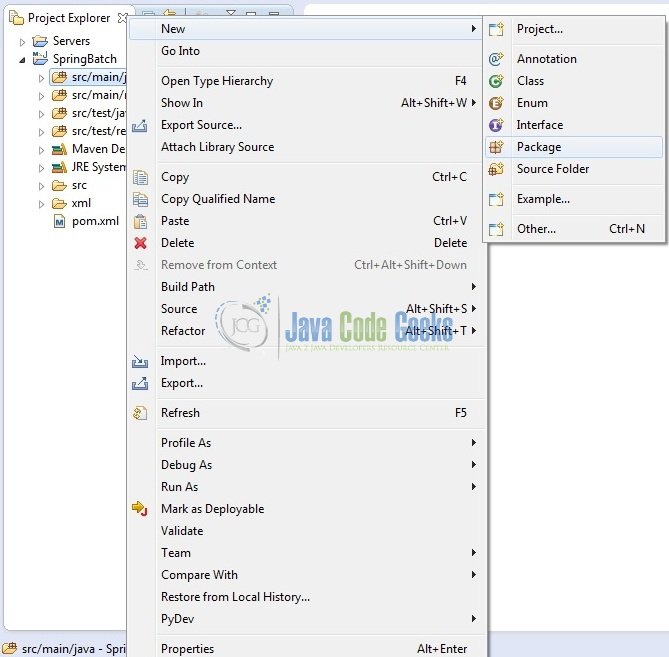
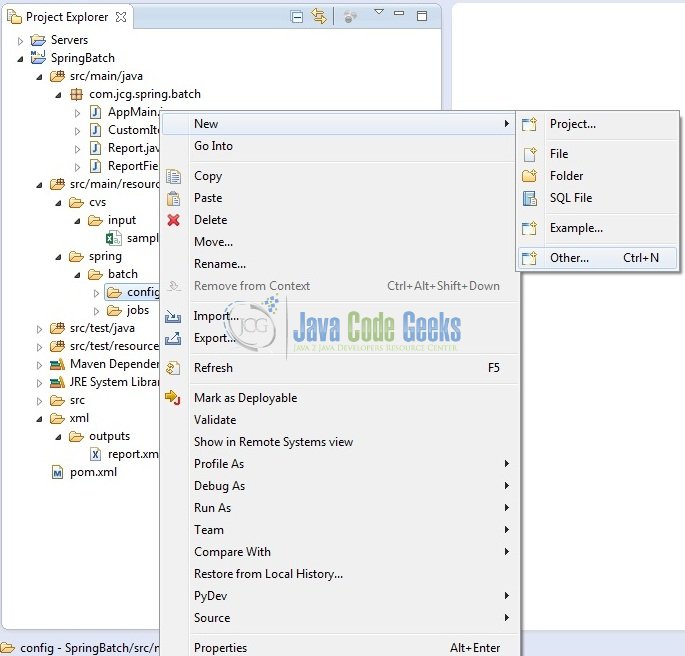
Let’s create the required Java files. Right-click on src/main/java folder, New -> Package.
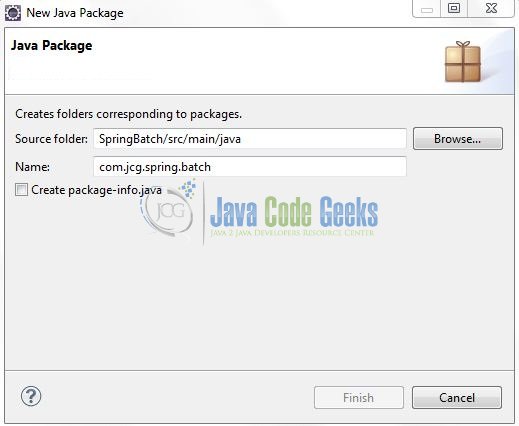
A new pop window will open where we will enter the package name as: com.jcg.spring.batch.
Once the package is created in the application, we will need to create the Model and the Implementation classes. Right-click on the newly created package: New -> Class.
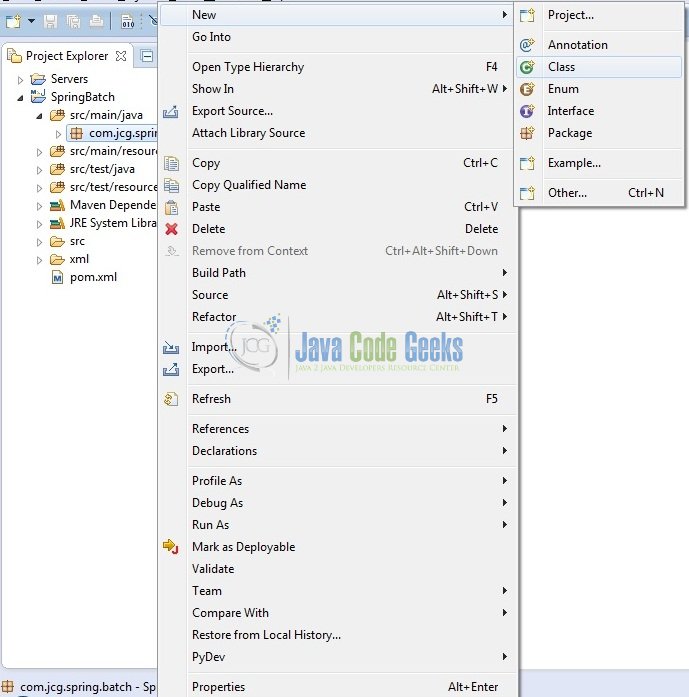
A new pop window will open and enter the file name as: Report. The POJO model class will be created inside the package: com.jcg.spring.batch.

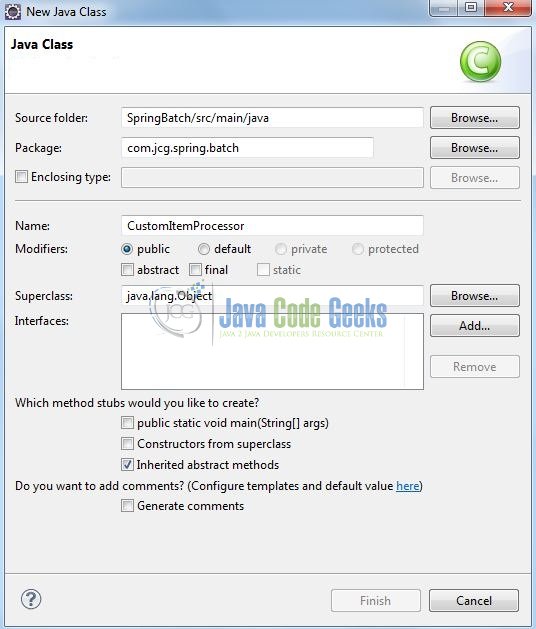
Repeat the step (i.e. Fig. 8) and enter the filename as: CustomItemProcessor.
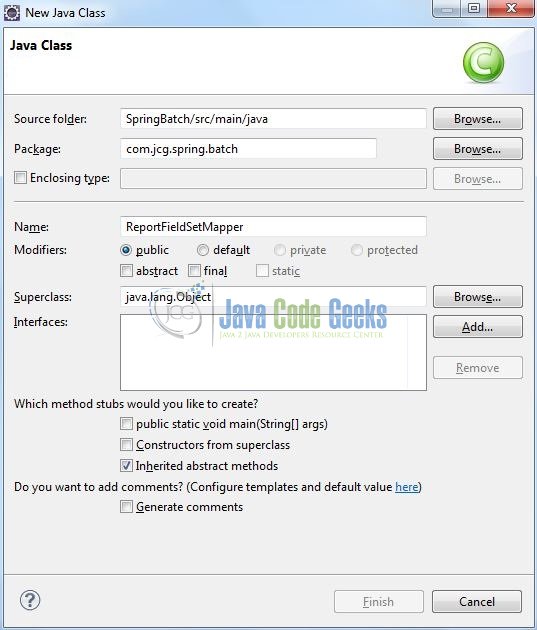
Again, repeat the step (i.e. Fig. 8) and enter the filename as: ReportFieldSetMapper.
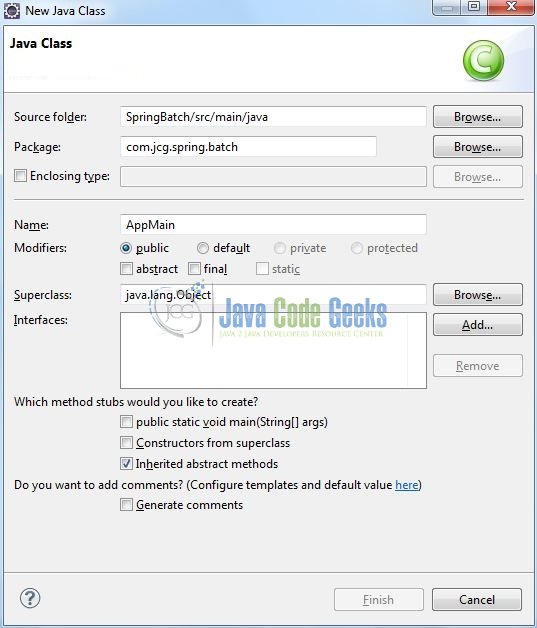
To create the utility or the implementation class, repeat the step (i.e. Fig. 8) and enter the filename as AppMain.
3.2.1 Implementation of Model Class
This is a simple class where we will map the CSV values to the Report object and write it to an XML file. Add the following code to it:
Report.java
package com.jcg.spring.batch;

import java.math.BigDecimal;
import java.util.Date;

import javax.xml.bind.annotation.XmlAttribute;
import javax.xml.bind.annotation.XmlElement;
import javax.xml.bind.annotation.XmlRootElement;

@XmlRootElement(name = "record")
public class Report {

	private int id;
	private BigDecimal sales;
	private int qty;
	private String staffName;
	private Date date;

	@XmlAttribute(name = "id")
	public int getId() {
		return id;
	}
	public void setId(int id) {
		this.id = id;
	}

	@XmlElement(name = "sales")
	public BigDecimal getSales() {
		return sales;
	}
	public void setSales(BigDecimal sales) {
		this.sales = sales;
	}

	@XmlElement(name = "qty")
	public int getQty() {
		return qty;
	}
	public void setQty(int qty) {
		this.qty = qty;
	}

	@XmlElement(name = "staffName")
	public String getStaffName() {
		return staffName;
	}
	public void setStaffName(String staffName) {
		this.staffName = staffName;
	}

	public Date getDate() {
		return date;
	}
	public void setDate(Date date) {
		this.date = date;
	}

	@Override
	public String toString() {
		return "Report [Id?=" + id + ", Sales?=" + sales + ", Qty?=" + qty + ", Staff-name?=" + staffName + "]";
	}
}
3.2.2 Implementation of Processor Class
This is a simple class which will be executed before the ItemWriter class. Add the following code to it:
CustomItemProcessor.java
package com.jcg.spring.batch;

import org.springframework.batch.item.ItemProcessor;

public class CustomItemProcessor implements ItemProcessor<Report, Report> {
	public Report process(Report itemObj) throws Exception {
		System.out.println("Processing Item?= " + itemObj);
		return itemObj;
	}
}
3.2.3 Implementation of Mapper Class
This class is used to convert the Date to a custom FieldMapper and is used to map the CSV fields to the Report class. Add the following code to it:
ReportFieldSetMapper.java
package com.jcg.spring.batch;

import java.text.ParseException;
import java.text.SimpleDateFormat;

import org.springframework.batch.item.file.mapping.FieldSetMapper;
import org.springframework.batch.item.file.transform.FieldSet;
import org.springframework.validation.BindException;

public class ReportFieldSetMapper implements FieldSetMapper<Report> {

	static Report reportObj;
	private SimpleDateFormat dateFormatObj = new SimpleDateFormat("dd/MM/yyyy");

	public Report mapFieldSet(FieldSet fieldSetObj) throws BindException {
		reportObj = new Report();
		reportObj.setId(fieldSetObj.readInt(0));
		reportObj.setSales(fieldSetObj.readBigDecimal(1));
		reportObj.setQty(fieldSetObj.readInt(2));
		reportObj.setStaffName(fieldSetObj.readString(3));

		String csvDate = fieldSetObj.readString(4);
		try {
			reportObj.setDate(dateFormatObj.parse(csvDate));
		} catch (ParseException parseExceptionObj) {
			parseExceptionObj.printStackTrace();
		}
		return reportObj;
	}
}
3.2.4 Implementation of Utility Class
This class will get the bean from the context file (i.e. spring-beans.xml) and calls the jobLauncherObj.run() method to execute the job. Add the following code to it:

AppMain.java
package com.jcg.spring.batch;

import org.springframework.batch.core.Job;
import org.springframework.batch.core.JobExecution;
import org.springframework.batch.core.JobParameters;
import org.springframework.batch.core.launch.JobLauncher;
import org.springframework.context.ApplicationContext;
import org.springframework.context.support.ClassPathXmlApplicationContext;

public class AppMain {

	static Job jobObj;
	static JobLauncher jobLauncherObj;
	static ApplicationContext contextObj;
	private static String[] springConfig  = {"spring/batch/jobs/spring-beans.xml" };

	public static void main(String[] args) {
		// Loading The Bean Definition From The Spring Configuration File
		contextObj = new ClassPathXmlApplicationContext(springConfig);

		jobObj = (Job) contextObj.getBean("helloWorldJob");
		jobLauncherObj = (JobLauncher) contextObj.getBean("jobLauncher");
		try {
			JobExecution execution = jobLauncherObj.run(jobObj, new JobParameters());
			System.out.println("Exit Status : " + execution.getStatus());
		} catch (Exception exceptionObj) {
			exceptionObj.printStackTrace();
		}
		System.out.println("Done");
	}
}
3.3 Configuration File
To configure the spring batch framework, developers need to implement a bean configuration, data-source and, a spring context file i.e. spring-beans.xml, spring-database.xml and, spring-context.xml respectively. Right-click on SpringBatch/src/main/resources/spring/batch/config folder, New -> Other.
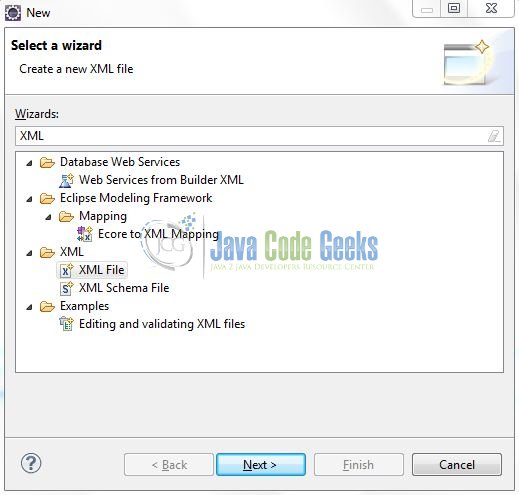
A new pop window will open and select the wizard as an XML file.
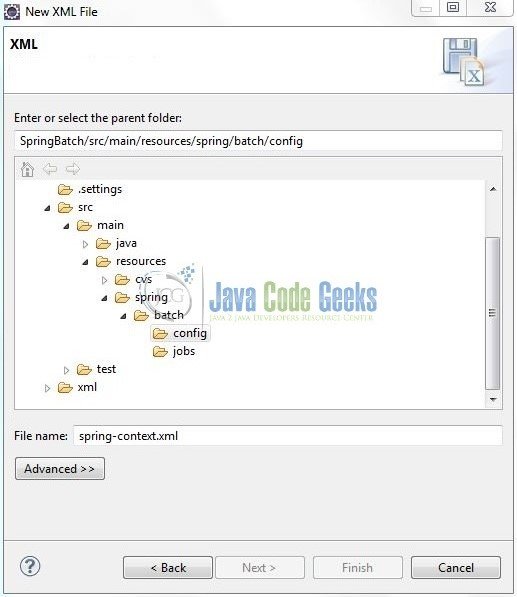
Again, a pop-up window will open. Verify the parent folder location as: SpringBatch/src/main/resources/spring/batch/config and enter the file name as: spring-context.xml. Click Finish.
Once the XML file is created, we will add the following code to it:
spring-context.xml
<?xml version="1.0" encoding="UTF-8"?>
<beans xmlns="http://www.springframework.org/schema/beans" xmlns:xsi="http://www.w3.org/2001/XMLSchema-instance" xsi:schemaLocation="   http://www.springframework.org/schema/beans    http://www.springframework.org/schema/beans/spring-beans-3.2.xsd">
   <!-- stored job-meta in database -->
   <bean id="jobRepository" class="org.springframework.batch.core.repository.support.JobRepositoryFactoryBean">
      <property name="dataSource" ref="dataSource" />
      <property name="transactionManager" ref="transactionManager" />
      <property name="databaseType" value="mysql" />
   </bean>
   <bean id="transactionManager" class="org.springframework.batch.support.transaction.ResourcelessTransactionManager" />
   <bean id="jobLauncher" class="org.springframework.batch.core.launch.support.SimpleJobLauncher">
      <property name="jobRepository" ref="jobRepository" />
   </bean>
</beans>
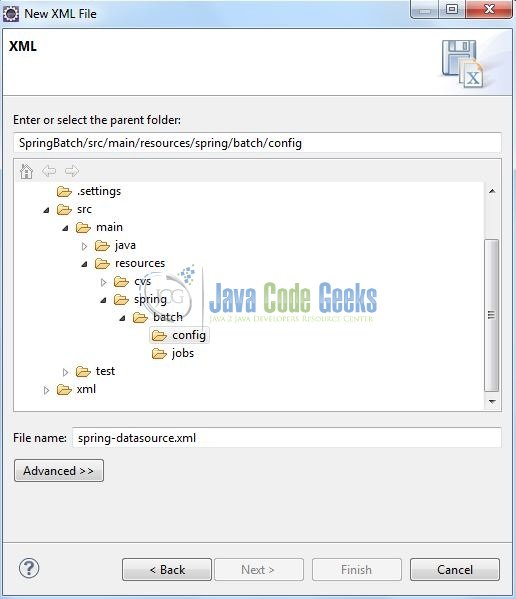
Repeat the step (i.e. Fig. 13) and enter the filename as: spring-datasource.xml.
Once the XML file is created, we will add the following code to it:
spring-datasource.xml
<?xml version="1.0" encoding="UTF-8"?>
<beans xmlns="http://www.springframework.org/schema/beans" xmlns:jdbc="http://www.springframework.org/schema/jdbc" xmlns:xsi="http://www.w3.org/2001/XMLSchema-instance" xsi:schemaLocation="http://www.springframework.org/schema/beans    http://www.springframework.org/schema/beans/spring-beans-3.2.xsd   http://www.springframework.org/schema/jdbc    http://www.springframework.org/schema/jdbc/spring-jdbc-3.2.xsd">
   <!-- Connect To Database -->
   <bean id="dataSource" class="org.springframework.jdbc.datasource.DriverManagerDataSource">
      <property name="driverClassName" value="com.mysql.jdbc.Driver" />
      <property name="url" value="jdbc:mysql://localhost:3306/tutorialDb" />
      <property name="username" value="root" />
      <property name="password" value="beena" />
   </bean>
   <bean id="transactionManager" class="org.springframework.batch.support.transaction.ResourcelessTransactionManager" />
   <!-- Create Spring Jobs Meta-Tables Automatically -->
   <jdbc:initialize-database data-source="dataSource">
      <jdbc:script location="org/springframework/batch/core/schema-drop-mysql.sql" />
      <jdbc:script location="org/springframework/batch/core/schema-mysql.sql" />
   </jdbc:initialize-database>
</beans>
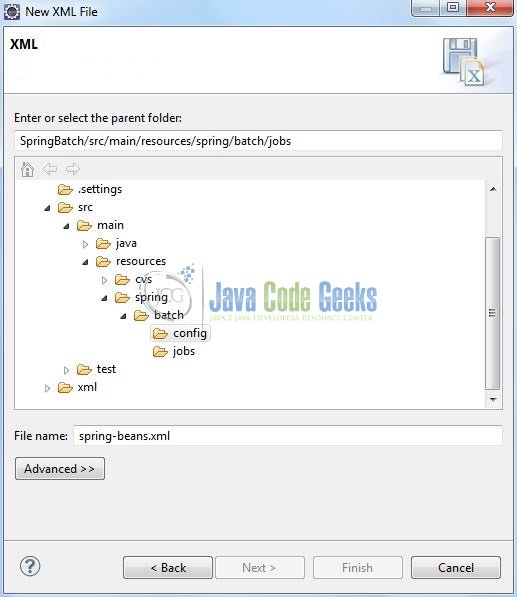
Again repeat the step (i.e. Fig. 13) and enter the filename as: spring-beans.xml.
Once the XML file is created, we will add the following code to it:
spring-beans.xml
<?xml version="1.0" encoding="UTF-8"?>
<beans xmlns="http://www.springframework.org/schema/beans" xmlns:batch="http://www.springframework.org/schema/batch" xmlns:xsi="http://www.w3.org/2001/XMLSchema-instance" xsi:schemaLocation="http://www.springframework.org/schema/batch   http://www.springframework.org/schema/batch/spring-batch-2.2.xsd   http://www.springframework.org/schema/beans    http://www.springframework.org/schema/beans/spring-beans-3.2.xsd  ">
   <import resource="../config/spring-context.xml" />
   <import resource="../config/spring-datasource.xml" />
   <bean id="report" class="com.jcg.spring.batch.Report" scope="prototype" />
   <bean id="itemProcessor" class="com.jcg.spring.batch.CustomItemProcessor" />
   <batch:job id="helloWorldJob">
      <batch:step id="step1">
         <batch:tasklet>
            <batch:chunk reader="cvsFileItemReader" writer="xmlItemWriter" processor="itemProcessor" commit-interval="10" />
         </batch:tasklet>
      </batch:step>
   </batch:job>
   <bean id="cvsFileItemReader" class="org.springframework.batch.item.file.FlatFileItemReader">
      <property name="resource" value="classpath:cvs/input/sampleReport.csv" />
      <property name="lineMapper">
         <bean class="org.springframework.batch.item.file.mapping.DefaultLineMapper">
            <property name="lineTokenizer">
               <bean class="org.springframework.batch.item.file.transform.DelimitedLineTokenizer">
                  <property name="names" value="id,sales,qty,staffName,date" />
               </bean>
            </property>
            <property name="fieldSetMapper">
               <bean class="com.jcg.spring.batch.ReportFieldSetMapper" />
            </property>
         </bean>
      </property>
   </bean>
   <bean id="xmlItemWriter" class="org.springframework.batch.item.xml.StaxEventItemWriter">
      <property name="resource" value="file:xml/outputs/report.xml" />
      <property name="marshaller" ref="reportMarshaller" />
      <property name="rootTagName" value="report" />
   </bean>
   <bean id="reportMarshaller" class="org.springframework.oxm.jaxb.Jaxb2Marshaller">
      <property name="classesToBeBound">
         <list>
            <value>com.jcg.spring.batch.Report</value>
         </list>
      </property>
   </bean>
</beans>
4. Run the Application
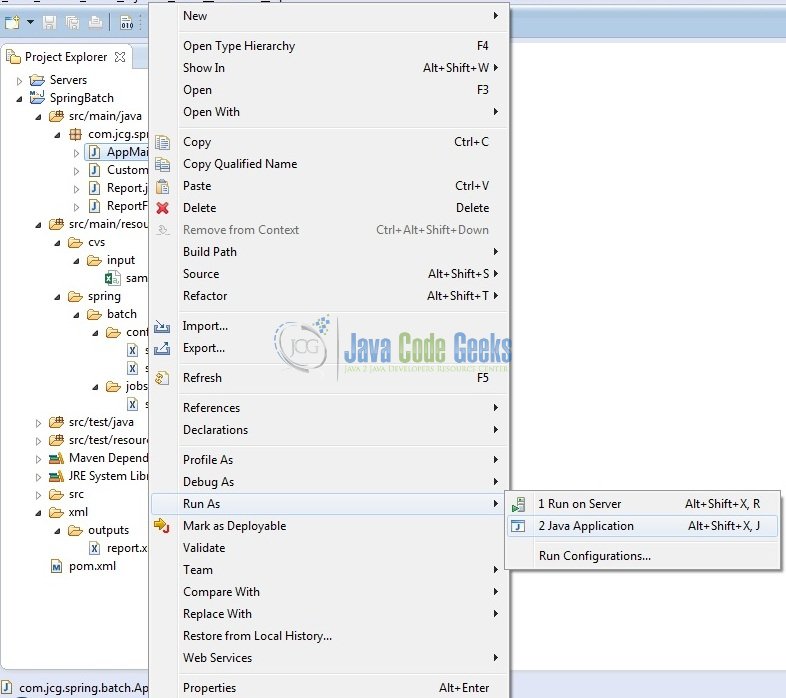
To run the application, right click on the AppMain class, Run As -> Java Application. Developers can debug the example and see what happens after every step. Enjoy!
5. Project Demo
Running the above program as a Java application, the code shows the following status as output.
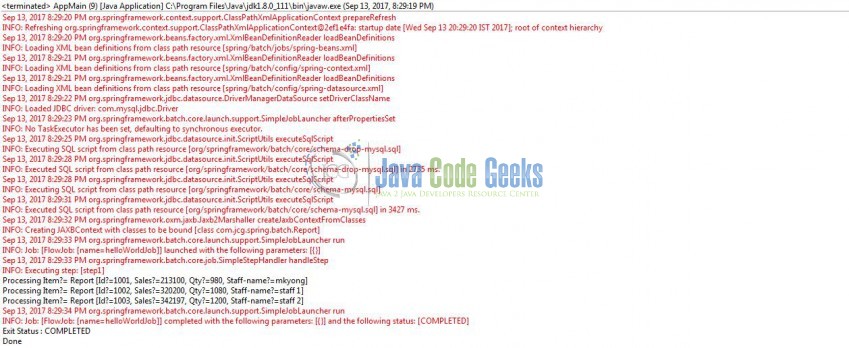
Developers can see that we have processed all the input records and the XML file is found in the project/xml folder.
<?xml version="1.0" encoding="UTF-8"?>
<report>
	<record id="1001">
		<date>2013-07-29T00:00:00+05:30</date>
		<qty>980</qty>
		<sales>213100</sales>
		<staffName>mkyong</staffName>
	</record>
	<record id="1002">
		<date>2013-07-30T00:00:00+05:30</date>
		<qty>1080</qty>
		<sales>320200</sales>
		<staffName>staff 1</staffName>
	</record>
	<record id="1003">
		<date>2013-07-31T00:00:00+05:30</date>
		<qty>1200</qty>
		<sales>342197</sales>
		<staffName>staff 2</staffName>
	</record>
</report>
That’s all for this post. Happy Learning!
6. Conclusion
This article has provided the introductory details of Spring Batch and helps developers understand the basic configuration required to achieve this. That’s all for this tutorial and I hope this article served you whatever you were looking for.
7. Download the Eclipse Project
This was an example of Spring Batch for beginners.
You can download the full source code of this example here: SpringBatch

13
14
15
Are these two .sql files preconfigured with Spring’s batch framework?
Hope you are well. Yes Sayak, In
spring-datasource.xml, these.sqlare pre-configured in Spring’s batch framework! Thank you & have a great day! :)Hi there thanks for this great tutorial but I think there is one step missing here that we need to configure the mysql in order to run the above spring batch project.
@Barun – The
spring-datasource.xmlwill autoconfigure the mysql (provided you have successfully set-up the mysql on your machine).Could you please provide the mysql configure details.
realy its very helpful tutorial thank you for sharing..
You may want to add java prop as below
1.8
1.8
Hello,
I’am new in spring technlogies and i didn’t understand very well the part (3.3 configuration file), could you please explain more why do we have to set up the configurations of the mysql database.
As i understood the batch should read the .csv file and then write in the output the xml file, so why do we have to set up a connection to the database? what is the purpose?
Thank you.
SpringBatch/src/main/resources/spring/batch/config i am not getting this path plz let me know why
Hello,
I can not get why do we need mysql while we are reading from csv to write in xml?
For quick testing you can use MapJobRepositoryFactoryBean that would still need a transactionmanager and you can use ResourcelessTransactionManager for that requirement.
Merci pour exemple