Java Servlet Hello World Example
Servlets are essentially the first and main technology in Java world capable of dynamic page generation, now in its version 4.0 (released on September 2017).
The term suggests a new way to receive HTTP requests, process them and return the proper response to the clients, all of that through the extension of a server or a web container capabilities, such as Tomcat, JBoss or IBM WebSphere.
They also have an entire specification determining how the interactions for every type of client-server communication must be done: the protocols (HTTP is the most widely used), the verbs (POST, GET, HEAD, etc.), session control, cookies and so on.
1. Servlet Architecture
Before you understand the servlet architecture, you must first address how the HTTP web communication is made upon Servlet’s world. Take a look at the following diagram:
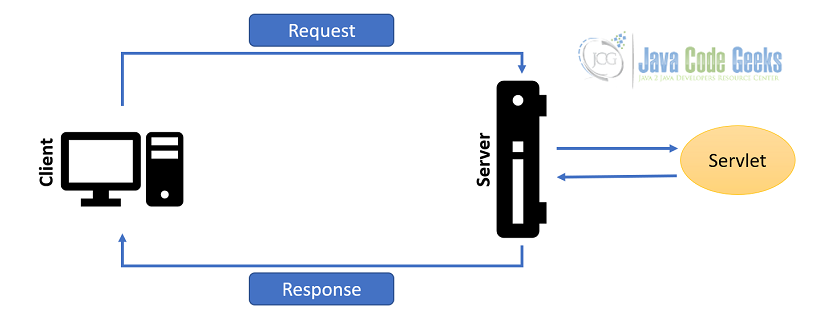
All the communication exists between a client (usually a web browser, but it can be any kind of devide that understand HTTP, like pads, smartphone apps, card machines, etc.) and a server (since Servlets are written in Java, they can run in all types of Operating Systems).
Its job starts when the client creates and sends a request which, in turn, may contain data like the request body itself, cookies, authentication information, headers, etc. Once the request arrives at the server, it translates all of its main information and try to guess which one of its deployed applications is responsible to process, as well as the specific Servlet class to handle the business/data logic.
When the Servlet finishes the processing, the server will return a response object along with all the information of which type of document the client is going to receive (in order to it knowing how to deal with this doc, e.g. XML, JSON or HTML), then the server flushes the same response back to the client (even if something got wrong during this whole path).
1.2. Servlet Life Cycle
The life cycle of a Servlet always follow the same path: it is first created (initialized by the container), it serves the request (and return a response back) and it finally dies (the server/container will destroy it and clean the resources).
We can divide these three steps into three specific methods:
- init(): the only responsability of this method is to provide any kind of initialization processing to the Serlvet object. Once a request arrives, the Servlet object is instantiated (only once per object) and, there, you can do whatever you want to provide the Servlet with important implementation that is going to be useful afterwards.
- service(), doGet(), doPost(), etc.: these methods are the ones responsible to serve the requests and give a response back to the client. They will be correspondingly called for each type of HTTP verb every time a request is mapped to that specific Servlet class.
- destroy(): it is the official cleanup method of every Servlet. Just like
init(), it’s up to you override it and implement any type of code that’ll be called only once before the Servlet is really destroyed and discarded by the container.
2. Servlet Hello World Example
However, despite all of that complexities, they are quite simple to use. In this article, we are going to understand, in a few steps, how to create a Hello World program with Servlets.
In order to have the project up and running, we’re going to need:
- JDK 1.8
- Maven (latest version)
- Eclipse (latest version)
- Tomcat 9 (a good version for Servlets 4.0)
We will make use of Maven and the respective Eclipse plugin to create the project, which already comes integrated with Eclipse IDE since its version 4.3 Kepler.
2.1. Setup
Create a new Maven project in Eclipse for our Hello World Servlet example, making sure to no select any archetype as well as defining the packaging type as “war”. Then, add the following dependency and build configurations:
pom.xml
<dependencies>
	<dependency>
		<groupId>javax.servlet</groupId>
		<artifactId>javax.servlet-api</artifactId>
		<version>4.0.0</version>
		<scope>provided</scope>
	</dependency>
</dependencies>

<build>
	<sourceDirectory>src/main/java</sourceDirectory>

	<plugins>
		<plugin>
			<groupId>org.apache.maven.plugins</groupId>
			<artifactId>maven-war-plugin</artifactId>
			<version>3.2.1</version>
		</plugin>
		<plugin>
			<groupId>org.apache.maven.plugins</groupId>
			<artifactId>maven-compiler-plugin</artifactId>
			<version>3.7.0</version>
			<configuration>
				<source>1.8</source>
				<target>1.8</target>
			</configuration>
		</plugin>
	</plugins>
</build>
These will make sure we have the latest Servlets API jars available at the classpath, as well as the maven war and compiler plugins managed by Maven for the project based on the version 1.8 of Java. The value provided in the scope tag says that the same lib is going to be provided by the container/JDK at runtime.
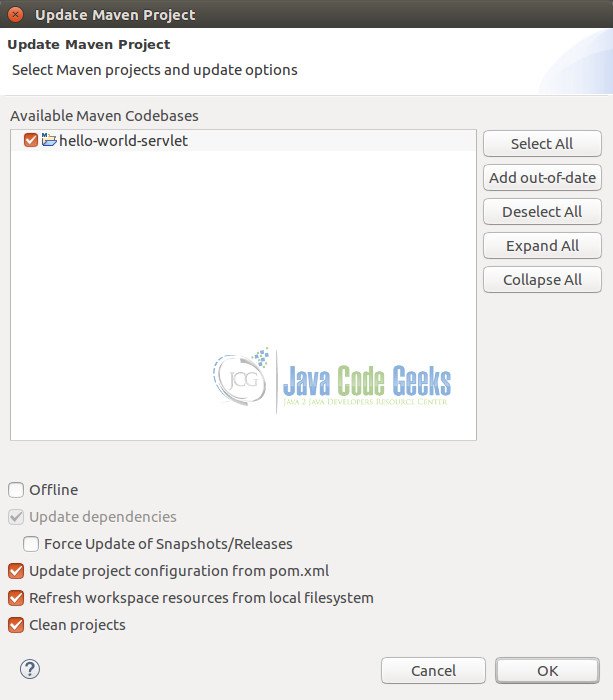
Before we can move to the Servlet creation, refresh the Maven project to update the dependencies tree right clicking the project > Maven > Update project….
2.2. Setting up the Servlet
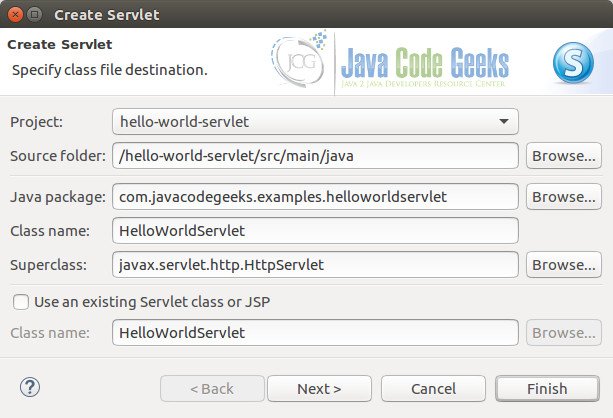
Go to the project, right click on it and select New > Servlet. Give it a Java class and package names and click Next.
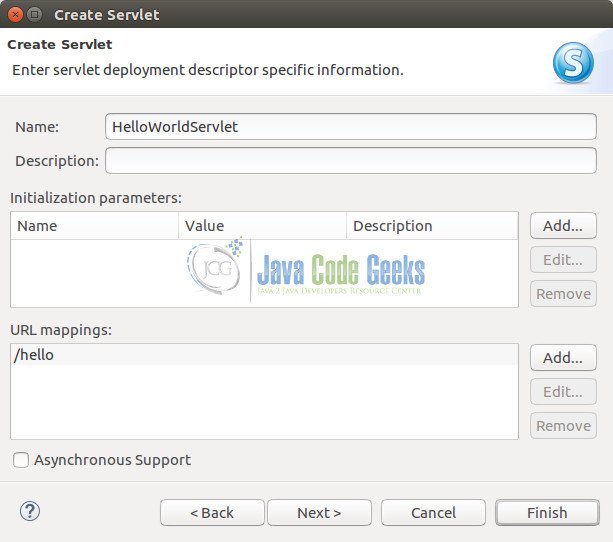
In the next screen, you’ll be prompted to inform the description of your servlet (optional, for documentation purposes only), the initialization parameters (if you’re interested on setting up any parameter to your servlet when the container starts up) and the url pattern mappings.
The last one, specifically, is responsible for setting the routes (i.e., the servlet classes) each request that comes to your application is going to be redirected as soon as it arrives. In our case, in order to make the final URI simpler, let’s use the pattern /hello.
Click Next. After that, you’ll see a screen asking for the class modifiers and interfaces your servlet should implement, so just leave them as they come. Regarding the methods stubs, check the doPost, doGet and service options and click Finish.
2.3. The Servlet class
Below you cand find the class that your Eclipse IDE has created through this wizard process. It’s a simple class that comes already commented with JavaDoc as well as with a single constructor (if you want to build anything before the Servlet itself attend new requests) and the methods we selected before.
HelloWorldServlet
package com.javacodegeeks.examples.helloworldservlet;

import java.io.IOException;
import javax.servlet.ServletException;
import javax.servlet.annotation.WebServlet;
import javax.servlet.http.HttpServlet;
import javax.servlet.http.HttpServletRequest;
import javax.servlet.http.HttpServletResponse;

/**
 * Servlet implementation class HelloWorldServlet
 */
@WebServlet("/hello")
public class HelloWorldServlet extends HttpServlet {

	private static final long serialVersionUID = 1L;

    /**
     * @see HttpServlet#HttpServlet()
     */
    public HelloWorldServlet() {
        super();
        // TODO Auto-generated constructor stub
    }

	/**
	 * @see HttpServlet#service(HttpServletRequest request, HttpServletResponse response)
	 */
	protected void service(HttpServletRequest request, HttpServletResponse response) throws ServletException, IOException {
		// TODO Auto-generated method stub
		response.getWriter().append("service at: ").append(request.getContextPath()).append("<br>");
		doGet(request, response);
	}

	/**
	 * @see HttpServlet#doGet(HttpServletRequest request, HttpServletResponse response)
	 */
	protected void doGet(HttpServletRequest request, HttpServletResponse response) throws ServletException, IOException {
		// TODO Auto-generated method stub
		response.getWriter().append("<i>doGet</i> at: ").append(request.getRequestURL()).append("<br>");
		doPost(request, response);
	}

	/**
	 * @see HttpServlet#doPost(HttpServletRequest request, HttpServletResponse response)
	 */
	protected void doPost(HttpServletRequest request, HttpServletResponse response) throws ServletException, IOException {
		// TODO Auto-generated method stub
		response.setContentType("text/html");
		response.getWriter().append("<b>doPost</b> at: ").append(request.getRequestURI());
	}

}
Let’s notice some important things:
- Every time you need to create a servlet in a Java project, just annotate your class with
@WebServletand extends it fromjavax.servlet.http.HttpServlet. - The same annotation must receive a string defining the url pattern that’ll route requests to this servlet specifically. In our case, it’s going to be
/hello. - In this example, we explore three of the HTTP methods that Servlets API use to receive the requests: get, post and service. The two first methods are equivalent to the HTTP methods GET and POST, respectively, and as you may suspect, they are used to receive requests under each respective method. You can find other options such as
doPut(),doDelete(), etc. Theservicemethod is ajavax.servlet.Servletimplementation that allow the servlet class to firstly respond to a request; it also overwrites the other HTTP methods precedence (that’s why we’re explicitly calling the others from it). - Note that, inside each method, we’re providing some texts that the response object is going to print. The method
getWriter()returns the official writer object the Servlet is going to use to write the response back to the client. The methodsetContentType()specifies which type of content we’re sending back to the client (html, in our case). Note also that we’re writing some HTML code inside the strings to test the result at the client browser. - The methods
getContextPath(),getRequestURL()andgetRequestURI()return the root path of the context (the application itself), the complete URL being requested and the URI (internal resource) being requested, respectively.
3. Running the project
In order to test the implementation, import the project into your Tomcat server, start it up and access the following URL at the browser:
http://localhost:8080/hello-world-servlet/hello
If everything is fine you should get the following screen:
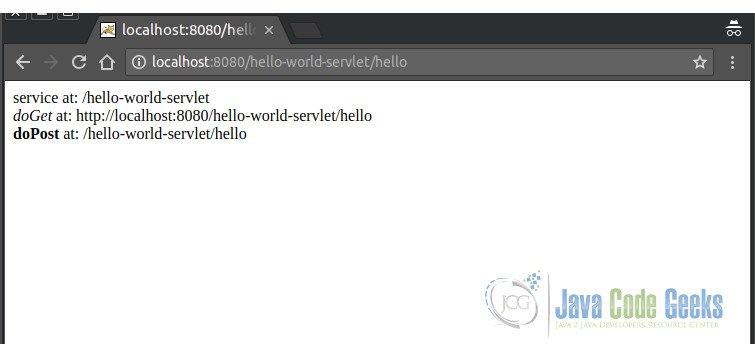
Note that the HTML formatting we’ve implemented into your Java code is now live. Each path is also very useful when you want to recall some other Servlet internal mappings, get images or other types of resources that are hosted in your Java web application.
4. Download the Complete Source Code
This was a Servlet Hello World example.
You can download the full source code of this example here: hello-world-servlet

