This is a tutorial for beginners, about Java Swing.
1. Introduction
Java, provides a rich set of libraries to create Graphical User Interface (GUI), to make it work independently on different platforms. Swing is definitely the one which is most popular used because of its properties of light-weight, rich-control, easy-customizable.
Before Java Swing, Abstract Windowing Toolkit (AWT) is the one to create different GUIs. However, because of its disadvantages on platform-dependent, heavy-weight, few-components, it has been replaced by Java Swing, which is built on top of the AWT package. Note that some AWT components remain in Java and in some situations it must be used. In the following part, you’ll see some AWT package to be imported by our examples.
In this article, we focus on Java Swing, which has a large set of components, such as JFrame, JButton, JMenu, etc. we’ll cover the most-often-used components in Java Swing and each component will be explained with an example. Finally we’ll combine all these components to create a small GUI project.
For the following examples, Java 8 and Eclipse IDE (version Mars 4.5.0) are used.
2. Java Swing Components
2.1 JFrame
In Java Swing, the most applications will be built inside a basic component JFrame, which creates a window to hold other components.
JFrameExample.java
|
01
02
03
04
05
06
07
08
09
10
11
12
13
14
15
16
17
18
|
package javaCodeGeeks;import javax.swing.JFrame;/* * A basic swing example with JFrame */public class JFrameExample { public static void main(String[] args) { JFrame frame = new JFrame("Hello Swing"); frame.setDefaultCloseOperation(JFrame.EXIT_ON_CLOSE); frame.setSize(350, 250); frame.setVisible(true); }} |
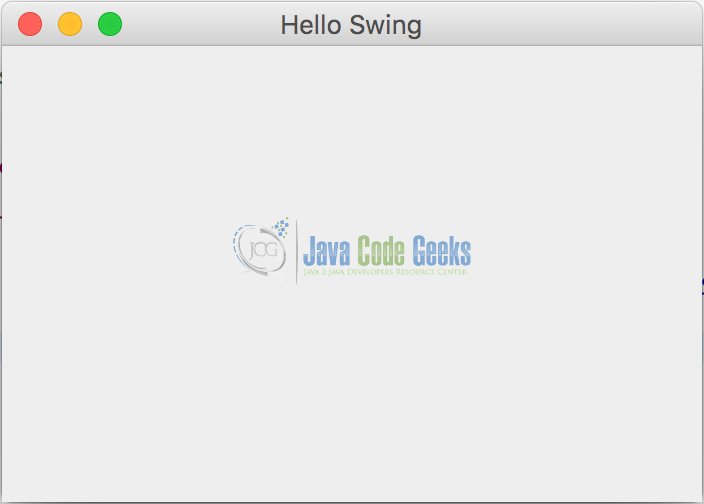
Note that we can initialize the frame with the string “Hello Swing”, which creates a blank frame with the title “Hello Swing” like the figure below. The function setDefaultCloseOperation tells the frame what to do when the user closes the frame and JFrame.EXIT_ON_CLOSE reforms exit when the user closes the frame. The size of the frame could be set by setSize width and height parameters. Notice that without the setVisible function with the parameter true, you won’t see anything on the screen. In order to see the GUI part, we need this function and set it to be true.
2.2 JLabel
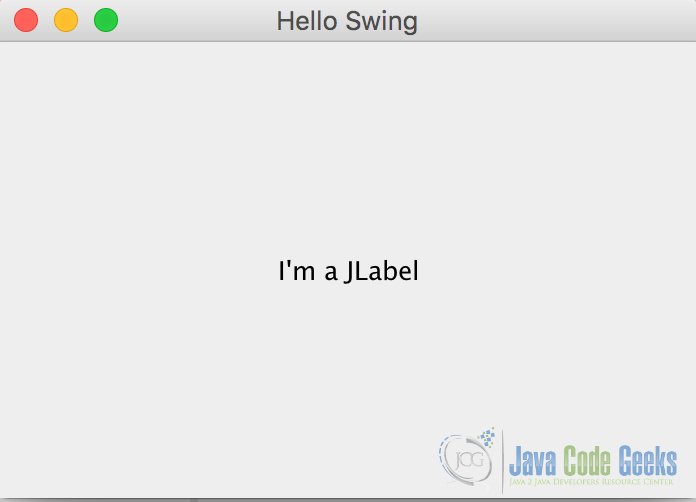
JLabel is an area to display a short string or an image or both. Normally we can add the JLabel into the JFrame we’ve built in the previous part and show different displays. With the following java code added following the creation of JFrame, a label with the text “I’m a JLabel” is created.
|
1
2
|
JLabel label = new JLabel("I'm a JLabel", JLabel.CENTER);frame.add(label); |
For the position of the label, it could be specified by JLabel.LEFT, JLabel.CENTER, JLabel.RIGHT, of which the position could set to be left, center, and right correspondently. The figure below shows that a label is set in the center of the window.
2.3 JPanel
JPanel is a popular container to hold different components. It could be set and added by using the code similar to the following:
|
1
2
|
JPanel panel = new JPanel();frame.add(panel); |
2.4 JButton
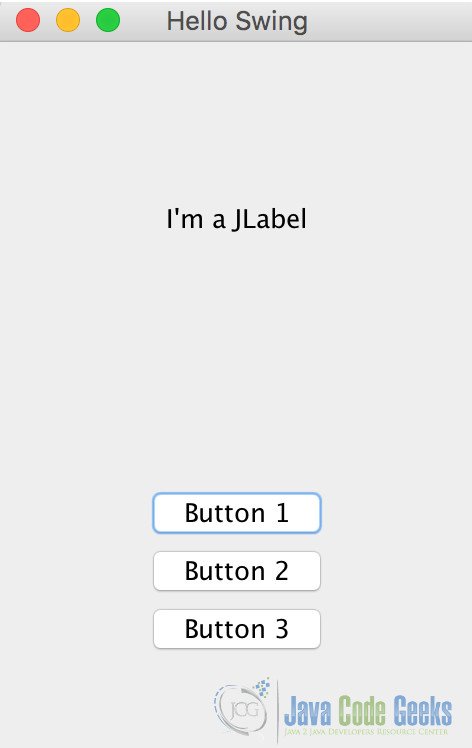
JButton is an implementation of a “push” button. It can be pressed and configured to have different actions, using the event listener. For this part, we’ll discuss it in the last. In the following code, we added three buttons into the panel with different names on them: Button 1, Button 2, Button 3.
ButtonExample.java
|
01
02
03
04
05
06
07
08
09
10
11
12
13
14
15
16
17
18
19
20
21
22
23
24
25
26
27
28
29
30
31
32
33
34
35
36
37
38
39
40
41
42
43
44
45
46
47
48
49
50
51
52
|
package javaCodeGeeks;import java.awt.GridLayout;import java.awt.Insets;import javax.swing.BoxLayout;import javax.swing.JButton;import javax.swing.JFrame;import javax.swing.JLabel;import javax.swing.JPanel;import javax.swing.border.EmptyBorder;/* * A basic swing example with JButton */public class ButtonExample { public static void main(String[] args) { // Define frame, label and panel JFrame frame = new JFrame("Hello Swing"); JLabel label = new JLabel("I'm a JLabel", JLabel.CENTER); JPanel panel = new JPanel(); // Setting for the panel BoxLayout boxlayout = new BoxLayout(panel, BoxLayout.Y_AXIS); panel.setLayout(boxlayout); panel.setBorder(new EmptyBorder(new Insets(45, 70, 45, 70))); // Define new buttons JButton jb1 = new JButton("Button 1"); JButton jb2 = new JButton("Button 2"); JButton jb3 = new JButton("Button 3"); // Add buttons to the frame (and spaces between buttons) panel.add(jb1); panel.add(jb2); panel.add(jb3); // Add the label and panel to the frame frame.setLayout(new GridLayout(2, 1)); frame.add(label); frame.add(panel); // Settings for the frame frame.pack(); frame.setDefaultCloseOperation(JFrame.EXIT_ON_CLOSE); frame.setVisible(true); }} |
In the example above, we set a label to be on the upside and a panel containing three buttons in the bottom. The result is shown in the figure below. Note that we have a BoxLayout function, which is used to set the layout of the components. Further inflammation can be found in my another article about BoxLayout, which used the JButton a lot.
2.5 JRadioButton
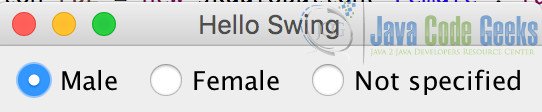
Here, JRadioButton is quite different from JButton. It’s a radio button that can be selected or deselected. Use with the ButtonGroup object to create a group of buttons, in which only one button can be selected at a time.
RadioButtonExample.java
|
01
02
03
04
05
06
07
08
09
10
11
12
13
14
15
16
17
18
19
20
21
22
23
24
25
26
27
28
29
30
31
32
33
34
35
36
37
38
39
|
package javaCodeGeeks;import javax.swing.ButtonGroup;import javax.swing.JFrame;import javax.swing.JPanel;import javax.swing.JRadioButton;/* * A basic swing example with JFrame */public class RadioButtonExample { public static void main(String[] args) { JFrame frame = new JFrame("Hello Swing"); JPanel panel = new JPanel(); // Create Radio buttons ButtonGroup bg = new ButtonGroup(); JRadioButton rb1 = new JRadioButton("Male", true); JRadioButton rb2 = new JRadioButton("Female", false); JRadioButton rb3 = new JRadioButton("Not specified", false); // Add the radio buttons to the button group bg.add(rb1); bg.add(rb2); bg.add(rb3); // Add to the panel and frame panel.add(rb1); panel.add(rb2); panel.add(rb3); frame.add(panel); frame.pack(); frame.setDefaultCloseOperation(JFrame.EXIT_ON_CLOSE); frame.setVisible(true); }} |
The code above creates a button group and have their radio button inside. We set the “Male” button to be chosen by default, by setting it to be true initially. And we can see figures below, showing that each time, only one button can be chosen.

2.6 JCheckBox
JCheckBox is used to create a checkbox, of which multiple checkboxes could be selected at the same time. That’s the main difference between JRadioButton. For JCheckBox, I’ve written another article on it with a detailed example, you can check it here.
2.7 JSlider
JSlider is a component that lets the users select a value by sliding a knob within a specified interval. For the knob, it always points to the point which matches the integer values within the interval. You can check my article on JSlider here.
2.8 JTable
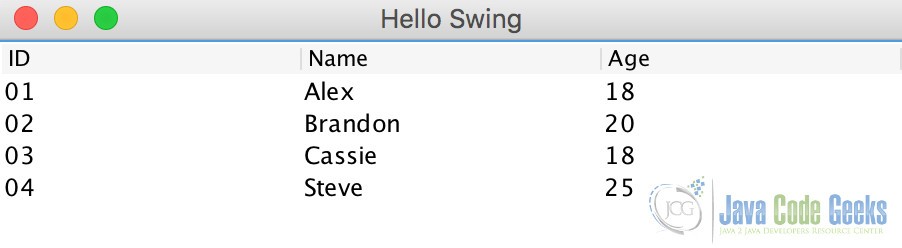
JTable is used to create a regular two-dimensional table. The table can display data inside of it. In addition, the user can also edit the data. The following example shows that we created three columns: ID, Name, Age. In each column, we have set the data/information inside.
JTableExample.java
|
01
02
03
04
05
06
07
08
09
10
11
12
13
14
15
16
17
18
19
20
21
22
23
24
25
26
27
28
29
30
|
package javaCodeGeeks;import javax.swing.JFrame;import javax.swing.JScrollPane;import javax.swing.JTable;/* * A basic swing example with JTable */public class JTableExample { public static void main(String[] args) { JFrame frame = new JFrame("Hello Swing"); // Set data inside the table String[][] data = {{"01", "Alex", "18"}, {"02", "Brandon", "20"}, {"03", "Cassie", "18"}, {"04", "Steve", "25"}}; String[] column = {"ID", "Name", "Age"}; // Create JTable JTable jt = new JTable(data, column); JScrollPane sp = new JScrollPane(jt); frame.add(sp); frame.pack(); frame.setDefaultCloseOperation(JFrame.EXIT_ON_CLOSE); frame.setVisible(true); }} |
The table is shown below:
2.9 JComboBox
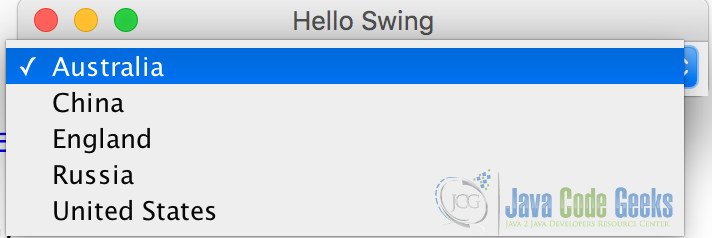
JComboBox is a component to select a value from a drop-down list. You can choose one and only one element from the list. The following example shows how to create the drop-down list, from which different countries can be chosen: “Australia”, “China”, “England”, “Russia”, “United States”.
JComboBoxExample.java
|
01
02
03
04
05
06
07
08
09
10
11
12
13
14
15
16
17
18
19
20
21
22
23
24
25
26
27
|
package javaCodeGeeks;import javax.swing.JComboBox;import javax.swing.JFrame;/* * A basic swing example with JComboBox */public class ComboBoxExample { public static void main(String[] args) { JFrame frame = new JFrame("Hello Swing"); // Set data in the drop-down list String[] country = {"Australia", "China", "England", "Russia", "United States"}; // Create combobox JComboBox cb = new JComboBox(country); frame.add(cb); frame.pack(); frame.setDefaultCloseOperation(JFrame.EXIT_ON_CLOSE); frame.setVisible(true); }} |
The two figures below show that we can choose different countries.

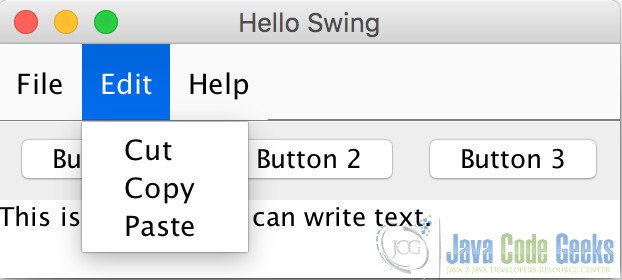
2.10 JMenu
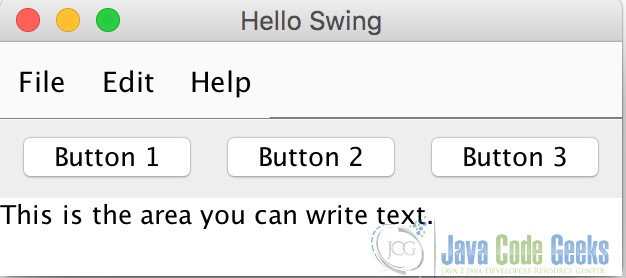
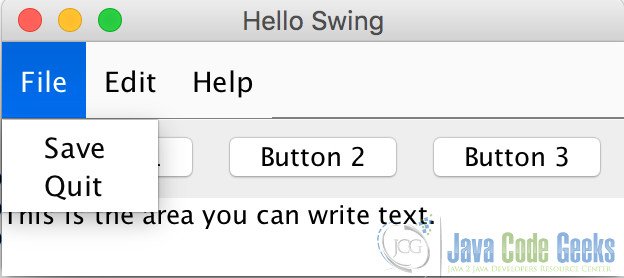
In this example, we have different settings on the menu. We have a File menu, which includes of save, quit submenu, and Edit menu, including copy, cut, paste submenu, and Help menu, containing try your best:)
The code below is to generate the menus:
JMenuExample.java
|
01
02
03
04
05
06
07
08
09
10
11
12
13
14
15
16
17
18
19
20
21
22
23
24
25
26
27
28
29
30
31
32
33
34
35
36
37
38
39
40
41
42
43
44
45
46
47
48
49
50
51
52
53
54
55
56
57
58
59
60
61
62
63
64
65
66
67
68
69
70
71
72
73
|
package javaCodeGeeks;import java.awt.GridLayout;import javax.swing.JButton;import javax.swing.JFrame;import javax.swing.JMenu;import javax.swing.JMenuBar;import javax.swing.JMenuItem;import javax.swing.JPanel;import javax.swing.JTextArea;/* * A basic swing example with JMenu */public class JMenuExample { public static void main(String[] args) { JFrame frame = new JFrame("Hello Swing"); JPanel panel = new JPanel(); JTextArea ta = new JTextArea(); // Define the main menu JMenuBar mb = new JMenuBar(); JMenu file = new JMenu("File"); JMenu edit = new JMenu("Edit"); JMenu help = new JMenu("Help"); // Define submenue for file JMenuItem save = new JMenuItem("Save"); JMenuItem quit = new JMenuItem("Quit"); // Define submenue for edit JMenuItem cut = new JMenuItem("Cut"); JMenuItem copy = new JMenuItem("Copy"); JMenuItem paste = new JMenuItem("Paste"); // Define submenue for help JMenuItem tryYourBest = new JMenuItem("Try your best:)"); file.add(save); file.add(quit); edit.add(cut); edit.add(copy); edit.add(paste); help.add(tryYourBest); mb.add(file); mb.add(edit); mb.add(help); // Define new buttons JButton jb1 = new JButton("Button 1"); JButton jb2 = new JButton("Button 2"); JButton jb3 = new JButton("Button 3"); // Add buttons to the frame (and spaces between buttons) panel.add(jb1); panel.add(jb2); panel.add(jb3); frame.setLayout(new GridLayout(3, 1)); frame.add(mb); frame.add(panel); frame.add(ta); frame.pack(); frame.setDefaultCloseOperation(JFrame.EXIT_ON_CLOSE); frame.setVisible(true); }} |

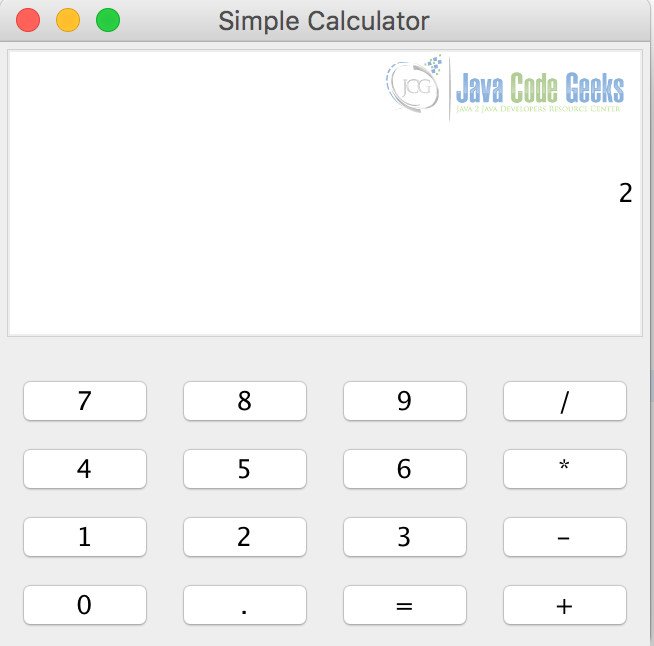
3. A small Java Swing project
In this example, we’ll combine what we’ve learned from the previous part and try to use them in a small project: a simple calculator with a GUI display. In this project, we’ll add event listeners into the system, and when we press the button, there’ll be some reactions to it.
The following code is for the simple calculator project. Note that it’s just a basic one, which supports only the basic add, subtract, multiply, divide operations. Most of the code could be referred here.
MainApp.java
|
001
002
003
004
005
006
007
008
009
010
011
012
013
014
015
016
017
018
019
020
021
022
023
024
025
026
027
028
029
030
031
032
033
034
035
036
037
038
039
040
041
042
043
044
045
046
047
048
049
050
051
052
053
054
055
056
057
058
059
060
061
062
063
064
065
066
067
068
069
070
071
072
073
074
075
076
077
078
079
080
081
082
083
084
085
086
087
088
089
090
091
092
093
094
095
096
097
098
099
100
101
102
103
104
105
106
107
108
109
110
111
112
113
114
115
116
117
118
119
120
121
122
123
124
125
126
127
128
129
130
131
132
133
134
135
136
137
138
139
140
141
142
143
144
145
146
147
148
149
150
151
152
153
154
155
156
157
158
159
160
161
162
163
164
165
166
167
168
169
170
171
172
173
174
175
176
177
178
179
180
181
182
183
184
185
186
187
188
189
190
191
192
193
194
195
196
197
198
199
200
201
202
203
204
205
206
|
package Calculator;import java.awt.BorderLayout;import java.awt.GridLayout;import java.awt.event.ActionEvent;import java.awt.event.ActionListener;import javax.swing.JButton;import javax.swing.JFrame;import javax.swing.JPanel;import javax.swing.JTextField;import javax.swing.SwingConstants;import javax.swing.border.EmptyBorder;/*** * * A simple calculator using Java Swing * */public class MainApp { // Define different components private static JFrame frame; private static JTextField field; private static JPanel contentPanel; private static JPanel displayPanel; private static JPanel buttonPanel; private static boolean start = true; private static double result = 0; private static String lastCommand = "="; // Define the action listeners private static ActionListener insert = new InsertAction(); private static ActionListener command = new CommandAction(); public static void main(String[] args) { // Add the frame, panel and text field frame = new JFrame("Simple Calculator"); field = new JTextField(); contentPanel = new JPanel(); displayPanel = new JPanel(); buttonPanel = new JPanel(); // Set the content panel contentPanel.setBorder(new EmptyBorder(5, 5, 5, 5)); contentPanel.setLayout(new BorderLayout(0, 0)); contentPanel.add(displayPanel, BorderLayout.NORTH); contentPanel.add(buttonPanel, BorderLayout.CENTER); // Set the result field field.setText("0"); field.setHorizontalAlignment(SwingConstants.RIGHT); field.setEditable(false); field.setColumns(13); buttonPanel.setLayout(new GridLayout(4, 4, 5, 5)); // Set the buttons JButton number7 = new JButton("7"); number7.addActionListener(insert); JButton number8 = new JButton("8"); number8.addActionListener(insert); JButton number9 = new JButton("9"); number9.addActionListener(insert); JButton divide = new JButton("/"); divide.addActionListener(command); JButton number4 = new JButton("4"); number4.addActionListener(insert); JButton number5 = new JButton("5"); number5.addActionListener(insert); JButton number6 = new JButton("6"); number6.addActionListener(insert); JButton multiply = new JButton("*"); multiply.addActionListener(command); JButton number1 = new JButton("1"); number1.addActionListener(insert); JButton number2 = new JButton("2"); number2.addActionListener(insert); JButton number3 = new JButton("3"); number3.addActionListener(insert); JButton subtract = new JButton("-"); subtract.addActionListener(command); JButton number0 = new JButton("0"); number0.addActionListener(insert); JButton dot = new JButton("."); JButton equal = new JButton("="); equal.addActionListener(command); JButton add = new JButton("+"); add.addActionListener(command); // Add the buttons buttonPanel.add(number7); buttonPanel.add(number8); buttonPanel.add(number9); buttonPanel.add(divide); buttonPanel.add(number4); buttonPanel.add(number5); buttonPanel.add(number6); buttonPanel.add(multiply); buttonPanel.add(number1); buttonPanel.add(number2); buttonPanel.add(number3); buttonPanel.add(subtract); buttonPanel.add(number0); buttonPanel.add(dot); buttonPanel.add(equal); buttonPanel.add(add); // Settings for the frame frame.setLayout(new GridLayout(2, 1)); frame.add(field); frame.add(contentPanel); frame.pack(); frame.setDefaultCloseOperation(JFrame.EXIT_ON_CLOSE); frame.setVisible(true); } //Insert action on digital numbers private static class InsertAction implements ActionListener { public void actionPerformed(ActionEvent e) { String input = e.getActionCommand(); String text = field.getText(); if (start) { field.setText(""); start = false; } if (text.startsWith(".")) { field.setText("0" + field.getText() + input); } else if (text.startsWith("-0.") || text.startsWith("0.")) { field.setText(field.getText() + input); } else if (text.startsWith("-0")) { field.setText("-" + input); } else if (text.startsWith("0")) { field.setText(input); } else { field.setText(field.getText() + input); } } } // Command actions on +, -, *, /, = private static class CommandAction implements ActionListener { public void actionPerformed(ActionEvent e) { String command = e.getActionCommand(); if (start) { if (command.equals("-")) { field.setText(command); start = false; } else { lastCommand = command; } } else { calculate(Double.parseDouble(field.getText())); lastCommand = command; start = true; } } } /* * Real caculation function */ public static void calculate(double x) { char operator = lastCommand.charAt(0); switch (operator) { case '+': result += x; break; case '-': result -= x; break; case '*': result *= x; break; case '/': result /= x; break; case '=': result = x; break; } field.setText("" + result); }} |
The result after running the code is shown below:
4. Download the Source Code
You can download the source code of this example here: Java Swing Tutorial for Beginners
