JavaFX Scene Example
This is a JavaFX Scene example. A Scene represents the visual contents of a Stage. The Scene class in the javafx.scene package represents a scene in a JavaFX program.
A Scene object is attached to, at the most, one stage at a time. If an already attached scene is attached to another stage, it is first detached from the previous stage. A stage can have, at the most, one scene attached to it at any time.
A Scene contains a Scene Graph that consists of visual nodes. In this sense, a scene acts as a container for a Scene Graph. A Scene Graph is a tree data structure whose elements are known as nodes. Nodes in a Scene Graph form a parent-child hierarchical relationship.
A Node in a Scene Graph is an instance of the javafx.scene.Node class. A node can be a branch node or a leaf node. A branch node can have children nodes, whereas a leaf node cannot. The first node in a Scene Graph is called the root node.
The following table shows an overview of the whole article:
Table Of Contents
The following examples use Java SE 7 and JavaFX 2.2.
1. What is a Scene
A Scene always has a root node. If the root node is resizable, for example a Region, it tracks the size of the scene. That is, if the scene is resized, the resizable root node resizes itself to fill the entire scene. Based on the policy of a root node, the Scene Graph may be laid out again when the size of the scene changes.
A Group is a nonresizable parent node that can be set as the root node of a scene. If a Group is the root node of a scene, the content of the Scene Graph is clipped by the size of the scene. If the scene is resized, the Scene Graph is not laid out again.
Parent is an abstract class. It is the base class for all branch nodes in a Scene Graph. If you want to add a branch node to a Scene Graph, use objects of one of its concrete subclasses, for example, Group, Pane, HBox, or VBox. Classes that are subclasses of the Node class, but not the Parent class, represent leaf nodes, for example, Rectangle, Circle, Text, Canvas, or ImageView.
The root node of a Scene Graph is a special branch node that is the topmost node. This is the reason you use a Group or a VBox as the root node while creating a Scene object.
2. Setting the Cursor for a Scene
2.1 The Code
FxSceneExample1.java
package FXScene;

import javafx.application.Application;
import javafx.scene.Cursor;
import javafx.scene.Scene;
import javafx.scene.image.Image;
import javafx.scene.image.ImageView;
import javafx.scene.layout.VBox;
import javafx.stage.Stage;

public class FxSceneExample1 extends Application
{
	public static void main(String[] args)
	{
		Application.launch(args);
	}

	@Override
	public void start(Stage stage)
	{
		// Create the Image
		String file = "file:///Path-To-Your-Image/javafx-logo.png";
		Image image = new Image(file);

		// Create the Cursor
		Cursor myCur = Cursor.cursor(file);

		// Create the ImageView
		ImageView imageView = new ImageView();

		// Add the Image to the ImageView
        imageView.setImage(image);

        // Create the VBox
		VBox root = new VBox();

		// Set the width and height of the VBox
		root.setMinWidth(300);
		root.setMinHeight(200);

		// Add the ImageView to the VBox
		root.getChildren().add(imageView);

		// Set the Style-properties of the VBox
		root.setStyle("-fx-padding: 10;" +
				"-fx-border-style: solid inside;" +
				"-fx-border-width: 2;" +
				"-fx-border-insets: 5;" +
				"-fx-border-radius: 5;" +
				"-fx-border-color: blue;");

		// Create the Scene
		Scene scene = new Scene(root);
		// Set the Cursor to the Scene
		scene.setCursor(myCur);
		// Add the Scene to the Stage
		stage.setScene(scene);
		// Set the Title of the Stage
		stage.setTitle("Setting the Cursor for a Scene");
		// Display the Stage
		stage.show();
	}

}
An instance of the javafx.scene.Cursor class represents a mouse cursor. The Cursor class contains many constants, for example HAND, CLOSED_HAND, DEFAULT, TEXT, NONE, WAIT, for standard mouse cursors.
The following snippet of code sets the WAIT cursor for a Scene:
Scene scene;
...
scene.setCursor(Cursor.WAIT);
You can also create and set a custom cursor to a scene. The cursor(String name) static method of the Cursor class returns a standard cursor if the specified name is the name of a standard cursor. Otherwise, it treats the specified name as a URL for the cursor bitmap.
The following snippet of code creates a cursor from a bitmap file named javafx-logo.png.
// Create the Image
String file = "file:///C:/Workspaces/workspace_java/JavaFXProjects/src/FXScene/javafx-logo.png";
Image image = new Image(file);

// Create the Cursor
Cursor myCur = Cursor.cursor(file);
2.2 The GUI
3. The Focus Owner in a Scene
3.1 The Code
FxSceneExample2.java
package FXScene;

import javafx.application.Application;
import javafx.scene.Node;
import javafx.scene.Scene;
import javafx.scene.control.Button;
import javafx.scene.control.TextArea;
import javafx.scene.layout.VBox;
import javafx.stage.Stage;

public class FxSceneExample2 extends Application
{
	// Create the TextArea
	TextArea textarea = new TextArea();

	public static void main(String[] args)
	{
		Application.launch(args);
	}

	@Override
	public void start(Stage stage)
	{
		// Create the Button
		Button button = new Button("Test");

		// Create the VBox
		VBox root = new VBox();

		// Set the width and height of the VBox
		root.setMinWidth(200);
		root.setMinHeight(100);

		// Add the children to the VBox
		root.getChildren().addAll(button, textarea);

		// Set the Focus Owner
		button.requestFocus();

		// Create the Scene
		Scene scene = new Scene(root);

		// Get the FocusOwner
		Node focusOwnerNode = scene.getFocusOwner();

		if (focusOwnerNode == null)
		{
			// The scene does not have a focus owner
			writeMessage("The scene does not have a focus owner");
		}
		else if (focusOwnerNode.isFocused())
		{
			// The focus owner is the one that has the focus
			writeMessage("The focus owner is the one that has the focus");
		}
		else
		{
			// The focus owner does not have the focus
			writeMessage("The focus owner does not have the focus");
		}

		// Set the Style-properties of the VBox
		root.setStyle("-fx-padding: 10;" +
				"-fx-border-style: solid inside;" +
				"-fx-border-width: 2;" +
				"-fx-border-insets: 5;" +
				"-fx-border-radius: 5;" +
				"-fx-border-color: blue;");

		// Add the Scene to the Stage
		stage.setScene(scene);
		// Set the Title of the Stage
		stage.setTitle("Testing the Focus Owner in a Scene");
		// Display the Stage
		stage.show();
	}

	private void writeMessage(String msg)
	{
		textarea.appendText(msg + "\n");
	}
}
Only one node in a scene can be the focus owner. The focusOwner property of the Scene class tracks the Node class that has the focus. Note that the focusOwner property is read-only. If you want a specific node in a scene to be the focus owner, you need to call the requestFocus() method of the Node class.
The following line of code shows an example:
// Set the Focus Owner
button.requestFocus();
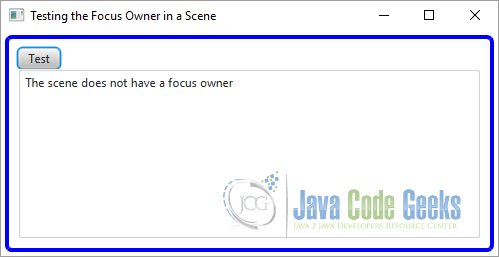
You can use the getFocusOwner() method of the Scene class to get the reference of the node having the focus in the scene. A scene may not have a focus owner, and in that case, the getFocusOwner() method returns null. For example, a scene does not have a focus owner when it is created but is not attached to a window.
It is important to understand the distinction between a focus owner and a node having focus. Each scene may have a focus owner. For example, if you open two windows, you will have two scenes and you can have two focus owners. However, only one of the two focus owners can have the focus at a time.
The focus owner of the active window will have the focus. To check if the focus owner node also has the focus, you need to use the focused property of the Node class.
The following snippet of code shows the typical logic in using the focus owner:
// Get the FocusOwner
Node focusOwnerNode = scene.getFocusOwner();

if (focusOwnerNode == null)
{
	// The scene does not have a focus owner
	writeMessage("The scene does not have a focus owner");
}
else if (focusOwnerNode.isFocused())
{
	// The focus owner is the one that has the focus
	writeMessage("The focus owner is the one that has the focus");
}
else
{
	// The focus owner does not have the focus
	writeMessage("The focus owner does not have the focus");
}
3.2 The GUI
4. Using Builder Classes
4.1 The Code
A simple example of the Builder class:
FxSceneExample3.java
package FXScene;

import javafx.application.Application;
import javafx.scene.Scene;
import javafx.scene.layout.BorderPane;
import javafx.scene.layout.BorderPaneBuilder;
import javafx.scene.paint.Color;
import javafx.scene.shape.Rectangle;
import javafx.scene.shape.RectangleBuilder;
import javafx.stage.Stage;

public class FxSceneExample3 extends Application
{
	public static void main(String[] args)
	{
		Application.launch(args);
	}

	@Override
	public void start(Stage stage)
	{
		// Create the first Rectangle
		Rectangle rectangle1 = RectangleBuilder.create()
				.x(10)
				.y(20)
				.width(200)
				.height(100)
				.fill(Color.RED)
				.build();

		// Create a partially configured RectangleBuilder
		@SuppressWarnings("rawtypes")
		RectangleBuilder builder = RectangleBuilder.create()
		.width(50)
		.height(50)
		.fill(Color.GREEN);

		// Create additional Rectangles using the Builder
		Rectangle rectangle2 = builder.x(250).y(50).build();
		Rectangle rectangle3 = builder.x(350).y(80).build();

		// Create the BorderPane
		BorderPane root = BorderPaneBuilder.create().build();
		// Set the Size of the BorderPane
		root.setMinWidth(500);
		root.setMinHeight(200);

		// ASdd the Children to the Group
		root.getChildren().addAll(rectangle1, rectangle2, rectangle3);

		// Set the Style-properties of the BorderPane
		root.setStyle("-fx-padding: 10;" +
				"-fx-border-style: solid inside;" +
				"-fx-border-width: 2;" +
				"-fx-border-insets: 5;" +
				"-fx-border-radius: 5;" +
				"-fx-border-color: blue;");

		// Create the Scene
		Scene scene = new Scene(root);
		// Add the Scene to the Stage
		stage.setScene(scene);
		// Set the Title of the Stage
		stage.setTitle("An example with Builder Classes");
		// Display the Stage
		stage.show();
	}

}
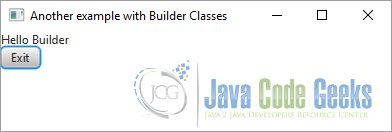
Using the SceneBuilder to create a whole Scene and all their children:
FxSceneExample4.java
package FXScene;

import javafx.application.Application;
import javafx.event.ActionEvent;
import javafx.event.EventHandler;
import javafx.scene.Scene;
import javafx.scene.SceneBuilder;
import javafx.scene.control.ButtonBuilder;
import javafx.scene.control.LabelBuilder;
import javafx.scene.layout.VBoxBuilder;
import javafx.stage.Stage;

public class FxSceneExample4 extends Application
{
	public static void main(String[] args)
	{
		Application.launch(args);
	}

	@Override
	public void start(Stage stage)
	{
		// Create the whole Scene using different SceneBuilder Classes
		Scene scene = SceneBuilder.create().width(300).height(100).root
		(
			VBoxBuilder.create().minWidth(300).minHeight(200).children(
			LabelBuilder.create().text("Hello Builder").build(),
			ButtonBuilder.create().text("Exit").onAction(new EventHandler()
			{
				@Override
				public void handle(ActionEvent event)
				{
					System.exit(0);
				}
			}
			).build()
		).build()).build();

		// Add the Scene to the Stage
		stage.setScene(scene);
		// Set the Title of the Stage
		stage.setTitle("Another example with Builder Classes");
		// Display the Stage
		stage.show();
	}

}
JavaFX provides two classes for creating and configuring objects that constitute the building blocks of a Scene Graph. One class is named after the type of object that the class represents. Another with the former class name suffixed with the word Builder. For example, Rectangle and RectangleBuilder classes exist to work with rectangles, Scene and SceneBuilder classes exist to work with scenes, and so on.
Builder classes provide three types of methods:
- They have a create() static method to create an instance of the builder class.
- They contain methods to set properties. Method names are the same as the property names that they set.
- They have a build() method that returns the object of the class for which the builder class exists. For example, the build() method of the RectangleBuilder class returns an object of the Rectangle class.
Builder classes are designed to use method chaining. Their methods to configure properties return the same builder instance.
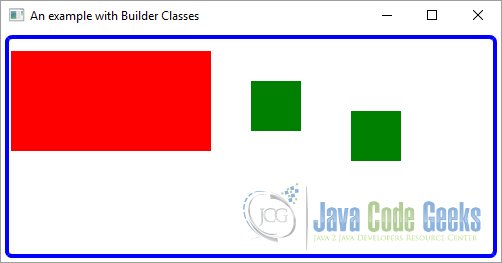
The following snippet of code creates a Rectangle, using the Rectangle class, with (x, y) coordinates, with a width and a height. It also sets the fill property to red:
Rectangle r1 = new Rectangle(10, 20, 200, 100);
r1.setFill(Color.RED);
You can use the RectangleBuilder class to create the same rectangle:
// Create the first Rectangle
Rectangle rectangle1 = RectangleBuilder.create()
		.x(10)
		.y(20)
		.width(200)
		.height(100)
		.fill(Color.RED)
		.build();
Using builder classes requires longer code. However, it is more readable compared to using constructors to set the properties. Another advantage of builder classes is that they can be reused to build objects with slightly different properties. Suppose you want to create multiple rectangles with a 50px width and a 50px height, filled with the color red. However, they have different x and y coordinates.
You can do so with the following code:
// Create a partially configured RectangleBuilder
@SuppressWarnings("rawtypes")
RectangleBuilder builder = RectangleBuilder.create()
.width(50)
.height(50)
.fill(Color.GREEN);

// Create additional Rectangles using the Builder
Rectangle rectangle2 = builder.x(250).y(50).build();
Rectangle rectangle3 = builder.x(350).y(80).build();
4.2. The GUI
The following image shows the result of the first example:
The following image shows the result of the second one:

5. Understanding the Platform Class
5.1 The Code
FxSceneExample5.java
package FXScene;

import javafx.application.Application;
import javafx.application.Platform;
import javafx.scene.Scene;
import javafx.scene.control.TextArea;
import javafx.scene.layout.VBox;
import javafx.stage.Stage;

public class FxSceneExample5 extends Application
{
	// Create the TextArea
	TextArea textarea = new TextArea();

	public static void main(String[] args)
	{
		Application.launch(args);
	}

	@Override
	public void init()
	{
		writeMessage("init(): " + Thread.currentThread().getName() + "\n");

		// Create a Runnable task
		Runnable task = new Runnable()
		{
			public void run()
			{
				writeMessage("Running the task on the " + Thread.currentThread().getName());
			}
		};

		// Submit the task to be run on the JavaFX Application Thread
		Platform.runLater(task);
	}

	@Override
	public void start(Stage stage) throws Exception
	{
		// Create the BorderPane
		VBox root = new VBox();

		// Set the Style-properties of the VBOx
		root.setStyle("-fx-padding: 10;" +
				"-fx-border-style: solid inside;" +
				"-fx-border-width: 2;" +
				"-fx-border-insets: 5;" +
				"-fx-border-radius: 5;" +
				"-fx-border-color: blue;");

		// Add the TextArea to the Group
		root.getChildren().add(textarea);

		// Create the Scene
		Scene scene = new Scene(root);

		// Add the Scene to the Stage
		stage.setScene(scene);
		// Set the Title of the Stage
		stage.setTitle("A Platform Example");
		// Display the Stage
		stage.show();
	}

	private void writeMessage(String msg)
	{
		textarea.appendText(msg + "\n");
	}

}
The Platform class in the javafx.application package is a utility class used to support platform-related functionalities.
The runLater() method is used to submit a Runnable task to an event queue, so it is executed on the JavaFX Application Thread. JavaFX allow developers to execute some of the code only on the JavaFX Application Thread.
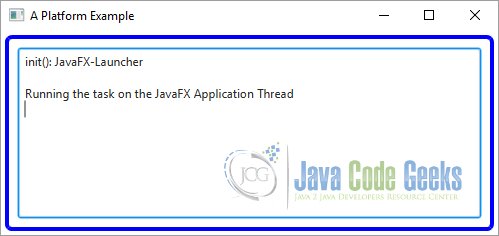
The following code creates a task in the init() method that is called on the JavaFX Launcher Thread. It uses the Platform.runLater() method to submit the task to be executed on the JavaFX Application Thread later:
@Override
public void init()
{
	writeMessage("init(): " + Thread.currentThread().getName() + "\n");

	// Create a Runnable task
	Runnable task = new Runnable()
	{
		public void run()
		{
			writeMessage("Running the task on the " + Thread.currentThread().getName());
		}
	};

	// Submit the task to be run on the JavaFX Application Thread
	Platform.runLater(task);
}
Some features in a JavaFX implementation are optional (or conditional). They may not be available on all platforms. Using an optional feature on a platform that does not support the feature does not result in an error; the optional feature is simply ignored. Optional features are defined as enum constants in the ConditionalFeature enum in the javafx.application package.
5.2. The GUI

6. Knowing the Host Environment
6.1 The Code
FxSceneExample6.java
package FXScene;

import java.util.HashMap;
import java.util.Map;

import javafx.application.Application;
import javafx.application.HostServices;
import javafx.event.ActionEvent;
import javafx.event.EventHandler;
import javafx.scene.Scene;
import javafx.scene.control.Button;
import javafx.scene.control.Label;
import javafx.scene.control.TextArea;
import javafx.scene.layout.HBox;
import javafx.scene.layout.VBox;
import javafx.stage.Modality;
import javafx.stage.Stage;
import javafx.stage.StageStyle;
import netscape.javascript.JSObject;

public class FxSceneExample6 extends Application
{
	// Create the TextArea
	TextArea textarea = new TextArea();

	public static void main(String[] args)
	{
		Application.launch(args);
	}

	@Override
	public void start(Stage stage)
	{
		// Create the URL-String
		final String yahooURL = "http://www.yahoo.com";

		// Create the Buttons and their EventHandlers
		Button openURLButton = new Button("Go to Yahoo!");

		openURLButton.setOnAction(new EventHandler<ActionEvent>()
		{
			@Override
			public void handle(ActionEvent event)
			{
				getHostServices().showDocument(yahooURL);
			}
		});

		Button showAlert = new Button("Show Alert");

		showAlert.setOnAction(new EventHandler<ActionEvent>()
		{
			@Override
			public void handle(ActionEvent event)
			{
				showAlert();
			}
		});

		// Create the HBox
		HBox hbox = new HBox();
		// Add the Children to the HBox
		hbox.getChildren().addAll(openURLButton, showAlert);

		// Create the VBox
		VBox root = new VBox();

		// Set the width and height of the VBox
		root.setMinWidth(400);
		root.setMinHeight(300);

		// Add buttons and all host related details to the VBox
		root.getChildren().addAll(hbox,textarea);

		// Set the Style-properties of the VBox
		root.setStyle("-fx-padding: 10;" +
				"-fx-border-style: solid inside;" +
				"-fx-border-width: 2;" +
				"-fx-border-insets: 5;" +
				"-fx-border-radius: 5;" +
				"-fx-border-color: blue;");

		// Create the Map
		Map<String, String> hostdetails = getHostDetails();

		// Add the Details to the Map
		for(Map.Entry<String, String> entry : hostdetails.entrySet())
		{
			String desc = entry.getKey() + ": " + entry.getValue();
			textarea.appendText(desc + "\n");
		}

		// Create the Scene
		Scene scene = new Scene(root);

		// Add the Scene to the Stage
		stage.setScene(scene);
		// Set the Title of the Stage
		stage.setTitle("Knowing the Host");
		// Display the Stage
		stage.show();
	}

	protected Map<String, String> getHostDetails()
	{
		// Create the Map
		Map<String, String> map = new HashMap<>();

		// Create the Host
		HostServices host = this.getHostServices();

		// Get the Host Details
		String codeBase = host.getCodeBase();
		map.put("CodeBase", codeBase);

		String documentBase = host.getDocumentBase();
		map.put("DocumentBase", documentBase);

		JSObject js = host.getWebContext();
		map.put("Environment", js == null?"Non-Web":"Web");

		String splashImageURI = host.resolveURI(documentBase, "splash.jpg");
		map.put("Splash Image URI", splashImageURI);

		return map;
	}

	protected void showAlert()
	{
		// Create the Host
		HostServices host = getHostServices();

		// Create a JavaScriptObject
		JSObject js = host.getWebContext();

		if (js == null)
		{
			// Create the Stage
			Stage stage = new Stage(StageStyle.UTILITY);
			stage.initModality(Modality.WINDOW_MODAL);

			// Create the Label
			Label label = new Label("This is an FX alert!");

			// create the VBox
			VBox root = new VBox();

			// Set the width and height of the VBox
			root.setMinWidth(300);
			root.setMinHeight(200);

			// Set the Style-properties of the VBox
			root.setStyle("-fx-padding: 10;" +
					"-fx-border-style: solid inside;" +
					"-fx-border-width: 2;" +
					"-fx-border-insets: 5;" +
					"-fx-border-radius: 5;" +
					"-fx-border-color: blue;");

			// Add the Children to the VBox
			root.getChildren().add(label);

			// Create the Scene
			Scene scene = new Scene(root);

			// Add the Scene to the Stage
			stage.setScene(scene);

			// Set the Title of the Stage
			stage.setTitle("FX Alert");

			//Display the Stage
			stage.show();
		}
		else
		{
			js.eval("window.alert('This is a JavaScript alert!')");
		}
	}
}
The HostServices class in the javafx.application package provides services related to the launching environment (desktop, web browser, or WebStart) hosting the JavaFX application. You cannot create an instance of the HostServices class directly. The getHostServices() method of the Application class returns an instance of the HostServices class.
The following is an example of how to get an instance of HostServices inside a class that inherits from the Application class:
HostServices host = getHostServices();
The HostServices class contains the following methods:
The getCodeBase() method returns the code base uniform resource identifier (URI) of the application. In a stand-alone mode, it returns the URI of the directory that contains the JAR file used to launch the application. If the application is launched using a class file, it returns an empty string. If the application is launched using a JNLP file, it returns the value for the specified code base parameter in the JNLP file.
The getDocumentBase() method returns the URI of the document base. In a web environment, it returns the URI of the web page that contains the application. If the application is launched using WebStart, it returns the code base parameter specified in the JNLP file. It returns the URI of the current directory for application launched in stand-alone mode.
The getWebContext() method returns a JSObject that allows a JavaFX application to interact with the JavaScript objects in a web browser. If the application is not running in a web page, it returns null. You can use the eval() method of the JSObject to evaluate a JavaScript expression from inside your JavaFX code.
The following snippet of code displays an alert box using the window.alert() function. If the application runs in a nonweb environment, it shows a JavaFX modal stage instead:
// Create the Host
HostServices host = getHostServices();

// Create a JavaScriptObject
JSObject js = host.getWebContext();

if (js == null)
{
	// Create the Stage
	Stage stage = new Stage(StageStyle.UTILITY);
	stage.initModality(Modality.WINDOW_MODAL);

	// Create the Label
	Label label = new Label("This is an FX alert!");

	// create the VBox
	VBox root = new VBox();

	// Set the width and height of the VBox
	root.setMinWidth(300);
	root.setMinHeight(200);

	// Set the Style-properties of the VBox
	root.setStyle("-fx-padding: 10;" +
			"-fx-border-style: solid inside;" +
			"-fx-border-width: 2;" +
			"-fx-border-insets: 5;" +
			"-fx-border-radius: 5;" +
			"-fx-border-color: blue;");

	// Add the Children to the VBox
	root.getChildren().add(label);

	// Create the Scene
	Scene scene = new Scene(root);

	// Add the Scene to the Stage
	stage.setScene(scene);

	// Set the Title of the Stage
	stage.setTitle("FX Alert");

	//Display the Stage
	stage.show();
}
else
{
	js.eval("window.alert('This is a JavaScript alert!')");
}
The resolveURI() method resolves the specified relative URI with respect to the specified base URI and returns the resolved URI.
The showDocument() method opens the specified URI in a new browser window. Depending on the browser preference, it may open the URI in a new tab instead. This method can be used in a stand-alone mode as well as in a web environment.
The following snippet of code opens the Yahoo! home page:
getHostServices().showDocument("http://www.yahoo.com");
6.2. The GUI
The following image shows a stage with two buttons and host details. One button opens the Yahoo! home page and another shows an alert box.

7. Download Java Source Code
This was an example of javafx.scene
You can download the full source code of this example here: JavaFxSceneExample.zip


