Eclipse XPath Evaluation Plugin Example
Hello, I started using Eclipse IDE to work with XML. In this tutorial, we will learn to use the XML and XPath Editor available through the Web Tools Platform (WTP) within Eclipse.
1. Introduction
XML stands for Extensible Markup Language and is a text-based markup language derived from Standard Generalized Markup Language (SGML). XML tags identify the data and are used to store and organize the data, rather than specifying how to display them like HTML tags, which are used to display the data. XML is not going to replace HTML in the near future, but it introduces new possibilities by adopting many successful features of HTML.
1.1 XPath
XPath is an XML query language. It is an important and a core component of XSLT standard and is used to traverse the elements and attributes in an XML document. XPath provides various types of expressions which can be used to enquire relevant information from the XML document:
- Structure Definitions
- Path Expressions
- Standard Functions
- Solution to finding information in an
XMLdocument
This post details the instructions for adding XPath Plugin to the Eclipse. It is really a simple process, but I’ve detailed it out anyway.
1.2 Eclipse XPath Evaluation Plugin
Eclipse XPath Evaluation plugin provides a new view in an eclipse perspective and enables the user to evaluate XPath expressions against the active text editor containing XML and has the following features:
XPath2.0 expression validation- Well-formed
XMLvalidation - Executing
XPath2.0 expressions againstXML - Namespace support in
XPathqueries - Pretty print.

Supported Eclipse Versions:
- Neon / 4.6+
- Mars / 4.5+
- Luna / 4.4+
- Kepler / 4.3+
- Juno / 4.2+
- Indigo / 3.7+
- Helios / 3.6+
- Galileo / 3.5+
- Ganymede / 3.4+
Supported Java Versions:
- JDK 1.6 and above (from plugin version 1.4.1 onwards)
- JDK 1.5 (up to plugin version 1.3.0)
1.3 Eclipse XPath Evaluation Plugin Installation
I’m using Eclipse Kepler SR2 and it’s probably a similar process in other versions. Below are the steps involved in the installation of this plugin.
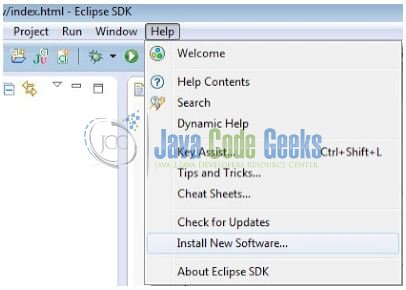
- Go to Help –> Install New Software…
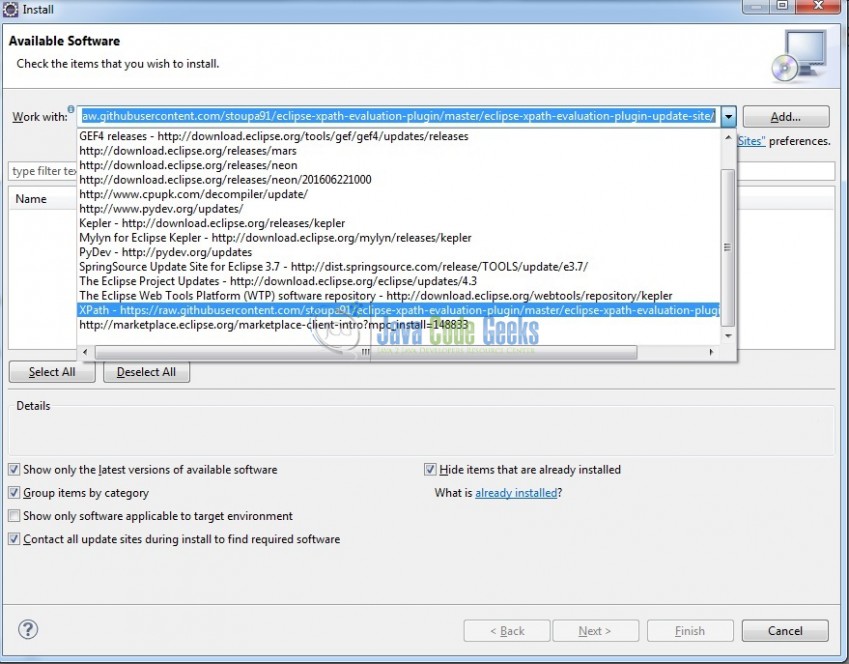
- Select the
XPathRepository (https://raw.githubusercontent.com/stoupa91/eclipse-xpath-evaluation-plugin/master/eclipse-xpath-evaluation-plugin-update-site/) from the ‘Work with:‘ menu.
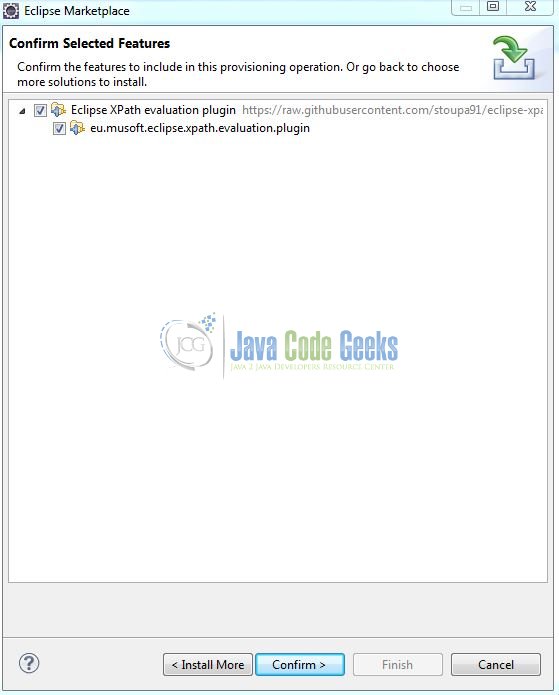
- In the search box, enter XPath to filter the results and select ‘ Eclipse XPath Plugin‘. Click Confirm.
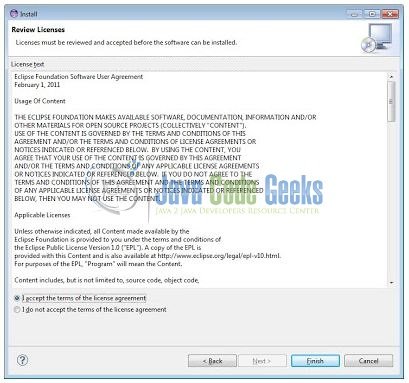
- Accept the terms and click Finish.
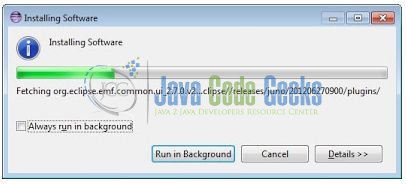
- Wait for the installation to run.
- You might see this – just click OK.
- Click Yes when ready.
- Now you have finished installing the
XPathplugin. After the restart, all you need to do is to go toWindow -> Show View -> Other -> XML -> XPath. This view will be used for executing theXPathexpressions.

Anyway, that was pretty easy, wasn’t it? Now, let’s start building the sample application!
2. Eclipse XPath Evaluation Plugin Tutorial
After installing and reviewing the XPath Plugin features, let us see now the XPath evaluation in action. Below are the steps involved in developing this application.
2.1 Getting Started
This section will demonstrate on how to create a Dynamic Web Java project with Eclipse. In Eclipse IDE, go to File -> New -> Dynamic web project.
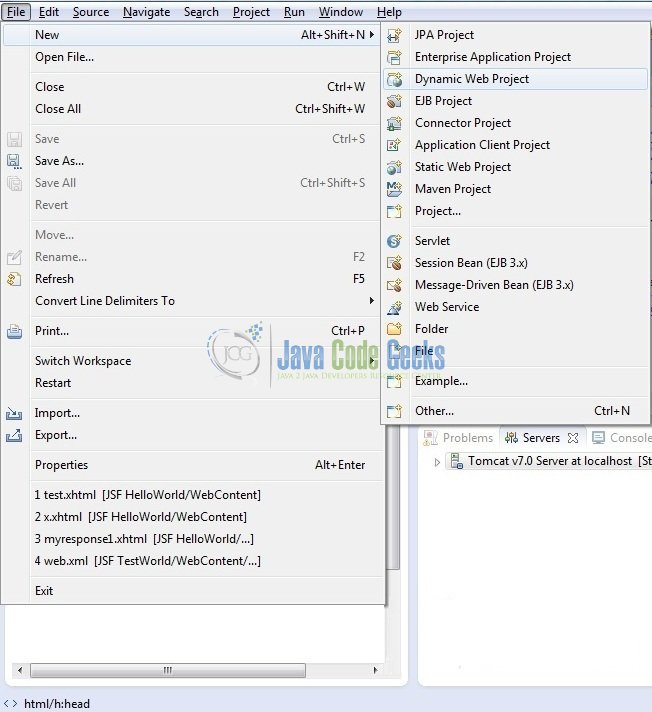
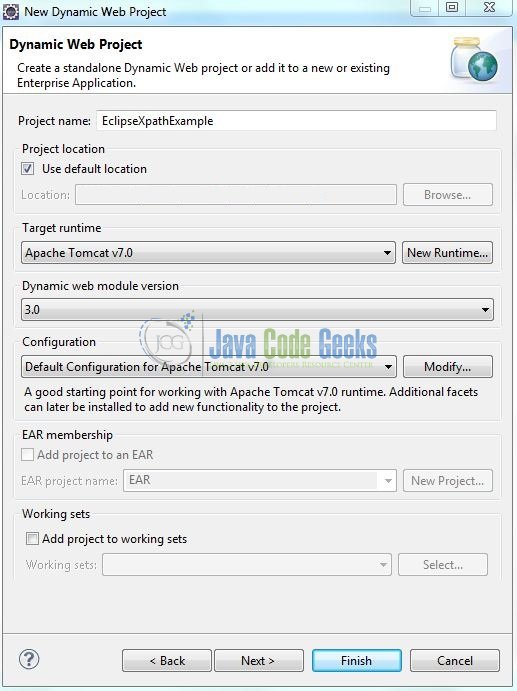
In the New, Dynamic Project window fill in the below details and click next.
- Enter the project name and project location.
- Select Target runtime as Apache Tomcat v7.0 from the drop-down.
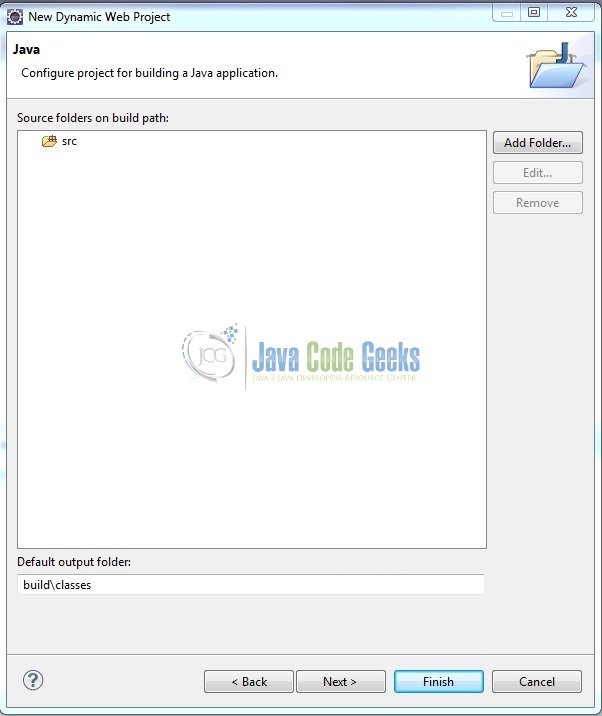
Leave everything as default in this window as we will be making the required java file at a later stage. Simply click next and we will land up on the web-module window.
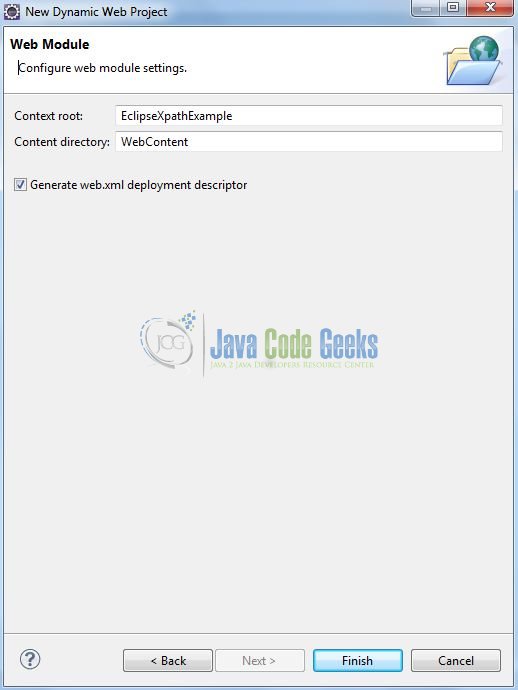
In the Web Module window, leave the context_root and content_directory values as default (however, you can change the context_root but for the first application let’s keep it as a default value). Simply, check Generate web.xml deployment descriptor check box and click Finish.
Eclipse will create the project named EclipseXpathExample in the workspace and web.xml will be configured.
2.2 XPath in Action
Once the web project is created, we can now create a new XML file. Right click on the project context, and click New. Select XML file and provide a name to the file: xpathEvaluatorWelcome.xml. Click Next.
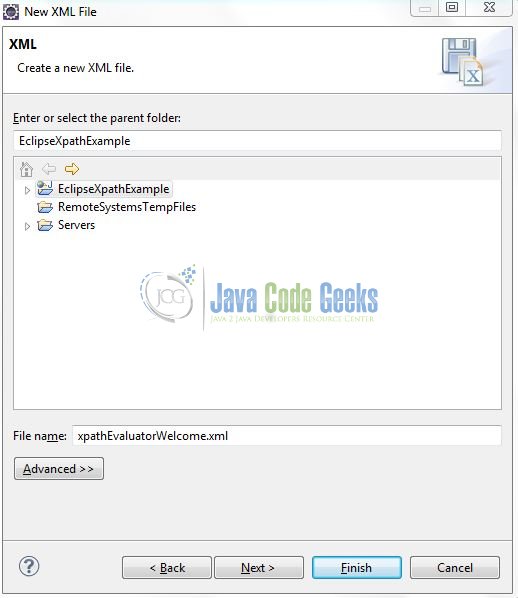
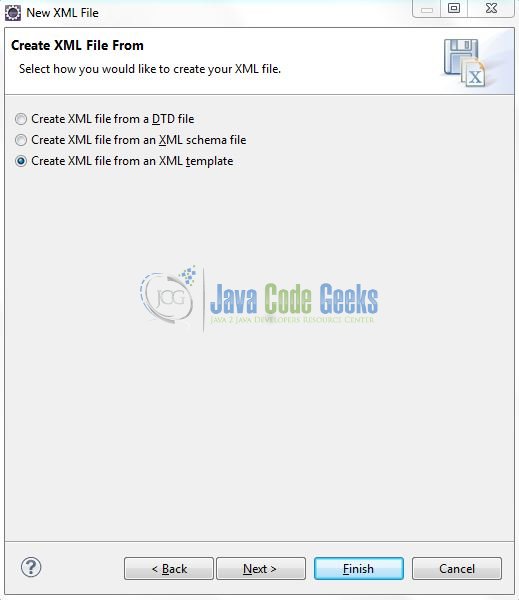
In this step, we will select the desired template to use for the new XML file. In this tutorial, we will use the already existing XML Template. Click Finish and the new XML file will be created.
Let us complete our example XML page by adding some tags.
2.3 Application Building
Here in the xpathEvaluatorWelcome.xml, we will have the basic XML components. Add the following code to it.
xpathEvaluatorWelcome.xml
<?xml version="1.0" encoding="UTF-8"?>
<company xmlns="urn:xmlns:9hoursaday-com:company">
	<staff id="101">
		<title>Mr.</title>
		<firstname>Java Code</firstname>
		<lastname>Geek</lastname>
		<nickname>JCG</nickname>
		<salary format="$">10000</salary>
	</staff>
	<staff id="102">
		<title>Mr.</title>
		<firstname>Harry</firstname>
		<lastname>Potter</lastname>
		<nickname>HP</nickname>
		<salary format="$">5000</salary>
	</staff>
</company>
3. Project Run
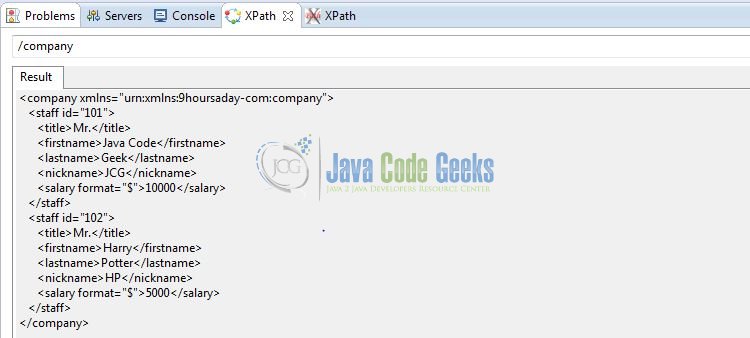
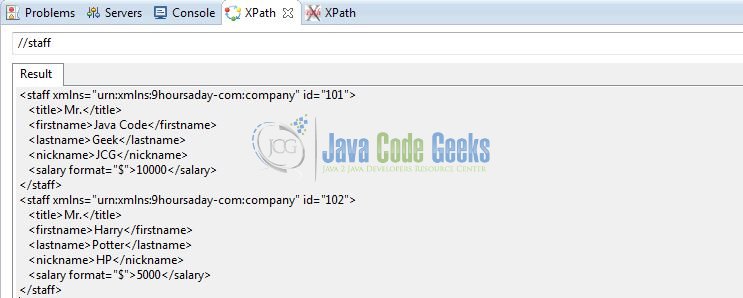
Once we are ready with all the changes, provide the XPath query you want to execute in the XPath combo box and press Enter. The result will be shown under the query combo box.
Query #1
//company
Query #2
//staff
Query #3
//staff/firstname
Query #4
//staff/nickname
That’s all for this post. Happy Learning!
5. Conclusion
In this article, we saw how to install the XPath Plugin in Eclipse. We also discussed what XML is and how we can easily create and edit a XML file in Eclipse.
6. Download the Eclipse Project
This was an example of Eclipse XPath Evaluation Plugin.
You can download the full source code of this example here: EclipseXpathExample






Hello,
Thank you very much for these steps.
I have a question regarding the “result” section from Xpath evaluation.
all my search are showeed in one line and it is pretty hard to read it.
How can I put it to read the results separated?
(image attached)
I am pretty new, i am a student.