1. Introduction
The Eclipse IDE has excellent support for the Git version control system. This support is provided by the EGit project via a set of plug-ins (software component). Eclipse uses the JGit library to perform the Git commands. JGit is a library which implements the Git functionality in Java. Most Eclipse IDE distributions from Eclipse.org already contain support for Git. In this case no additional installation is required. If for some reason this is not the case you can download the plugin from Eclipse Marketplace.
2. GIT
Git is a free and open source distributed version control system designed to handle everything from small to very large projects with speed and efficiency. Git is easy to learn and has a tiny footprint with lightning fast performance. Git is a distributed SCM, which means every developer has a full copy of all history of every revision of the code, making queries against the history very fast and versatile.
3. EGit
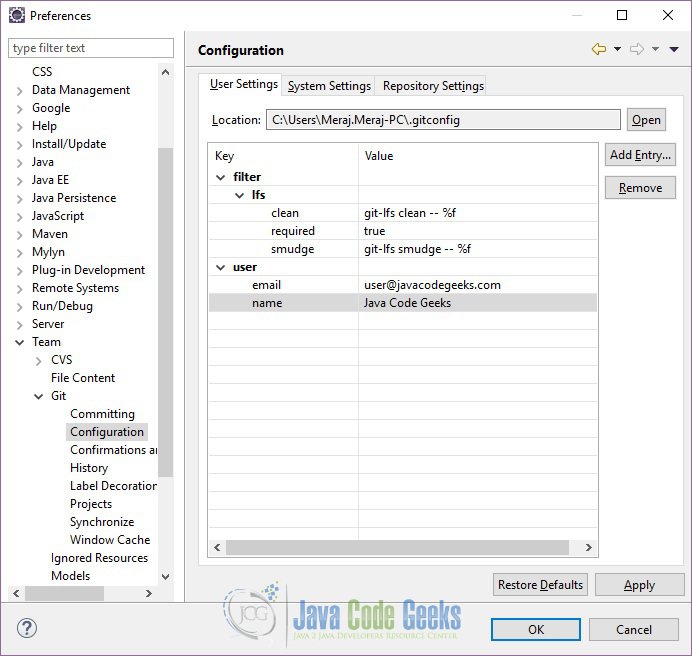
EGit is an Eclipse Team provider for the Git version control system. The EGit project is implementing Eclipse tooling on top of the JGit Java implementation of Git. To use Git you must configure your full name and email address. This information is used to fill the author and committer information of commits you create. These Git configuration settings can be adjusted via the Eclipse preference setting. Go to to see the current configuration and to change it.
If you clone a new repository via Eclipse Git, it will create by default a new sub-folder for the new Git repository in a default directory. This default path can be configured via the Windows => Preferences => Team => Git entry in the Default Repository folder field.
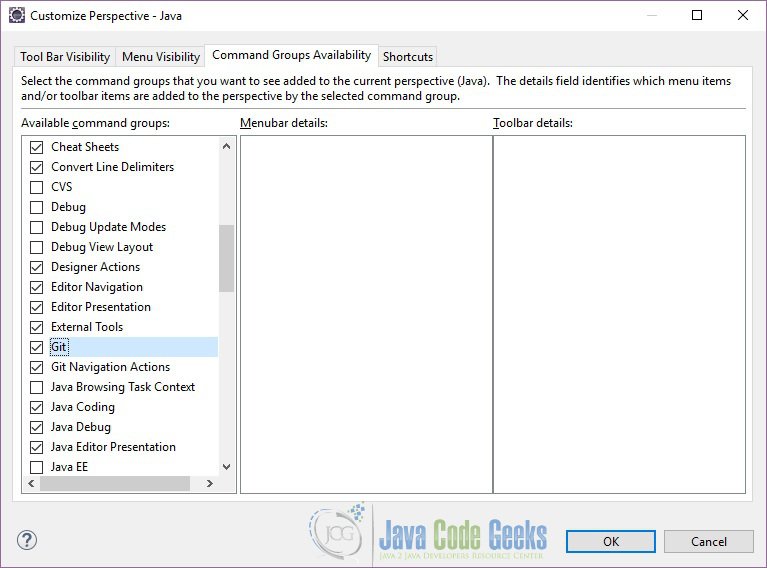
To simplify access to the common Git operations you can activate the Git toolbar. For this select Window => Customize perspective… and check the Git and Git Navigation Actions entries in the Command Groups Availability tab.
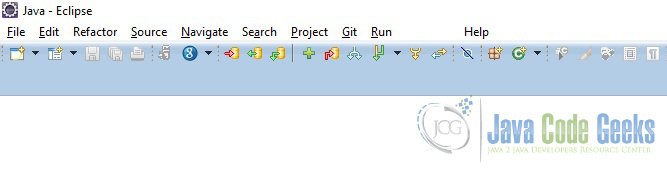
Eclipse will add some new buttons/links in the navigation bar.
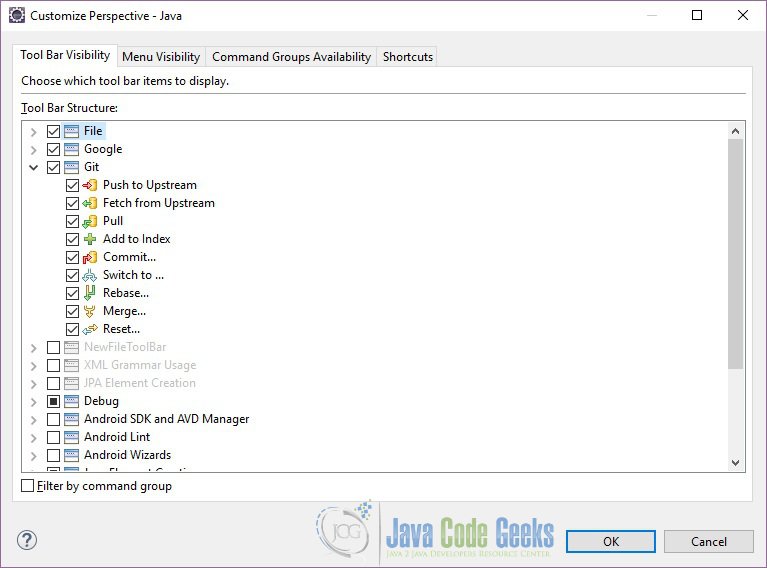
Afterwards you can configure which Git operations should be available via the Tool Bar Visibility or the Menu Visibility tab.
4. Create Java Project
In this section we will see how to create a simple Java project. The objective of this section is to show how to make a simple Java project which we will use as a GIT project. To create a Java project go to File => New => Java Project
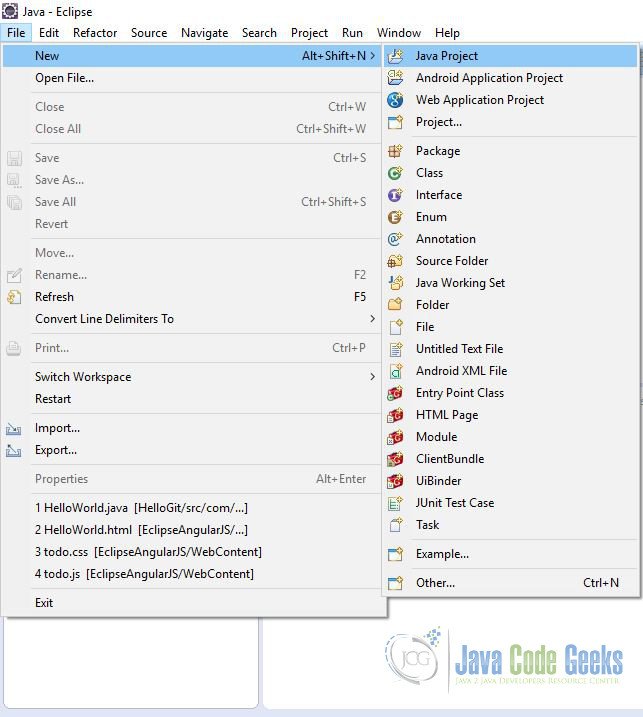
It could be possible that you will not find Java Project option in the New window. In that case you can choose Other. Eclipse will open a pop-up which you can use to find the Java Project.
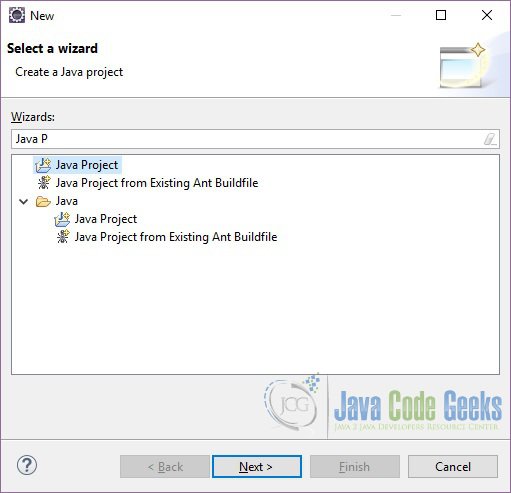
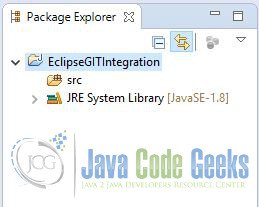
In the Create a Java Project window enter the Project Name. You can also choose the project location, for our example we will use the default location. You can also choose the JRE version for which you want to run your project. For this example we will use JRE8. Leave everything as default and click on Finish. Eclipse will create a project structure as below:
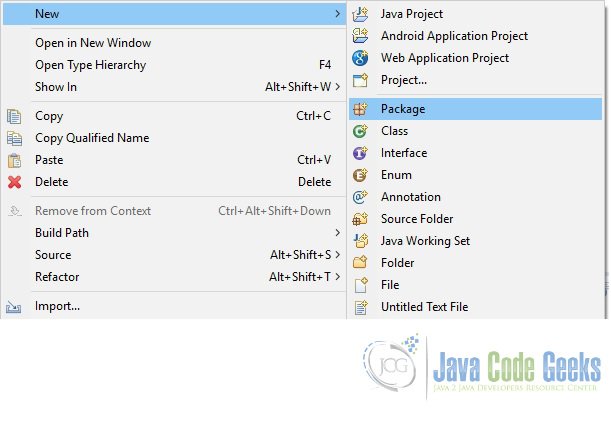
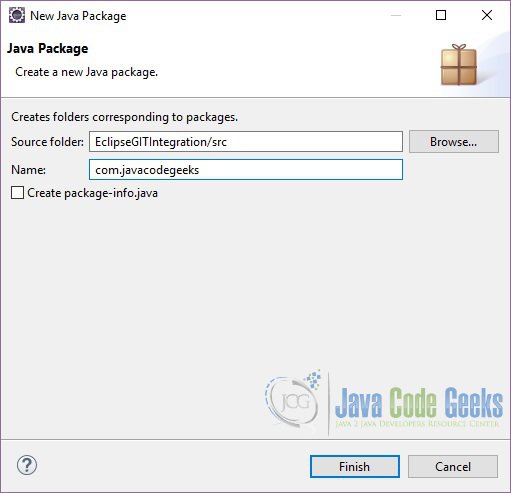
Now we have created a simple Java project. Now we will create a simple class. First we will create a package. To create a package right click on the src folder and choose New => Package.
In the Java Package window give the package name and click Finish.
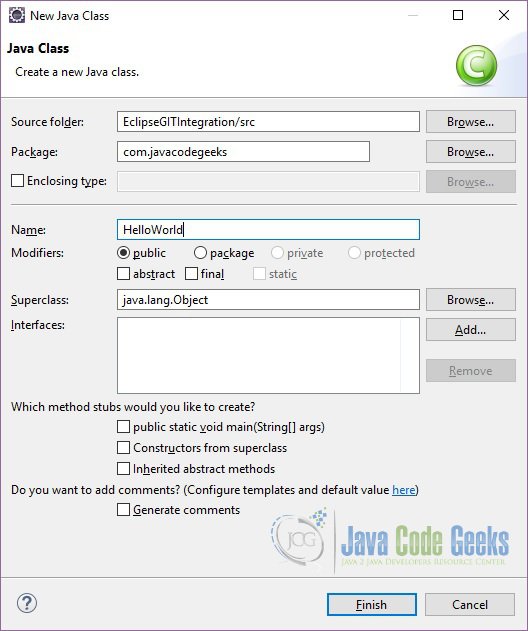
Now we will create a new class. To create a new class right click on the package which we just created and choose New => Class. Give the name of the class and leave other things as default. Click Finish
5. GIT Repository
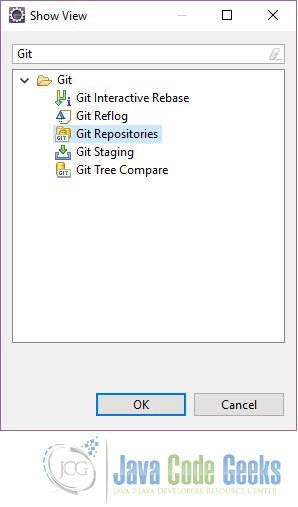
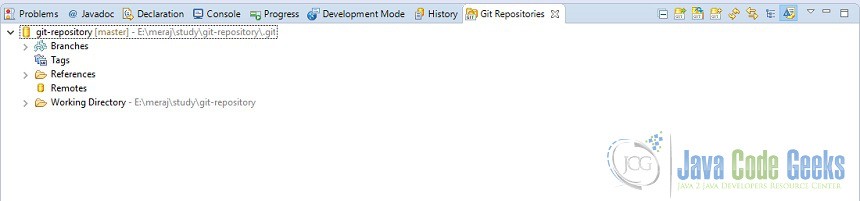
In this section we will learn about GIT repository. In information technology, a repository (pronounced ree-PAHZ-ih-tor-i) is a central place in which an aggregation of data is kept and maintained in an organized way, usually in computer storage. A GIT repository is a place where the code which is managed by GIT is stored. To see the GIT repository go to Windows => Show View => Other. In the search box type Git. Choose Git Repositories.
Now you will be able to view the repository and perform actions on it.
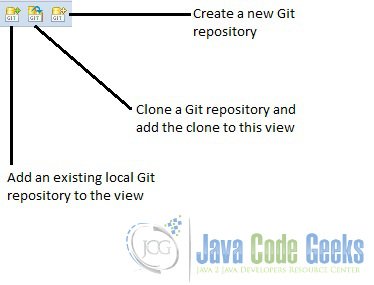
The toolbar entries allow you to add an existing local Git repository to the view, clone a Git repository and add the clone to this view and to create a new Git repository.
A right-click (context menu) on an element in the Git repositories view allows you to perform related Git operations.
The History view allows you to analyze the history of your Git repository and to see to which commits the branches and tags points. This view displays author, date, commit message and the modified files of a commits
5.1 Add Project to Repository
In this section we will see how to add the projects to the existing GIT repository. Let say we want to add the EclipeGITIntegration project which we just created to the GIT repository. To do that right click on the project and choose Team => Share Project. In the Share Project window choose GIT. In the Configure Git Repository window select the repository and leave other options as default then click Finish. The project will be added to the repository. To confirm that the project has been added to the repository right click on the HelloWorld class and go to Team. You will see options related to GIT actions.
5.2 Staging
Eclipse gives you several options to stage and commit your changes. The Git Staging view provides a convenient compact overview on all changes you have done compared to the current HEAD revision. This view presents which files you have touched and which files will be included in the next commit. Unstaged Changes lists those changes which you have done locally but which you have not yet added to the staging area. Staged Changes list those changes which you already have added to the staging area. You can drag and drop files from one area to the other. To commit the staged changes you write your commit message and press the Commit button which is highlighted in the following screenshot.

You can switch between different repositories or even restart Eclipse without losing a commit message and it allows incremental staging for changes.
You can open the Git Staging view via the Window => Show View => Other… Git => Git Staging menu.
6. Conclusion
In this article we saw how Eclipse provide an excellent interface for GIT integration. We discussed about the GIT repositories and various options available to create/update repositories. We discussed how to add a project to a repository and also discussed about the various views present in Eclipse for GIT for e.g. Staging and History view.
