MySQL Python Example
1. MySQL Python – Introduction
In this post, we feature a comprehensive Tutorial on integrating MySQL in a simple Python application based on Flask and execute basic CRUD operations with the same. MySQL is one of the most used SQL databases in many of the world-enterprise applications due to its ability to manage transactions and the ACID-behaviour which is built into its core. One of the reasons MySQL is so popular is due to the easiness it provides for its usage and its related commands. In the open source web application framework LAMP (which consist of Linux, Apache, MySQL, and PHP), MySQL server is a central & important component. The MySQL Database server is written using C and C++ which internally uses a lexical analyzer to parse and understand the SQL queries.
For this lesson, we need to have a complete MySQL Server installation so that we can run examples for the Python application we create. Please go through the MySQL Server Tutorial lesson to understand how installation can be done with some simple commands to get started with the MySQL operations in a Python application. We will be using a Virtual environment to install flask so that we don’t have to use it globally on our machine. Please note that to complete and follow along with this lesson, you must install the virtualenv and Flask on your machine.
Table Of Contents
2. Setting up Python application
In this section, we will start by setting up a simple Python application with important techniques to establish and close the connection with the server along with database connection pooling techniques which is very important to have in any production-grade application. In this lesson, we will make use of the virtual environment to use Flask in our application. Make sure that virtual environment is installed on your machine. We used the following command to install it via Python and PIP:
Install virtualenv
python -m pip install --user virtualenv
Now that virtualenv is installed on your machine, it is time we make a new virtualenv environment on our machine:
Make new virtual environment
python -m virtualenv jcg-python-mysql-app
Once a new Virtual environment is made as jcg-python-mysql-app, we will see the following output, describing that the virtual environment setup some things for us in advance which helps us to install more tools and softwares inside it:

We can now start using this virtual environment with the following command:
Activate virtual environment
source jcg-python-mysql-app/bin/activate
We can also deactivate a virtual environment once we are done with its use like this:
Deactivate virtual environment
deactivate
We will see the following cursor change to confirm that a virtual environment is active now:
Now, when our virtual environment is active, we will install Flask framework in it so that we can use it in our application:
Install Flask
pip install Flask
Finally, we will install MySQL driver for Flask with the following command so that we can integrate MySQL in our application as well:
Install MySQL driver for Flask
pip install flask-mysql
With this command, we are ready to start making our application for Flask and MySQL integration. As our application is pretty simple, we will make a new file with name mysql_app.py and put our complete code in that file itself. Even though we will make use of a Python framework known as Flask to make this application, we could have used any other framework with very similar working. Other frameworks can be Django etc. or we can make a standalone Python application as well which is not bound to any framework. But for now, to keep things simple, we will make use of Flask which allows us to keep things simple.
3. Making routes in Flask application
To start quickly for demonstration, we will add minor code in our application and run a set of commands which will start the flask application with a traditional “Hello World” message. If you want to quickly understand what a route is, just understand that a ‘route’ allows us to call a Python function with the help of a URL. When we deploy a Python application on our local machine, this URL points to our local web server we make use of. In our case, we will make use of Flask’s embedded web server which runs on Port 5000 by default. Here is the code we will be using in our application for a simple traditional message:
Hello World from Flask
from flask import Flask
app = Flask(__name__)

@app.route('/')
def hello_world():
    return 'Hello, Geeks!'
Once we save this code, we can run a set of commands to run the application. Here is what we need to run:
Run Flask application
export FLASK_APP=mysql_app.py
flask run
We will see the following output on terminal:
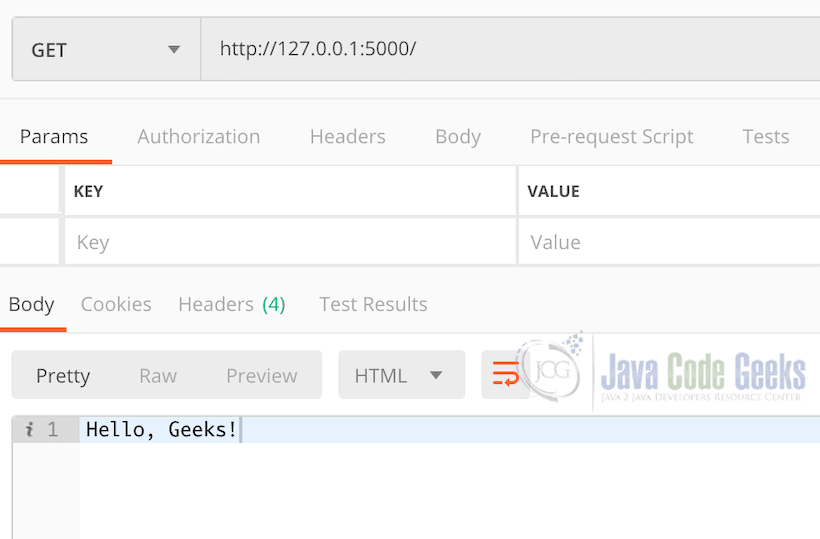
When we make use of a REST client like Postman to make the request to provided path, we will see the following output:
Now, we will add some routes for each of the CRUD operations we will performing in our Python application. These routes will look like:
Routes for CRUD operations
from flask import Flask, request
app = Flask(__name__)

@app.route('/hello')
def hello_world():
    return 'Hello, World!'

@app.route('/student', methods=['POST'])
def insert_student():
    new_student = request.get_json()
    return 'Insert Student data: %s' % new_student['name']

@app.route('/student/<int:student_id>', methods=['GET'])
def get_student(student_id):
    return 'Get Student data with ID: %s' % student_id

@app.route('/student', methods=['PUT'])
def update_student():
    updated_student = request.get_json()
    return 'Update Student data: %s' % updated_student['name']

@app.route('/student/<int:student_id>', methods=['DELETE'])
def delete_student(student_id):
    return 'Delete Student data with ID: %s' % student_id
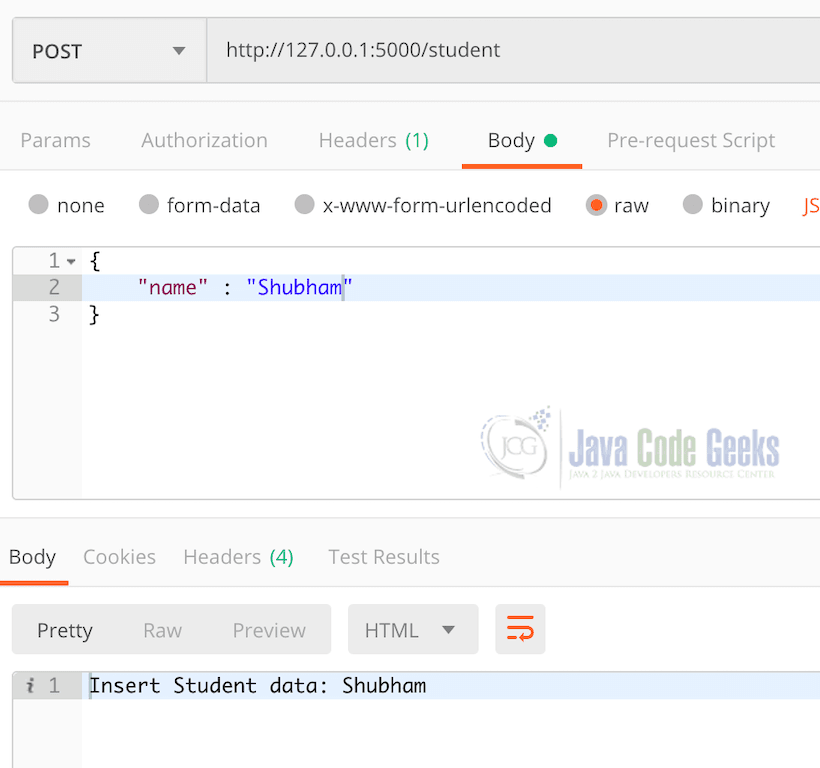
Once we run the above application again and try to get POST some JSON in the insert student route, we will see the following output in Postman app:
As this is not a Flask based lesson, we won’t dive into much detail about how we are accepting JSON data in above defined routes and how we access tge attributes which are passed in the request object as JSON data. This is a nice place to start a Flask application in a development mode because that allows us to quickly make changes to the application without having to restart your app again and again. Run the following command to activate the debugger and live reload in your Flask application:
Run Flask application in Development mode
export FLASK_APP=mysql_app.py FLASK_ENV=development
flask run
Once this is done, we are free to make any changes in our application without having to restart our app again and again. Let’s move forward to integrating some MySQL based dependencies in our application.
4. Adding MySQL dependencies and parameters
In the last section, we completed our setup of the basic Flask application in which we will integrate some MySQL related operations like saving and retrieving Student related data. Now, we need to define MySQL connection properties in our application with which we can establish a connection and execute MySQL properties with the connection. Here, we define those connection properties:
Define connection properties
from flask import Flask, request
from flaskext.mysql import MySQL

app = Flask(__name__)
mysql = MySQL()

app.config['MYSQL_DATABASE_USER'] = 'root'
app.config['MYSQL_DATABASE_PASSWORD'] = 'root'
app.config['MYSQL_DATABASE_DB'] = 'jcg_schema'
app.config['MYSQL_DATABASE_HOST'] = 'localhost'
mysql.init_app(app)
Now that we have defined the connection properties for MySQL connection with the jcg_schema in which we have a Table called Student. We can make this table with the following SQL command:
Make Student table
CREATE Table Student IF NOT EXISTS (
  id INT PRIMARY KEY AUTO_INCREMENT,
  name VARCHAR(100),
  roll_no INT NOT NULL
);
We could have integrated this SQL query to create a new Table in the application itself if we want because that way, we won’t have to be depend on an individual SQL query to create our table when the code for the app itself could have created that table for us when the app was run. We can now add the following line of code to make sure that the connection is made to MySQL:
Making connection to MySQL server
connection = mysql.connect()
Please note that as this is just a demonstration lesson and not a production-grade application, we do not manage the database connection pooling here. In any application, once we focus on database connection pooling for productionisation of our application, it makes a huge difference because database connections are expensive to make and keep.
5. Insert new records
Once the connection is made, we can define a simple function which will insert the provided JSON data into the Student table. Here is the definition for the said function:
Insert new student function
insert_sql_query = "INSERT INTO Student (`name`, `roll_no`) VALUES (%s, %s)"
data = (new_student['name'], new_student['roll_no'])
cursor = connection.cursor()
cursor.execute(insert_sql_query, data)
Note that we just pass a simple SQL query. Even though we have defined the query above, the data will still not be inserted into the database, at least not yet. For this to happen, we must commit the transaction:
Committing a Transaction
connection.commit()
If you do not commit the transaction, the insert query will be rolled-back once the current session with the application is terminated. This is not something we need in our apps, so always commit the transactions you do.
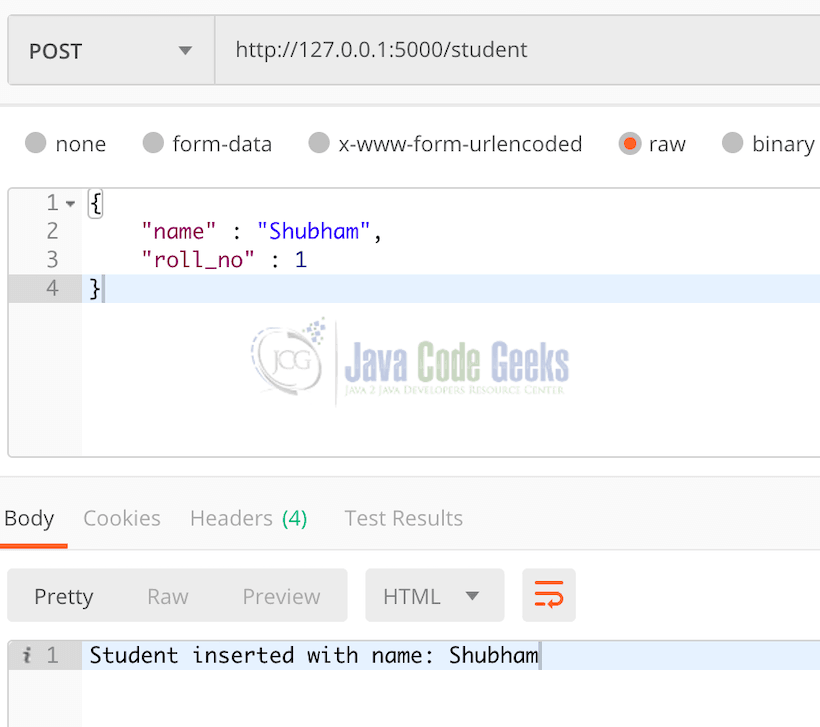
Let’s look at the POST Postman call we made to insert a new Student table:
Now that we have a Student in our Table, we can move to other operations as well. For now, the complete function for insert functionality will look like:
INSERT function
@app.route('/student', methods=['POST'])
def insert_student():
    new_student = request.get_json()
    insert_sql_query = "INSERT INTO Student (`name`, `roll_no`) VALUES (%s, %s)"
    data = (new_student['name'], new_student['roll_no'])
    cursor = connection.cursor()
    cursor.execute(insert_sql_query, data)
    connection.commit()
    return 'Student inserted with name: %s' % new_student['name']
We see that we are not setting the update and where values in the query directly because that is a security vulnerability we can avoid just by using Prepared statements. That is what we have done by defining a Tuple data which contains the actual values to be inserted. This is really important because, without this, the application can easily become a victim of SQL Injection attacks which must be avoided. If you are interested in exploring more, read Using SQL Injection Vulnerabilities to Dump Your Database for much more information and knowledge.
We were able to insert data into our table using the Python Flask application. Please note that we can perform any database operation just like what we did above, may it be a Delete or Update operation. We can even use a UI Framework which binds to Flask which will help us to view all the data we have in our table into a nice UI view but for now, we will stick to an API based calls to operate on the queries we define.
6. Display data from MySQL
Now that we have some data in our table, we can display the same by making a GET call on the app route we defined to get a student with a specific ID. Please note that IDs are auto-generated because of the fact we defined them like that when we ran an SQL query to construct the Student table.
To show data from the database, we need to run a SELECT query for the data. Let us define the SELECT statement here:
SELECT statement
cursor = connection.cursor()
cursor.execute("SELECT * from Student WHERE id='" + student_id + "'")
Note that we have defined a cursor object to go over the data we fetch from the above query. We can run this command now:
Run SELECT command
student_data = cursor.fetchone()
if student_data is None:
  return "Wrong ID passed."
else:
  return jsonify(student_data)
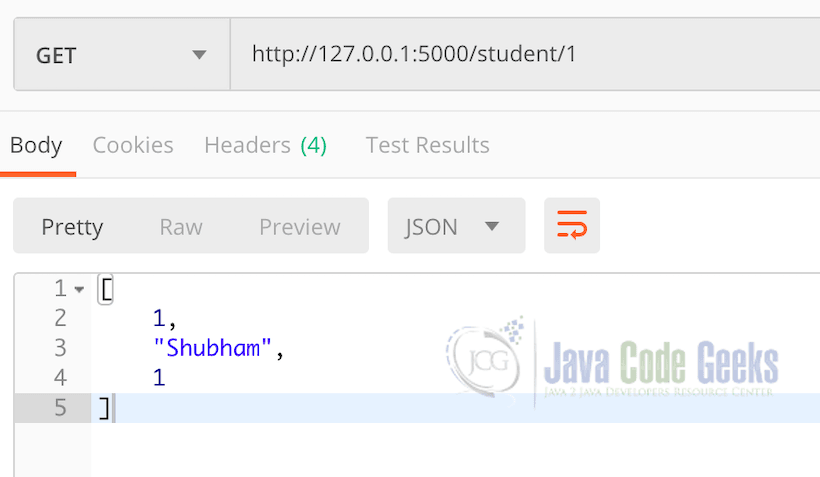
When we run the above command, we will get back the following JSON containing the data for the Student for which we passed the ID to the application route:
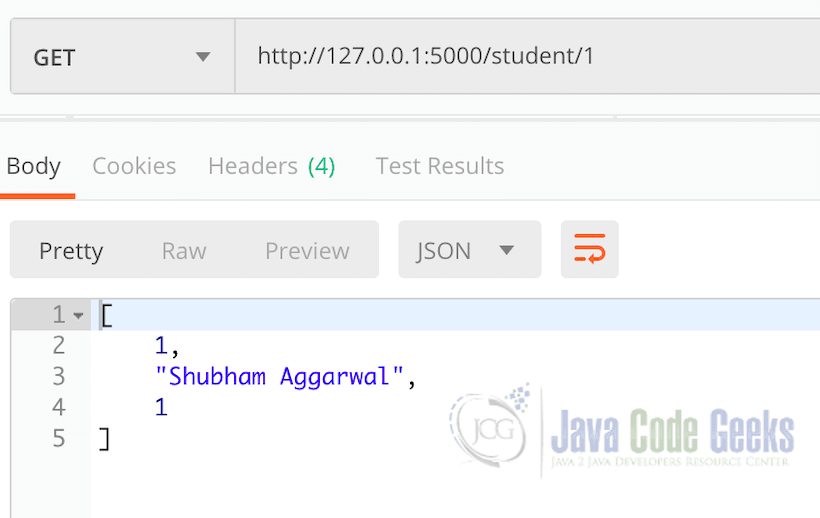
Note that we do not exactly get the JSON we expected in the form of key-value pair. Instead, we get back a cursor representation of the data which is in the form of an array itself where each item represents the value for a column and is ordered in manner we defined them in the table. The complete function for insert functionality will look like:
Complete SELECT command
@app.route('/student/<student_id>', methods=['GET'])
def get_student(student_id):
    cursor = connection.cursor()
    cursor.execute("SELECT * from Student WHERE id='" + student_id + "'")
    student_data = cursor.fetchone()
    if student_data is None:
     return "Wrong ID passed."
    else:
     return jsonify(student_data)
If you want to get back a more sophisticated JSON based result which correct key-value pair, feel free to explore some JSON based libraries for the same and mention them in the comments below.
7. Update existing records in MySQL
Now that there is some data present for our Student in the database, we can move to update an existing tuple in our table Student. This can be done by passing in the JSON containing data related to our Student. Let us define the function and query which will perform this, note that we also include the commit call to the connection object as well so that this query is executed and the data for the corresponding Student is updated:
Update a Student function
update_sql_query = "Update Student SET name=%s, roll_no=%s WHERE id=%s"
data = (updated_student['name'], updated_student['roll_no'], updated_student['id'])
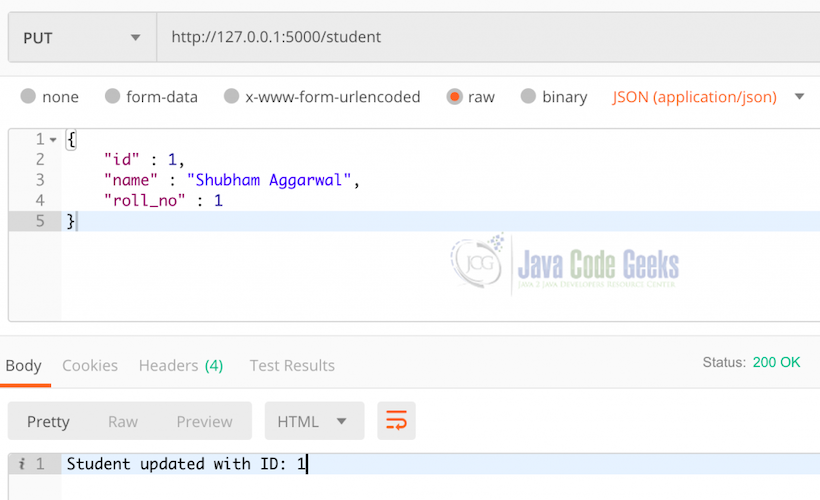
Let us execute the udpate call in Postman with the following data:
Now if we call the GET method for the same student, we will get the following output:
The complete function for insert functionality will look like:
Complete UPDATE command
@app.route('/student', methods=['PUT'])
def update_student():
    updated_student = request.get_json()
    update_sql_query = "Update Student SET name=%s, roll_no=%s WHERE id=%s"
    data = (updated_student['name'], updated_student['roll_no'], updated_student['id'])
    cursor = connection.cursor()
    cursor.execute(update_sql_query, data)
    connection.commit()
    return 'Student updated with ID: %s' % updated_student['id']
8. Delete data in MySQL
One of the most important operation in SQL is DELETE operation. This is what we will be demonstrating in this section by executing one of the DELETE statement in the application. We have defined a simple DELETE method which accepts an ID of a single student and now, we will define the helper method which will delete the student with the provided ID:
Delete a Student
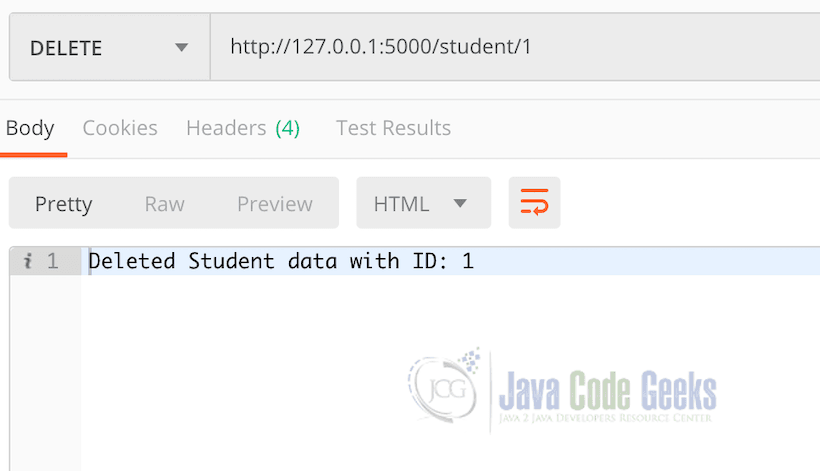
Once we run the delete method call, we will see the following output:
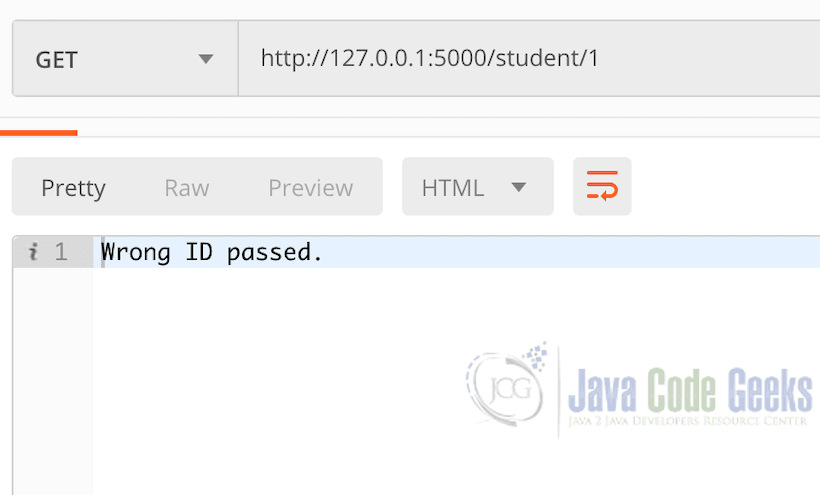
If we try to GET that same student again, we will see an error in Postman:
At this stage, our application is complete. Here is the final code for our only Python file we made for the complete working project:
Complete Code
from flask import Flask, request, jsonify
from flaskext.mysql import MySQL

app = Flask(__name__)
mysql = MySQL()

app.config['MYSQL_DATABASE_USER'] = 'root'
app.config['MYSQL_DATABASE_PASSWORD'] = 'root'
app.config['MYSQL_DATABASE_DB'] = 'jcg_schema'
app.config['MYSQL_DATABASE_HOST'] = 'localhost'
mysql.init_app(app)
connection = mysql.connect()

@app.route('/hello')
def hello_world():
    return 'Hello, World!'

@app.route('/student', methods=['POST'])
def insert_student():
    new_student = request.get_json()
    insert_sql_query = "INSERT INTO Student (`name`, `roll_no`) VALUES (%s, %s)"
    data = (new_student['name'], new_student['roll_no'])
    cursor = connection.cursor()
    cursor.execute(insert_sql_query, data)
    connection.commit()
    return 'Student inserted with name: %s' % new_student['name']

@app.route('/student/<student_id>', methods=['GET'])
def get_student(student_id):
    cursor = connection.cursor()
    cursor.execute("SELECT * from Student WHERE id='" + student_id + "'")
    student_data = cursor.fetchone()
    if student_data is None:
     return "Wrong ID passed."
    else:
     return jsonify(student_data)

@app.route('/student', methods=['PUT'])
def update_student():
    updated_student = request.get_json()
    update_sql_query = "Update Student SET name=%s, roll_no=%s WHERE id=%s"
    data = (updated_student['name'], updated_student['roll_no'], updated_student['id'])
    cursor = connection.cursor()
    cursor.execute(update_sql_query, data)
    connection.commit()
    return 'Student updated with ID: %s' % updated_student['id']

@app.route('/student/<int:student_id>', methods=['DELETE'])
def delete_student(student_id):
    cursor = connection.cursor()
    cursor.execute("DELETE FROM Student WHERE id=%s", (student_id,))
    connection.commit()
    return 'Deleted Student data with ID: %s' % student_id
The above code can be run by first setting up a virtual environment and installing all the packages we talked about in the beginning of this lesson. I highly recommend you to look at SQLAlachemy which provides us a way to use Model ORM mapping which is mostly used in a production-ready application.
9. Conclusion
In this lesson, we looked at a very simple yet effective example of setting up a connection to a MySQL server from a Python application. We started with important techniques to establish and close the connection with the server along with database connection pooling techniques which are very important to have in any production-grade application based on any framework and not just Python. We encourage you to study more about Python and MySQL to run more complex examples which involve Prepared statements and result sets. One of the more important things which can be done inside a Python application is calling stored procedures, define triggers and adding full-text search capabilities to the application.
MySQL Stored procedures are a very powerful tool with very high performance (usually) but the bad thing is that they can grow very large very easily and quickly once your application starts to grow. The main database consistency should be managed at the application level wherever and whenever possible. Still, MySQL Stored procedures make a very good companion if you are a database administrator and just want to make things consistent without relying on too much code because after all, the performance of Stored procedures is very high because database operations are very fast on the database server itself. Don’t forget to check the examples of using Java with SQL: JDBC Best Practices Tutorial and Java JDBC ResultSet Example. These lessons explain how to effectively use SQL commands with Java & JDBC drivers. There are many more examples present on MySQL which can be studied for a deeper understanding of the database. Finally, do read about some of the most popular MySQL functions which you will find interesting and useful in your daily life when you deal with MySQL. There are many more examples present on MySQL which can be studied for a deeper understanding of the database.
Finally, even though we made use of a Python framework known as Flask to make this application, you could have used any other framework with very similar working. Other frameworks can be Django etc. or you could have made a standalone Python application as well which is not bound to any framework. That is a decision which can be made easily for a learning. Please feel free to share your feedback for the lesson in the comments below.
10. Download the Source Code
This was an example of MySQL with Python programming language with Flask framework.
You can download the full source code of this example here: Python MySQL Example


