Mockito Maven Dependency Example
A unit test should test a class in isolation. Side effects from other classes or the system should be eliminated if possible. Mockito lets you write beautiful tests with a clean & simple API. In this example we will learn how to define Mockito dependency in maven and how to use it. Tools and technologies used in this example are Java 1.8, Eclipse Luna 4.4.2
1. Introduction
Mockito is a popular mocking framework which can be used in conjunction with JUnit. Mockito allows us to create and configure mock objects. Using Mockito simplifies the development of tests for classes with external dependencies significantly. We can create the mock objects manually or can use the mocking framewors like Mockito, EasyMock. jMock etc. Mock frameworks allow us to create mock objects at runtime and define their behavior. The classical example for a mock object is a data provider. In production a real database is used, but for testing a mock object simulates the database and ensures that the test conditions are always the same.
Apache Maven is a software project management and comprehension tool. Based on the concept of a project object model (POM), Maven can manage a project’s build, reporting and documentation from a central piece of information. When creating a project in Eclipse, one may use Maven to manage dependencies more easily and to resolve transitive dependencies automatically.
2. Creating a project
In this section we will see how Eclipse can help us create a simple maven project. Below are the steps we need to take to create the project.
- Open Eclipse. Go to File=>New=>Other. Type ‘Maven’ in the search wizard and choose ‘Maven Project’ under ‘Maven’ folder.
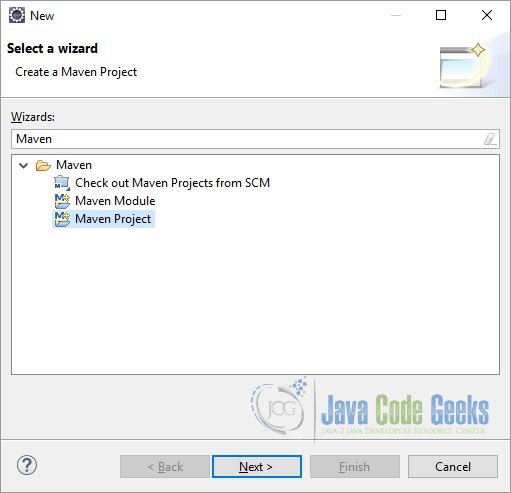
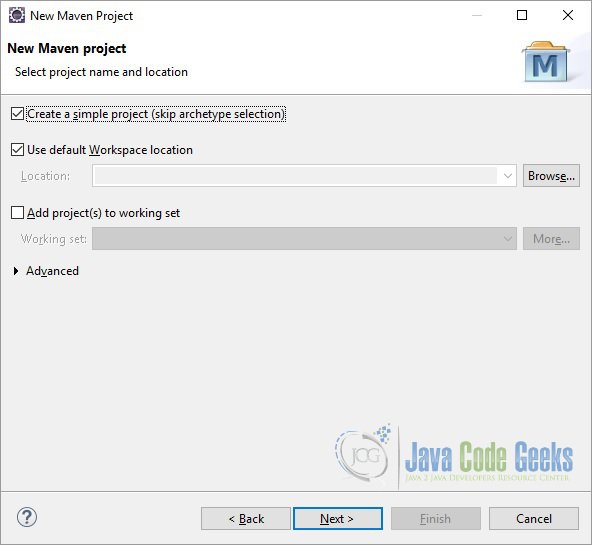
- Click ‘Next’. In the next section you need to select the project name and location. Tick the checkbox ‘Create a simple project (skip archetype selection)’. For the purposes of this tutorial, we will choose the simple project. This will create a basic, Maven-enabled Java project. If you require a more advanced setup, leave this setting unchecked, and you will be able to use more advanced Maven project setup features. Leave other options as is, and click ‘Next’.
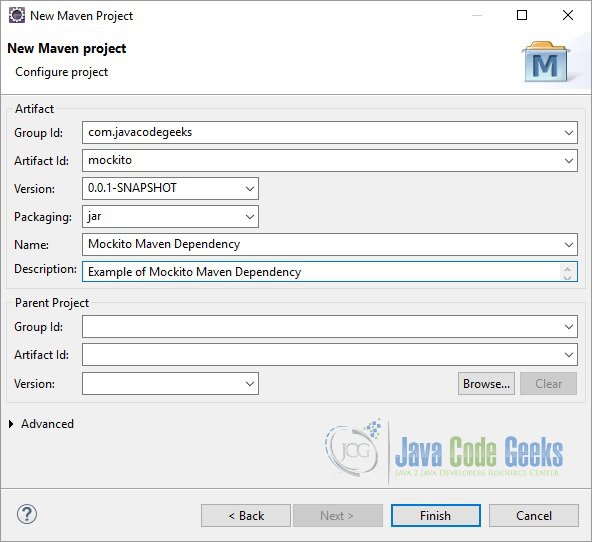
- Now, you will need to enter information regarding the Maven Project you are creating. You may visit the Maven documentation for a more in-depth look at the Maven Coordinates (Maven Coordinates). In general, the Group Id should correspond to your organization name, and the Artifact Id should correspond to the project’s name. The version is up to your discretion as is the packing and other fields. If this is a stand-alone project that does not have parent dependencies, you may leave the Parent Project section as is. Fill out the appropriate information, and click Finish.
- You will now notice that your project has been created. You will place your Java code in/src/main/java, resources in /src/main/resources, and your testing code and resources in /src/test/java and /src/test/resources respectively.
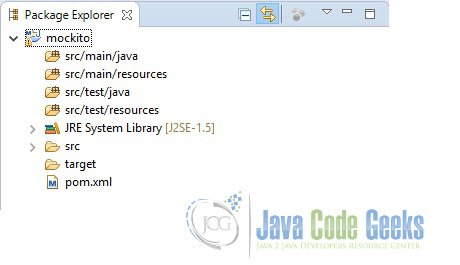
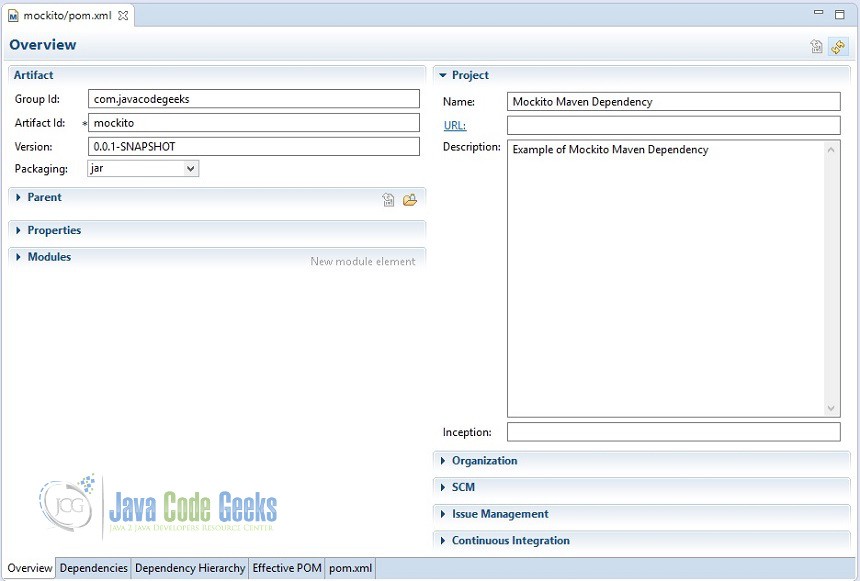
Open the pom.xml file to view the structure Maven has set up. In this file, you can see the information entered in the steps above. You may also use the tabs at the bottom of the window to change to view Dependencies, the Dependency Hierarchy, the Effective POM, and the raw xml code for the pom file in the pom.xml tab.
3. Adding dependencies
Dependencies can be added in two ways. Either directly specifying the dependencies in the pom.xml tab or using ‘Dependencies’ tab to add dependencies. We will use the later.
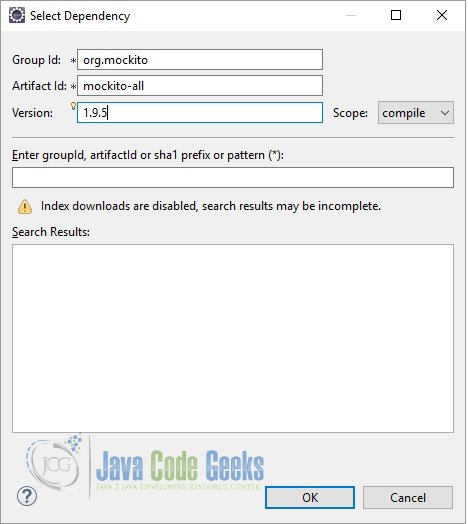
Open the pom.xml file and click on the ‘Dependencies’ tab. Click on the ‘Add…’ button. Eclipse will open a popup where you can define dependencies. Enter the details as below:
Group Id: org.mockito
Artifact Id: mockito-all
Version: 1.9.5
Click OK. Check the pom.xml file. Eclipse will add the below section:
<dependencies>
  <dependency>
    <groupId>org.mockito</groupId>
    <artifactId>mockito-all</artifactId>
    <version>1.9.5</version>
  </dependency>
</dependencies>
Repeat the same steps to add the JUnit dependency
Group Id: junit
Artifact Id: junit
Version: 4.12
Now our final pom will look like below:
<project xmlns="http://maven.apache.org/POM/4.0.0" xmlns:xsi="http://www.w3.org/2001/XMLSchema-instance" xsi:schemaLocation="http://maven.apache.org/POM/4.0.0 http://maven.apache.org/xsd/maven-4.0.0.xsd">
  <modelVersion>4.0.0</modelVersion>
  <groupId>com.javacodegeeks</groupId>
  <artifactId>mockito</artifactId>
  <version>0.0.1-SNAPSHOT</version>
  <name>Mockito Maven Dependency</name>
  <description>Example of Mockito Maven Dependency</description>
  <dependencies>
    <dependency>
      <groupId>org.mockito</groupId>
      <artifactId>mockito-all</artifactId>
      <version>1.9.5</version>
    </dependency>
    <dependency>
      <groupId>junit</groupId>
      <artifactId>junit</artifactId>
      <version>4.12</version>
    </dependency>
  </dependencies>
</project>
4. Testing
Now we will test if our maven project has been set up correctly or not. We will create a simple test class to test this.
MockitoExample.java
package mockito;

import java.util.List;

import org.junit.Test;

import static org.mockito.Mockito.*;
import static org.junit.Assert.*;

public class MockitoExample {

  @Test
  public void test() {
    List<String> mockList = mock(List.class);
    mockList.add("First");
    when(mockList.get(0)).thenReturn("Mockito");
    when(mockList.get(1)).thenReturn("JCG");
    assertEquals("Mockito", mockList.get(0));
    assertEquals("JCG", mockList.get(1));
  }
}
Run this class as JUnit test and it should run successfully. This will prove that your dependencies are setup correctly.
5. Download the source file
In this example we saw how to setup a maven dependency for Mockito using Eclipse
You can download the full source code of this example here: Mockito Maven Dependency

