JUnit Ant Example
1. Introduction
In this tutorial, I’ll be showing an example of how to run your test units in Apache Ant. It is entirely possible that one of the applications you might encounter in your experience as a developer to use Apache Ant. After all, it was the defacto standard for building Java/Java EE apps before so the possibility of you using this tool to run your builds and test is still high up the ceiling.
Before we dive in though, let me just give you an overview what Apache Ant is.
Apache Ant as stated on their site is a Java library and command-line tool whose mission is to drive processes described in build files as targets and extension points dependent upon each other. The main known usage of Ant is the build of Java applications. Ant supplies a number of built-in tasks allowing to compile, assemble, test and run Java applications. Ant can also be used effectively to build non Java applications, for instance C or C++ applications. More generally, Ant can be used to pilot any type of process which can be described in terms of targets and tasks.
This tool can be used to drive the entire building process of your Java applications by invoking tasks that corresponds to the build instructions given by the builder (which is sometimes the deployer or the developer).
Given that, we can use it to execute our JUnit Tests as well from our application along with the build.
2. Setup
2.1 Download Ant
Let’s start by downloading and setting your ANT library on your environment classpath. You can download ANT from here. You can download the binary distribution and put it somewhere in your environment tools or path.
2.2 Set it on your classpath
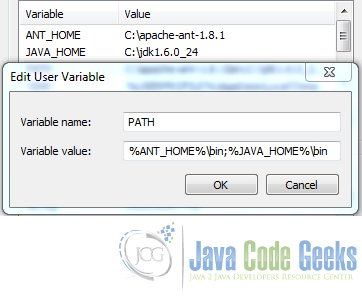
Next, we set it on your classpath. In windows, you simply put the “bin” folder on your “PATH”.
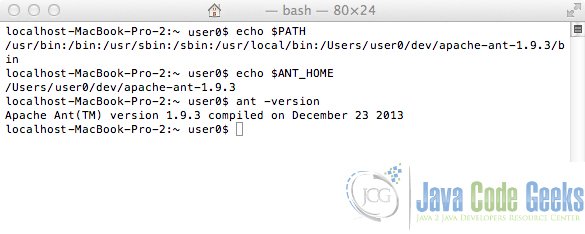
In MAC you can put it in your bash file.
3. Run your test cases
Ant has a built-in task called “junit” which can run your unit tests. Here is a simple example:
build.xml
<project name="junit-ant-example" default="unit-test-1" basedir=".">

	<property name="src" location="src" />
	<property name="build" location="build" />
	<property name="dist" location="dist" />

	<description>
    simple example build file
  </description>
	<target name="unit-test-1">
		<junit printsummary="yes" haltonfailure="yes">
			<classpath>
				<pathelement location="${project.class.path}" />
				<pathelement location="${build.tests}" />
				<pathelement path="${java.class.path}" />
			</classpath>
			<test name="com.areyes1.jgc.junit.assertequals.JUnitAssertEqualsExample" haltonfailure="no" outfile="result">
				<formatter type="plain" />
				<formatter type="xml" />
			</test>
		</junit>
	</target>
</project>
You’ll be able to run this via Eclipse or Command Line. In Eclipse you can right click on the build.xml > Run as > Ant build.. and select the unit-test-1 target. If you prefer to run it in the command line, you can call this:
ant -buildfile test.xml dist
4. Add on: Running Batch JUnit
You can also run a batch of JUnit Test via Ant. Here is an example ant XML for that.
build.xml
	<target name="unit-test-2-batch">
		<mkdir dir="${reports.tests}" />
		<junit printsummary="yes" haltonfailure="yes">
			<classpath>
				<pathelement location="${project.class.path}" />
				<pathelement location="${build.tests}" />
				<pathelement path="${java.class.path}" />
			</classpath>

			<formatter type="plain" />
			<formatter type="xml" />

			<batchtest fork="yes" todir="${reports.tests}">
				<fileset dir="${src.test}">
					<include name="**/*Test*.java" />
				</fileset>
			</batchtest>
		</junit>
	</target>
5. Download the Eclipse project
This was an example of JUnit Ant
You can download the full source code of this example here: junit-ant-example


