Hello. In this tutorial, we will understand Spy in Mockito. As stubbing is now obsolete I will focus @Spy annotation in this tutorial.
1. Introduction
Mockito is a popular framework used to mock the interfaces or classes so that dummy functionality can be added during the unit testing. It is a java based library that helps simplify the test-cases development by mocking the external dependencies. In this example, we will take a look at the Spy (i.e. @Spy) in Mockito.
- Annotation is used to spy on an existing instance
- Helps to partially mock an object
- Using spy on an object results in calling the real methods unless it is stubbed
In Mockito, sometimes engineers encounter NotAMockException which is most common in the case when one forgets to mock or spy on the object and tries to mock its method. E.g. the below code will throw the exception as when expects the mocked object to be passed.
Snippet
UserSrv objUndrTest = new UserSrv();
// UserSrv objUndrTest = Mockito.mock(UserSrv.class)
Mockito.when(objUndrTest.getUsers(Mockito.any())).thenReturn(Collections.emptyList());
2. Practice
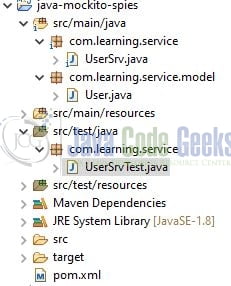
Let us dive into some practice stuff from here and I am assuming that you already have the Java 1.8 or greater installed on your local machine. I am using JetBrains IntelliJ IDEA as my preferred IDE. You’re free to choose the IDE of your choice. The below pictures shows the project structure.
2.1 Setting up the pom
Add the below code to the pom file where we will specify the dependencies required for this java project.
pom.xml
<project xmlns:xsi="http://www.w3.org/2001/XMLSchema-instance"
  xmlns="http://maven.apache.org/POM/4.0.0"
  xsi:schemaLocation="http://maven.apache.org/POM/4.0.0 https://maven.apache.org/xsd/maven-4.0.0.xsd">

  <artifactId>java-mockito-spies</artifactId>
  <dependencies>
    <!-- https://mvnrepository.com/artifact/org.mockito/mockito-junit-jupiter -->
    <dependency>
      <artifactId>mockito-junit-jupiter</artifactId>
      <groupId>org.mockito</groupId>
      <scope>test</scope>
      <version>4.5.1</version>
    </dependency>
    <!-- https://mvnrepository.com/artifact/org.mockito/mockito-core -->
    <dependency>
      <artifactId>mockito-core</artifactId>
      <groupId>org.mockito</groupId>
      <scope>test</scope>
      <version>4.5.1</version>
    </dependency>
  </dependencies>

  <description>Spies in mockito</description>

  <groupId>com.learning</groupId>
  <modelVersion>4.0.0</modelVersion>
  <name>Spies in mockito</name>

  <properties>
    <maven.compiler.source>8</maven.compiler.source>
    <maven.compiler.target>8</maven.compiler.target>
  </properties>

  <version>0.0.1-SNAPSHOT</version>
</project>
2.2 Creating the model class
Create a model class in the com.learning.service.model package under the src/main/java folder.
User.java
package com.learning.service.model;

import java.util.UUID;

public class User {

  final UUID id;
  final String fullName;

  public User(final UUID id, final String name) {
    this.id = id;
    this.fullName = name;
  }

  public UUID getId() {
    return id;
  }

  public String getFullName() {
    return fullName;
  }
}
2.3 Creating the setup
To understand and implement the execution of Spy we first need to create an implementation class in the com.learning.service package under the src/main/java folder. The below code helps to create a user list.
UserSrv.java
package com.learning.service;

import com.learning.service.model.User;
import java.util.ArrayList;
import java.util.List;
import java.util.UUID;

public class UserSrv {

  public List<User> getUsers(final boolean fetch) {
    final List<User> users = new ArrayList<>();
    if (fetch) {
      System.out.println("Populating list with elements");
      for (int i = 0; i < 10; i++) {
        users.add(new User(UUID.randomUUID(), "Some name_" + i));
      }
    }
    return users;
  }
}
2.4 Creating the test class
To understand the spy’s execution we will create a test class in the com.learning.service package under the src/test/java folder.
UserSrvTest.java
package com.learning.service;

import com.learning.service.model.User;
import java.util.List;
import org.junit.jupiter.api.Assertions;
import org.junit.jupiter.api.Test;
import org.junit.jupiter.api.extension.ExtendWith;
import org.mockito.Spy;
import org.mockito.junit.jupiter.MockitoExtension;

/*
@Spy annotation is used to spy on an existing resource. It helps to partially mock an object.
 */
@ExtendWith(MockitoExtension.class)
public class UserSrvTest {

  @Spy
  private UserSrv objUndrTest;

  @Test
  public void getUsersShouldReturnEmployeeListIfFetchIsTrue() {
    final List<User> response = objUndrTest.getUsers(true);
    Assertions.assertNotNull(response);
    Assertions.assertEquals(response.size(), 10);
  }

  @Test
  public void getUsersShouldReturnEmptyEmployeeListIfFetchIsFalse() {
    Assertions.assertEquals(objUndrTest.getUsers(false).size(), 0);
  }
}
Run the file as a java file under the JUnit framework and one can debug the execution of it. If everything goes well all the test cases should pass. As a general recommendation, there should be no or less logging while running the test cases and hence we are following the same.
That is all for this tutorial and I hope the article served you with whatever you were looking for. Happy Learning and do not forget to share!
3. Summary
In this tutorial, we discussed the practical implementation of Spy in Mockito. You can download the source code from the Downloads section.
4. Download the Project
This was a tutorial under Spy in the Mockito framework.
You can download the full source code of this example here: How to use Spies in Mockito
