In this article, we will provide you with a detailed guide on how to set up an upstream branch in Git, including step-by-step instructions and examples. Whether you’re a beginner or an experienced developer, this article will help you improve your workflow and collaborate more effectively with your team. So let’s get started!
1. Introduction
Git is a popular version control system used by developers to track changes in their codebase. It allows for collaboration and easy management of code repositories. When working with Git, it is common to work with a remote repository, which allows multiple developers to work on the same codebase.
One important concept in Git is the notion of an “upstream” branch. An upstream branch refers to the main branch of a repository, often called “master” or “main”. Setting an upstream branch in Git allows you to easily pull changes from the upstream branch, and push your changes to the upstream branch when ready. In this article, we will discuss how to set up an upstream branch on Git.
2. What is a Git Upstream Branch?
An upstream branch is a remote branch that you track in your local repository. This remote branch is usually the main branch of the repository, and is often called “master” or “main”. Tracking an upstream branch allows you to easily pull changes from the remote repository and push your changes to the remote repository when ready.
When you clone a repository, Git automatically sets up an upstream branch for you. This means that your local branch is tracking the remote branch, and you can easily push and pull changes between the two.
However, if you create a new branch in your local repository, you will need to set the upstream branch manually. This is important if you want to push changes from your local branch to the remote branch, or if you want to easily pull changes from the remote branch into your local branch.
3. How to set up a Git Upstream Branch
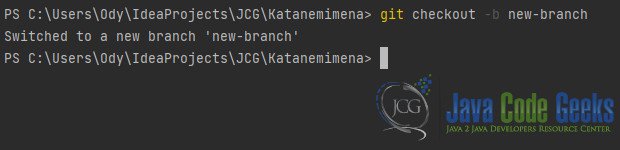
To set up an upstream branch, you first need to create a new branch in your local repository. You can do this using the following command:
$ git checkout -b <new-branch-name>
This command creates a new branch in your local repository and switches to that branch.
Next, you need to set the upstream branch for this new branch. You can do this using the following command:
$ git push --set-upstream origin <new-branch-name>
This command sets the upstream branch for the new branch to the remote branch with the same name. The “origin” keyword refers to the remote repository where the upstream branch is located.

Once you have set the upstream branch, you can push changes from your local branch to the remote branch using the following command:
$ git push
This command will push any changes you have made in your local branch to the remote upstream branch.
4. How to change the Git Upstream Branch
If you need to change the upstream branch for a local branch, you can do this using the following command:
$ git branch --set-upstream-to=<new-upstream-branch>
This command changes the upstream branch for the current branch to the new branch specified. You can then push changes to the new upstream branch using the git push command.

5. Conclusion
Setting an upstream branch in Git is an important concept to understand when working with a remote repository. By setting an upstream branch, you can easily pull changes from the remote repository and push your changes to the remote repository when ready. In this article, we have discussed how to set up an upstream branch in Git, and how to change the upstream branch if necessary. By understanding these concepts, you can more effectively manage your code repositories and collaborate with other developers.
