In most GUI frameworks, a Layout manager is used to place widgets on the screen, there are multiple kind of layouts with different laying out policies.
1. The tools
- Java JDK 8
- Latest Eclipse Mars
- Vaadin 7.6.6
- Tomcat Server 8
2. Introduction
The Vaadin custom layout uses HTML templates to lay out widgets on the screen, you can combine them to make the layout of your application. First you have to create the templates and inside your application you instantiate a CustomLayout class that points to the template.
3. Prerequisites
- JDK installed
- Eclipse Mars installed and working
- Vaadin plug-in installed
- Tomcat 8 installed and running
4. Set up the project
In the file menu choose File -> New -> Other
Now from the list choose Vaadin 7 project
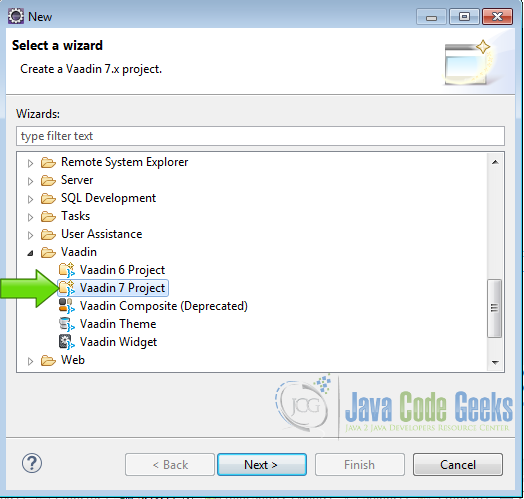
Hit next and name your project then hit finish.
5. Coding the example
In this example we have 4 HTML layouts to make our GUI.
5.1 Main Layout
Main Layout
<table width="100%" height="100%">
	<tr>
		<td><div location="top"></div></td>
	</tr>
	<tr>
		<td><div location="center"></div></td>
	</tr>
	<tr>
		<td><div location="bottom"></div></td>
	</tr>
</table>
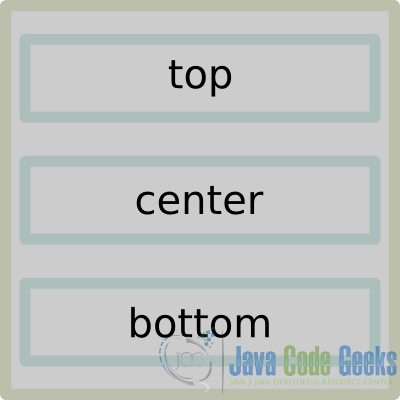
This layout is a table and has 3 rows, top, center and bottom and lays the components as shown in the image.
The location property is used for the layout manager to identify the container, where you are going to put the widget. So this layout has 3 containers top, center and bottom.
5.2 Center layout
In the center container of the main layout we are going to create another layout.
Center Layout
<table width="100%" height="100%">
	<tr>
		<td><div location="left"></div></td>
		<td><div location="center" class="center"></div></td>
		<td><div location="right"></div></td>
	</tr>
</table>
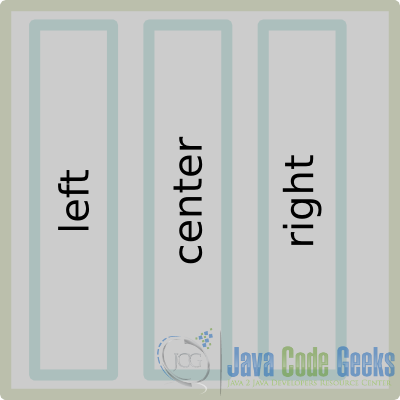
This layout has 3 columns left, center and right as shown in the picture, each column is a container of the same name. You can use your own styles in the templates, these styles can be defined in the application styles.
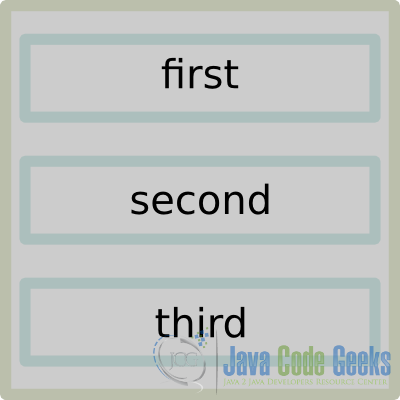
5.3 Left layout
We are going to create a menu on the left side of the screen, to simulate a menu bar.
Left layout
<table width="100%" height="100%">
	<tr>
		<td><div location="first"></div></td>
	</tr>
	<tr>
		<td><div location="second"></div></td>
	</tr>
	<tr>
		<td><div location="third"></div></td>
	</tr>
</table>
this layout hs 3 rows first, second and third.
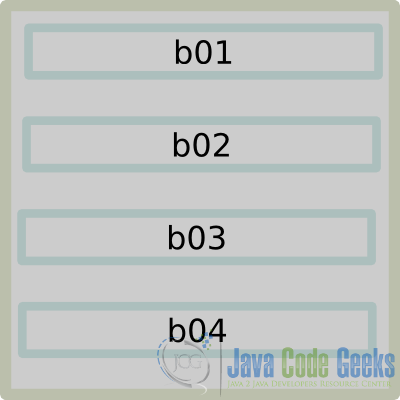
5.4 right layout
On the right side of the screen we are going to create another menu.
right layout
<table width="100%" height="100%">
	<tr>
		<td><div location="b01" align="right"></div></td>
	</tr>
	<tr>
		<td><div location="b02" align="right"></div></td>
	</tr>
	<tr>
		<td><div location="b03" align="right"></div></td>
	</tr>
	<tr>
		<td><div location="b04" align="right"></div></td>
	</tr>
</table>
This layout has 4 row containers b01, b02, b03 and b04.
Now we can see how to make a complex layout like the following image, just using simple layouts.

This composite layout is the layout of our application.
5.5 Create the layout
You have to create the templates and put inside the folder:
[Project name] -> WebContent -> VAADIN -> themes -> [Project Name] -> layouts
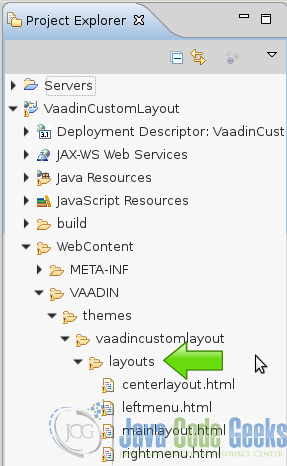
In this location Vaadin can see the layouts.
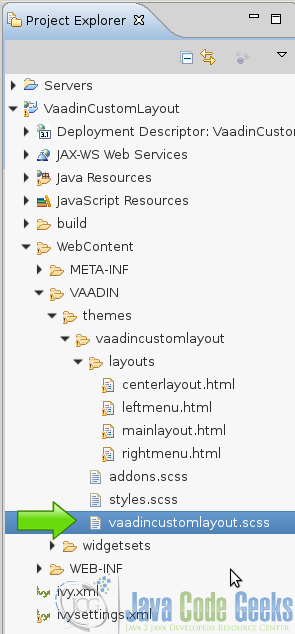
5.6 Styles
We create a custom styles to use in our application. The styles are stored into the folder:
[Project name] -> WebContent -> VAADIN -> themes -> [Project Name]
Label style
	.v-label-mylabelstyle {
	    color: white;
	    text-align: center;
	    background-color: lightgrey;
	    border-color: white;
	    font-weight: bold;
	    font-size: 44px;
	}
A style for the labels used in the application.
Center label style
	.v-label-centerlabel {
	    color: white;
	    text-align: center;
	    font-weight: bold;
	    font-size: 44px;
	}
The center label has a different style.
Center container style
	.center{
		background-color: lightblue;
		width: 300px;
		height: 250px;
	}
A style for the center container.
5.7 Init Vaadin method
Main layout
		CustomLayout layout = new CustomLayout("mainlayout");
		setContent(layout);
We create the main layout with CustomLayout layout = new CustomLayout("mainlayout"); and set the main content of the Vaadin application to the layout with setContent(layout);
Center label
		Label centerLabel = new Label("Center");
		centerLabel.addStyleName("centerlabel");
Create a label with Label centerLabel = new Label("Center"); and add a custom style created before. This label is going to be in the center of the screen and is used to feedback the button pressed.
Left buttons click listener
		Button.ClickListener leftListener = new Button.ClickListener() {

			@Override
			public void buttonClick(ClickEvent event) {

				centerLabel.setValue(event.getButton().getCaption());

			}
		};
A click listener that captures the click event when a button from the left menu is clicked. When the button is clicked the caption of the button is copied in the label in the center of the screen.
Right buttons click listener
		Button.ClickListener rightListener = new Button.ClickListener() {

			@Override
			public void buttonClick(ClickEvent event) {

				String capt = event.getButton().getCaption();
				String val = "empty";

				if(capt.equals("B01")){
					val = "Right Button one";
				}

				if(capt.equals("B02")){
					val = "Right Button two";
				}

				if(capt.equals("B03")){
					val = "Right Button three";
				}

				if(capt.equals("B04")){
					val = "Right Button four";
				}

				centerLabel.setValue(val);

			}
		};
When a button of the right menu is clicked this listener first gets the caption and puts an appropriate message into the center label.
Left menu
		CustomLayout leftmenu = new CustomLayout("leftmenu");
		Button firstButton = new Button("First Button");
		firstButton.setWidth("200px");
		firstButton.addStyleName("primary");
		firstButton.addClickListener(leftListener);
		leftmenu.addComponent((Component) firstButton, "first");
		Button secondButton = new Button("Second Button");
		secondButton.setWidth("200px");
		secondButton.addStyleName("primary");
		secondButton.addClickListener(leftListener);
		leftmenu.addComponent((Component) secondButton, "second");
		Button thirdButton = new Button("Third Button");
		thirdButton.setWidth("200px");
		thirdButton.addStyleName("primary");
		thirdButton.addClickListener(leftListener);
		leftmenu.addComponent((Component) thirdButton, "third");
We create a custom layout using the HTML template leftmenu.html with CustomLayout leftmenu = new CustomLayout("leftmenu");, this look into the templates folder using the name and create the layout.
Button firstButton = new Button("First Button"); creates a button.
firstButton.setWidth("200px"); sets the width of the button.
firstButton.addStyleName("primary"); adds a predefined style to the button.
firstButton.addClickListener(leftListener); adds the listener to the button.
leftmenu.addComponent((Component) firstButton, "first"); adds the button to the layout using the first placeholder
Button secondButton = new Button("Second Button"); creates a button.
secondButton.setWidth("200px"); sets the width of the button.
secondButton.addStyleName("primary"); adds a style to the button.
secondButton.addClickListener(leftListener); adds the listener to the button.
leftmenu.addComponent((Component) secondButton, "second"); adds the button to the layout.
Button thirdButton = new Button("Third Button"); creatse the last button of the menu.
thirdButton.setWidth("200px"); sets the width of the button.
thirdButton.addStyleName("primary"); adds the style to the button.
thirdButton.addClickListener(leftListener); adds a listener to the button.
leftmenu.addComponent((Component) thirdButton, "third"); adds the button to the layout.
Right menu
		CustomLayout rightmenu = new CustomLayout("rightmenu");
		Button b01 = new Button("B01");
		b01.addStyleName("friendly");
		b01.addClickListener(rightListener);
		rightmenu.addComponent((Component) b01, "b01");
		Button b02 = new Button("B02");
		b02.addStyleName("friendly");
		b02.addClickListener(rightListener);
		rightmenu.addComponent((Component) b02, "b02");
		Button b03 = new Button("B03");
		b03.addStyleName("friendly");
		b03.addClickListener(rightListener);
		rightmenu.addComponent((Component) b03, "b03");
		Button b04 = new Button("B04");
		b04.addStyleName("friendly");
		b04.addClickListener(rightListener);
		rightmenu.addComponent((Component) b04, "b04");
Here we create the right menu.
CustomLayout rightmenu = new CustomLayout("rightmenu"); creates the custom layout using the template.
Button b01 = new Button("B01"); creates the first button of the menu.
b01.addStyleName("friendly"); adds a style to the button.
b01.addClickListener(rightListener); adds the listener to the button.
rightmenu.addComponent((Component) b01, "b01"); adds the button to the layout using the placeholder.
We do a similar procedure for each button.
java

		CustomLayout centerLayout = new CustomLayout("centerlayout");
		centerLayout.setSizeFull();
		centerLayout.addComponent(leftmenu, "left");
		centerLayout.addComponent(centerLabel, "center");
		centerLayout.addComponent(rightmenu, "right");
Here we create a center layout that has the right and left menus and the center label.
CustomLayout centerLayout = new CustomLayout("centerlayout"); creates the layout from the template.
centerLayout.setSizeFull(); sets the layout size to full.
centerLayout.addComponent(leftmenu, "left"); adds the left menu to the layout.
centerLayout.addComponent(centerLabel, "center"); adds the center label to the layout.
centerLayout.addComponent(rightmenu, "right"); adds the right menu to the layout.
Header and footer
		Label lHeader = new Label("Header");
		lHeader.addStyleName("mylabelstyle");
		lHeader.setSizeFull();
		Label lFooter = new Label("Footer");
		lFooter.addStyleName("mylabelstyle");
		lFooter.setSizeFull();
We create a label for the header and a label for the footer.
Label lHeader = new Label("Header"); creates a label for the header.
lHeader.addStyleName("mylabelstyle"); adds a custom style to the header label.
lHeader.setSizeFull(); sets the size of the label to full.
Label lFooter = new Label("Footer"); creates a label for the footer.
lFooter.addStyleName("mylabelstyle"); adds a style to the footer label.
lFooter.setSizeFull(); sets the size of the label to full.
Add the components to the layout
		layout.addComponent(lHeader, "top");
		layout.addComponent(centerLayout, "center");
		layout.addComponent(lFooter, "bottom");
Finally we add the components to the main layout.
layout.addComponent(lHeader, "top"); adds the header to the main layout.
layout.addComponent(centerLayout, "center"); adds the center layout to the main layout.
layout.addComponent(lFooter, "bottom"); adds the footer to the layout.
6. The complete source code
leftmenu.html
<table width="100%" height="100%">
	<tr>
		<td><div location="first"></div></td>
	</tr>
	<tr>
		<td><div location="second"></div></td>
	</tr>
	<tr>
		<td><div location="third"></div></td>
	</tr>
</table>
rightmenu.html
<table width="100%" height="100%">
	<tr>
		<td><div location="b01" align="right"></div></td>
	</tr>
	<tr>
		<td><div location="b02" align="right"></div></td>
	</tr>
	<tr>
		<td><div location="b03" align="right"></div></td>
	</tr>
	<tr>
		<td><div location="b04" align="right"></div></td>
	</tr>
</table>
centerlayout.html
<table width="100%" height="100%">
	<tr>
		<td><div location="left"></div></td>
		<td><div location="center" class="center"></div></td>
		<td><div location="right"></div></td>
	</tr>
</table>
mainlayout.html
<table width="100%" height="100%">
	<tr>
		<td><div location="top"></div></td>
	</tr>
	<tr>
		<td><div location="center"></div></td>
	</tr>
	<tr>
		<td><div location="bottom"></div></td>
	</tr>
</table>
vaadincustomlayout.scss
@import "../valo/valo.scss";

@mixin vaadincustomlayout {
  @include valo;

	.v-label-mylabelstyle {
	    color: white;
	    text-align: center;
	    background-color: lightgrey;
	    border-color: white;
	    font-weight: bold;
	    font-size: 44px;
	}
	.v-label-centerlabel {
	    color: white;
	    text-align: center;
	    font-weight: bold;
	    font-size: 44px;
	}
	.center{
		background-color: lightblue;
		width: 300px;
		height: 250px;
	}
}
VaadincustomlayoutUI.java
package com.example.vaadincustomlayout;

import javax.servlet.annotation.WebServlet;

import com.vaadin.annotations.Theme;
import com.vaadin.annotations.VaadinServletConfiguration;
import com.vaadin.server.VaadinRequest;
import com.vaadin.server.VaadinServlet;
import com.vaadin.ui.Button;
import com.vaadin.ui.Component;
import com.vaadin.ui.CustomLayout;
import com.vaadin.ui.Label;
import com.vaadin.ui.UI;
import com.vaadin.ui.Button.ClickEvent;

@SuppressWarnings("serial")
@Theme("vaadincustomlayout")
public class VaadincustomlayoutUI extends UI {

	@WebServlet(value = "/*", asyncSupported = true)
	@VaadinServletConfiguration(productionMode = false, ui = VaadincustomlayoutUI.class, widgetset = "com.example.vaadincustomlayout.widgetset.VaadincustomlayoutWidgetset")
	public static class Servlet extends VaadinServlet {
	}

	@Override
	protected void init(VaadinRequest request) {
		CustomLayout layout = new CustomLayout("mainlayout");
		setContent(layout);

		Label centerLabel = new Label("Center");
		centerLabel.addStyleName("centerlabel");

		Button.ClickListener leftListener = new Button.ClickListener() {

			@Override
			public void buttonClick(ClickEvent event) {

				centerLabel.setValue(event.getButton().getCaption());

			}
		};

		Button.ClickListener rightListener = new Button.ClickListener() {

			@Override
			public void buttonClick(ClickEvent event) {

				String capt = event.getButton().getCaption();
				String val = "empty";

				if(capt.equals("B01")){
					val = "Right Button one";
				}

				if(capt.equals("B02")){
					val = "Right Button two";
				}

				if(capt.equals("B03")){
					val = "Right Button three";
				}

				if(capt.equals("B04")){
					val = "Right Button four";
				}

				centerLabel.setValue(val);

			}
		};

		CustomLayout leftmenu = new CustomLayout("leftmenu");
		Button firstButton = new Button("First Button");
		firstButton.setWidth("200px");
		firstButton.addStyleName("primary");
		firstButton.addClickListener(leftListener);
		leftmenu.addComponent((Component) firstButton, "first");
		Button secondButton = new Button("Second Button");
		secondButton.setWidth("200px");
		secondButton.addStyleName("primary");
		secondButton.addClickListener(leftListener);
		leftmenu.addComponent((Component) secondButton, "second");
		Button thirdButton = new Button("Third Button");
		thirdButton.setWidth("200px");
		thirdButton.addStyleName("primary");
		thirdButton.addClickListener(leftListener);
		leftmenu.addComponent((Component) thirdButton, "third");

		CustomLayout rightmenu = new CustomLayout("rightmenu");
		Button b01 = new Button("B01");
		b01.addStyleName("friendly");
		b01.addClickListener(rightListener);
		rightmenu.addComponent((Component) b01, "b01");
		Button b02 = new Button("B02");
		b02.addStyleName("friendly");
		b02.addClickListener(rightListener);
		rightmenu.addComponent((Component) b02, "b02");
		Button b03 = new Button("B03");
		b03.addStyleName("friendly");
		b03.addClickListener(rightListener);
		rightmenu.addComponent((Component) b03, "b03");
		Button b04 = new Button("B04");
		b04.addStyleName("friendly");
		b04.addClickListener(rightListener);
		rightmenu.addComponent((Component) b04, "b04");

		CustomLayout centerLayout = new CustomLayout("centerlayout");
		centerLayout.setSizeFull();
		centerLayout.addComponent(leftmenu, "left");
		centerLayout.addComponent(centerLabel, "center");
		centerLayout.addComponent(rightmenu, "right");

		Label lHeader = new Label("Header");
		lHeader.addStyleName("mylabelstyle");
		lHeader.setSizeFull();
		Label lFooter = new Label("Footer");
		lFooter.addStyleName("mylabelstyle");
		lFooter.setSizeFull();

		layout.addComponent(lHeader, "top");
		layout.addComponent(centerLayout, "center");
		layout.addComponent(lFooter, "bottom");

	}

}
7. Running the example
Right click on the project folder and choose Run as -> Run on server choose Tomcat 8 server and hit finish.
8. Results
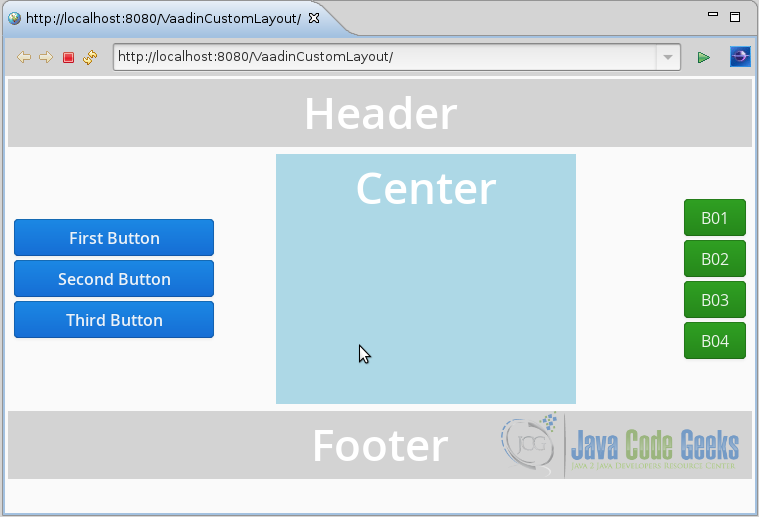
When we run the application, we get the intended composite layout and when we click on each button the feedback is shown in the center label.
9. Download the Source Code
This was an example of: Vaadin CustomLayout.
