Netbeans is a well known open source Java IDE, that supports development of all Java application types out of the box. It has an Ant-based project system and supports, Maven, refactoring, version control and has a lot of useful features to help you in your Java development.
1. The tools
- Java JDK 8
- Latest Netbeans
- Vaadin 7.6.6
- Tomcat Server 8
2. Introduction
You can create Vaadin projects in Netbeans using the plugin. In this example we are going to see how to download and install Netbeans, install the plugin, create a Vaadin project and run it on Tomcat.
3. Prerequisites
- JDK installed
3. Download NetBeans
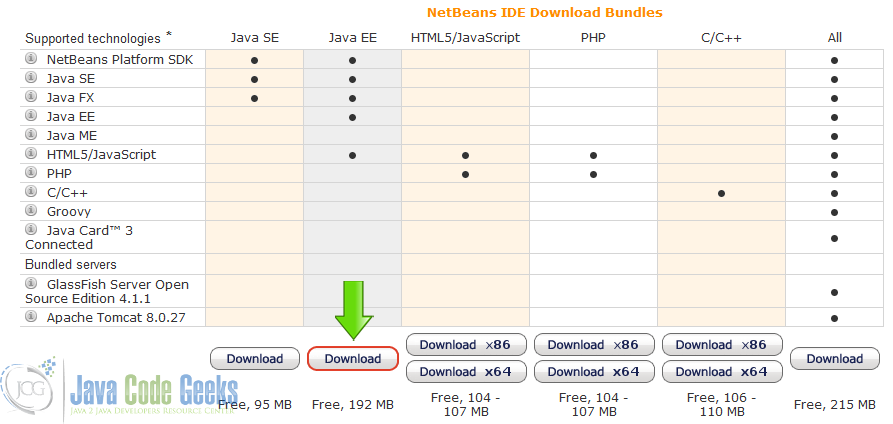
Open your browser and go to the page Download Netbeans and download the NetBeans Ide for JavaEE.
4. Install NetBeans
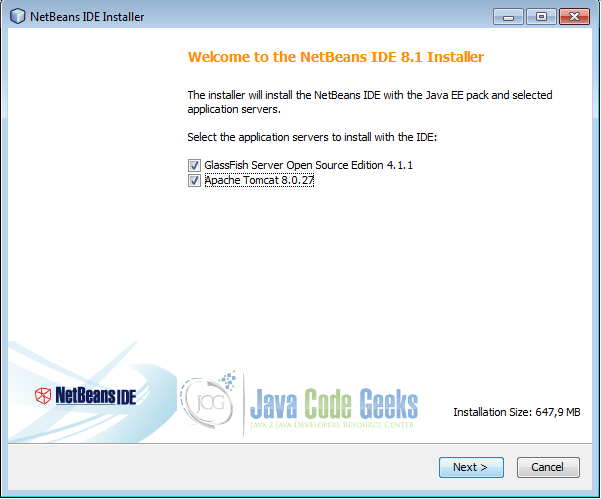
When the download is finished, double click on the file. Select the application servers to be installed and hit next.
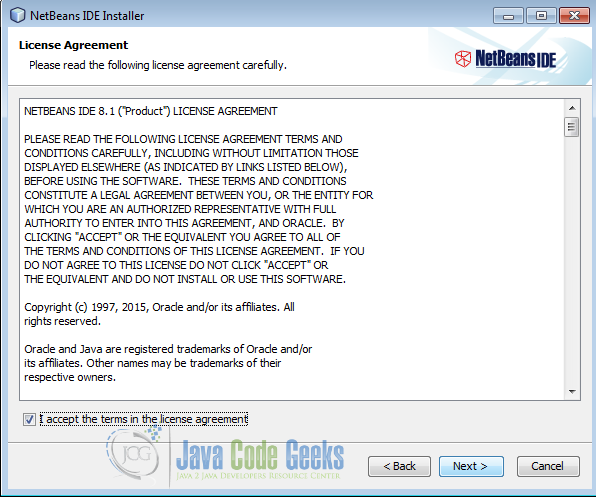
Accept the terms in the license.
Choose the destination directory and the JDK. Then press next.

Choose the directory for the GlassFish application server and press next.

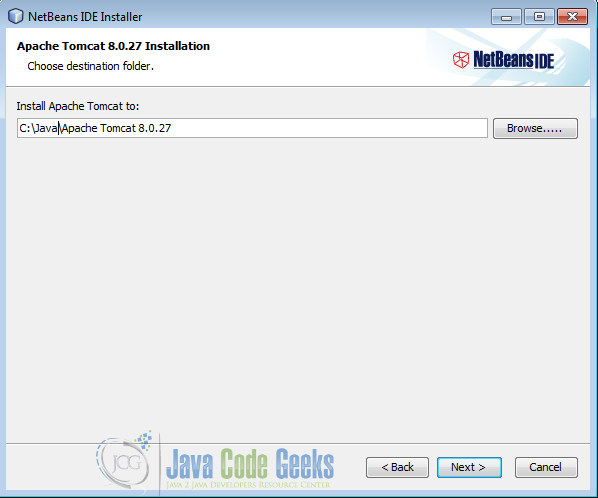
Choose the directory for the Tomcat server and then press next.
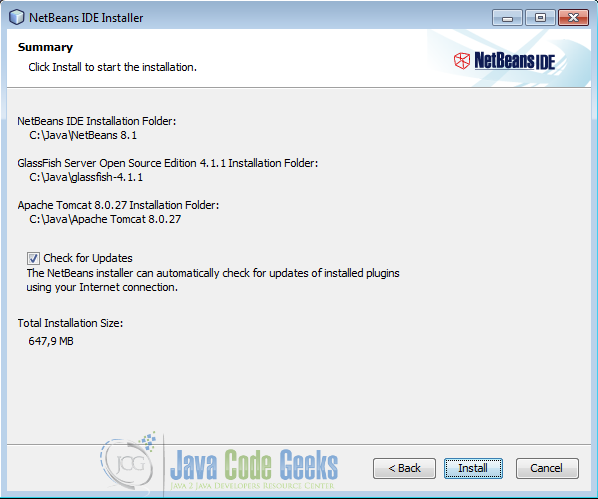
Review the settings and press install.
5. Install The Vaadin plugin
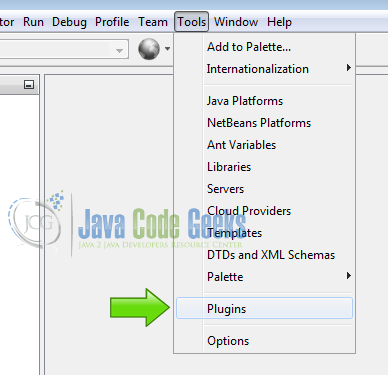
Start up NetBeans and from the menu Tools choose Plugins:
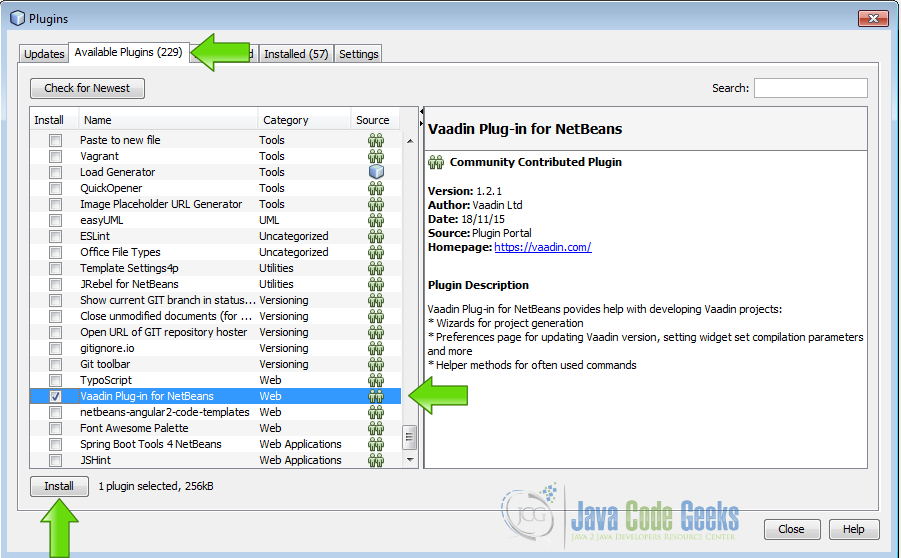
Select the available plugins tab. From the list choose Vaadin Plug-in for NetBeans and then press install.
Review the plugins to install and then press next.

Accept the terms of the license and press install.

Once the plugin is installed choose restart IDE now and press finish. In order to use the plugin we need to restart the IDE.

6. Check for updates
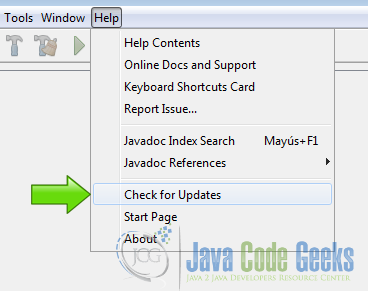
From the help menu choose “Check for Updates”
When the proccess is done press finish.

7. Create the Vaadin project
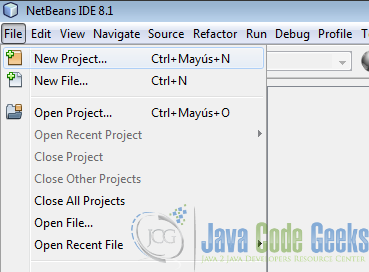
In the file menu choose New project.
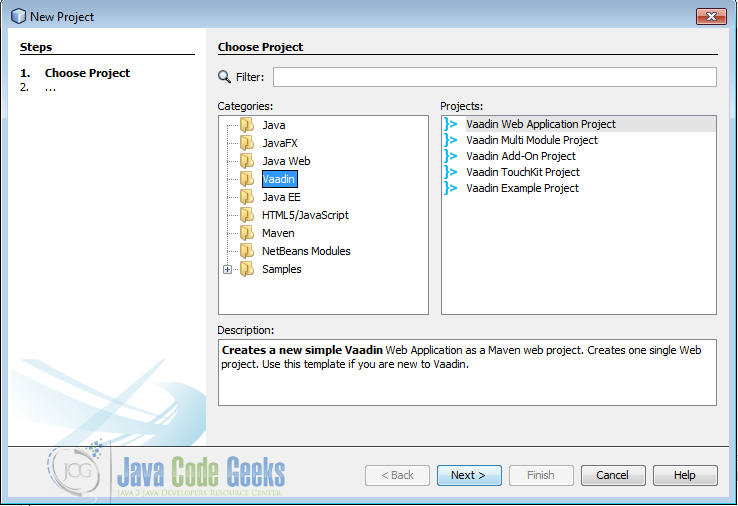
From the categories choose Vaadin and in projects choose “Vaadin Web Application project” and press the next button.
Write the name of the project and press finish.

Now NetBeans is going to use maven to download all needed dependencies.
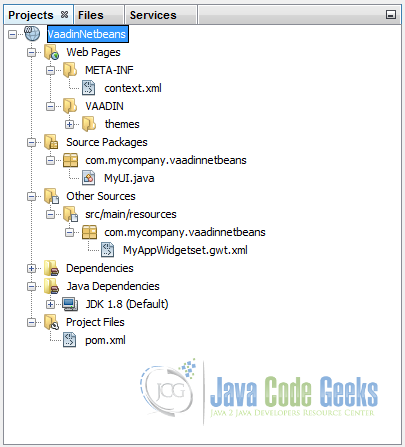
8. Review the created project
When NetBeans finish the project creation task, you should get a project structure like the following image:
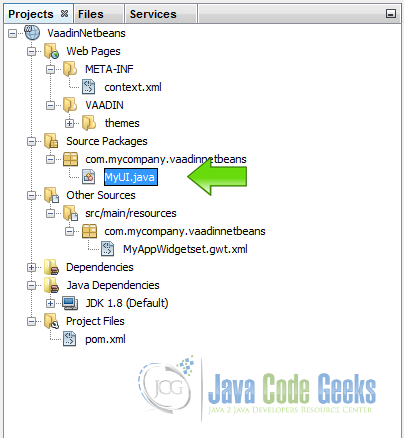
Open the file MyUI.java.
And you can see the code generated by NetBeans. Lets examine the init method
MyUI.java
public class MyUI extends UI {

    @Override
    protected void init(VaadinRequest vaadinRequest) {
        final VerticalLayout layout = new VerticalLayout();

        final TextField name = new TextField();
        name.setCaption("Type your name here:");

        Button button = new Button("Click Me");
        button.addClickListener( e -> {
            layout.addComponent(new Label("Thanks " + name.getValue() + ", it works!"));
        });

        layout.addComponents(name, button);
        layout.setMargin(true);
        layout.setSpacing(true);

        setContent(layout);
    }
}
final VerticalLayout layout = new VerticalLayout(); Creates a vertical layout.
final TextField name = new TextField(); Creates a text field.
name.setCaption("Type your name here:"); sets the caption of the text field.
Button button = new Button("Click Me"); creates a button.
button.addClickListener adds a click listener.
layout.addComponent(new Label("Thanks " + name.getValue() + ", it works!")); the click listener adds a label every time the button is clicked
layout.addComponents(name, button); adds the text field and the button to the layout.
layout.setMargin(true); sets the margin of the layout.
layout.setSpacing(true); sets the spacing of the layout.
setContent(layout); sets the vertical layout as a main layout.

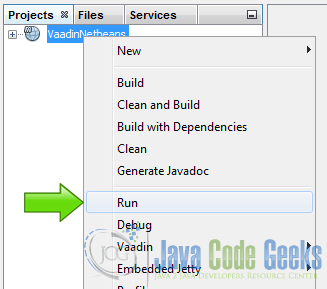
9. Run the application
Right click on the project and choose run
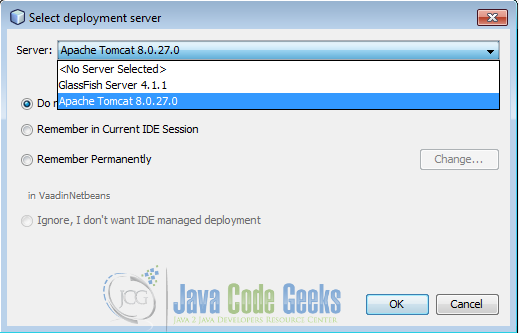
Choose the server and press OK.
The first time you run the project, NetBeans will compile the widgetset and you get an output log like the following.
NetBeans compile widgetset
   Adding '1' new generated units
      [WARN] Warnings in 'C:\devel\Java\JEE\VaadinNetbeans\target\.generated\com\vaadin\client\metadata\ConnectorBundleLoaderImpl.java'
         [WARN] Line 4342: Referencing deprecated class 'com.vaadin.shared.ui.progressindicator.ProgressIndicatorState'
         [WARN] Line 4345: Referencing deprecated class 'com.vaadin.shared.ui.progressindicator.ProgressIndicatorState'
         [WARN] Line 4348: Referencing deprecated class 'com.vaadin.shared.ui.progressindicator.ProgressIndicatorState'
   Computing all possible rebind results for 'com.vaadin.client.ui.dd.VAcceptCriterionFactory'
      Rebinding com.vaadin.client.ui.dd.VAcceptCriterionFactory
         Invoking generator com.vaadin.server.widgetsetutils.AcceptCriteriaFactoryGenerator
            Detecting available criteria ...
            creating mapping for com.vaadin.event.dd.acceptcriteria.AcceptAll
            creating mapping for com.vaadin.event.dd.acceptcriteria.And
            creating mapping for com.vaadin.event.dd.acceptcriteria.ContainsDataFlavor
            creating mapping for com.vaadin.event.dd.acceptcriteria.SourceIs
            creating mapping for com.vaadin.ui.AbstractSelect.TargetItemIs
            creating mapping for com.vaadin.ui.AbstractSelect.AcceptItem
            creating mapping for com.vaadin.ui.Table.TableDropCriterion
            creating mapping for com.vaadin.ui.Tree.TreeDropCriterion
            creating mapping for com.vaadin.event.dd.acceptcriteria.Not
            creating mapping for com.vaadin.event.dd.acceptcriteria.Or
            creating mapping for com.vaadin.event.dd.acceptcriteria.ServerSideCriterion
            creating mapping for com.vaadin.event.dd.acceptcriteria.SourceIsTarget
            creating mapping for com.vaadin.event.dd.acceptcriteria.TargetDetailIs
            creating mapping for com.vaadin.ui.Tree.TargetInSubtree
            Done. (0seconds)
   Compiling 1 permutation
      Compiling permutation 0...
   Compile of permutations succeeded
   Compilation succeeded -- 158,081s
Linking into C:\devel\Java\JEE\VaadinNetbeans\target\classes\VAADIN\widgetsets\com.mycompany.vaadinnetbeans.MyAppWidgetset
   Link succeeded
   Linking succeeded -- 0,889s
If your application compiles whitout errors you get the log.
Tomcat log
=================================================================
Vaadin is running in DEBUG MODE.
Add productionMode=true to web.xml to disable debug features.
To show debug window, add ?debug to your application URL.
=================================================================
10. The results
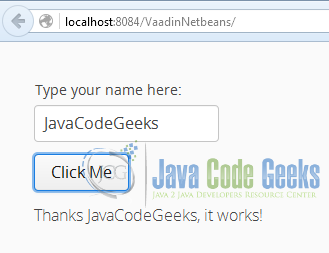
We get the text field with the caption, the button and it works as expected.
11. Complete source code
MyUI.java
package com.mycompany.vaadinnetbeans;

import javax.servlet.annotation.WebServlet;

import com.vaadin.annotations.Theme;
import com.vaadin.annotations.VaadinServletConfiguration;
import com.vaadin.annotations.Widgetset;
import com.vaadin.server.VaadinRequest;
import com.vaadin.server.VaadinServlet;
import com.vaadin.ui.Button;
import com.vaadin.ui.Label;
import com.vaadin.ui.TextField;
import com.vaadin.ui.UI;
import com.vaadin.ui.VerticalLayout;

/**
 * This UI is the application entry point. A UI may either represent a browser window
 * (or tab) or some part of a html page where a Vaadin application is embedded.
 *
* The UI is initialized using {@link #init(VaadinRequest)}. This method is intended to be * overridden to add component to the user interface and initialize non-component functionality. */ @Theme(“mytheme”) @Widgetset(“com.mycompany.vaadinnetbeans.MyAppWidgetset”) public class MyUI extends UI { @Override protected void init(VaadinRequest vaadinRequest) { final VerticalLayout layout = new VerticalLayout(); final TextField name = new TextField(); name.setCaption(“Type your name here:”); Button button = new Button(“Click Me”); button.addClickListener( e -> { layout.addComponent(new Label(“Thanks ” + name.getValue() + “, it works!”)); }); layout.addComponents(name, button); layout.setMargin(true); layout.setSpacing(true); setContent(layout); } @WebServlet(urlPatterns = “/*”, name = “MyUIServlet”, asyncSupported = true) @VaadinServletConfiguration(ui = MyUI.class, productionMode = false) public static class MyUIServlet extends VaadinServlet { } }
12. Download the Source Code
This was an example of: Using Vaadin in the NetBeans IDE.
