Welcome readers, in this tutorial, we will show how to implement the REST services to perform the SQL operations using the Spring MVC and Hibernate framework.
1. Introduction
Developers can refer to this link to briefly understand the Spring, Spring MVC, and Hibernate framework.
1.1 Download and Install Hibernate
Developers can read this tutorial in order to download and install Hibernate in the Eclipse IDE.
1.2 Download and Install MySQL
Developers can watch this video in order to download and install the MySQL database on your Windows operating system.
Now, open up the Eclipse IDE and let us see how to implement this tutorial.
2. Spring Rest Hibernate Example
Here is a systematic guide for implementing this tutorial in the Spring Mvc framework.
2.1 Tools Used
We are using Eclipse Kepler SR2, MySQL, JDK 8 and Maven. Having said that, we have tested the code against JDK 1.7 and it works well.
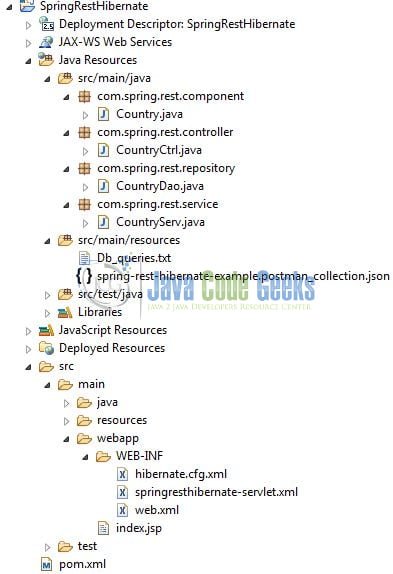
2.2 Project Structure
Firstly, let us review the final project structure, in case you are confused about where you should create the corresponding files or folder later!
2.3 Project Creation
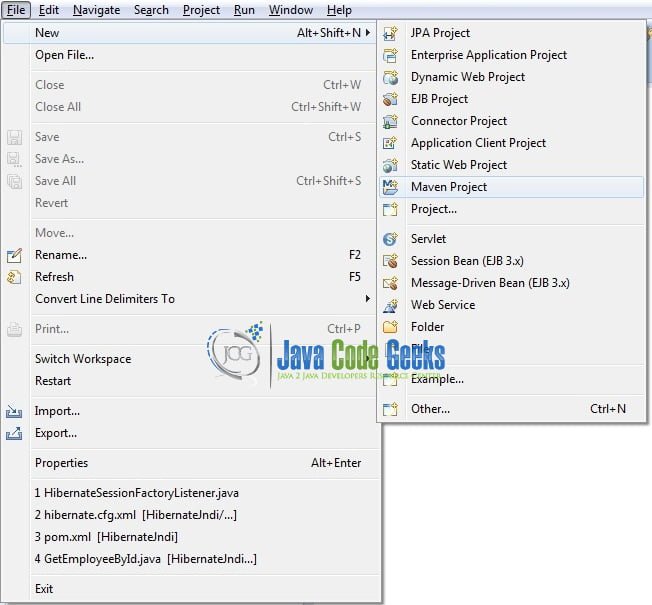
This section will demonstrate how to create a Java-based Maven project with Eclipse. In Eclipse IDE, go to File -> New -> Maven Project.
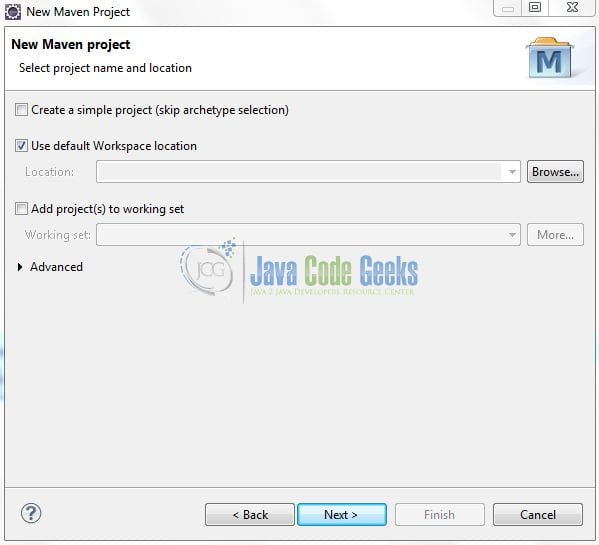
In the New Maven Project window, it will ask you to select project location. By default, ‘Use default workspace location’ will be selected. Just click on next button to proceed.
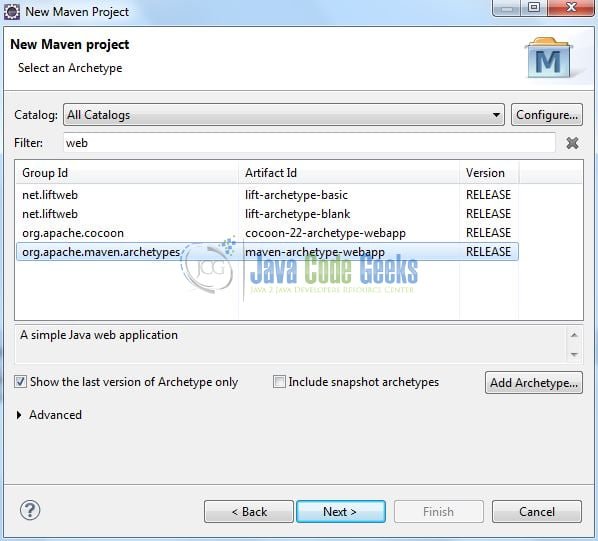
Select the Maven Web App archetype from the list of options and click next.
It will ask you to ‘Enter the group and the artifact id for the project’. We will input the details as shown in the below image. The version number will be by default: 0.0.1-SNAPSHOT.
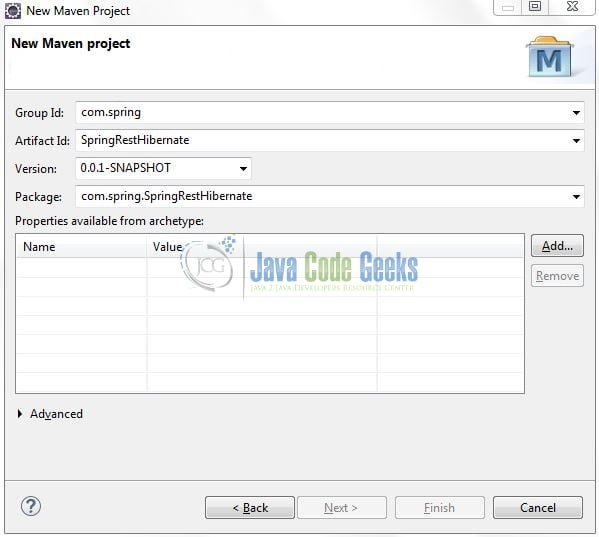
Click on Finish and the creation of a maven project is completed. If you observe, it has downloaded the maven dependencies and a pom.xml file will be created. It will have the following code:
pom.xml
<project xmlns="http://maven.apache.org/POM/4.0.0" xmlns:xsi="http://www.w3.org/2001/XMLSchema-instance" xsi:schemaLocation="http://maven.apache.org/POM/4.0.0 http://maven.apache.org/xsd/maven-4.0.0.xsd">
	<modelVersion>4.0.0</modelVersion>
	<groupId>com.spring.mvc</groupId>
	<artifactId>SpringRestHibernate</artifactId>
	<version>0.0.1-SNAPSHOT</version>
	<packaging>war</packaging>
</project>
We can start adding the dependencies that developers want like Servlet API, Spring Mvc, Hibernate, MySQL etc. Let us start building the application!
3. Application Building
Below are the steps involved in developing this application.
3.1 Database & Table Creation
The following MySQL script creates a database called springresthibernate with a table: Country_Tbl. Open MySQL terminal or workbench terminal and execute the SQL script.
Script
CREATE DATABASE springresthibernate;
CREATE TABLE Country_Tbl(
Country_id INT(11) PRIMARY KEY NOT NULL AUTO_INCREMENT,
Country_name VARCHAR(100) NOT NULL,
Country_population BIGINT(51) NOT NULL
);
INSERT INTO `springresthibernate`.`country_tbl`
(`country_id`, `country_name`, `country_population`)
VALUES (NULL, 'China', '1409'),
(NULL, 'India', '1339'),
(NULL, 'United States of America', '324'),
(NULL, 'Indonesia', '263'),
(NULL, 'Brazil', '208');
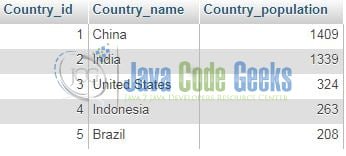
SELECT * FROM country_tbl;
If everything goes well, the table will be shown in the MySQL Workbench.
3.2 Maven Dependencies
Here, we specify the dependencies for the Spring Mvc and Hibernate framework, MySQL, and Jackson API. Maven will automatically resolve the rest dependencies such as Spring Beans, Spring Core, and Jackson Binding etc. The updated file will have the following code:
pom.xml
<project xmlns="http://maven.apache.org/POM/4.0.0" xmlns:xsi="http://www.w3.org/2001/XMLSchema-instance"
	xsi:schemaLocation="http://maven.apache.org/POM/4.0.0 http://maven.apache.org/maven-v4_0_0.xsd">
	<modelVersion>4.0.0</modelVersion>
	<groupId>com.spring</groupId>
	<artifactId>SpringRestHibernate</artifactId>
	<packaging>war</packaging>
	<version>0.0.1-SNAPSHOT</version>
	<name>SpringRestHibernate Maven Webapp</name>
	<url>http://maven.apache.org</url>
	<dependencies>
		<!-- spring dependency -->
		<dependency>
			<groupId>org.springframework</groupId>
			<artifactId>spring-webmvc</artifactId>
			<version>5.0.8.RELEASE</version>
		</dependency>
		<dependency>
			<groupId>org.springframework</groupId>
			<artifactId>spring-orm</artifactId>
			<version>5.0.8.RELEASE</version>
		</dependency>
		<!-- jstl dependency -->
		<dependency>
			<groupId>javax.servlet</groupId>
			<artifactId>jstl</artifactId>
			<version>1.2</version>
		</dependency>
		<!-- javax servlet api -->
		<dependency>
			<groupId>javax.servlet</groupId>
			<artifactId>servlet-api</artifactId>
			<version>3.0-alpha-1</version>
		</dependency>
		<!-- hibernate dependency -->
		<dependency>
			<groupId>org.hibernate</groupId>
			<artifactId>hibernate-core</artifactId>
			<version>5.3.6.Final</version>
		</dependency>
		<!-- mysql connector dependency -->
		<dependency>
			<groupId>mysql</groupId>
			<artifactId>mysql-connector-java</artifactId>
			<version>8.0.12</version>
		</dependency>
		<!-- https://mvnrepository.com/artifact/com.fasterxml.jackson.core/jackson-databind -->
		<dependency>
			<groupId>com.fasterxml.jackson.core</groupId>
			<artifactId>jackson-databind</artifactId>
			<version>2.9.6</version>
		</dependency>
	</dependencies>
	<build>
		<finalName>${project.artifactId}</finalName>
	</build>
</project>
3.3 Configuration Files
Let us write all the configuration files involved in this application.
3.3.1 Web Deployment Descriptor
The web.xml file declares one servlet (i.e. Dispatcher Servlet) to receive all kind of the requests. Dispatcher servlet here acts as a front controller. Add the following code to it:
web.xml
<?xml version="1.0" encoding="UTF-8"?>
<web-app version="2.5" xmlns="http://java.sun.com/xml/ns/javaee"
	xmlns:xsi="http://www.w3.org/2001/XMLSchema-instance"
	xsi:schemaLocation="http://java.sun.com/xml/ns/javaee http://java.sun.com/xml/ns/javaee/web-app_2_5.xsd">

	<display-name>SpringMvcRestHibernate</display-name>

	<servlet>
		<servlet-name>springresthibernate</servlet-name>
		<servlet-class>org.springframework.web.servlet.DispatcherServlet</servlet-class>
	</servlet>

	<servlet-mapping>
		<servlet-name>springresthibernate</servlet-name>
		<url-pattern>/</url-pattern>
	</servlet-mapping>

	<!-- Database configuration file -->
	<context-param>
		<param-name>contextConfigLocation</param-name>
		<param-value>/WEB-INF/hibernate.cfg.xml</param-value>
	</context-param>

	<listener>
		<listener-class>org.springframework.web.context.ContextLoaderListener</listener-class>
	</listener>
</web-app>
3.3.2 Spring Configuration File
To configure the spring framework, developers need to implement a bean configuration file i.e. springresthibernate-servlet.xml which provide an interface between the basic Java class and the outside world. Put this XML file in the SpringRestHibernate/src/main/webapp/WEB-INF folder and add the following code to it:
springresthibernate-servlet.xml
<?xml version="1.0" encoding="UTF-8"?>
<beans xmlns="http://www.springframework.org/schema/beans"
	xmlns:xsi="http://www.w3.org/2001/XMLSchema-instance" xmlns:context="http://www.springframework.org/schema/context"
	xmlns:mvc="http://www.springframework.org/schema/mvc"
	xsi:schemaLocation="
        http://www.springframework.org/schema/beans http://www.springframework.org/schema/beans/spring-beans.xsd
        http://www.springframework.org/schema/context http://www.springframework.org/schema/context/spring-context.xsd
        http://www.springframework.org/schema/mvc http://www.springframework.org/schema/mvc/spring-mvc.xsd">

	<context:annotation-config />

	<mvc:annotation-driven />

	<!-- For the Stereotype annotations to work -->
	<context:component-scan base-package="com.spring.rest.controller" />
	<context:component-scan base-package="com.spring.rest.service" />
	<context:component-scan base-package="com.spring.rest.repository" />
	<context:component-scan base-package="com.spring.rest.component" />
</beans>
3.3.3 Database Configuration File
To configure the database settings, we need to implement a bean configuration file i.e. hibernate.cfg.xml which provide the database connection and hibernate session factory details. Put this XML file in the SpringRestHibernate/src/main/webapp/WEB-INF folder and add the following code to it:
hibernate.cfg-servlet.xml
<?xml version="1.0" encoding="UTF-8"?>
<beans xmlns="http://www.springframework.org/schema/beans"
	xmlns:xsi="http://www.w3.org/2001/XMLSchema-instance" xmlns:tx="http://www.springframework.org/schema/tx"
	xsi:schemaLocation="http://www.springframework.org/schema/beans http://www.springframework.org/schema/beans/spring-beans.xsd
	http://www.springframework.org/schema/tx http://www.springframework.org/schema/tx/spring-tx-2.5.xsd">

	<!-- Database details -->
	<bean id="dbBean"
		class="org.springframework.jdbc.datasource.DriverManagerDataSource">
		<property name="driverClassName" value="com.mysql.cj.jdbc.Driver" />
		<property name="url"
			value="jdbc:mysql://localhost:3306/springresthibernate" />
		<property name="username" value="root" />
		<property name="password" value="" />
	</bean>

	<!-- Hibernate session factory -->
	<bean id="sfBean"
		class="org.springframework.orm.hibernate5.LocalSessionFactoryBean">
		<property name="dataSource" ref="dbBean" />
		<property name="annotatedClasses">
			<array>
				<value>com.spring.rest.component.Country</value>
			</array>
		</property>
		<property name="hibernateProperties">
			<props>
				<prop key="hibernate.dialect">org.hibernate.dialect.MySQL5Dialect</prop>
				<prop key="hibernate.hbm2ddl.auto">validate</prop>
				<prop key="hibernate.show_sql">true</prop>
			</props>
		</property>
	</bean>

	<bean id="template" class="org.springframework.orm.hibernate5.HibernateTemplate">
		<property name="sessionFactory" ref="sfBean" />
		<property name="checkWriteOperations" value="false" />
	</bean>
</beans>
3.4 Java Class Creation
Let us write the Java classes involved in this application.

3.4.1 Model Class
This pojo class defines the schema as per which the country data is stored in the MySQL database. Add the following code to it:
Country.java
package com.spring.rest.component;

import javax.persistence.Column;
import javax.persistence.Entity;
import javax.persistence.Id;
import javax.persistence.Table;

import org.springframework.stereotype.Component;

@Entity
@Table(name="Country_Tbl")
@Component
public class Country {

	@Id
	@Column(name="Country_id")
	private int cid;

	@Column(name="Country_name")
	private String cname;

	@Column(name="Country_population")
	private long cpopulation;

	public Country() { }

	public Country(int cid, String cname, long cpopulation) {
		this.cid = cid;
		this.cname = cname;
		this.cpopulation = cpopulation;
	}

	public int getCid() {
		return cid;
	}
	public void setCid(int cid) {
		this.cid = cid;
	}
	public String getCname() {
		return cname;
	}
	public void setCname(String cname) {
		this.cname = cname;
	}
	public long getCpopulation() {
		return cpopulation;
	}
	public void setCpopulation(long cpopulation) {
		this.cpopulation = cpopulation;
	}

	@Override
	public String toString() {
		return "Country [cid=" + cid + ", cname=" + cname + ", cpopulation=" + cpopulation + "]";
	}
}
3.4.2 DAO Class
This data-access-object class will execute the Hibernate SQL queries to perform the database operations and fetches the data stored in the MySQL database. Add the following code to it:
CountryDao.java
package com.spring.rest.repository;

import java.util.List;

import org.springframework.beans.factory.annotation.Autowired;
import org.springframework.orm.hibernate5.HibernateTemplate;
import org.springframework.stereotype.Repository;

import com.spring.rest.component.Country;

@Repository
public class CountryDao {

	@Autowired
	private HibernateTemplate template;

	public HibernateTemplate getTemplate() {
		return template;
	}

	public void setTemplate(HibernateTemplate template) {
		this.template = template;
	}

	// Get all countries from the database
	public List<Country> getAllCountries() {
		List<Country> countries = getTemplate().loadAll(Country.class);

		for(Country c : countries)
			System.out.println(c.toString());

		return countries;
	}

	// Get country by id from the database
	public Country getCountry(int id) {
		Country country = (Country) getTemplate().get(Country.class, new Integer(id));
		System.out.println(country.toString());
		return country;
	}
}
3.4.3 Service Class
This service class calls the implementation methods of the DAO layer class. Add the following code to it:
CountryServ.java
package com.spring.rest.service;

import java.util.List;

import org.springframework.beans.factory.annotation.Autowired;
import org.springframework.stereotype.Service;
import org.springframework.transaction.annotation.Transactional;

import com.spring.rest.component.Country;
import com.spring.rest.repository.CountryDao;

@Service
public class CountryServ {

	@Autowired
	private CountryDao cdao;

	public List<Country> getAllCountries() {
		return cdao.getAllCountries();
	}

	@Transactional
	public Country getCountry(int id) {
		return cdao.getCountry(id);
	}
}
3.4.4 Controller Class
This controller class consists of the request mapping methods that interacts with the MySQL database to perform the SQL operations. Always remember:
- Whenever the application requests a resource as JSON with
headers="Accept=application/json", then the JSON Message Converter plays a crucial role and convert the resource to the JSON format
Add the following code to it:
CountryCtrl.java
package com.spring.rest.controller;

import java.util.List;

import org.springframework.beans.factory.annotation.Autowired;
import org.springframework.web.bind.annotation.PathVariable;
import org.springframework.web.bind.annotation.RequestMapping;
import org.springframework.web.bind.annotation.RequestMethod;
import org.springframework.web.bind.annotation.RestController;

import com.spring.rest.component.Country;
import com.spring.rest.service.CountryServ;

@RestController
public class CountryCtrl {

	@Autowired
	private CountryServ cservice;

	// Get all countries
	@RequestMapping(value="/getCountries", method=RequestMethod.GET, headers="Accept=application/json")
	public List<Country> getCountries() {
		List<Country> list = cservice.getAllCountries();
		return list;
	}

	// Get a country by id
	@RequestMapping(value="/getCountry/{id}", method=RequestMethod.GET, headers="Accept=application/json")
	public Country getCountryById(@PathVariable(name="id") int id) {
		return cservice.getCountry(id);
	}
}
4. Run the Application
As we are ready with all the changes, let us compile the project and deploy the application on the Tomcat7 server. To deploy the application on Tomat7, right-click on the project and navigate to Run as -> Run on Server.
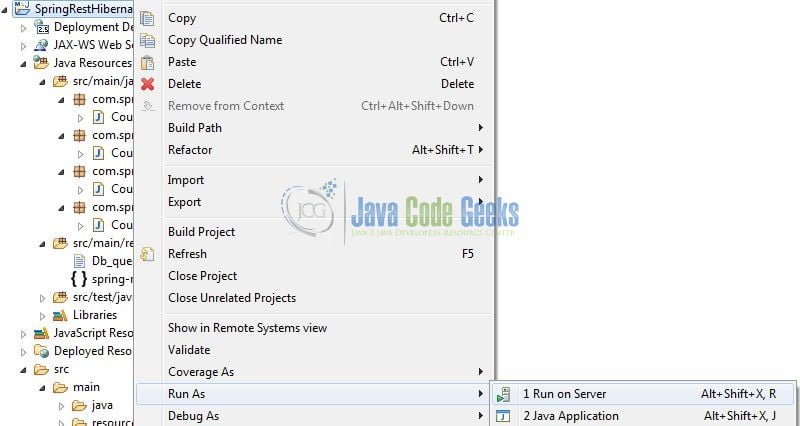
Tomcat will deploy the application in its web-apps folder and shall start its execution to deploy the project so that we can go ahead and test it on the browser.
5. Project Demo
We will test this sample application using a GUI based client. Launch the Postman tool and hit the different URL’s to fetch the data from the database and display the results in the JSON format.
5.1 Get all Countries
The HTTP Get method fetches the resources. Hit the following URL in the Postman tool to display the list of countries in the JSON format.
http://localhost:8088/SpringRestHibernate/getCountries
Output
[
    {
        "cid": 1,
        "cname": "China",
        "cpopulation": 1409
    },
    {
        "cid": 2,
        "cname": "India",
        "cpopulation": 1339
    },
    {
        "cid": 3,
        "cname": "United States",
        "cpopulation": 324
    },
    {
        "cid": 4,
        "cname": "Indonesia",
        "cpopulation": 263
    },
    {
        "cid": 5,
        "cname": "Brazil",
        "cpopulation": 208
    }
]
5.2 Get Country by Id
The HTTP Get method fetches the resources. Hit the following URL in the Postman tool to display the details of a particular country in the JSON format.
http://localhost:8088/SpringRestHibernate/getCountry/3
In here, the numeric 3 refers to the ‘country id’, which will be fetched from the database.
Output
{
    "cid": 3,
    "cname": "United States",
    "cpopulation": 324
}
Do note, server name (localhost) and port (8088) may vary as per your tomcat configuration. That is all for this tutorial and I hope the article served you whatever you were looking for. Happy Learning and do not forget to share!
6. Conclusion
In this section, developers learned how to implement the REST services in the spring and hibernate framework. Developers can download the sample application as an Eclipse project in the Downloads section.
7. Download the Eclipse Project
This was an example of Spring with Hibernate and Rest services.
You can download the full source code of this example here: SpringRestHibernate

Very good demo, I just have a few comments:
The hibernate configuration file in 3.3.3 is listed as hibernate.cfg-servlet.xml but should be hibernate.cfg.xml
The default port for tomcat is 8080 instead of 8088 (typo I guess)
And finally, I kept having an error, the first exception was about creating the sfBean, after a while I saw the very last exception in the corresponding stack trace: The server time zone value ‘AEST’ is unrecognized or represents more than one time zone. If someone gets that error just change line 12 of hibernate.cfg.xml to: value=”jdbc:mysql://localhost:3306/springresthibernate?useLegacyDatetimeCode=false&serverTimezone=UTC” />
Thanks for
I am using this example , all get method working fine. but issue in save where i am try to save country no such error occurred and data not save in database please suggest where i am wrong
*********Controller********
//Save a country
@RequestMapping(value=”/saveCountry”, method=RequestMethod.POST, headers=”Accept=application/json”)
public long savecountry(@RequestBody Country c) {
return cservice.saveCountry(c);
}
//Save new country
public long save(Country c){
System.out.println(“2->”+c.toString());
try{
System.out.println(getTemplate());
getTemplate().save(c);
}catch(DataAccessException ex){
System.out.println(ex.getMessage());
}
//System.out.println(“save successfully”);
return 455652145;
}