Spring provides the first-class support for sending emails. It comes with the utility libraries which abstracts away the complexities of the underlying mailing system and provides a simple API to use in the application for sending emails. In this tutorial, we will show how to write a simple Web application for sending an email based on the Spring MVC framework and the JavaMail API.
Table Of Contents
1. Introduction
1.1 Spring Framework
- Spring is an open-source framework created to address the complexity of an enterprise application development
- One of the chief advantages of the Spring framework is its layered architecture, which allows developer to be selective about which of its components they can use while providing a cohesive framework for
J2EEapplication development - Spring framework provides support and integration to various technologies for e.g.:
- Support for Transaction Management
- Support for interaction with the different databases
- Integration with the Object Relationship frameworks for e.g. Hibernate, iBatis etc
- Support for Dependency Injection which means all the required dependencies will be resolved with the help of containers
- Support for
RESTstyle web services
1.2 Spring MVC Framework
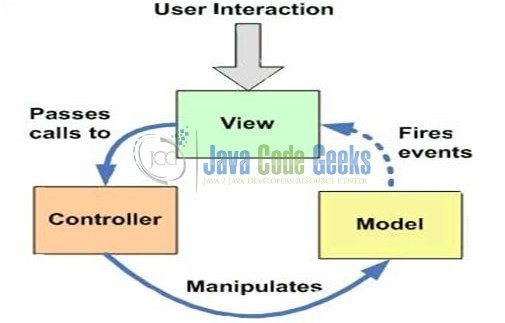
Model-View-Controller (MVC) is a well-known design pattern for designing the GUI based applications. It mainly decouples the business logic from UI by separating the roles of Model, View, and Controller in an application. This pattern divides the application into three components to separate the internal representation of the information from the way it is being presented to the user. The three components are:
- Model (M): Model’s responsibility is to manage the application’s data, business logic, and the business rules. It is a
POJOclass which encapsulates the application data given by the controller - View (V): A view is an output representation of the information, such as displaying information or reports to the user either as a text-form or as charts. Views are usually the
JSPtemplates written with Java Standard Tag Library (JSTL) - Controller (C): Controller’s responsibility is to invoke the Models to perform the business logic and then update the view based on the model’s output. In spring framework, the controller part is played by the Dispatcher Servlet
1.3 Spring Framework’s Support for Email
Spring Email support is built upon the JavaMail API which provides a high-level abstraction API for simplifying the email sending process. Let’s take a brief look at this API in the following class diagram.
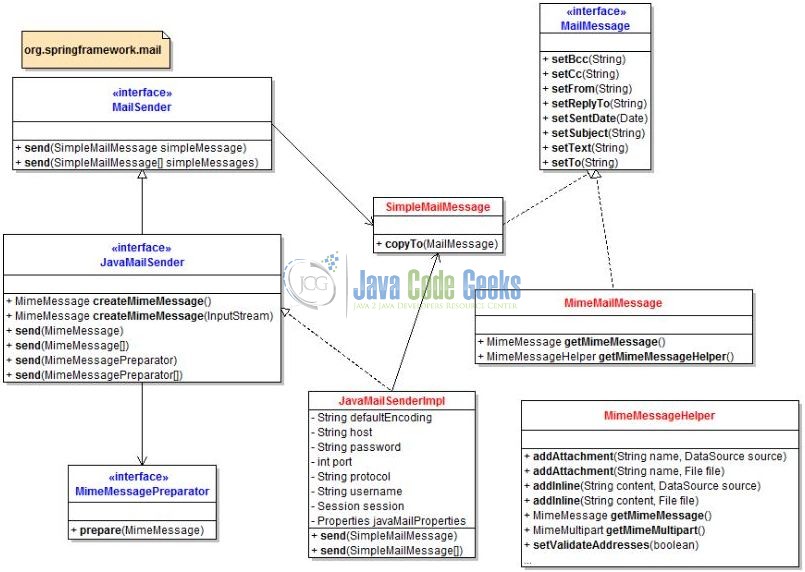
To send the email messages, developers can use the implementation of the MailSender interface. This interface has the JavaMailSenderImpl class which is built upon on the JavaMail API and if often convenient to configure this implementation as a bean in the spring’s context.
<bean id="mailSender" class="org.springframework.mail.javamail.JavaMailSenderImpl">
    <!-- SMTP settings -->
    <property name="host" value="SMTP_HOST" />
    <property name="port" value="SMTP_PORT" />
    <property name="username" value="USER_NAME" />
    <property name="password" value="PASSWORD" />

    <property name="javaMailProperties">
        <!-- additional properties specific to JavaMail -->
        <props>
            <prop key="mail.transport.protocol">smtp</prop>
            <prop key="mail.smtp.auth">true</prop>
            <prop key="mail.smtp.starttls.enable">true</prop>
        </props>
    </property>
</bean>
This spring’s bean holds the properties for the SMTP and the JavaMail that can be injected to a service class which needs to send an email. For e.g.:
mailSender.send(emailObj);
In this, the emailObj is an object of a type that implements the MailMessage interface (i.e. SimpleMailMessage class). Developers can construct the email object as follows:
SimpleMailMessage emailObj = new SimpleMailMessage();
emailObj.setTo(toAddress);
emailObj.setSubject(emailSubject);
emailObj.setText(emailBody);
That’s for a simple plain text email message. In case, if developers want to send an HTML email or attach files to an email, they can use the MimeMailMessage class with the help of MimeMessagePreparator and MimeMessageHelper classes. For e.g.:
mailSender.send(new MimeMessagePreparator() {
  public void prepare(MimeMessage mimeMessageObj) throws MessagingException {
    MimeMessageHelper messageObj = new MimeMessageHelper(mimeMessageObj, true, "UTF-8");
    messageObj.setFrom(fromEmail);
    messageObj.setTo(toEmail);
    messageObj.setSubject("Test File");
    messageObj.setText("See The Attached", true);
    messageObj.addAttachment("Template.doc", new File("Template.doc"));
  }
});
1.3.1 Spring JavaMail API
The following table summarizes the interfaces and classes provided in org.springframework.mail package for supporting the JavaMail API.
| No. | Description | |
|---|---|---|
| 1. | MailSender | It is the root interface which provides the basic functionality for sending simple emails. |
| 2. | JavaMailSender | It is the subinterface of the MailSender which supports MIME messages. Mostly used with the MimeMessageHelper class for the creation of JavaMail MimeMessage. The Spring framework recommends MimeMessagePreparator mechanism for using this interface. |
| 3. | JavaMailSenderImpl | It provides the implementation of JavaMailSender interface which supports JavaMail MimeMessage and Spring SimpleMailMessage. |
| 4. | SimpleMailMessage | It is used to create a simple email message including from, to, cc, subject and text messages. |
| 5. | MimeMessagePreparator | It is a callback interface for the preparation of JavaMail MimeMessage. |
| 6. | MimeMessageHelper | It is the helper class for creating a MimeMessage which offers support for the inline elements such as images, attachments and HTML text contents. |
Now, open up the Eclipse IDE and let’s see how to implement the code for sending emails in the spring framework!
2. Sending Email with Spring MVC Example
Here is a step by step guide for sending emails using the spring’s framework org.springframework.mail.javamail.JavaMailSender interface.
2.1 Tools Used
We are using Eclipse Kepler SR2, JDK 8 and Maven. Having said that, we have tested the code against JDK 1.7 and it works well.
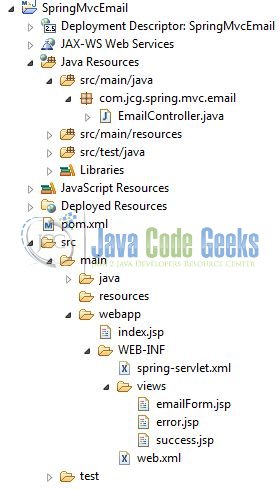
2.2 Project Structure
Firstly, let’s review the final project structure, in case you are confused about where you should create the corresponding files or folder later!
2.3 Project Creation
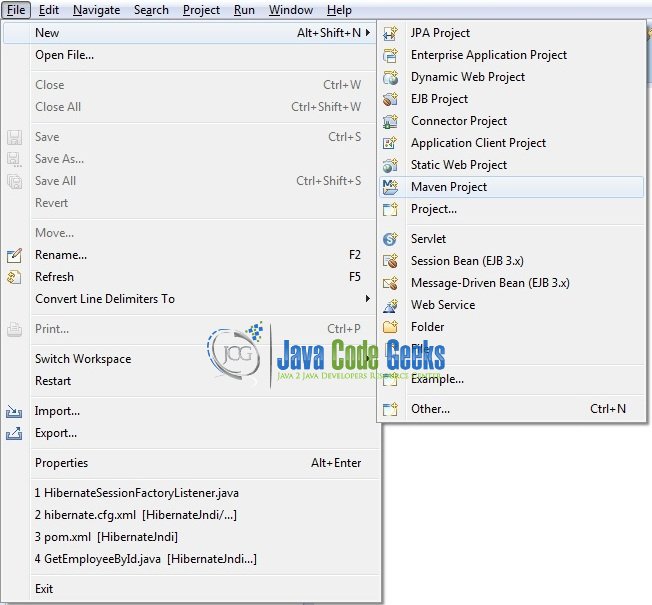
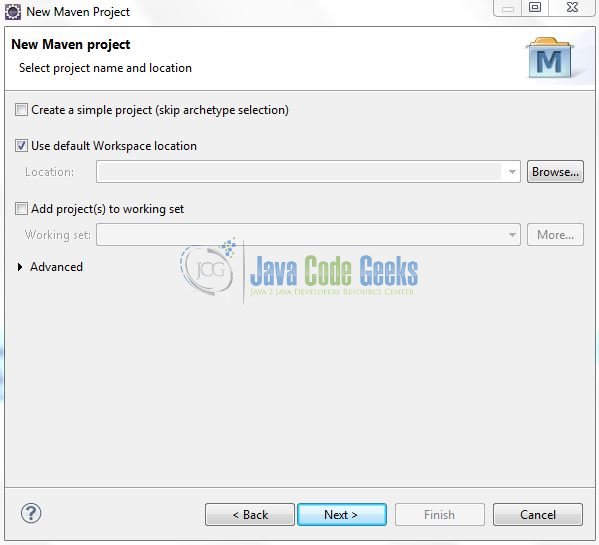
This section will demonstrate on how to create a Java based Maven project with Eclipse. In Eclipse IDE, go to File -> New -> Maven Project.
In the New Maven Project window, it will ask you to select project location. By default, ‘Use default workspace location’ will be selected. Just click on next button to proceed.
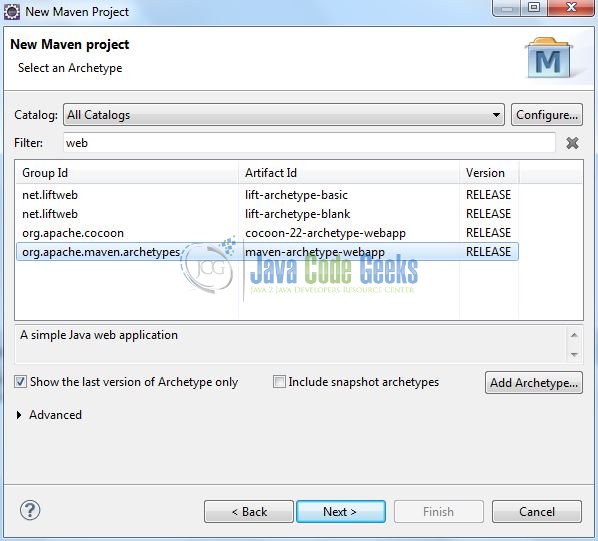
Select the Maven Web App Archetype from the list of options and click Next.
It will ask you to ‘Enter the group and the artifact id for the project’. We will input the details as shown in the below image. The version number will be by default: 0.0.1-SNAPSHOT.

Click on Finish and the creation of a maven project is completed. If you observe, it has downloaded the maven dependencies and a pom.xml file will be created. It will have the following code:
pom.xml
<project xmlns="http://maven.apache.org/POM/4.0.0" xmlns:xsi="http://www.w3.org/2001/XMLSchema-instance" xsi:schemaLocation="http://maven.apache.org/POM/4.0.0 http://maven.apache.org/xsd/maven-4.0.0.xsd">
	<modelVersion>4.0.0</modelVersion>
	<groupId>SpringMvcEmail</groupId>
	<artifactId>SpringMvcEmail</artifactId>
	<version>0.0.1-SNAPSHOT</version>
	<packaging>war</packaging>
</project>
We can start adding the dependencies that developers want like Spring MVC, Spring Email Support etc. Let’s start building the application!
3. Application Building
Below are the steps involved in developing this application.
3.1 Maven Dependencies
Here, we specify the dependency for the Spring and Spring Email framework. The rest dependencies will be automatically resolved by Maven, such as Spring Core, Spring Beans, Spring MVC etc. The updated file will have the following code:
pom.xml
<?xml version="1.0" encoding="UTF-8"?>
<project xmlns="http://maven.apache.org/POM/4.0.0" xmlns:xsi="http://www.w3.org/2001/XMLSchema-instance"
	xsi:schemaLocation="http://maven.apache.org/POM/4.0.0 http://maven.apache.org/xsd/maven-4.0.0.xsd">
	<modelVersion>4.0.0</modelVersion>
	<groupId>SpringMvcEmail</groupId>
	<artifactId>SpringMvcEmail</artifactId>
	<packaging>war</packaging>
	<version>0.0.1-SNAPSHOT</version>
	<name>SpringMvcEmail Maven Webapp</name>
	<url>http://maven.apache.org</url>
	<dependencies>
		<!-- Servlet API Dependency -->
		<dependency>
			<groupId>javax.servlet</groupId>
			<artifactId>servlet-api</artifactId>
			<version>3.0-alpha-1</version>
		</dependency>
		<dependency>
			<groupId>javax.servlet.jsp</groupId>
			<artifactId>jsp-api</artifactId>
			<version>2.1</version>
		</dependency>
		<!-- Spring Framework Dependencies -->
		<dependency>
			<groupId>org.springframework</groupId>
			<artifactId>spring-core</artifactId>
			<version>3.1.2.RELEASE</version>
		</dependency>
		<dependency>
			<groupId>org.springframework</groupId>
			<artifactId>spring-context</artifactId>
			<version>3.1.2.RELEASE</version>
		</dependency>
		<dependency>
			<groupId>org.springframework</groupId>
			<artifactId>spring-beans</artifactId>
			<version>3.1.2.RELEASE</version>
		</dependency>
		<dependency>
			<groupId>org.springframework</groupId>
			<artifactId>spring-webmvc</artifactId>
			<version>3.1.2.RELEASE</version>
		</dependency>
		<!-- All Mail Related Stuff + Much more -->
		<dependency>
			<groupId>org.springframework</groupId>
			<artifactId>spring-context-support</artifactId>
			<version>3.1.2.RELEASE</version>
		</dependency>
		<!-- Java Mail Dependency -->
		<dependency>
			<groupId>javax.mail</groupId>
			<artifactId>javax.mail-api</artifactId>
			<version>1.5.5</version>
		</dependency>
		<dependency>
			<groupId>javax.mail</groupId>
			<artifactId>mail</artifactId>
			<version>1.4.7</version>
		</dependency>
		<dependency>
			<groupId>commons-fileupload</groupId>
			<artifactId>commons-fileupload</artifactId>
			<version>1.2.1</version>
		</dependency>
		<dependency>
			<groupId>commons-io</groupId>
			<artifactId>commons-io</artifactId>
			<version>2.5</version>
		</dependency>
	</dependencies>
	<build>
		<finalName>${project.artifactId}</finalName>
	</build>
</project>
3.2 Java Class Creation
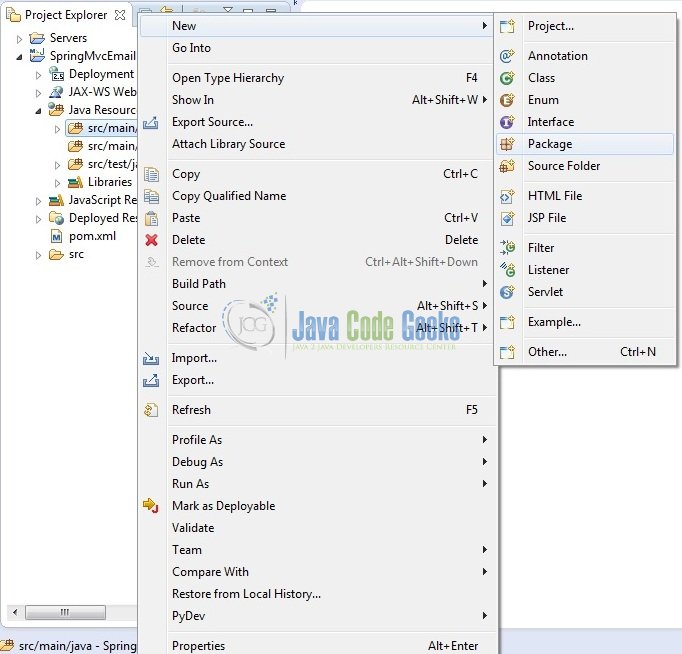
Let’s create the required Java files. Right-click on src/main/java folder, New -> Package.
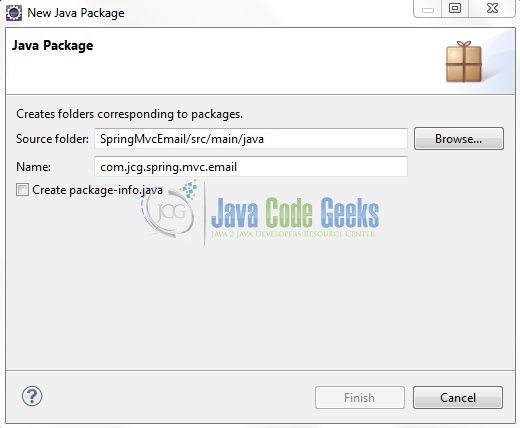
A new pop window will open where we will enter the package name as: com.jcg.spring.mvc.email.
Once the package is created in the application, we will need to create the controller class. Right-click on the newly created package: New -> Class.
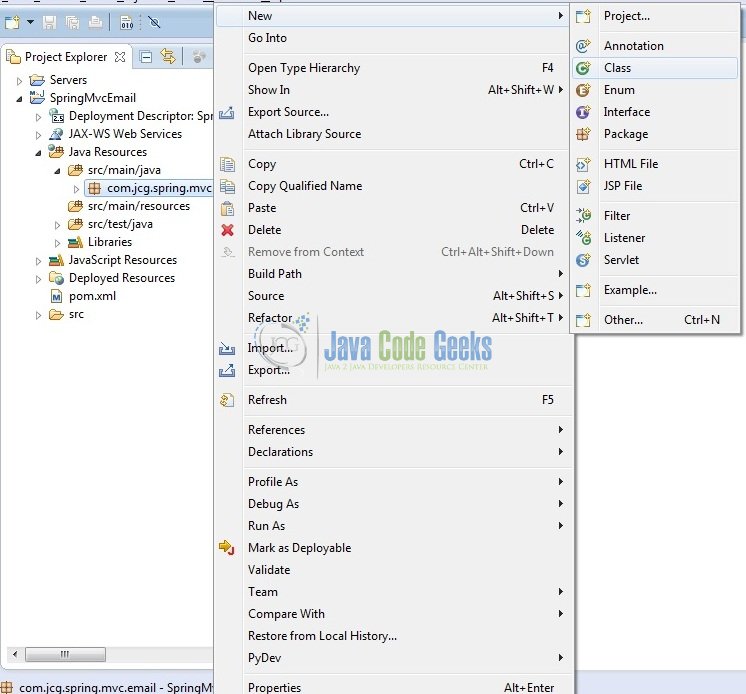
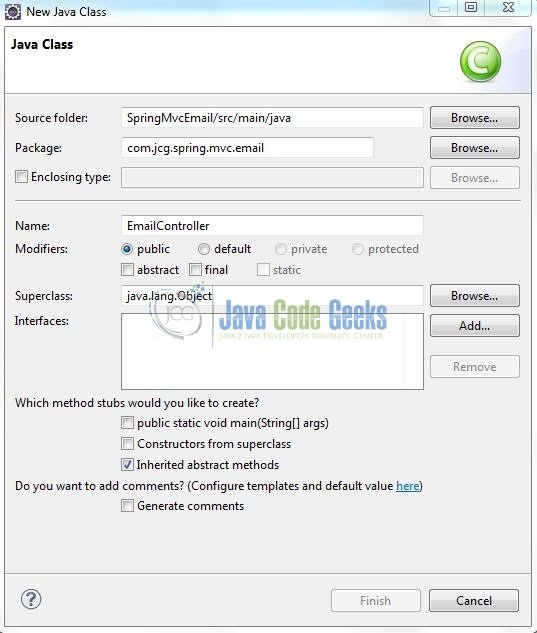
A new pop window will open and enter the file name as EmailController. The controller class will be created inside the package: com.jcg.spring.mvc.email.
3.2.1 Implementation of Controller Class
It is a simple class where the @Controller annotation is used to specify this class as a spring controller and is responsible for handling the email form’s submission which is configured by the @RequestMapping annotation.
The second parameter of the sendEmail() method is annotated by @RequestParam annotation which maps the email form field: attachFileObj to a CommonsMultipartFile object that represents an upload file.
In the sendEmail() method, we are capturing the input fields from the email form (i.e. mailto, subject, and message) and send an email by invoking the send() method on the mailSenderObj object (which is automatically injected to this controller via the @Autowired annotation).
The send() method is passed with an anonymous class which implements the MimeMessagePreparator interface and implements the prepare() method. In the prepare() method we will construct the email message object with help of the MimeMessageHelper class and invoke its addAttachment() method to attach the upload file as an attachment to the email. This method reads the data of the upload file from the input stream which is returned by the attachFileObj object.
Finally, the controller redirects the user to a result page whose logical name is: success. Add the following code to it:
EmailController.java
package com.jcg.spring.mvc.email;

import java.io.IOException;
import java.io.InputStream;

import javax.mail.internet.MimeMessage;
import javax.servlet.http.HttpServletRequest;

import org.springframework.beans.factory.annotation.Autowired;
import org.springframework.core.io.InputStreamSource;
import org.springframework.mail.javamail.JavaMailSender;
import org.springframework.mail.javamail.MimeMessageHelper;
import org.springframework.mail.javamail.MimeMessagePreparator;
import org.springframework.stereotype.Controller;
import org.springframework.ui.ModelMap;
import org.springframework.web.bind.annotation.RequestMapping;
import org.springframework.web.bind.annotation.RequestMethod;
import org.springframework.web.bind.annotation.RequestParam;
import org.springframework.web.multipart.commons.CommonsMultipartFile;
import org.springframework.web.servlet.ModelAndView;

@Controller
public class EmailController {

	static String emailToRecipient, emailSubject, emailMessage;
	static final String emailFromRecipient = "<!-- Source Email Address -->";

	static ModelAndView modelViewObj;

	@Autowired
	private JavaMailSender mailSenderObj;

	@RequestMapping(value = {"/", "emailForm"}, method = RequestMethod.GET)
	public ModelAndView showEmailForm(ModelMap model) {
		modelViewObj = new ModelAndView("emailForm");
		return  modelViewObj;
	}

	// This Method Is Used To Prepare The Email Message And Send It To The Client
	@RequestMapping(value = "sendEmail", method = RequestMethod.POST)
	public ModelAndView sendEmailToClient(HttpServletRequest request, final @RequestParam CommonsMultipartFile attachFileObj) {

		// Reading Email Form Input Parameters
		emailSubject = request.getParameter("subject");
		emailMessage = request.getParameter("message");
		emailToRecipient = request.getParameter("mailTo");

		// Logging The Email Form Parameters For Debugging Purpose
		System.out.println("\nReceipient?= " + emailToRecipient + ", Subject?= " + emailSubject + ", Message?= " + emailMessage + "\n");

		mailSenderObj.send(new MimeMessagePreparator() {
			public void prepare(MimeMessage mimeMessage) throws Exception {

				MimeMessageHelper mimeMsgHelperObj = new MimeMessageHelper(mimeMessage, true, "UTF-8");
				mimeMsgHelperObj.setTo(emailToRecipient);
				mimeMsgHelperObj.setFrom(emailFromRecipient);
				mimeMsgHelperObj.setText(emailMessage);
				mimeMsgHelperObj.setSubject(emailSubject);

				// Determine If There Is An File Upload. If Yes, Attach It To The Client Email
				if ((attachFileObj != null) && (attachFileObj.getSize() > 0) && (!attachFileObj.equals(""))) {
					System.out.println("\nAttachment Name?= " + attachFileObj.getOriginalFilename() + "\n");
					mimeMsgHelperObj.addAttachment(attachFileObj.getOriginalFilename(), new InputStreamSource() {
						public InputStream getInputStream() throws IOException {
							return attachFileObj.getInputStream();
						}
					});
				} else {
					System.out.println("\nNo Attachment Is Selected By The User. Sending Text Email!\n");
				}
			}
		});
		System.out.println("\nMessage Send Successfully.... Hurrey!\n");

		modelViewObj = new ModelAndView("success","messageObj","Thank You! Your Email Has Been Sent!");
		return  modelViewObj;
	}
}
Note:
- If the user doesn’t pick up a file to be shared as an attachment, the
attachFileObjwill be empty and a plain text format email will be sent to the customer mailbox
3.3 Configuration Files
Let’s write all the configuration files involved in this application.
3.3.1 Spring Configuration File
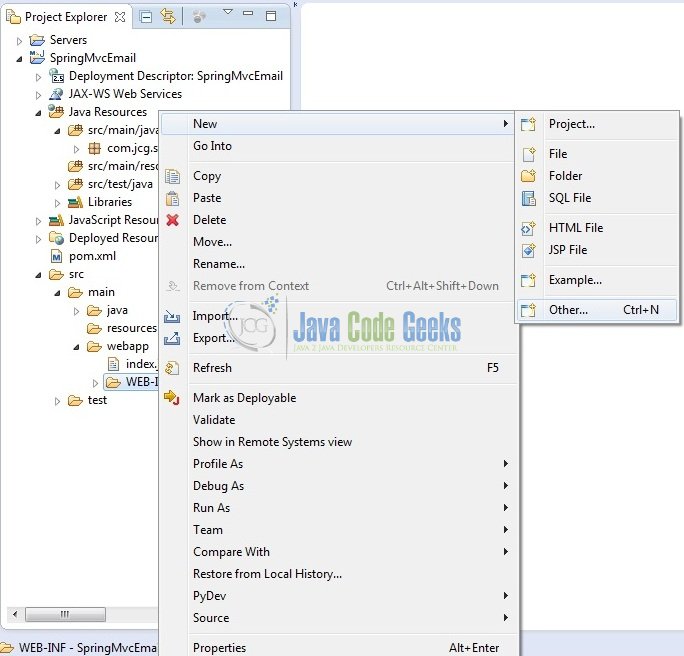
To configure the spring framework, we need to implement a bean configuration file i.e. spring-servlet.xml which provides an interface between the basic Java class and the outside world. Right-click on SpringMVCRedirect/src/main/webapp/WEB-INF folder, New -> Other.
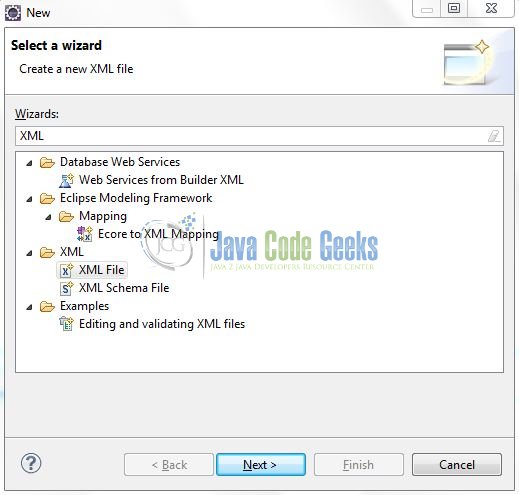
A new pop window will open and select the wizard as an XML file.
Again, a pop-up window will open. Verify the parent folder location as: SpringMvcEmail/src/main/webapp/WEB-INF and enter the file name as: spring-servlet.xml. Click Finish.
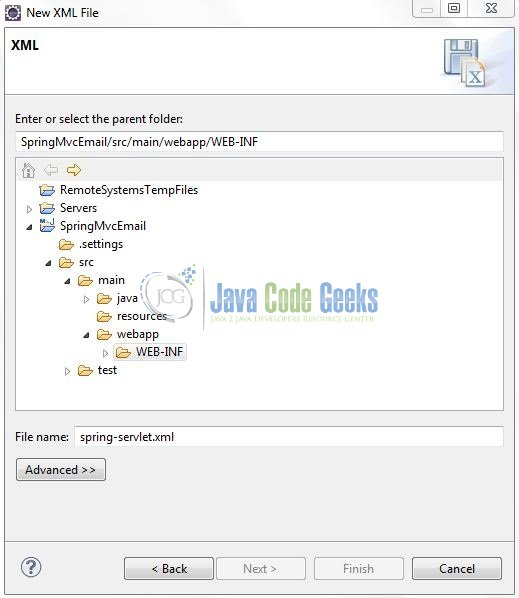
Once the XML file is created, we will add the following code to it:
spring-servlet.xml
<?xml version="1.0" encoding="UTF-8"?>
<beans xmlns="http://www.springframework.org/schema/beans" xmlns:xsi="http://www.w3.org/2001/XMLSchema-instance" xmlns:p="http://www.springframework.org/schema/p" xmlns:context="http://www.springframework.org/schema/context" xsi:schemaLocation="http://www.springframework.org/schema/beans               http://www.springframework.org/schema/beans/spring-beans-3.0.xsd               http://www.springframework.org/schema/context               http://www.springframework.org/schema/context/spring-context-3.0.xsd">

    <context:component-scan base-package="com.jcg.spring.mvc.email" />

    <!-- Spring Email Sender Bean Configuration -->
    <bean id="mailSender" class="org.springframework.mail.javamail.JavaMailSenderImpl">
        <property name="host" value="smtp.mail.yahoo.com" />
        <property name="port" value="587" />
        <property name="username" value="<!-- Source Email Address -->" />
        <property name="password" value="<!-- Source Email Password -->" />
        <property name="javaMailProperties">
            <props>
                <prop key="mail.smtp.auth">true</prop>
                <prop key="mail.debug">true</prop>
                <prop key="mail.transport.protocol">smtp</prop>
                <prop key="mail.smtp.socketFactory.class">javax.net.ssl.SSLSocketFactory</prop>
                <prop key="mail.smtp.socketFactory.port">465</prop>
                <prop key="mail.smtp.starttls.enable">true</prop>
            </props>
        </property>
    </bean>

    <!-- Spring Email Attachment Configuration -->
    <bean id="multipartResolver" class="org.springframework.web.multipart.commons.CommonsMultipartResolver">
        <!-- Maximum Upload Size In Bytes -->
        <property name="maxUploadSize" value="20971520" />
        <!-- Maximum Size Of File In Memory (In Bytes) -->
        <property name="maxInMemorySize" value="1048576" />
    </bean>

    <!-- Resolves Views Selected For Rendering by @Controllers to *.jsp Resources in the /WEB-INF/ Folder -->
    <bean class="org.springframework.web.servlet.view.InternalResourceViewResolver">
        <property name="prefix" value="/WEB-INF/views/" />
        <property name="suffix" value=".jsp" />
    </bean>

    <!-- Send Email Exception Resolver i.e. In Case Of Exception The Controller Will Navigate To 'error.jsp' & Will Display The Exception Message -->
    <bean class="org.springframework.web.servlet.handler.SimpleMappingExceptionResolver">
		<property name="exceptionMappings">
			<props>
				<prop key="java.lang.Exception">error</prop>
			</props>
		</property>
	</bean>
</beans>
Notes:

This file is loaded by the Spring’s Dispatcher Servlet which receives all the requests coming into the application and dispatches them to the controller for processing. There are four beans declared in this configuration which draws our attention:
InternalResourceViewResolver: This bean declaration tells the framework how to find the physicalJSPfiles according to the logical view names returned by the controllers, by attaching the prefix and the suffix to a view name. For e.g. If a controller’s method returnshomeas the logical view name, then the framework will find a physical filehome.jspunder the/WEB-INF/viewsdirectory<context:component-scan />: This tells the framework which packages to be scanned when using the annotation-based strategy. Here the framework will scan all classes under the package:com.jcg.spring.mvc.emailmailSender: This bean id configures theSMTPserver settings and the JavaMail properties. This bean is injected into the spring controller classmultipartResolver: This bean id is for parsing the multipart request with theCommonsMultipartResolverimplementation which is based on the Apache Commons File Upload. We will also configure the file upload settings as follows:maxUploadSize: It is the maximum size (in bytes) of the multipart request, including the upload file. For this example, it is set to 20 MBmaxInMemorySize: It is a threshold (in bytes) beyond which the upload file will be saved to the disk instead of in the memory. For this example, it is set to 1 MB
SimpleMappingExceptionResolver: This specifies theerror.jspwhich handles the exceptions
3.3.2 Web Deployment Descriptor
The web.xml file declares one servlet (i.e. Dispatcher Servlet) to receive all kind of the requests and specifies the default page (i.e. emailForm.jsp) when accessing the application. Dispatcher servlet here acts as a front controller. Add the following code to it:
web.xml
<?xml version="1.0" encoding="UTF-8"?>
<web-app version="2.5" xmlns="http://java.sun.com/xml/ns/javaee" xmlns:xsi="http://www.w3.org/2001/XMLSchema-instance" xsi:schemaLocation="http://java.sun.com/xml/ns/javaee              http://java.sun.com/xml/ns/javaee/web-app_2_5.xsd">
    <display-name>Spring Mvc Email Example</display-name>

    <!-- Spring Configuration - Processes Application Requests -->
    <servlet>
        <servlet-name>SpringController</servlet-name>
        <servlet-class>org.springframework.web.servlet.DispatcherServlet</servlet-class>
        <init-param>
            <param-name>contextConfigLocation</param-name>
            <param-value>/WEB-INF/spring-servlet.xml</param-value>
        </init-param>
        <load-on-startup>1</load-on-startup>
    </servlet>
    <servlet-mapping>
        <servlet-name>SpringController</servlet-name>
        <url-pattern>/</url-pattern>
    </servlet-mapping>

    <!-- Welcome File List -->
    <welcome-file-list>
    	<welcome-file>emailForm.jsp</welcome-file>
  	</welcome-file-list>
</web-app>
3.4 Creating JSP Views
Spring MVC supports many types of views for different presentation technologies. These include – JSP, HTML, XML etc. So let us write a simple view in SpringMvcEmail/src/main/webapp/WEB-INF/views.
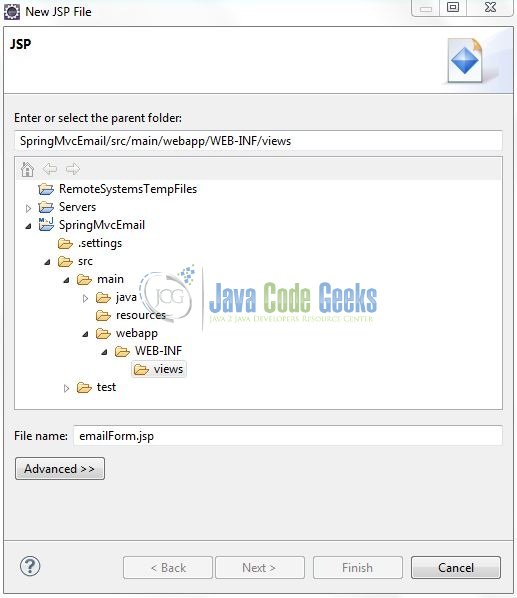
Right-click on SpringMvcEmail/src/main/webapp/WEB-INF/views folder, New -> JSP File.

Verify the parent folder location as: SpringMvcEmail/src/main/webapp/WEB-INF/views and enter the filename as: emailForm.jsp. Click Finish.
This is a simple form with three fields: Email To, Subject, and Message which are the necessary attributes for a simple outgoing email message. There are few notices for this HTML form i.e.
action="sendEmail": This specifies the action name which will handle submission of this formenctype="multipart/form-data": This tells the browser that this form contains the multipart data so it will construct a multipart request to be sent to theSMTPserver<input type="file" … />: This tag shows a file browse button from which the user can pick up a file
Add the following code to it:
emailForm.jsp
<%@ page language="java" contentType="text/html; charset=UTF-8" pageEncoding="UTF-8"%>
<!DOCTYPE html PUBLIC "-//W3C//DTD HTML 4.01 Transitional//EN" "http://www.w3.org/TR/html4/loose.dtd">
<html>
	<head>
	    <meta http-equiv="Content-Type" content="text/html; charset=UTF-8">
	    <title>Spring MVC Email Example</title>
	    <style type="text/css">
	    	#sendEmailBtn {
				float: left;
    			margin-top: 22px;
    		}
    	</style>
	</head>

	<body>
	    <center>
	        <h2>Spring MVC Email Example</h2>
	        <form id="sendEmailForm" method="post" action="sendEmail" enctype="multipart/form-data">
	            <table id="emailFormBeanTable" border="0" width="80%">
	                <tr>
	                    <td>Email To: </td>
	                    <td><input id="receiverMail" type="text" name="mailTo" size="65" /></td>
	                </tr>
	                <tr>
	                    <td>Subject: </td>
	                    <td><input id="mailSubject" type="text" name="subject" size="65" /></td>
	                </tr>
	                <tr>
	                    <td>Message: </td>
	                    <td><textarea id="mailMessage" cols="50" rows="10" name="message"></textarea></td>
	                </tr>
	                <tr>
	                    <td>Attachment: </td>
	                    <td><input id="mailAttachment" type="file" name="attachFileObj" size="60" /></td>
	                </tr>
	                <tr>
	                    <td colspan="2" align="center"><input id="sendEmailBtn" type="submit" value="Send Email" /></td>
	                </tr>
	            </table>
	        </form>
	    </center>
	</body>
</html>
Repeat the step (i.e. Fig. 15) and enter the filename as: success.jsp.
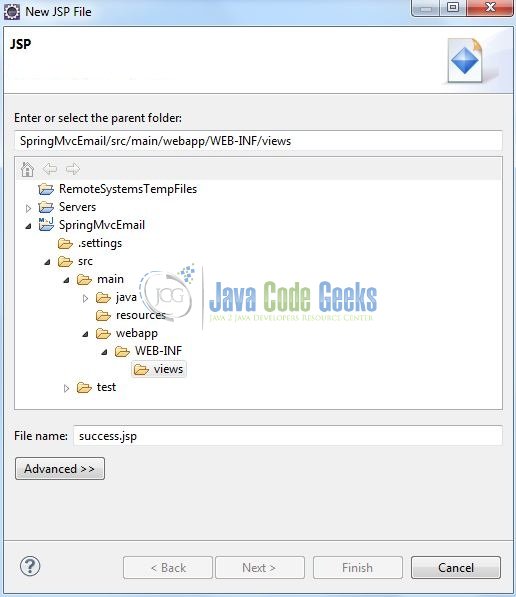
This page will simply show a success message after the email has been sent. Add the following code it:
success.jsp
<%@ page language="java" contentType="text/html; charset=ISO-8859-1" pageEncoding="ISO-8859-1"%>
<!DOCTYPE html PUBLIC "-//W3C//DTD HTML 4.01 Transitional//EN" "http://www.w3.org/TR/html4/loose.dtd">
<html>
	<head>
	    <meta http-equiv="Content-Type" content="text/html; charset=UTF-8">
	    <title>Spring MVC Email Example</title>
	    <style type="text/css">
	    	#emailFormDiv {
	    		text-align: center;
    			padding-top: 16px;
	    	}

    		#emailFormPage {
    			text-decoration: none;
    			text-align: center;
    			cursor: pointer;
    		}

    		#successMessage {
    			text-align: center;
    			color: green;
    			font-size: 25px;
    			padding-top: 17px;
    		}
    	</style>
	</head>

	<body>
	    <center>
	    	<h2>Spring MVC Email Example</h2>
	    </center>
	    <div id="successMessage">
	        <strong>${messageObj}</strong>
	    </div>
	    <div id="emailFormDiv">
	    	<a id="emailFormPage" href="emailForm">Go To Email Form Page</a>
	    </div>
	</body>
</html>
Again repeat the step (i.e. Fig. 15) and enter the filename as: error.jsp.
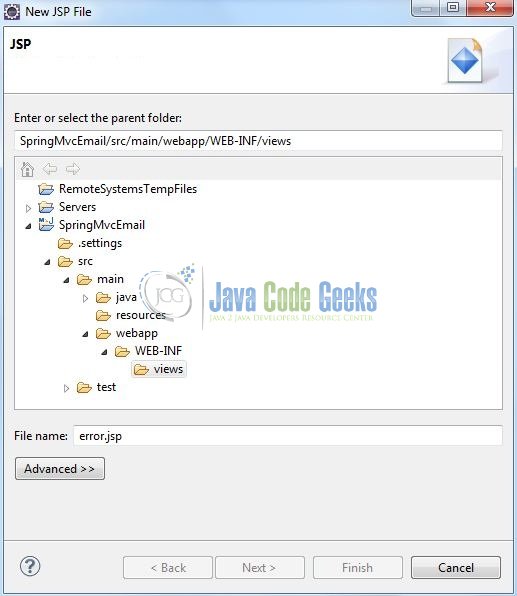
This page displays an error message in case of exceptions thrown, such as the upload file’s size exceeds the limit or SMTP settings are wrong. Add the following code it:
error.jsp
<%@ page language="java" contentType="text/html; charset=UTF-8" pageEncoding="UTF-8"%>
<!DOCTYPE html PUBLIC "-//W3C//DTD HTML 4.01 Transitional//EN" "http://www.w3.org/TR/html4/loose.dtd">
<html>
<head>
<meta http-equiv="Content-Type" content="text/html; charset=UTF-8">
<title>Spring MVC Email Example</title>
<style type="text/css">
#errorMessage {
text-align: center;
font-size: 25px;
padding-top: 17px;
}
#errorMessage span {
color: red;
}
</style>
</head>
<body>
<center>
<h2>Spring MVC Email Example</h2>
</center>
<br /> <br />
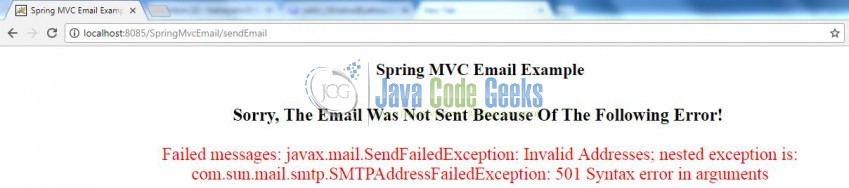
<div id="errorMessage">
<strong>Sorry, The Email Was Not Sent Because Of The Following Error!</strong>
<span id="exceptionTrace">${exception.message}</span>
</div>
</body>
</html>
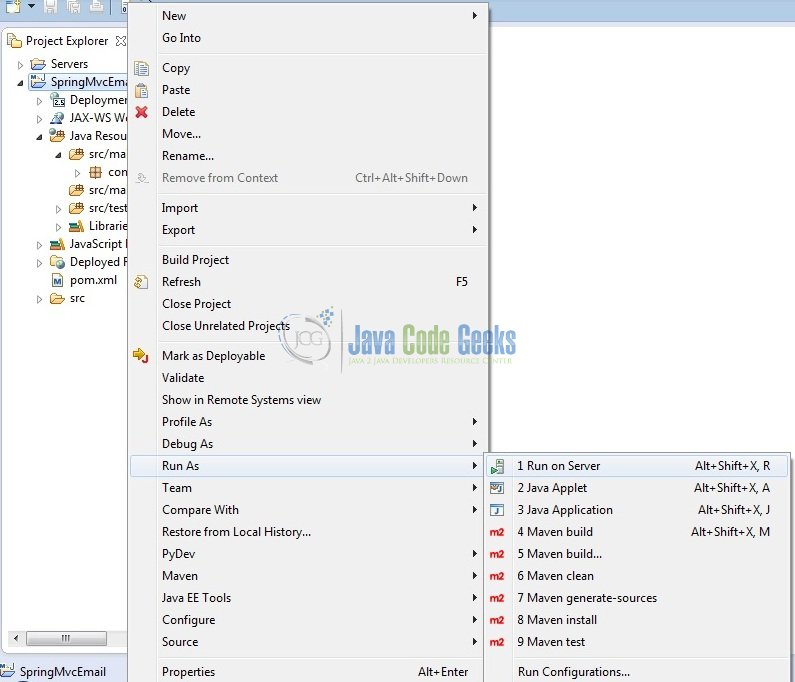
4. Run the Application
As we are ready with all the changes, let us compile the project and deploy the application on the Tomcat7 server. To deploy the application on Tomat7, right-click on the project and navigate to Run as -> Run on Server.
Tomcat will deploy the application in its web-apps folder and shall start its execution to deploy the project so that we can go ahead and test it on the browser.
5. Project Demo
Open your favorite browser and hit the following URL. The output page will be displayed.
http://localhost:8085/SpringMvcEmail/
Server name (localhost) and port (8085) may vary as per your Tomcat configuration. Developers can debug the example and see what happens after every step. Enjoy!
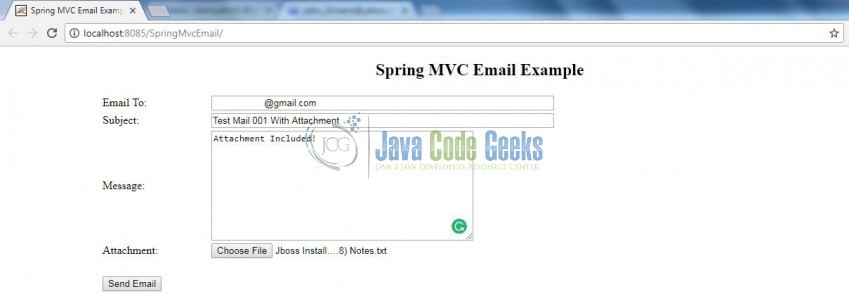
The email form is displayed, type in required information and hit the Send Email button. It may take a while for the email to be sent and a successful message appears on the result page in case everything goes well.

In case of an error (such as network failure or the SMTP server could not be reached etc.), the error page will be displayed.
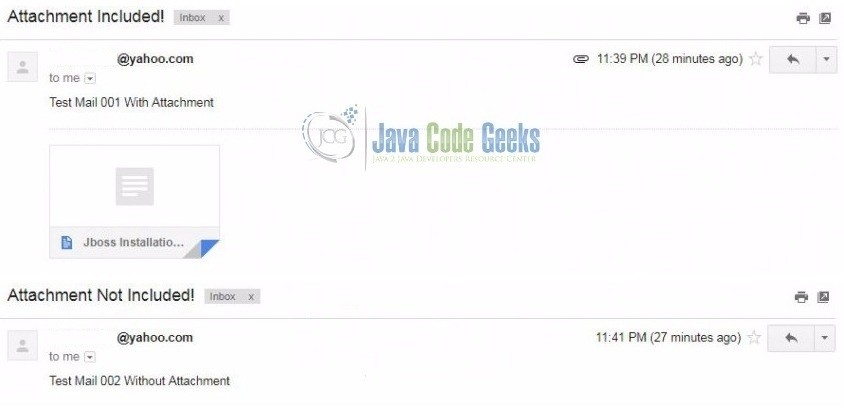
Now checking the customer’s mailbox and we should see the new email message.
That’s all for this post. Happy Learning!!
6. Conclusion
In this section, developers learned how to create a sample Spring MVC application that allows the user to send an email message by filling a web form. Developers can download the sample application as an Eclipse project in the Downloads section, and remember to update the SMTP settings to match your email account.
7. Download the Eclipse Project
This was an example of Sending an email with Spring MVC.
You can download the full source code of this example here: SpringMvcEmail

Could not parse mail; nested exception is javax.mail.internet.AddressException
Sunil looks like you are using the “wrongly formatted address” while sending the email from the web-application. Please use the correct “toAddress” or username (“from” address) and let us know in case you encounter any further errors.
Authentication failed; nested exception is javax.mail.AuthenticationFailedException: 535 5.7.0 (#AUTH012) Incorrect username or password.
Sorry, The Email Was Not Sent Because Of The Following Error! Authentication failed; nested exception is javax.mail.AuthenticationFailedException: 535 5.7.0 (#AUTH012) Incorrect username or password.
As per the exception snippet is given, it like you are using the incorrect credentials while connecting to your email account. Please use the correct account details and the program will be good to execute!
It’s very structured tutorial and works for me when i follow the given instruction. But in my ERP system I wish to send mail from server instead of form in this case it is throwing Exception. Please mention me what should be done. Thank you.
@Safi – Can you please share the exception logs with me? I’ll analyze and provide you with a required solution. Thank you and have a splendid day!
!ENTRY org.eclipse.m2e.logback.appender 2 0 2018-01-31 09:21:18.548
!MESSAGE Using platform encoding (Cp1252 actually) to copy filtered resources, i.e. build is platform dependent!
!ENTRY org.eclipse.m2e.logback.appender 2 0 2018-01-31 09:21:18.550
!MESSAGE Using platform encoding (Cp1252 actually) to copy filtered resources, i.e. build is platform dependent!
!ENTRY org.eclipse.m2e.logback.appender 2 0 2018-01-31 09:21:18.559
!MESSAGE Using platform encoding (Cp1252 actually) to copy filtered resources, i.e. build is platform dependent!
// EmailController.java package com.email.job; import java.io.IOException; import java.io.InputStream; import javax.mail.internet.MimeMessage; import javax.servlet.http.HttpServletRequest; import org.springframework.beans.factory.annotation.Autowired; import org.springframework.core.io.InputStreamSource; import org.springframework.mail.javamail.JavaMailSender; import org.springframework.mail.javamail.MimeMessageHelper; import org.springframework.mail.javamail.MimeMessagePreparator; import org.springframework.stereotype.Controller; import org.springframework.ui.ModelMap; import org.springframework.web.bind.annotation.RequestMapping; import org.springframework.web.bind.annotation.RequestMethod; import org.springframework.web.bind.annotation.RequestParam; import org.springframework.web.multipart.commons.CommonsMultipartFile; import org.springframework.web.servlet.ModelAndView; public class EmailController { // constructor public EmailController() { } static String emailTo, emailSubject, emailMessage; static final String emailFrom = “ayman.sadik45@gmail.com”; static ModelAndView modelViewObj; @Autowired private JavaMailSender mailSenderObj; // This Method Is Used To Prepare The Email Message And Send It To The Client public void sendEmailToClient( final String emailTo, final String emailSubject, final String emailMessage) { // Logging The Email Form Parameters For… Read more »
Morning Safi, hope you are well. Can you please share the exception stack-trace you are getting while calling the
emailController.sendEmailToClient()method?And for the error, you pointed above (i.e. “!MESSAGE Using platform encoding (Cp1252 actually) to copy filtered resources, i.e. build is platform dependent!”) is basically a maven error and can easily be avoided. For reference, you can refer this link
I printed the exception. It printed “null”
Strange. I think it should print the null-pointer as the
mailSenderObjis not initialized properly. I would really appreciate if you could provide something concrete to debug this further.Archetype Created Web Application contextConfigLocation /WEB-INF/applicationContext.xml, /WEB-INF/securityContext.xml SystemDevelopment org.springframework.web.servlet.DispatcherServlet 1 SystemDevelopment / org.springframework.web.context.ContextLoaderListener com.email.BackgroundJobManager springSecurityFilterChain springSecurityFilterChain org.springframework.web.filter.DelegatingFilterProxy springSecurityFilterChain /* org.springframework.web.context.request.RequestContextListener <!– –> /WEB-INF/layout/default.xml org.hibernate.dialect.MySQLDialect true true test true true true true smtp javax.net.ssl.SSLSocketFactory 465 true // HourlyJob.java package com.email.job; import org.springframework.beans.factory.annotation.Autowired; import org.springframework.mail.javamail.JavaMailSender; import org.springframework.mail.javamail.MimeMessageHelper; import org.springframework.mail.javamail.MimeMessagePreparator; import org.springframework.stereotype.Controller; import org.springframework.stereotype.Service; import org.springframework.web.servlet.ModelAndView; import org.springframework.web.servlet.config.annotation.RedirectViewControllerRegistration; import java.sql.*; import java.util.Date; import java.util.Properties; import java.util.concurrent.TimeUnit; import javax.mail.Message; import javax.mail.MessagingException; import javax.mail.Session; import javax.mail.Transport; import javax.mail.internet.AddressException; import javax.mail.internet.InternetAddress; import javax.mail.internet.MimeMessage; public class HourlyJob implements Runnable { @Override public void run() { // Do your hourly job here. System.out.println(“Job trigged by scheduler”); try {… Read more »
As you have removed the
@Controllerannotation from theEmailController. Do this, add the@Serviceannotation to theEmailController.javaclass i.e.@Service("mailService") public class EmailController { ..... }Also, in order to get the emailer instance, you’ll have to call the
EmailController.sendEmailToClient()like this –EmailController mailer = (EmailController) context.getBean("mailService"); mailer.sendEmailToClient("test@test.com","Test email","Email body");Test this and let me know the results. I am hoping your web-application is Spring-based as the
JavaMailSender mailSenderObjobject instance will only get initialized once the bean definitions are loaded from thespring-servlet.xmlat the time of application start-up.What about HourlyJob.java?
In
Hourlyjob.java, just call theEmailController.sendEmailToClient()method via thecontext.getBean(...)approach. Code snippet already shared in above comment!Mail server connection failed; nested exception is javax.mail.MessagingException: Could not convert socket to TLS;
i want email to same mail id but mailfrom is differents mvcusing spring maven with
Thank you very much. Email integration was successful by this beautiful tutorial. Can you help me to download a report in xlsx format?
Please connect through the support section and we’ll surely help to solve your problem! :)
i have promble how tofix
DEBUG: getProvider() returning javax.mail.Provider[TRANSPORT,smtp,com.sun.mail.smtp.SMTPTransport,Oracle]
DEBUG SMTP: useEhlo true, useAuth true
DEBUG SMTP: trying to connect to host “smtp.mail.yahoo.com”, port 465, isSSL false
same problem
DEBUG: getProvider() returning javax.mail.Provider[TRANSPORT,smtp,com.sun.mail.smtp.SMTPTransport,Oracle]
DEBUG SMTP: useEhlo true, useAuth true
DEBUG SMTP: trying to connect to host “smtp.mail.gmail.com”, port 587, isSSL false
please help me…..
DEBUG: getProvider() returning javax.mail.Provider[TRANSPORT,smtp,com.sun.mail.smtp.SMTPTransport,Oracle]
DEBUG SMTP: useEhlo true, useAuth true
DEBUG SMTP: trying to connect to host “smtp.mail.gmail.com”, port 587, isSSL false
Its Done …
Thank you So much…!
i have this error. how to resolve this??
Mail server connection failed; nested exception is javax.mail.MessagingException: Could not convert socket to TLS; nested exception is: javax.net.ssl.SSLHandshakeException: sun.security.validator.ValidatorException: PKIX path building failed: sun.security.provider.certpath.SunCertPathBuilderException: unable to find valid certification path to requested target. Failed messages: javax.mail.MessagingException: Could not convert socket to TLS; nested exception is: javax.net.ssl.SSLHandshakeException: sun.security.validator.ValidatorException: PKIX path building failed: sun.security.provider.certpath.SunCertPathBuilderException: unable to find valid certification path to requested target
Getting the same error..Can someone help?I guess it is due to some certification missing but i am not able to resolve it.
This work also with gmail?
Not for the account that has two factors enabled.
hi, i seem to be getting a HTTP Status 404 – Not Found when i press the Send Email button, what could be the problem? please assist.
it seems like your resource mapping is incorrect. the URL you are using in the browser is different from what configured in the spring controller.
I got an error everytime I click the button ‘send email’ as Mail server connection failed; nested exception is java.mail.NoSuchProviderException: No provider for SMTP.
Please help me rectify this error.
@Yatin
Spring MVC Email Example
Sorry, The Email Was Not Sent Because Of The Following Error! Mail server connection failed; nested exception is javax.mail.MessagingException: Could not convert socket to TLS; nested exception is: javax.net.ssl.SSLException: Received fatal alert: protocol_version. Failed messages: javax.mail.MessagingException: Could not convert socket to TLS; nested exception is: javax.net.ssl.SSLException: Received fatal alert: protocol_version