In this example, we will explore Apache Zookeeper, starting with the introduction and then followed by the steps to setup the Zookeeper and to get it up and running.
1. Introduction
Apache Zookeeper is the building block of distributed systems. When a distributed system is designed there is always a need of developing and deploying something which can coordinate through the cluster. This is where Zookeeper comes into the picture. It is an open-source project maintained by Apache for maintenance and coordination of the distributed cluster. Some of the services provided by Zookeeper are:
- Naming Service: A name service is used to map a name to some sort of data which can then be accessed using this name. For example, DNS servers map to the ip address of the server and then client can access the server using that url name. In distributed systems we may need to check the status of servers or nodes using the name assigned to them. This can be done by using the naming service interface provided by default by Zookeeper.
- Configuration Management: Zookeeper also provides the option to manage the configuration of distributed system centrally. Configuration can be stored centrally on Zookeeper and any new node on joining the distributed system can pick the configuration from Zookeeper. This makes managing configuration quite easy and effort free.
- Leader Election: Distributed Systems usually needs an automatic fail-over strategy in case some nodes fails. Zookeeper provides an option to do so using leader election functionality.
- Locking: In every distributed system, there will be some shared resources and multiple services may need to access this. So to allow serialized access to this resource, a locking mechanism is required. Zookeeper provides this functionality.
- Synchronization: The access to the shared resources also need to the synchronized in the distributed setup. Zookeeper also provides a simple interface for this.
2. How Zookeeper Works?
Zookeeper follows a client-server model. In which clients are the machines in the cluster. These machines are also called nodes. These clients consume the service provided by the servers. Zookeeper coordinates the distributed system but it in itself is also a distributed system. The collection of Zookeeper servers in distributed mode is called Zookeeper ensemble.
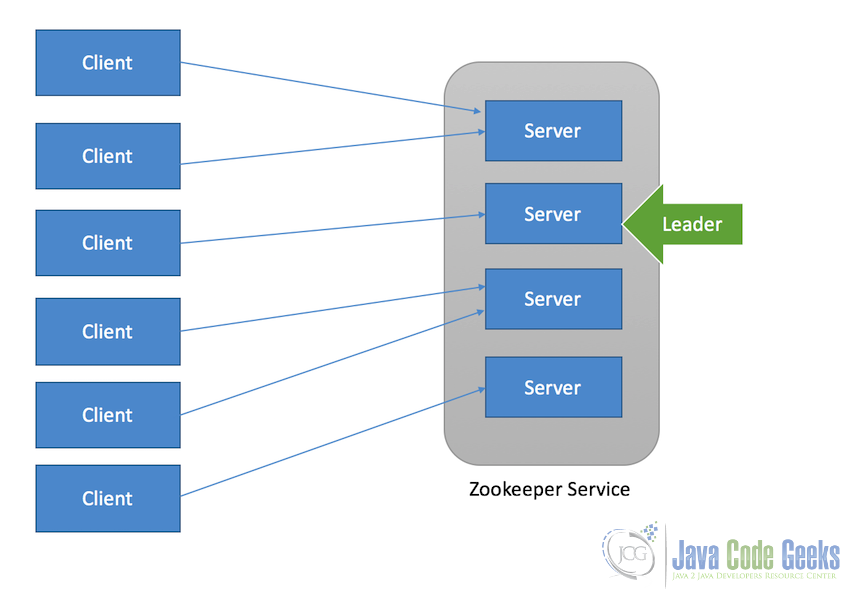
At any given time, one client can be connected to only one Zookeeper server but each zookeeper server can handle multiple clients at the time. Clients send pings(heartbeats) to the server periodically to let it know that it is alive and connected to the server. Zookeeper server also responds with an acknowledgement informing that it is alive and connected as well. The frequency of these pings/heartbeats can be set in the configuration file which we will see in the next section.
In case the client does not receive an acknowledgement from the server it is connected to within the specified time period, the client then tries to connect to the another server from the pool and on the successful connection the client session is transferred to the new Zookeeper server it is connected to.
Zookeeper follows a hierarchical system similar to the file system to store data in the nodes and it is called znodes. Znode is derived from “Zookeeper data nodes”. Each znode acts as a directory and can have multiple sub-node and the hierarchy continues. To access the znodes also, Zookeeper follows the file path like structure. For example: the path to znode firstnode and the corresponsing sub nodes can look like this, /firstnode/sub-node/sub-sub-node
3. Zookeeper Setup
In this section, we will go through the steps to setup the Zookeeper server on the localhost for experimentation purpose. Zookeeper provides a single server in the package and can be directly run on the machine.
3.1 System Requirements
- Java, JDK 6 or later (We will use JDK 8)
- Minimum 2GB RAM
- Dual Core Processor
- Linux OS. Linux is supported as both development and production systems. Both Windows and MacOSX are only supported as the development system and not as production systems.
3.2 Install Java
First of all, we will check if Java is installed on the system and if not, we need to install Java first. To check if Java is installed use:
java -version
If this returns the Java version number then Java is installed. Make sure it is atleast JDK 6 or higher. In case Java is not installed, we have to install it first. Use the following commands to install Java JDK 8.
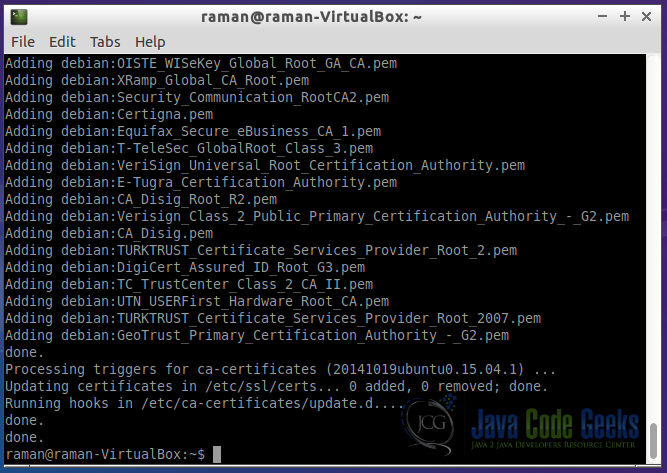
sudo apt-get update
sudo apt-get intstall openjdk-8-jre-headless
Th first command will update all the packages already installed and the second command will install the OpenJDK 8. Following is the console output we get after running the above commands:
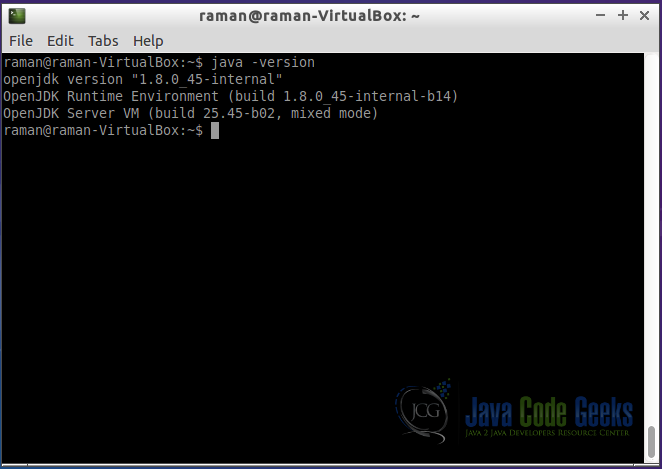
To check if the installation was successful, again run the command
java -version
the output should be something similar to what is displayed in the following screenshot:
3.3 Download Zookeeper
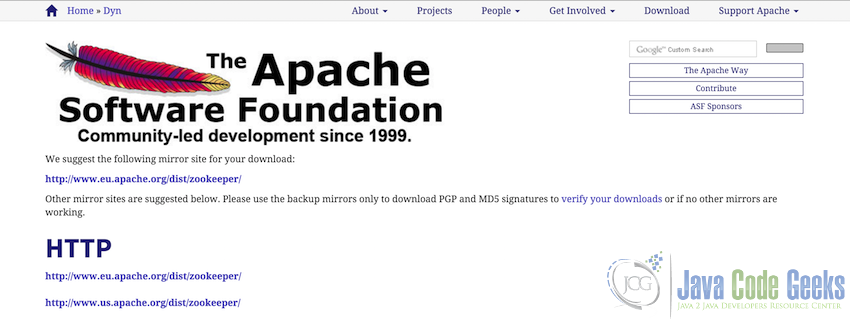
Next step is to download the stable release version of Zookeeper from Resease site. Download manually the stable version from the Download section of the release site(at the time of writing, stable release is 3.4.6). We can use any of the mirrors mentioned in the site(as shown in the screenshot below) and unzip/untar to the desired folder.
or use the following commands to download and untar.
wget http://www.eu.apache.org/dist/zookeeper/stable/zookeeper-3.4.6.tar.gz
tar -xvf zookeeper-3.4.6.tar.gz
cd zookeeper-3.4.6/

3.4 Data Directory
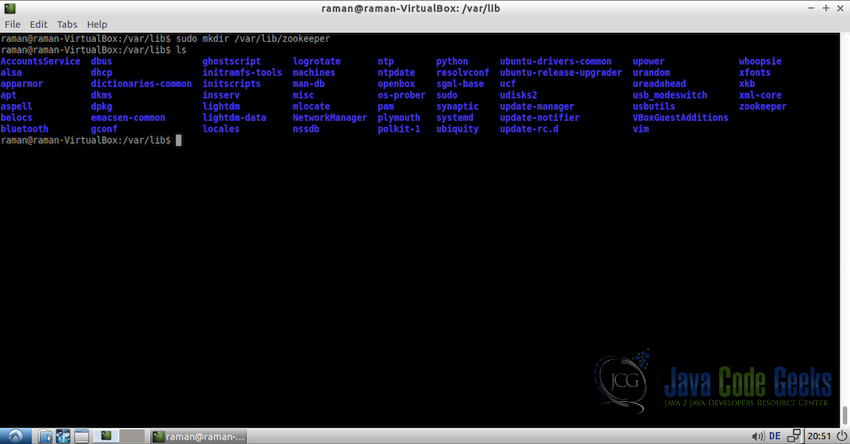
Next we need a directory to store the data related to the znodes and other zookeeper metadata. For that we will create a new directory in /var/lib/ by the name zookeeper
sudo mkdir /var/lib/zookeeper
cd /var/lib
ls
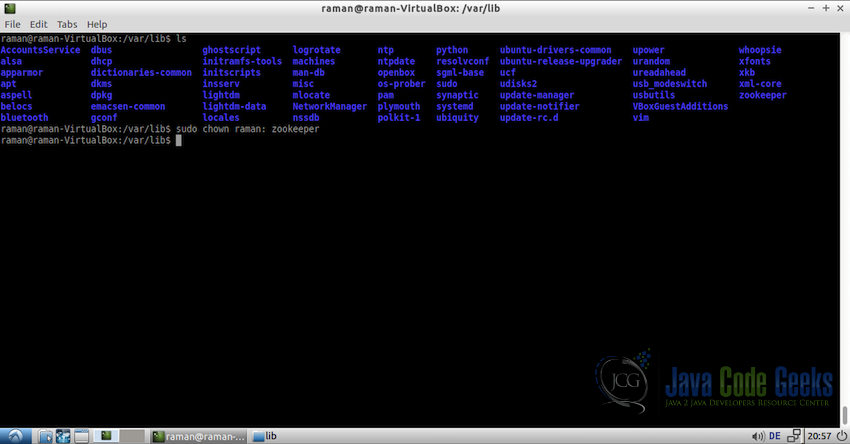
When this directory is created using sudo, it will by default be with root as the owner which we need to change to the user where Zookeeper will be running so that Zookeeper server can access the directory without any trouble. To change the user, run the following command from the folder /var/lib
cd /var/lib
sudo chown raman: zookeeper
Note: There is a space between : and zookeeper. Here we are only mentioning the raman user as the owner of the directory and no user group(usergroup comes after :). So it will assign the default usergroup of the user to the directory zookeeper.
To make sure that the owner is changed, go to the properties of the /var/lib/zookeeper directory and check the permissions. It should be assigned to user we set it in:

3.5 Configuration File
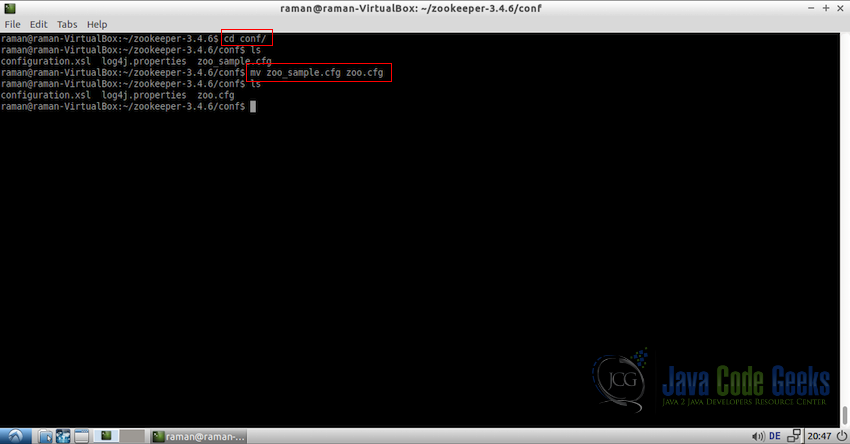
Now it is the time to make the required changes in the configurations of the Zookeeper server. It already contains the sample configuration file which we will use as the template. Sample configuration file is in the folder zookeeper-3.4.6/conf/ and is named zoo-sample.cfg
First lets rename the file to zoo.cfg. Name of the file does not matter but there should be only one .cfg file present in the conf folder.
cd zookeeper-3.4.6/conf
mv zoo-sample.cfg zoo.cfg
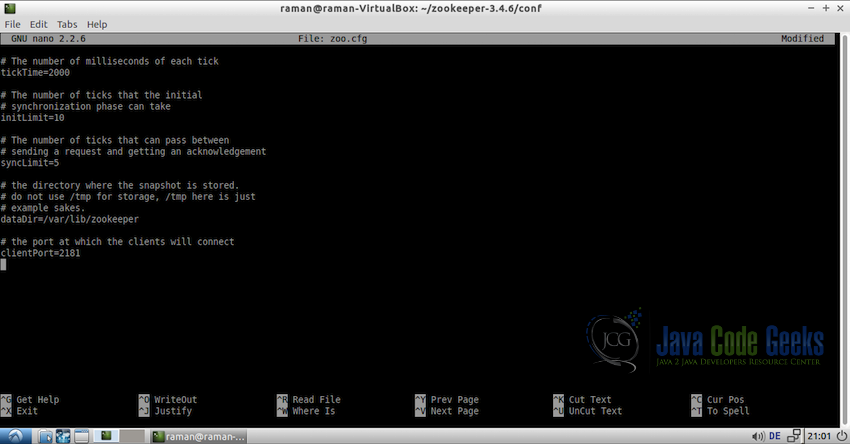
Now, let’s edit this zoo.cfg file. In this example, we used the nano editor but you can use whichever editor you like to.
nano zoo.cfg
Make sure the file looks like what is in the screenshot below and contain the following settings:
tickTime = 2000
initLimit=10
syncLimit=5
dataDir=/var/lib/zookeeper
clientPort=2181
Note: dataDir should be set to the directory we created in the previous step i.e. /var/lib/zookeeper

Let us have a short overview of what these configuration settings mean:
- tickTime: It is the time used by Zookeeper to do heartbeat with all the system nodes to check if all the nodes are alive and connected.
- initTime: The number of ticks that an initial synchronization phase can take.
- syncTime: The number of ticks that can pass between sending the request and getting an acknowledgement.
- dataDir: Directory to store in-memory database snapshots and the transaction logs by Zookeeper.
- clientPort: The port which will be used for the client connections.
3.6 Starting The Server
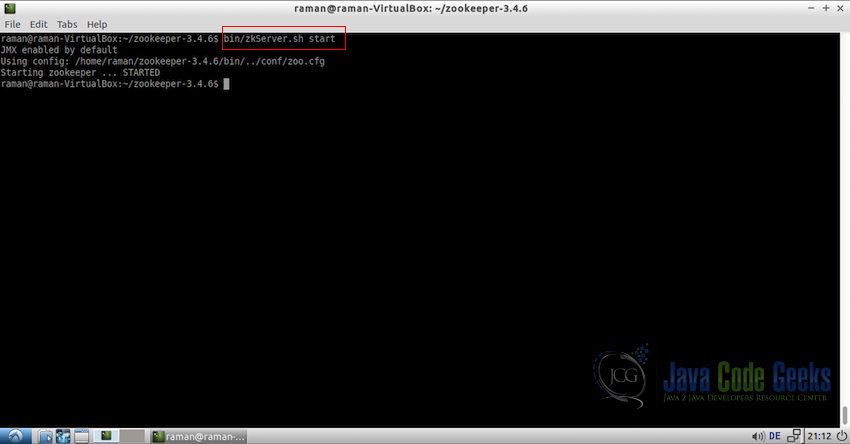
Now it is the time to start the Zookeeper server. Zookeeper comes with a script file to make it easy to start the server. The file is called zkServer.sh. So to start the server use the following code:
cd zookeeper-3.4.6/
bin/zkServer.sh start
It should display the console output similar to the following screenshot:
4. Zookeeper Server Basic Interaction
4.1 Starting The CLI
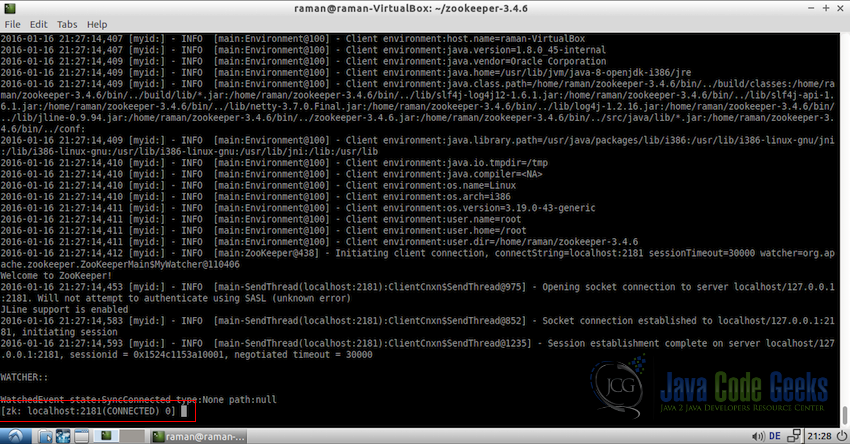
Once the Zookeeper server is running successfully, we can start the CLI(Command Line Interface) to interact with the server. Use the following command to do so:
cd zookeeper-3.4.6/
bin/zkCLi.sh -server
With this command, the console will go into the Zookeeper command line mode where we can use the Zookeeper specific commands to interact with the server.
4.2 Creating The First Znode
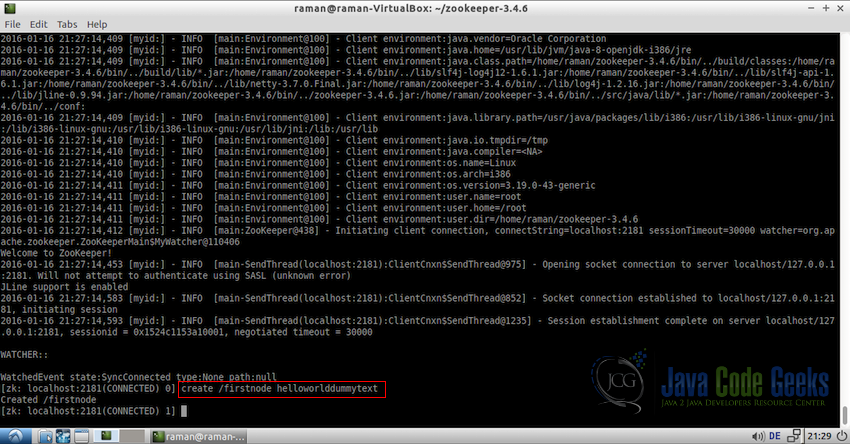
Let us start by creating a new node. Following is the Zookeeper command to create a new znode with dummy data.
create /firstnode helloworlddummytext
Here firstnode is the name of the znode which will be created on the root path as indicated by / and helloworlddummytext is the dummy text stored in the znode memory.
4.3 Retrieving Data From The First Znode
Similar to how we created a new znode, we can get back the details and data of the znode using the CLI(Command Line Interface). Following is the command for getting the data from znode.
get /firstnode
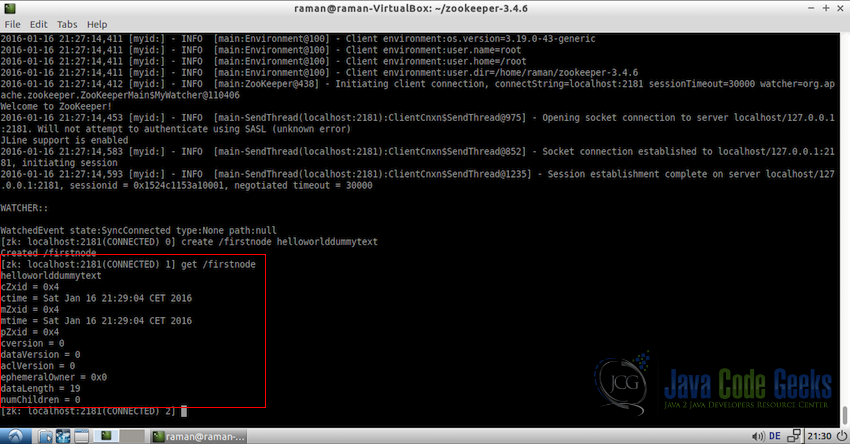
If you notice in the screenshot, along with the data we stored in the znode while creating, the server also returned some metadata related to this particular znode.
Some of the important fields in the metadata are:
- ctime: Time when this znode was created.
- mtime: Last modified time.
- dataVersion: Version of the data which changes everytime data is modified
- datalength: Length of the data stored in the znode. In this case data is
helloworlddummydataand the length is 19. - numchildren: Number of children of this aprticualr znode.
4.4 Modifying Data in Znode
If we want to modify data in a particular node Zookeeper provides a command for that also. Following is how to modify the data in an existing znode:
set /firstnode helloworld
Where firstnode is the existing znode and helloworld is the new data which need to be written in the znode. Old data will be removed when new data is set.
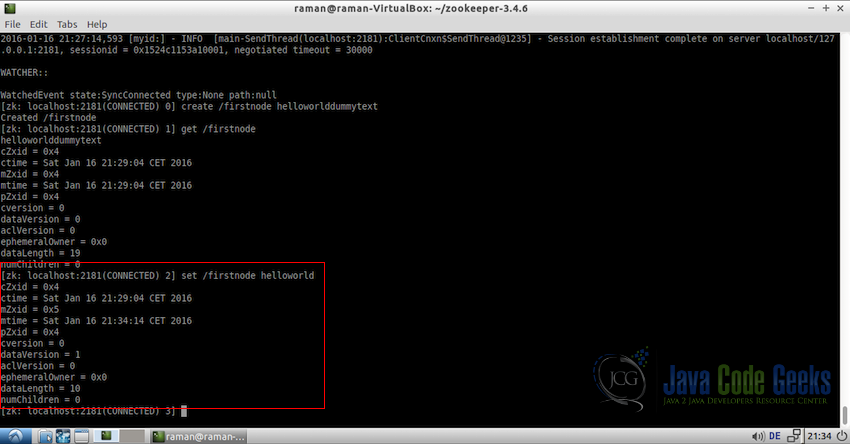
If you notice in the screenshot above datalength, mtime, and dataversion is also updated when a new value is set.
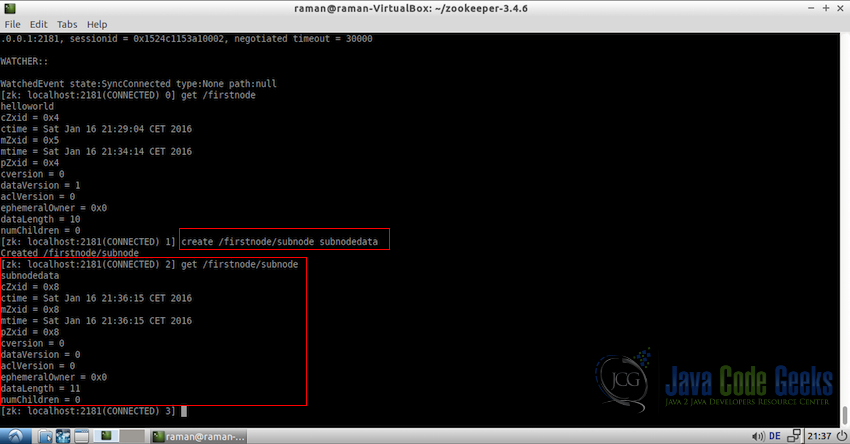
4.5 Creating A Subnode
Creating a subnode in an existing node is as easy as creating a new node. We just need to pass the full path for the new subnode.
create /firstnode/subnode subnodedata
get /firstnode/subnode
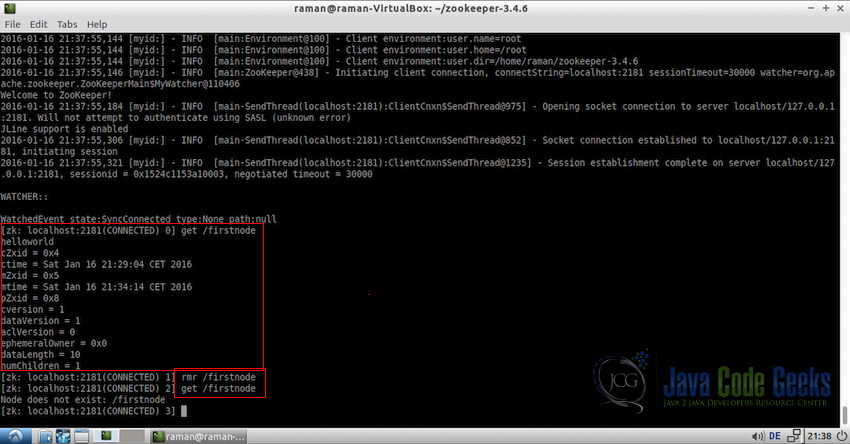
4.6 Removing A Node
Removing a node is quite easy using rmr command in the Zookeeper CLI. Removing a node also removing all its subnodes. Following is the code to remove firstnode which we created for this example:
rmr /firstnode
5. Conclusion
This brings us to the conclusion of this introductory example for Apache Zookeeper. In this example, we started with the introduction and the general architecture of Zookeeper followed by learning how to setup Zookeeper in a single machine. We also saw that using Zookeeper CLI to interface with the Zookeeper Service is also quite easy and command are present for all the basic interactions.
6. Download The Configuration File
You can download the configuration file
zoo.cfg used in this example here: Zookeeper Configuration