JavaFX TreeTableView Example
This is a JavaFX TreeTableView Example. The TreeTableView control combines the features of the TableView and TreeView controls. It displays a TreeView inside a TableView.
A TreeView is used to view hierarchical data. A TableView is used to view tabular data. A TreeTableView is used to view hierarchical data in a tabular form.
The following table shows an overview of the whole article:
Table Of Contents
The following examples use Java SE 8 and JavaFX 2.2.
1. Introduction
TreeTableView inherits from Control, not from TreeView or TableView. TreeTableView reuses most of the code used for TreeView and TableView. Most of the classes in the API are inherited from a common abstract base class for all three controls.
For example, the TableColumn and TreeTableColumn classes are used to define columns in TableView and TreeTableView, respectively, and both are inherited from the TableColumnBase class.
TreeTableView API looks huge as it combines the APIs for both TreeView and TableView. However, if you are familiar with TreeView and TableView APIs, the TreeTableView API will look familiar to you.
TreeTableView supports the following features:
- You can add multiple columns.
- You can have nested columns.
- You can resize columns at runtime.
- You can reorder columns at runtime.
- You can sort data on a single or multiple columns.
- You can add a context menu for columns.
- You can set a cell value factory for a column to populate its cells.
- You can set a cell factory for a column to customize its cells rendering.
- You can edit data in cells.
TreeItems provide the model in a TreeView. Each node in the TreeView derives its data from the corresponding TreeItem. Recall that you can visualize each node in a TreeView as a row with only one column.
An ObservableList provides the model in a TableView. Each item in the observable list provides data for a row in the TableView. A TableView can have multiple columns.
TreeTableView also uses a model for its data. Because it is a combination of TreeView and TableView, it has to decide which type of model it uses. It uses the model based on TreeView. That is, each row in a TreeTableView is defined by a TreeItem in a TreeView. TreeTableView supports multiple columns. Data for columns in a row are derived from the TreeItem for that row.
2. Creating a TreeTableView
2.1 The Code
Person.java
import java.time.LocalDate;
import java.time.temporal.ChronoUnit;

public class Person
{
	// Declaring the attributes page 424
	private String firstName;
	private String lastName;
	private LocalDate birthDate;

	// An enum for age categories
	public enum AgeCategory
	{
		BABY,
		CHILD,
		TEEN,
		ADULT,
		SENIOR,
		UNKNOWN
	};

	public Person(String firstName, String lastName, LocalDate birthDate)
	{
		this.firstName = firstName;
		this.lastName = lastName;
		this.birthDate = birthDate;
	}

	public String getFirstName()
	{
		return firstName;
	}

	public void setFirstName(String firstName)
	{
		this.firstName = firstName;
	}

	public String getLastName()
	{
		return lastName;
	}

	public void setLastName(String lastName)
	{
		this.lastName = lastName;
	}

	public LocalDate getBirthDate()
	{
		return birthDate;
	}

	public void setBirthDate(LocalDate birthDate)
	{
		this.birthDate = birthDate;
	}

	@Override
	public String toString()
	{
		return firstName + " " + lastName + ", " + birthDate.toString();
	}

	/* Domain specific business rules */
	public AgeCategory getAgeCategory()
	{
		if (birthDate == null)
		{
			return AgeCategory.UNKNOWN;
		}

		long years = ChronoUnit.YEARS.between(birthDate, LocalDate.now());

		if (years >= 0 && years < 2)
		{
			return AgeCategory.BABY;
		}
		else if (years >= 2 && years < 13)
		{
			return AgeCategory.CHILD;
		}
		else if (years >= 13 && years <= 19)
		{
			return AgeCategory.TEEN;
		}
		else if (years > 19 && years <= 50)
		{
			return AgeCategory.ADULT;
		}
		else if (years > 50)
		{
			return AgeCategory.SENIOR;
		}
		else
		{
			return AgeCategory.UNKNOWN;
		}
	}
}
TreeTableUtil.java
import java.time.LocalDate;

import javafx.scene.control.TreeItem;
import javafx.scene.control.TreeTableColumn;
import javafx.scene.control.cell.TreeItemPropertyValueFactory;

public class TreeTableUtil
{
	@SuppressWarnings("unchecked")
	public static TreeItem<Person> getModel()
	{
		// Create all persons
		// First level
		Person person1 = new Person("FirstName1", "LastName1", LocalDate.of(1930, 1, 1));

		// Second level
		Person person2 = new Person("FirstName2", "LastName2", LocalDate.of(1956, 12, 17));
		Person person3 = new Person("FirstName3", "LastName3", LocalDate.of(1961, 3, 1));
		Person person4 = new Person("FirstName4", "LastName4", LocalDate.of(1968, 1, 12));
		Person person5 = new Person("FirstName5", "LastName5", LocalDate.of(1978, 4, 14));

		// Third level
		Person person6 = new Person("FirstName6", "LastName6", LocalDate.of(1980, 5, 10));
		Person person7 = new Person("FirstName7", "LastName7", LocalDate.of(1981, 3, 20));
		Person person8 = new Person("FirstName8", "LastName8", LocalDate.of(1982, 6, 3));
		Person person9 = new Person("FirstName9", "LastName9", LocalDate.of(1990, 8, 27));
		Person person10 = new Person("FirstName10", "LastName10", LocalDate.of(1994, 5, 15));

		// Fourth level
		Person person11 = new Person("FirstName11", "LastName11", LocalDate.of(2010, 6, 3));
		Person person12 = new Person("FirstName12", "LastName12", LocalDate.of(2012, 10, 11));
		Person person13 = new Person("FirstName13", "LastName13", LocalDate.of(2012, 10, 11));

		// Build nodes
		TreeItem<Person> person6Node = new TreeItem<>(person6);
		person6Node.getChildren().addAll(new TreeItem<>(person11), new TreeItem<>(person12));

		TreeItem<Person> person7Node = new TreeItem<>(person7);
		person7Node.getChildren().addAll(new TreeItem<>(person13));

		TreeItem<Person> person2Node = new TreeItem<>(person2);
		person2Node.getChildren().addAll(person6Node, new TreeItem<>(person8),person7Node);

		TreeItem<Person> person3Node = new TreeItem<>(person3);
		person3Node.getChildren().addAll(new TreeItem<>(person9), new TreeItem<>(person10));

		TreeItem<Person> person4Node = new TreeItem<>(person4);
		TreeItem<Person> person5Node = new TreeItem<>(person5);

		// Create the root node and add children
		TreeItem<Person> rootNode = new TreeItem<>(person1);
		rootNode.getChildren().addAll(person2Node, person3Node, person4Node, person5Node);

		return rootNode;
	}

	// Returns Person Id TreeTableColumn
	public static TreeTableColumn<Person, Integer> getIdColumn()
	{
		TreeTableColumn<Person, Integer> idColumn = new TreeTableColumn<>("Id");
		idColumn.setCellValueFactory(new TreeItemPropertyValueFactory<>("personId"));
		return idColumn;
	}

	// Returns First Name TreeTableColumn
	public static TreeTableColumn<Person, String> getFirstNameColumn()
	{
		TreeTableColumn<Person, String> firstNameCol = new TreeTableColumn<>("First Name");
		firstNameCol.setCellValueFactory(new TreeItemPropertyValueFactory<>("firstName"));
		return firstNameCol;
	}

	// Returns Last Name TreeTableColumn
	public static TreeTableColumn<Person, String> getLastNameColumn()
	{
		TreeTableColumn<Person, String> lastNameCol = new TreeTableColumn<>("Last Name");
		lastNameCol.setCellValueFactory(new TreeItemPropertyValueFactory<>("lastName"));
		return lastNameCol;
	}

	// Returns Birth Date TreeTableColumn
	public static TreeTableColumn<Person, LocalDate> getBirthDateColumn()
	{
		TreeTableColumn<Person, LocalDate> birthDateCol = new TreeTableColumn<>("Birth Date");
		birthDateCol.setCellValueFactory(new TreeItemPropertyValueFactory<>("birthDate"));
		return birthDateCol;
	}

	// Returns Age Category TreeTableColumn
	public static TreeTableColumn<Person, Person.AgeCategory> getAgeCategoryColumn()
	{
		TreeTableColumn<Person, Person.AgeCategory> birthDateCol = new TreeTableColumn<>("Age Category");
		birthDateCol.setCellValueFactory(new TreeItemPropertyValueFactory<>("ageCategory"));
		return birthDateCol;
	}
}
FxTreeTableViewExample1.java
import javafx.application.Application;
import javafx.scene.Scene;
import javafx.scene.control.TreeTableView;
import javafx.scene.layout.VBox;
import javafx.stage.Stage;

public class FxTreeTableViewExample1 extends Application
{
	public static void main(String[] args)
	{
		Application.launch(args);
	}

	@Override
	public void start(Stage stage)
	{
		// Create a TreeTableView with model
		TreeTableView<Person> treeTable = new TreeTableView<>();
		treeTable.setPrefWidth(400);

		// Create the VBox
		VBox root = new VBox(treeTable);

		// Set the Style-properties of the VBox
		root.setStyle("-fx-padding: 10;" +
				"-fx-border-style: solid inside;" +
				"-fx-border-width: 2;" +
				"-fx-border-insets: 5;" +
				"-fx-border-radius: 5;" +
				"-fx-border-color: blue;");

		// Create the Scene
		Scene scene = new Scene(root);
		// Add the Scene to the Stage
		stage.setScene(scene);
		// Set the Title
		stage.setTitle("A simple TreeTableView");
		// Display the Stage
		stage.show();
	}
}
FxTreeTableViewExample2.java
import javafx.application.Application;
import javafx.scene.Scene;
import javafx.scene.control.TreeTableColumn;
import javafx.scene.control.TreeTableView;
import javafx.scene.layout.VBox;
import javafx.stage.Stage;

public class FxTreeTableViewExample2 extends Application
{
	public static void main(String[] args)
	{
		Application.launch(args);
	}

	@Override
	public void start(Stage stage)
	{
		// Create a TreeTableView with model
		TreeTableView<Person> treeTable = new TreeTableView<>();
		treeTable.setPrefWidth(400);

		// Create three columns
		TreeTableColumn<Person, String> firstNameCol = new TreeTableColumn<>("First Name");
		TreeTableColumn<Person, String> lastNameCol = new TreeTableColumn<>("Last Name");
		TreeTableColumn<Person, String> birthDateCol = new TreeTableColumn<>("Birth Date");

		// Add columns to the TreeTableView
		treeTable.getColumns().add(firstNameCol);
		treeTable.getColumns().add(lastNameCol);
		treeTable.getColumns().add(birthDateCol);

		// Create the VBox
		VBox root = new VBox(treeTable);

		// Set the Style-properties of the VBox
		root.setStyle("-fx-padding: 10;" +
				"-fx-border-style: solid inside;" +
				"-fx-border-width: 2;" +
				"-fx-border-insets: 5;" +
				"-fx-border-radius: 5;" +
				"-fx-border-color: blue;");

		// Create the Scene
		Scene scene = new Scene(root);
		// Add the Scene to the Stage
		stage.setScene(scene);
		// Set the Title
		stage.setTitle("A simple TreeTableView with Colums");
		// Display the Stage
		stage.show();
	}
}
FxTreeTableViewExample3.java
import javafx.application.Application;
import javafx.scene.Scene;
import javafx.scene.control.TreeItem;
import javafx.scene.control.TreeTableView;
import javafx.scene.layout.VBox;
import javafx.stage.Stage;

public class FxTreeTableViewExample3 extends Application
{
	public static void main(String[] args)
	{
		Application.launch(args);
	}

	@Override
	public void start(Stage stage)
	{
		// Create the RootNode
		TreeItem<Person> rootNode = TreeTableUtil.getModel();
		rootNode.setExpanded(true);

		// Create a TreeTableView with model
		TreeTableView<Person> treeTable = new TreeTableView<>(rootNode);
		treeTable.setPrefWidth(400);

		// Add columns to the TreeTableView
		treeTable.getColumns().add(TreeTableUtil.getFirstNameColumn());
		treeTable.getColumns().add(TreeTableUtil.getLastNameColumn());
		treeTable.getColumns().add(TreeTableUtil.getBirthDateColumn());
		treeTable.getColumns().add(TreeTableUtil.getAgeCategoryColumn());

		// Create the VBox
		VBox root = new VBox(treeTable);

		// Set the Style-properties of the VBox
		root.setStyle("-fx-padding: 10;" +
				"-fx-border-style: solid inside;" +
				"-fx-border-width: 2;" +
				"-fx-border-insets: 5;" +
				"-fx-border-radius: 5;" +
				"-fx-border-color: blue;");

		// Create the Scene
		Scene scene = new Scene(root);
		// Add the Scene to the Stage
		stage.setScene(scene);
		// Set the Title
		stage.setTitle("A TreeTableView with Data");
		// Display the Stage
		stage.show();
	}
}
An instance of the TreeTableView represents a TreeTableView control. The class takes a generic type argument, which is the type of the item contained in the TreeItems. Recall that TreeItems provide a model for a TreeTableView. The generic type of the controls and its TreeItems are the same.
The TreeTableView class provides two constructors. The default constructor creates a TreeTableView with no data. The following statement creates a TreeTableView of Person. The control displays a placeholder, similar to the one shown by TableView. Like a TableView, TreeTableView contains a placeholder property, which is Node, and if you need to, you can supply your own placeholder:
// Create a TableView
TreeTableView<Person> treeTable = new TreeTableView<>();
An instance of the TreeTableColumn class represents a column in a TreeTableView. The getColumns() method of the TreeTableView class returns an ObservableList of TreeTableColumns, which are columns that are added to the TreeTableView. You need to add columns to this columns list.
The following snippet of code creates four columns and adds them to the TreeTableView.
// Create three columns
TreeTableColumn firstNameCol = new TreeTableColumn("First Name");
TreeTableColumn lastNameCol = new TreeTableColumn("Last Name");
TreeTableColumn birthDateCol = new TreeTableColumn("Birth Date");

// Add columns to the TreeTableView
treeTable.getColumns().add(firstNameCol);
treeTable.getColumns().add(lastNameCol);
treeTable.getColumns().add(birthDateCol);
Now you need to supply data for the control. TreeTableView displays hierarchical data in tabular form. It requires you to construct a hierarchical model using TreeItems.
You need to pass the root TreeItem to the TreeTableView. Like a TreeView, a TreeTableView contains a root property, which is the root TreeItem for the TreeView. The root property acts as a model for the TreeTableView to supply it data.
The following snippet of code creates a tree of some persons. The root TreeItem is set as the root of the TreeTableView.
Person person1 = new Person("FirstName1", "LastName1", LocalDate.of(1930, 1, 1));

// Second level
Person person2 = new Person("FirstName2", "LastName2", LocalDate.of(1956, 12, 17));
Person person3 = new Person("FirstName3", "LastName3", LocalDate.of(1961, 3, 1));
Person person4 = new Person("FirstName4", "LastName4", LocalDate.of(1968, 1, 12));
Person person5 = new Person("FirstName5", "LastName5", LocalDate.of(1978, 4, 14));

Person person9 = new Person("FirstName9", "LastName9", LocalDate.of(1990, 8, 27));
Person person10 = new Person("FirstName10", "LastName10", LocalDate.of(1994, 5, 15));

TreeItem<Person> person3Node = new TreeItem<>(person3);
person3Node.getChildren().addAll(new TreeItem<>(person9), new TreeItem<>(person10));

TreeItem<Person> person4Node = new TreeItem<>(person4);
TreeItem<Person> person5Node = new TreeItem<>(person5);

// Create the root node and add children
TreeItem<Person> rootNode = new TreeItem<>(person1);
rootNode.getChildren().addAll(person2Node, person3Node, person4Node, person5Node);

// Set the model for the TreeTableView
treeTable.setRoot(rootNode);
There is a missing link and the columns do not know how to extract data from the TreeItems. This is accomplished by setting the cell value factory for each column.
Setting the cell value factory for a TreeTableColumn is very similar to of the way you would for TableColumn. The following snippet of code sets the cell value factory for columns:
// Create Columns with Cell Factories
TreeTableColumn<Person, String> firstNameColumn = TreeTableUtil.getFirstNameColumn();
firstNameColumn.setCellFactory(TextFieldTreeTableCell.<Person>forTreeTableColumn());

TreeTableColumn<Person, String> lastNameColumn = TreeTableUtil.getLastNameColumn();
lastNameColumn.setCellFactory(TextFieldTreeTableCell.<Person>forTreeTableColumn());

TreeTableColumn<Person, LocalDate> birthDateColumn = TreeTableUtil.getBirthDateColumn();
LocalDateStringConverter converter = new LocalDateStringConverter();

birthDateColumn.setCellFactory(TextFieldTreeTableCell.<Person, LocalDate>forTreeTableColumn(converter));
A TreeItemPropertyValueFactory reads the specified property of the object stored in the value property of a TreeItem to populate the cells of the column.
In the example, each TreeItem contains a Person object.
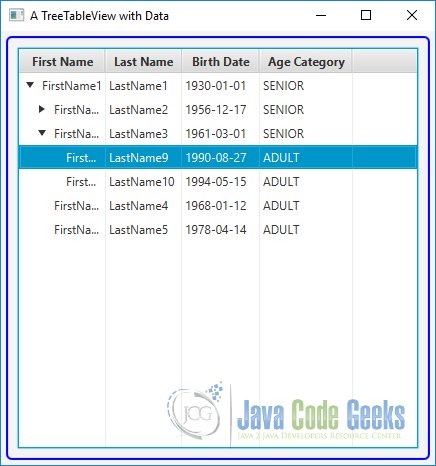
If you ignore the disclosure node and indentations in the first column, this is exactly how a TableView shows the data. The disclosure node and the indentations are features of the TreeView.
By default, a TreeTableView shows the disclosure node in the first column. You can show it in any other column using the treeColumn property.
The following snippet of code shows the disclosure node in the Last Name column:
treeTable.setTreeColumn(lastNameCol);
Another constructor of the TreeTableView class takes the value for its root property as an argument. You can use it as follows:
TreeTableView<Person> treeTable = new TreeTableView<Person>(rootNode);
2.2 The GUI
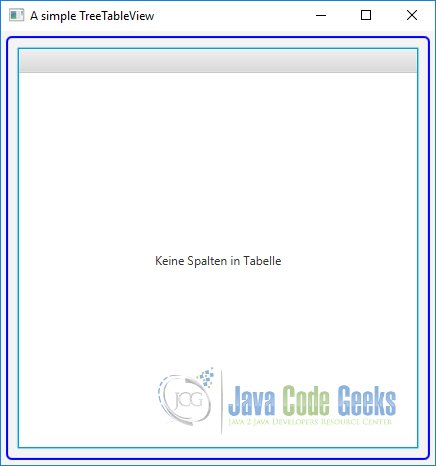
The following image shows a empty TreeTableView.
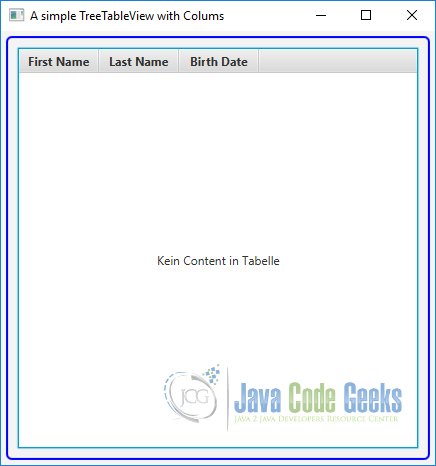
The following image shows a TreeTableView with columns, but no content.
The following image shows a TreeTableView with columns and data.
3. Showing and Hiding Columns
3.1 The Code
FxTreeTableViewExample4.java
import java.time.LocalDate;

import javafx.application.Application;
import javafx.scene.Scene;
import javafx.scene.control.TreeItem;
import javafx.scene.control.TreeTableColumn;
import javafx.scene.control.TreeTableView;
import javafx.scene.layout.VBox;
import javafx.stage.Stage;

public class FxTreeTableViewExample4 extends Application
{
	public static void main(String[] args)
	{
		Application.launch(args);
	}

	@Override
	public void start(Stage stage)
	{
		// Create the RootNode
		TreeItem<Person> rootNode = TreeTableUtil.getModel();
		rootNode.setExpanded(true);

		// Create a TreeTableView with model
		TreeTableView<Person> treeTable = new TreeTableView<>(rootNode);
		treeTable.setPrefWidth(400);

		// Create the TreeTableColumns
		TreeTableColumn<Person, String> firstNameColumn = TreeTableUtil.getFirstNameColumn();
		TreeTableColumn<Person, String> lastNameColumn = TreeTableUtil.getLastNameColumn();
		TreeTableColumn<Person, LocalDate> birthDateColumn = TreeTableUtil.getBirthDateColumn();
		TreeTableColumn<Person, Person.AgeCategory> ageCategoryColumn = TreeTableUtil.getAgeCategoryColumn();

		// Make the Age Category column invisible
		ageCategoryColumn.setVisible(false);

		// Add columns to the TreeTableView
		treeTable.getColumns().add(firstNameColumn);
		treeTable.getColumns().add(lastNameColumn);
		treeTable.getColumns().add(birthDateColumn);
		treeTable.getColumns().add(ageCategoryColumn);

		// Create the VBox
		VBox root = new VBox(treeTable);

		// Set the Style-properties of the VBox
		root.setStyle("-fx-padding: 10;" +
				"-fx-border-style: solid inside;" +
				"-fx-border-width: 2;" +
				"-fx-border-insets: 5;" +
				"-fx-border-radius: 5;" +
				"-fx-border-color: blue;");

		// Create the Scene
		Scene scene = new Scene(root);
		// Add the Scene to the Stage
		stage.setScene(scene);
		// Set the Title
		stage.setTitle("A Visibilty Example");
		// Display the Stage
		stage.show();
	}
}
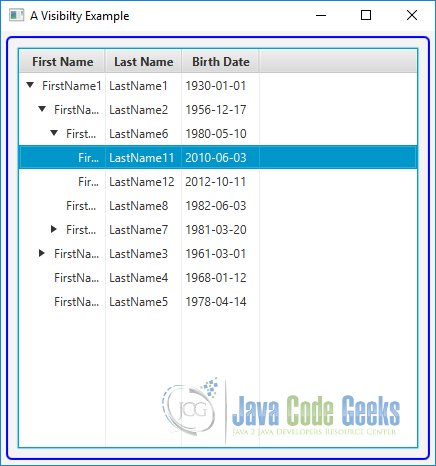
Showing and hiding columns in a TreeTableView work the same way they do for TableView. By default, all columns in a TreeTableView are visible. The TreeTableColumn class has a visible property to set the visibility of a column. If you turn off the visibility of a parent column, a column with nested columns, all its nested columns will become invisible. The following code shows this:
TreeTableColumn<Person, Person.AgeCategory> ageCategoryColumn = TreeTableUtil.getAgeCategoryColumn();

// Make the Age Category column invisible
ageCategoryColumn.setVisible(false);
Sometimes you may want to let the user control the visibility of columns. The TreeTableView class has a tableMenuButtonVisible property. If it is set to true, a menu button is displayed in the header area. Clicking the Menu button displays a list of all leaf columns. Columns are displayed as radio menu items that can be used to toggle their visibility.
3.2 The GUI
The following image shows a TreeTableView with a hidden column.
4. Selecting Cells and Rows in a TreeTableView
4.1 The Code
FxTreeTableViewExample5.java
import java.time.LocalDate;

import javafx.application.Application;
import javafx.scene.Scene;
import javafx.scene.control.SelectionMode;
import javafx.scene.control.TreeItem;
import javafx.scene.control.TreeTableColumn;
import javafx.scene.control.TreeTableView;
import javafx.scene.control.TreeTableView.TreeTableViewSelectionModel;
import javafx.scene.layout.VBox;
import javafx.stage.Stage;

public class FxTreeTableViewExample5 extends Application
{
	public static void main(String[] args)
	{
		Application.launch(args);
	}

	@Override
	public void start(Stage stage)
	{
		// Create the RootNode
		TreeItem<Person> rootNode = TreeTableUtil.getModel();
		rootNode.setExpanded(true);

		// Create a TreeTableView with model
		TreeTableView<Person> treeTable = new TreeTableView<>(rootNode);
		treeTable.setPrefWidth(400);

		// Create the TreeTableColumns
		TreeTableColumn<Person, String> firstNameColumn = TreeTableUtil.getFirstNameColumn();
		TreeTableColumn<Person, String> lastNameColumn = TreeTableUtil.getLastNameColumn();
		TreeTableColumn<Person, LocalDate> birthDateColumn = TreeTableUtil.getBirthDateColumn();
		TreeTableColumn<Person, Person.AgeCategory> ageCategoryColumn = TreeTableUtil.getAgeCategoryColumn();

		// Add columns to the TreeTableView
		treeTable.getColumns().add(firstNameColumn);
		treeTable.getColumns().add(lastNameColumn);
		treeTable.getColumns().add(birthDateColumn);
		treeTable.getColumns().add(ageCategoryColumn);

		// Turn on multiple-selection mode for the TreeTableView
		TreeTableViewSelectionModel<Person> selection = treeTable.getSelectionModel();
		selection.setSelectionMode(SelectionMode.MULTIPLE);

		// Enable cell-level selection
		selection.setCellSelectionEnabled(true);

		// Create the VBox
		VBox root = new VBox(treeTable);

		// Set the Style-properties of the VBox
		root.setStyle("-fx-padding: 10;" +
				"-fx-border-style: solid inside;" +
				"-fx-border-width: 2;" +
				"-fx-border-insets: 5;" +
				"-fx-border-radius: 5;" +
				"-fx-border-color: blue;");

		// Create the Scene
		Scene scene = new Scene(root);
		// Add the Scene to the Stage
		stage.setScene(scene);
		// Set the Title
		stage.setTitle("A TreeTableView with a Selection Model");
		// Display the Stage
		stage.show();
	}
}
TreeTableView has a selection model represented by its property called selectionModel. A selection model is an instance of the TreeTableViewSelectionModel class, which is an inner static class of the TreeTableView class. The selection model supports cell-level and row-level selection. It also supports two selection modes: single and multiple.
In the single selection mode, only one cell or row can be selected at a time. In the multiple-selection mode, multiple cells or rows can be selected. By default, single row selection is enabled.
You can enable multirow selection using the following code:
// Turn on multiple-selection mode for the TreeTableView
TreeTableViewSelectionModel<Person> selection = treeTable.getSelectionModel();
selection.setSelectionMode(SelectionMode.MULTIPLE);
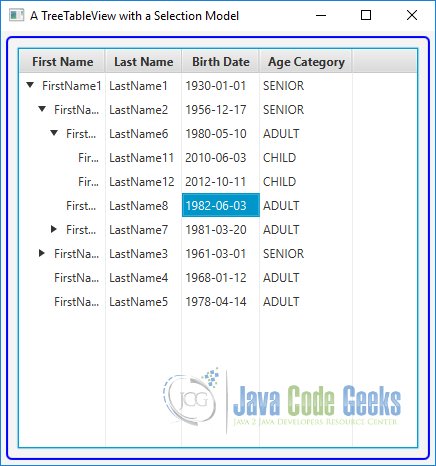
The cell-level selection can be enabled by setting the cellSelectionEnabled property of the selection model to true, as shown in the following snippet of code. When the property is set to true, the TreeTableView is put in cell-level selection mode and you cannot select an entire row. If multiple-selection mode is enabled, you can still select all cells in a row. However, the row itself is not reported as selected because the TreeTableView is in the cell-level selection mode. By default, cell-level selection mode is false.
// Enable cell-level selection
selection.setCellSelectionEnabled(true);
The selection model provides information about the selected cells and rows. The isSelected(int rowIndex) method returns true if the row at the specified rowIndex is selected. Use the isSelected(int rowIndex, TableColumn<S,?> column) method to determine if a cell at the specified rowIndex and column is selected. The getModelItem(int rowIndex) method returns the TreeItem for the specified rowIndex.
4.2 The GUI
The following image shows a TreeTableView with a selection model.
5. Editing Data in a TableView
5.1 The Code
FxTreeTableViewExample6.java
import java.time.LocalDate;

import javafx.application.Application;
import javafx.scene.Scene;
import javafx.scene.control.TreeItem;
import javafx.scene.control.TreeTableColumn;
import javafx.scene.control.TreeTableView;
import javafx.scene.control.cell.TextFieldTreeTableCell;
import javafx.scene.layout.VBox;
import javafx.stage.Stage;
import javafx.util.converter.LocalDateStringConverter;

public class FxTreeTableViewExample6 extends Application
{
	public static void main(String[] args)
	{
		Application.launch(args);
	}

	@Override
	public void start(Stage stage)
	{
		// Create the RootNode
		TreeItem<Person> rootNode = TreeTableUtil.getModel();
		rootNode.setExpanded(true);

		// Create a TreeTableView with a model
		TreeTableView<Person> treeTable = new TreeTableView<Person>(rootNode);
		treeTable.setPrefWidth(400);

		// Must make the TreeTableView editable
		treeTable.setEditable(true);

		// Create Columns with Cell Factories
		TreeTableColumn<Person, String> firstNameColumn = TreeTableUtil.getFirstNameColumn();
		firstNameColumn.setCellFactory(TextFieldTreeTableCell.<Person>forTreeTableColumn());

		TreeTableColumn<Person, String> lastNameColumn = TreeTableUtil.getLastNameColumn();
		lastNameColumn.setCellFactory(TextFieldTreeTableCell.<Person>forTreeTableColumn());

		TreeTableColumn<Person, LocalDate> birthDateColumn = TreeTableUtil.getBirthDateColumn();
		LocalDateStringConverter converter = new LocalDateStringConverter();

		birthDateColumn.setCellFactory(TextFieldTreeTableCell.<Person, LocalDate>forTreeTableColumn(converter));

		// Add Columns to the Tree
		treeTable.getColumns().add(firstNameColumn);
		treeTable.getColumns().add(lastNameColumn);
		treeTable.getColumns().add(birthDateColumn);

		// Create the VBox
		VBox root = new VBox(treeTable);

		// Set the Style-properties of the VBox
		root.setStyle("-fx-padding: 10;" +
				"-fx-border-style: solid inside;" +
				"-fx-border-width: 2;" +
				"-fx-border-insets: 5;" +
				"-fx-border-radius: 5;" +
				"-fx-border-color: blue;");

		// Create the Scene
		Scene scene = new Scene(root);
		// Add the Scene to the Stage
		stage.setScene(scene);
		// Set the Title
		stage.setTitle("Editing Data in a TreeTableView");
		// Display the Stage
		stage.show();
	}
}
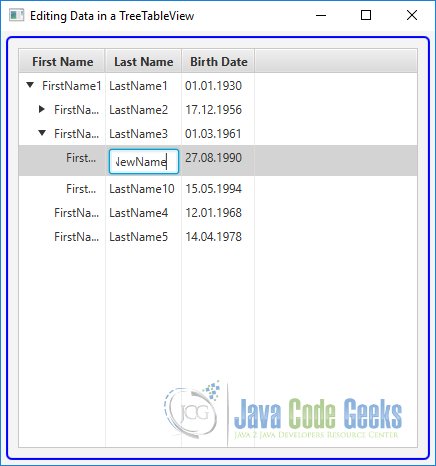
A cell in a TreeTableView can be editable. An editable cell switches between editing and nonediting modes. In editing mode, cell data can be modified by the user. In order for a cell to enter editing mode, the TreeTableView, TreeTableColumn, and TreeTableCell must be editable.
All three of them have an editable property, which can be set to true using the setEditable(true) method. By default, TreeTableColumn and TreeTableCell are editable. To make cells editable in a TreeTableView, you need to make the TreeTableView editable, as shown in the following code:
// Must make the TreeTableView editable
treeTable.setEditable(true);
The TreeTableColumn class supports three types of events:
- onEditStart
- onEditCommit
- onEditCancel
The onEditStart event is fired when a cell in the column enters editing mode. The onEditCommit event is fired when the user successfully commits the editing, for example, by pressing the Enter key in a TextField. The onEditCancel event is fired when the user cancels the editing, for example, by pressing the Esc key in a TextField. The events are represented by an object of the TreeTableColumn.CellEditEvent class.
The event object encapsulates the old and new values in the cell, the TreeItem of the model being edited, TreeTableColumn, the TreeTablePosition indicating the cell position where the editing is happening, and the reference of the TreeTableView. Use the methods of the CellEditEvent class to get these values.
Making a TreeTableView editable does not let you edit its cell data. You need to do a little more of a plumbing job before you can edit data in cells. Cell editing capability is provided through specialized implementations of the TreeTableCell class.
JavaFX library provides a few of these implementations. Set the cell factory for a column to use one of the following implementations of the TreeTableCell to edit cell data:
- CheckBoxTreeTableCell
- ChoiceBoxTreeTableCell
- ComboBoxTreeTableCell
- TextFieldTreeTableCell
The only difference between editing cells in TableView and TreeTableView is the cell classes you will need to use. TableView uses subclasses of TableCell that are named as XxxTableCell. TreeTableView uses subclasses of TreeTableCell that are named as XxxTreeTableCell.
The following snippet of code sets the cell factory for the First Name column to use a TextField to edit data in its cells:
// Create Columns with Cell Factories
TreeTableColumn<Person, String> firstNameColumn = TreeTableUtil.getFirstNameColumn();
firstNameColumn.setCellFactory(TextFieldTreeTableCell.<Person>forTreeTableColumn());
When editing nonstring data in cell, you need to provide a StringConverter.
The following snippet of code sets a cell factory for a Birth Date column with a StringConverter, which converts a String to a LocalDate and vice versa.
The column type is LocalDate. By default, the LocalDateStringConverter assumes a date format of mm/dd/yyyy:
TreeTableColumn<Person, LocalDate> birthDateColumn = TreeTableUtil.getBirthDateColumn();
LocalDateStringConverter converter = new LocalDateStringConverter();

birthDateColumn.setCellFactory(TextFieldTreeTableCell.<Person, LocalDate>forTreeTableColumn(converter));
5.2 The GUI
The following image shows an editable TreeTableView.
6. Adding and Deleting Rows in a TableView
6.1 The Code
FxTreeTableViewExample7.java
import javafx.application.Application;
import javafx.event.ActionEvent;
import javafx.event.EventHandler;
import javafx.scene.Scene;
import javafx.scene.control.Button;
import javafx.scene.control.TreeItem;
import javafx.scene.control.TreeTableColumn;
import javafx.scene.control.TreeTableView;
import javafx.scene.control.cell.TextFieldTreeTableCell;
import javafx.scene.layout.HBox;
import javafx.scene.layout.VBox;
import java.time.LocalDate;
import javafx.scene.control.TreeTableView.TreeTableViewSelectionModel;
import javafx.scene.control.Label;
import javafx.scene.control.TextArea;
import javafx.stage.Stage;
import javafx.util.converter.LocalDateStringConverter;

public class FxTreeTableViewExample7 extends Application
{
	// Create the TreeTableView
	private final TreeTableView<Person> treeTable = new TreeTableView<>();
	// Create a TextArea
	private final TextArea textarea = new TextArea();


	public static void main(String[] args)
	{
		Application.launch(args);
	}

	@Override
	public void start(Stage stage)
	{
		// Create the Root Node
		TreeItem<Person> rootNode = TreeTableUtil.getModel();
		rootNode.setExpanded(true);

		// Set the Properties of the Root Node
		treeTable.setRoot(rootNode);
		treeTable.setPrefWidth(400);
		treeTable.setEditable(true);
		treeTable.getSelectionModel().selectFirst();

		// Create Columns with Cell Factories
		TreeTableColumn<Person, String> firstNameColumn = TreeTableUtil.getFirstNameColumn();
		firstNameColumn.setCellFactory(TextFieldTreeTableCell.<Person>forTreeTableColumn());

		TreeTableColumn<Person, String> lastNameColumn = TreeTableUtil.getLastNameColumn();
		lastNameColumn.setCellFactory(TextFieldTreeTableCell.<Person>forTreeTableColumn());

		TreeTableColumn<Person, LocalDate> birthDateColumn = TreeTableUtil.getBirthDateColumn();
		LocalDateStringConverter converter = new LocalDateStringConverter();
		birthDateColumn.setCellFactory(TextFieldTreeTableCell.<Person, LocalDate>forTreeTableColumn(converter));

		// Add Columns to The TreeTableView
		treeTable.getColumns().add(firstNameColumn);
		treeTable.getColumns().add(lastNameColumn);
		treeTable.getColumns().add(birthDateColumn);

		// Add a placeholder to the TreeTableView.
		// It is displayed when the root node is deleted.
		treeTable.setPlaceholder(new Label("Click the Add button to add a row."));

		// Create the Label
		Label label = new Label("Please select a row to add/delete.");

		// Create the HBox
		HBox hbox = this.getButtons();

		// Create the VBox
		VBox root = new VBox(label, hbox, treeTable);
		root.setSpacing(10);

		// Create the Scene
		Scene scene = new Scene(root);
		// Add the Scene to the Stage
		stage.setScene(scene);
		// Set the Title
		stage.setTitle("Adding/Deleting Rows in a TreeTableView");
		// Display the Stage
		stage.show();
	}

	private HBox getButtons()
	{
		// Create the Buttons
		Button addButton = new Button("Add");
		Button deleteButton = new Button("Delete");

		// Create EventHandler for the Buttons
		addButton.setOnAction(new EventHandler<ActionEvent>()
		{
			@Override
			public void handle(ActionEvent event)
			{
				addRow();
			}
		});

		deleteButton.setOnAction(new EventHandler<ActionEvent>()
		{
			@Override
			public void handle(ActionEvent event)
			{
				deleteRow();
			}
		});

		// Create and return the HBox
		return new HBox(20, addButton, deleteButton);
	}

	private void addRow()
	{
		if (treeTable.getExpandedItemCount() == 0 )
		{
			// There is no row in the TreeTableView
			addNewRootItem();
		}
		else if (treeTable.getSelectionModel().isEmpty())
		{
			logging("Select a row to add.");
			return;
		}
		else
		{
			// Add Child
			addNewChildItem();
		}
	}

	private void addNewRootItem()
	{
		// Add a root Item
		TreeItem<Person> item = new TreeItem<>(new Person("New", "New", null));
		treeTable.setRoot(item);

		// Edit the item
		this.editItem(item);
	}

	private void addNewChildItem()
	{
		// Prepare a new TreeItem with a new Person object
		TreeItem<Person> item = new TreeItem<>(new Person("New", "New", null));

		// Get the selection model
		TreeTableViewSelectionModel<Person> sm = treeTable.getSelectionModel();

		// Get the selected row index
		int rowIndex = sm.getSelectedIndex();

		// Get the selected TreeItem
		TreeItem<Person> selectedItem = sm.getModelItem(rowIndex);

		// Add the new item as children to the selected item
		selectedItem.getChildren().add(item);

		// Make sure the new item is visible
		selectedItem.setExpanded(true);

		// Edit the item
		this.editItem(item);
	}

	private void editItem(TreeItem<Person> item)
	{
		// Scroll to the new item
		int newRowIndex = treeTable.getRow(item);
		treeTable.scrollTo(newRowIndex);

		// Put the first column in editing mode
		TreeTableColumn<Person, ?> firstCol = treeTable.getColumns().get(0);
		treeTable.getSelectionModel().select(item);
		treeTable.getFocusModel().focus(newRowIndex, firstCol);
		treeTable.edit(newRowIndex, firstCol);
	}

	private void deleteRow()
	{
		// Get the selection model
		TreeTableViewSelectionModel<Person> sm = treeTable.getSelectionModel();
		if (sm.isEmpty())
		{
			logging("Select a row to delete.");
			return;
		}

		// Get the selected Entry
		int rowIndex = sm.getSelectedIndex();
		TreeItem<Person> selectedItem = sm.getModelItem(rowIndex);
		TreeItem<Person> parent = selectedItem.getParent();

		if (parent != null)
		{
			// Remove the Item
			parent.getChildren().remove(selectedItem);
		}
		else
		{
			// Must be deleting the Root Item
			treeTable.setRoot(null);
		}
	}

	private void logging(String message)
	{
		this.textarea.appendText(message + "\n");
	}
}
Each row in a TreeTableView is represented by a TreeItem in its model. Adding and deleting a row in a TreeTableView is as simple as adding and deleting TreeItems in the model.
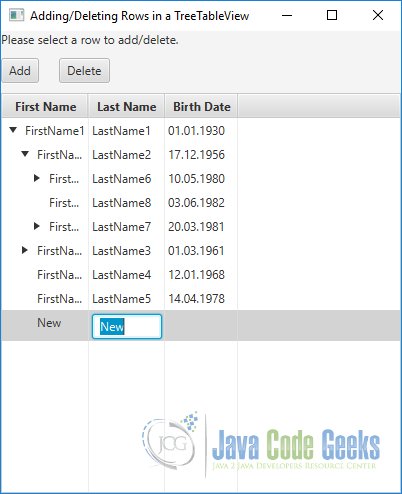
The above class shows how to add and delete rows. It displays a prebuilt family hierarchy in a TreeTableView along with Add and Delete buttons. Clicking the Add button adds a new row as a child row for the selected row. If there is no row, a new root item is added to the tree.
The new row is selected, scrolled to the view, and put in editing mode. The addRow() method contains the logic for adding a row. The Delete button deletes the selected row. Notice that all child rows of the selected row are deleted.
6.2 The GUI
The following image shows a TreeTableView, where rows can be added or removed.
7. Download the Source code
This was an example of javafx.scene.control.TreeTableView
You can download the full source code of this example here: JavaFX TreeTableView Example

