This is a JavaFX 2D Shape Example. Any shape that can be drawn in a two-dimensional plane is called a 2D shape. JavaFX offers variety nodes to draw different types of shapes (lines, circles, rectangles, etc.). You can add shapes to a Scene Graph. All shape classes are in the javafx.scene.shape package.
A Shape has a size and a position, which are defined by their properties. For example, the width and height properties define the size of a Rectangle. The radius property defines the size of a Circle. The x and y properties define the position of the upper-left corner of a Rectangle, the centerX and centerY properties define the center of a circle, etc.
Shapes are not resized by their parents during layout. The size of a shape changes only when its size-related properties are changed. Shapes have an interior and a stroke. The properties for defining the interior and stroke of a shape are declared in the Shape class.
The fill property specifies the color to fill the interior of the shape. The default fill is Color.BLACK. The stroke property specifies the color for the outline stroke, which is null by default, except for Line, Polyline, and Path, which have Color.BLACK as the default stroke.
The strokeWidth property specifies the width of the outline, which is 1.0px by default.
The Shape class contains a smooth property, which is true by default. Its true value indicates that an antialiasing hint should be used to render the shape. If it is set to false, the antialiasing hint will not be used, which may result in the edges of shapes being not crisp.
The following table shows an overview of the whole article:
Table Of Contents
The following examples use Java SE 7 and JavaFX 2.2.
1. Drawing Lines
1.1 The Code
Fx2DShapeExample1.java
import javafx.application.Application;
import javafx.scene.Scene;
import javafx.scene.layout.HBox;
import javafx.scene.paint.Color;
import javafx.scene.shape.Line;
import javafx.stage.Stage;

public class Fx2DShapeExample1 extends Application
{
	public static void main(String[] args)
	{
		Application.launch(args);
	}

	@Override
	public void start(Stage stage)
	{
		// Create the Lines
		Line line1 = new Line();
		Line line2 = new Line(0, 0, 50, 0);
		line2.setStrokeWidth(1.0);
		Line line3 = new Line(0, 50, 50, 0);
		line3.setStrokeWidth(2.0);
		line3.setStroke(Color.RED);
		Line line4 = new Line(0, 0, 50, 50);
		line4.setStrokeWidth(5.0);
		line4.setStroke(Color.BLUE);

		// Create the HBox
		HBox root = new HBox();
		// Add the Children to the HBox
		root.getChildren().addAll(line1, line2, line3, line4);
		// Set Spacing of the HBox
		root.setSpacing(10);

		// Set the Style of the HBox
		root.setStyle
		(
			"-fx-padding: 10;" +
			"-fx-border-style: solid inside;" +
			"-fx-border-width: 2;" +
			"-fx-border-insets: 5;" +
			"-fx-border-radius: 5;" +
			"-fx-border-color: blue;"
		);

		// Create the Scene
		Scene scene = new Scene(root);
		// Add the Scene to the Stage
		stage.setScene(scene);
		// Set the Title of the Stage
		stage.setTitle("A JavaFX Line Example");
		// Display the Stage
		stage.show();
	}
}
An instance of the Line class represents a line Node. A Line has no interior. By default, its fill property is set to null. Setting fill has no effects. The default stroke is Color.BLACK and the default strokeWidth is 1.0. The Line class contains four double properties.
- startX
- startY
- endX
- endY
The Line represents a line segment between (startX, startY) and (endX, endY) points. The Line class has a no-args constructor, which defaults all its four properties to zero resulting in a line from (0, 0) to (0, 0), which represents a point. Another constructor takes values for startX, startY, endX, and endY. After you create a Line, you can change its location and length by changing any of the four properties.
The following code snippet creates a Line with stroke width 1.0:
Line line2 = new Line(0, 0, 50, 0);
line2.setStrokeWidth(1.0);
1.2 The GUI
The first Line will appear as a point. The following Figure shows the lines.

2. Drawing Rectangles
2.1 The Code
Fx2DShapeExample2.java
import javafx.application.Application;
import javafx.scene.Scene;
import javafx.scene.layout.Pane;
import javafx.scene.paint.Color;
import javafx.scene.shape.Rectangle;
import javafx.stage.Stage;
public class Fx2DShapeExample2 extends Application
{
public static void main(String[] args)
{
Application.launch(args);
}
@Override
public void start(Stage stage)
{
// Create the Rectangles
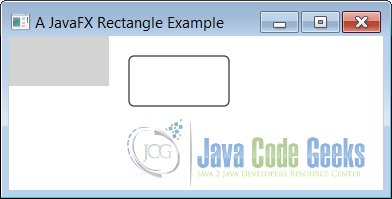
Rectangle rectangle1 = new Rectangle(100, 50, Color.LIGHTGRAY);
Rectangle rectangle2 = new Rectangle(120, 20, 100, 50);
rectangle2.setFill(Color.WHITE);
rectangle2.setStroke(Color.BLACK);
rectangle2.setArcWidth(10);
rectangle2.setArcHeight(10);
// Create the Pane
Pane root = new Pane();
// Add the Children to the Pane
root.getChildren().addAll(rectangle1, rectangle2);
// Create the Scene
Scene scene = new Scene(root);
// Add the Scene to the Stage
stage.setScene(scene);
// Set the Title of the Stage
stage.setTitle("A JavaFX Rectangle Example");
// Display the Stage
stage.show();
}
}
An instance of the Rectangle class represents a rectangle Node. The class uses six properties to define the rectangle.
- x
- y
- width
- height
- arcWidth
- arcHeight
The x and y properties are the x and y coordinates of the upper-left corner of the rectangle in the local coordinate system of the node. The width and height properties are the width and height of the rectangle, respectively. Specify the same width and height to draw a square.
By default, the corners of a rectangle are sharp. A Rectangle can have rounded corners by specifying the arcWidth and arcHeight properties. You can think of one of the quadrants of an ellipse positioned at the four corners to make them round. The arcWidth and arcHeight properties are the horizontal and vertical diameters of the ellipse. By default, their values are zero, which makes a rectangle have sharp corners.
The Rectangle class contains several constructors. They take various properties as arguments. The default values for x, y, width, height, arcWidth, and arcHeight properties are zero. The constructors are:
- Rectangle()
- Rectangle(double width, double height)
- Rectangle(double x, double y, double width, double height)
- Rectangle(double width, double height, Paint fill)
The following code sbippet creates a Rectangle with a width of 100px and a heigth of 50 px.
// Create the Rectangles
Rectangle rectangle1 = new Rectangle(100, 50, Color.LIGHTGRAY);
You will not see effects of specifying the values for the x and y properties for a Rectangle when you add it to most of the layout panes as they place their children at (0, 0). A Pane uses these properties.
2.2 The GUI
The following image shows Rectangles inside a Pane, which uses the x and y properties to position them.
3. Drawing Circles
3.1 The Code
Fx2DShapeExample3.java
import javafx.application.Application;
import javafx.scene.Scene;
import javafx.scene.layout.HBox;
import javafx.scene.paint.Color;
import javafx.scene.shape.Circle;
import javafx.stage.Stage;
public class Fx2DShapeExample3 extends Application
{
public static void main(String[] args)
{
Application.launch(args);
}
@Override
public void start(Stage stage)
{
// Create the Circles
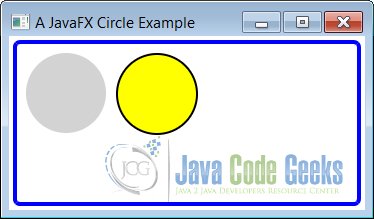
Circle circle1 = new Circle(0, 0, 40);
circle1.setFill(Color.LIGHTGRAY);
Circle circle2 = new Circle(10, 10, 40, Color.YELLOW);
circle2.setStroke(Color.BLACK);
circle2.setStrokeWidth(2.0);
// Create the HBox
HBox root = new HBox();
// Add the children to the HBox
root.getChildren().addAll(circle1, circle2);
// Set Spacing of the HBox
root.setSpacing(10);
// Set Style for the HBox
root.setStyle
(
"-fx-padding: 10;" +
"-fx-border-style: solid inside;" +
"-fx-border-width: 2;" +
"-fx-border-insets: 5;" +
"-fx-border-radius: 5;" +
"-fx-border-color: blue;"
);
// Create the Scene
Scene scene = new Scene(root);
// Add the Scene to the Stage
stage.setScene(scene);
// Set the Title of the Stage
stage.setTitle("A JavaFX Circle Example");
// Display the Stage
stage.show();
}
}
An instance of the Circle class represents a circle node. The class uses three properties to define the circle.
- centerX
- centerY
- radius
The centerX and centerY properties are the x and y coordinates of the center of the circle in the local coordinate system of the node. The radius property is the radius of the circle. The default values for these properties are zero.
The Circle class contains several constructors.
- Circle()
- Circle(double radius)
- Circle(double centerX, double centerY, double radius)
- Circle(double centerX, double centerY, double radius, Paint fill)
- Circle(double radius, Paint fill)
The following snippet of code creates a ligthgray Circle:
Circle circle1 = new Circle(0, 0, 40);
circle1.setFill(Color.LIGHTGRAY);
3.2 The GUI
The above program adds two circles to an HBox. The following figure shows the two circles:
4. Drawing Ellipses
4.1 The Code
Fx2DShapeExample4.java
import javafx.application.Application;
import javafx.scene.Scene;
import javafx.scene.layout.HBox;
import javafx.scene.paint.Color;
import javafx.scene.shape.Ellipse;
import javafx.stage.Stage;

public class Fx2DShapeExample4 extends Application
{
	public static void main(String[] args)
	{
		Application.launch(args);
	}

	@Override
	public void start(Stage stage)
	{
		// Create the ellipses
		Ellipse ellipse1 = new Ellipse(50, 30);
		ellipse1.setFill(Color.LIGHTGRAY);
		Ellipse ellipse2 = new Ellipse(60, 30);
		ellipse2.setFill(Color.YELLOW);
		ellipse2.setStroke(Color.BLACK);
		ellipse2.setStrokeWidth(2.0);
		Ellipse ellipse3 = new Ellipse(30, 30);
		ellipse3.setFill(Color.YELLOW);
		ellipse3.setStroke(Color.BLACK);
		ellipse3.setStrokeWidth(2.0);

		// Create the HBox
		HBox root = new HBox();
		// Add the children to the HBox
		root.getChildren().addAll(ellipse1, ellipse2, ellipse3);
		// Set Spacing of the HBox
		root.setSpacing(10);

		// Set the Style of the HBox
		root.setStyle
		(
			"-fx-padding: 10;" +
			"-fx-border-style: solid inside;" +
			"-fx-border-width: 2;" +
			"-fx-border-insets: 5;" +
			"-fx-border-radius: 5;" +
			"-fx-border-color: blue;"
		);

		// Create the Scene
		Scene scene = new Scene(root);
		// Add the Scene to the Stage
		stage.setScene(scene);
		// Set the Title of the Stage
		stage.setTitle("A JavaFX Ellipses Example");
		// Display the Stage
		stage.show();
	}
}
An instance of the Ellipse class represents an ellipse node. The class uses four properties to define the ellipse.
- centerX
- centerY
- radiusX
- radiusY
The centerX and centerY properties are the x and y coordinates of the center of the circle in the local coordinate system of the node. The radiusX and radiusY are the radii of the ellipse in the horizontal and vertical directions. The default values for these properties are zero. A circle is a special case of an ellipse when radiusX and radiusY are the same.
The Ellipse class contains several constructors.
- Ellipse()
- Ellipse(double radiusX, double radiusY)
- Ellipse(double centerX, double centerY, double radiusX, double radiusY)
The following code snippet create a ligthgray Ellipse:
Ellipse ellipse1 = new Ellipse(50, 30);
ellipse1.setFill(Color.LIGHTGRAY);
4.2 The GUI
The above program creates three instances of the Ellipse class. The third instance draws a circle as the program sets the same value for the ccode>radiusX and radiusY properties. The followng image shows the three ellipses.

5. Drawing Polygons
5.1 The Code
Fx2DShapeExample5.java
import javafx.application.Application;
import javafx.scene.Scene;
import javafx.scene.layout.HBox;
import javafx.scene.paint.Color;
import javafx.scene.shape.Polygon;
import javafx.stage.Stage;

public class Fx2DShapeExample5 extends Application
{
	public static void main(String[] args)
	{
		Application.launch(args);
	}

	@Override
	public void start(Stage stage)
	{
		// Create the Triangle
		Polygon triangle = new Polygon();
		triangle.getPoints().addAll(50.0, 0.0,	0.0, 50.0,100.0, 50.0);
		triangle.setFill(Color.WHITE);
		triangle.setStroke(Color.RED);

		// Create the Parallelogram
		Polygon parallelogram = new Polygon();
		parallelogram.getPoints().addAll(30.0, 0.0,130.0, 0.0,100.00, 50.0,	0.0, 50.0);
		parallelogram.setFill(Color.YELLOW);
		parallelogram.setStroke(Color.BLACK);

		// Create the Hexagon
		Polygon hexagon = new Polygon(100.0, 0.0,120.0, 20.0,120.0,
				40.0,100.0, 60.0,80.0,
				40.0,80.0, 20.0);
		hexagon.setFill(Color.WHITE);
		hexagon.setStroke(Color.BLACK);

		// Create the HBox
		HBox root = new HBox();
		// Add the Children to the HBox
		root.getChildren().addAll(triangle, parallelogram, hexagon);
		// Set Spacing of the HBox
		root.setSpacing(10);

		// Set the Style
		root.setStyle
		(
			"-fx-padding: 10;" +
			"-fx-border-style: solid inside;" +
			"-fx-border-width: 2;" +
			"-fx-border-insets: 5;" +
			"-fx-border-radius: 5;" +
			"-fx-border-color: blue;"
		);

		// Create the Scene
		Scene scene = new Scene(root);
		// Add the Scene to the Stage
		stage.setScene(scene);
		// Set the Title of the Stage
		stage.setTitle("A JavaFX Polygon Example");
		// Display the Stage
		stage.show();
	}
}
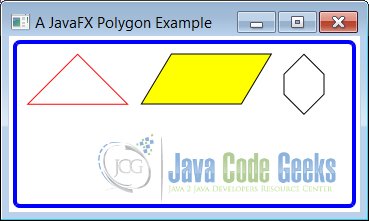
An instance of the Polygon class represents a polygon node. The class does not define any public properties. It lets you draw a polygon using an array of (x, y) coordinates defining the vertices of the polygon. Using the Polygon class, you can draw any type of geometric shape that is created using connected lines (triangles, pentagons, hexagons, parallelograms, etc.).
The Polygon class contains two constructors.
- Polygon()
- Polygon(double… points)
The no-args constructor creates an empty polygon. You need add the (x, y) coordinates of the vertices of the shape. The Polygon will draw a line from the first vertex to the second vertex, from the second to the third, and so on. Finally, the shape is closed by drawing a line from the last vertex to the first vertex.
The Polygon class stores the coordinates of the vertices in an ObservableList<Double>. You can get the reference of the observable list using the getPoints() method. Notice that it stores the coordinates in a list of Double, which is simply a number. It is your job to pass the numbers in pairs, so they can be used as (x, y) coordinates of vertices. If you pass an odd number of numbers, no shape is created.
The following snippet of code creates two triangles—one passes the coordinates of the vertices in the constructor and another adds them to the observable list later. Both triangles are geometrically the same.
// Create an empty triangle and add vertices later
Polygon triangle1 = new Polygon();
triangle1.getPoints().addAll(50.0, 0.0,0.0, 100.0,100.0, 100.0);
// Create a triangle with vertices
Polygon triangle2 = new Polygon(50.0, 0.0,0.0, 100.0,100.0, 100.0);
5.2 The GUI
The above program creates a triangle, a parallelogram, and a hexagon using the Polygon class as shown in the following Figure.
6. Drawing Polylines
6.1 The Code
Fx2DShapeExample6.java
import javafx.application.Application;
import javafx.scene.Scene;
import javafx.scene.layout.HBox;
import javafx.scene.paint.Color;
import javafx.scene.shape.Polyline;
import javafx.stage.Stage;

public class Fx2DShapeExample6 extends Application
{
	public static void main(String[] args)
	{
		Application.launch(args);
	}

	@Override
	public void start(Stage stage)
	{
		// Create the Triangle
		Polyline triangle = new Polyline();
		triangle.getPoints().addAll(50.0, 0.0,	0.0, 50.0,
				100.0, 50.0, 50.0, 0.0);
		triangle.setFill(Color.WHITE);
		triangle.setStroke(Color.BLUE);

		// Create an open Parallelogram
		Polyline parallelogram = new Polyline();
		parallelogram.getPoints().addAll(30.0, 0.0, 130.0, 0.0,
				100.00, 50.0,0.0, 50.0);
		parallelogram.setFill(Color.YELLOW);
		parallelogram.setStroke(Color.BLACK);

		// Create a Hexagon
		Polyline hexagon = new Polyline(100.0, 0.0,120.0, 20.0,
		120.0, 40.0,100.0, 60.0,80.0, 40.0, 80.0, 20.0,100.0, 0.0);

		hexagon.setFill(Color.WHITE);
		hexagon.setStroke(Color.BLACK);

		// Create the HBox
		HBox root = new HBox();
		// Add the children to the HBox
		root.getChildren().addAll(triangle, parallelogram, hexagon);
		// Set Spacing of the HBox
		root.setSpacing(10);

		// Set the Style
		root.setStyle
		(
			"-fx-padding: 10;" +
			"-fx-border-style: solid inside;" +
			"-fx-border-width: 2;" +
			"-fx-border-insets: 5;" +
			"-fx-border-radius: 5;" +
			"-fx-border-color: blue;"
		);

		// Create the Scene
		Scene scene = new Scene(root);
		// Add the Scene to the Stage
		stage.setScene(scene);
		// Set the Title of the Stage
		stage.setTitle("A JavaFX Polyline Example");
		// Display the Stage
		stage.show();
	}
}
A Polyline is similar to a Polygon, except that it does not draw a line between the last and first points. That is, a polyline is an open polygon. However, the fill color is used to fill the entire shape as if the shape was closed.

An instance of the Polyline class represents a polyline node. The class does not define any public properties. It lets you draw a polyline using an array of (x, y) coordinates defining the vertices of the polyline. Using the Polyline class, you can draw any type of geometric shape that is created using connected lines (triangles, pentagons, hexagons, parallelograms, etc.).
The Polyline class contains two constructors.
- Polyline()
- Polyline(double… points)
The no-args constructor creates an empty polyline. You need to add (x, y) coordinates of the vertices of the shape. The polygon will draw a line from the first vertex to the second vertex, from the second to the third, and so on. Unlike a Polygon, the shape is not closed automatically. If you want to close the shape, you need to add the coordinates of the first vertex as the last pair of numbers. If you want to add coordinates of vertices later, add them to the ObservableList<Double> returned by the getPoints() method of the Polyline class.
The following snippet of code creates two triangles with the same geometrical properties using different methods. Notice that the first and the last pairs of numbers are the same in order to close the triangle.
Polyline triangle = new Polyline();
triangle.getPoints().addAll(50.0, 0.0,	0.0, 50.0,100.0, 50.0, 50.0, 0.0);
triangle.setFill(Color.WHITE);
triangle.setStroke(Color.BLUE);
6.2 The GUI
The above program creates a triangle, an open parallelogram, and a hexagon using the
Polyline class as shown in the following Figure.

7. Drawing Arcs
7.1 The Code
Fx2DShapeExample7.java
import javafx.application.Application;
import javafx.scene.Scene;
import javafx.scene.layout.HBox;
import javafx.scene.paint.Color;
import javafx.scene.shape.Arc;
import javafx.scene.shape.ArcType;
import javafx.stage.Stage;

public class Fx2DShapeExample7 extends Application
{
	public static void main(String[] args)
	{
		Application.launch(args);
	}

	@Override
	public void start(Stage stage)
	{
		// Create an open arc with a fill
		Arc arc1 = new Arc(0, 0, 50, 100, 0, 90);
		arc1.setFill(Color.LIGHTGRAY);

		// Create an open arc with no fill and a stroke
		Arc arc2 = new Arc(0, 0, 50, 100, 0, 90);
		arc2.setFill(Color.TRANSPARENT);
		arc2.setStroke(Color.BLACK);

		// Create a chord arc with no fill and a stroke
		Arc arc3 = new Arc(0, 0, 50, 100, 0, 90);
		arc3.setFill(Color.TRANSPARENT);
		arc3.setStroke(Color.BLACK);
		arc3.setType(ArcType.CHORD);

		// Create a round arc with no fill and a stroke
		Arc arc4 = new Arc(0, 0, 50, 100, 0, 90);
		arc4.setFill(Color.TRANSPARENT);
		arc4.setStroke(Color.BLACK);
		arc4.setType(ArcType.ROUND);

		// Create a round arc with a gray fill and a stroke
		Arc arc5 = new Arc(0, 0, 50, 100, 0, 90);
		arc5.setFill(Color.GRAY);
		arc5.setStroke(Color.BLACK);
		arc5.setType(ArcType.ROUND);

		// Create the HBox
		HBox root = new HBox();
		// Add the children to the HBox
		root.getChildren().addAll(arc1, arc2, arc3, arc4, arc5);

		// Set Spacing of the HBox
		root.setSpacing(10);

		// Set the Style of the HBox
		root.setStyle
		(
			"-fx-padding: 10;" +
			"-fx-border-style: solid inside;" +
			"-fx-border-width: 2;" +
			"-fx-border-insets: 5;" +
			"-fx-border-radius: 5;" +
			"-fx-border-color: blue;"
		);

		// Create the Scene
		Scene scene = new Scene(root);
		// Add the Scene to the Stage
		stage.setScene(scene);
		// Set the Title of the Stage
		stage.setTitle("A JavaFX Arc Example");
		// Display the Stage
		stage.show();
	}
}
An instance of the Arc class represents a sector of an ellipse. The class uses seven properties to define the ellipse.
- centerX
- centerY
- radiusX
- radiusY
- startAngle
- length
- type
The first four properties define an ellipse. The last three properties define a sector of the ellipse that is the Arc node. The startAngle property specifies the start angle of the section in degrees measured counterclockwise from the positive x-axis. It defines the beginning of the arc. The length is an angle in degrees measured counterclockwise from the start angle to define the end of the sector. If the length property is set to 360, the Arc is a full ellipse.
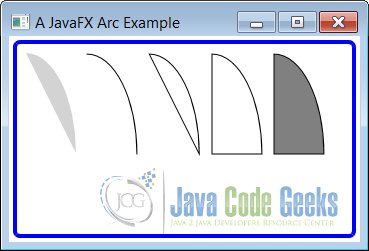
The type property specifies the way the Arc is closed. It is one of the constants, OPEN, CHORD, and ROUND, defined in the ArcType enum.
- The ArcType.OPEN does not close the arc.
- The ArcType.CHORD closes the arc by joining the starting and ending points by a straight line.
- The ArcType.ROUND closes the arc by joining the starting and ending point to the center of the ellipse.
The Arc class contains two constructors:
- Arc()
- Arc(double centerX, double centerY, double radiusX, double radiusY, double startAngle, double length)
The following code snippet creates an ligthgray Arc:
// Create an open arc with a fill
Arc arc1 = new Arc(0, 0, 50, 100, 0, 90);
arc1.setFill(Color.LIGHTGRAY);
7.2 The GUI
The above program shows how to create Arc nodes. The resulting window is shown in the following GUI:
8. Drawing Quadratic Curves
8.1 The Code
Fx2DShapeExample8.java
import javafx.application.Application;
import javafx.scene.Scene;
import javafx.scene.layout.HBox;
import javafx.scene.paint.Color;
import javafx.scene.shape.QuadCurve;
import javafx.stage.Stage;

public class Fx2DShapeExample8 extends Application
{
	public static void main(String[] args)
	{
		Application.launch(args);
	}

	@Override
	public void start(Stage stage)
	{
		// Create the QuadCurves
		QuadCurve quadcurce1 = new QuadCurve(0, 100, 20, 0, 150, 100);
		quadcurce1.setFill(Color.TRANSPARENT);
		quadcurce1.setStroke(Color.BLACK);
		QuadCurve quadcurce2 = new QuadCurve(0, 100, 20, 0, 150, 100);
		quadcurce2.setFill(Color.LIGHTGRAY);

		// Create the HBox
		HBox root = new HBox();
		// Add the children to the HBox
		root.getChildren().addAll(quadcurce1, quadcurce2);
		// Set Spacing of the HBox
		root.setSpacing(10);

		// Set the Style of the HBox
		root.setStyle
		(
			"-fx-padding: 10;" +
			"-fx-border-style: solid inside;" +
			"-fx-border-width: 2;" +
			"-fx-border-insets: 5;" +
			"-fx-border-radius: 5;" +
			"-fx-border-color: blue;"
		);

		// Create the Scene
		Scene scene = new Scene(root);
		// Add the Scene to the Stage
		stage.setScene(scene);
		// Set the Title of the Stage
		stage.setTitle("A JavaFX QuadCurve Example");
		// Display the Stage
		stage.show();
	}
}
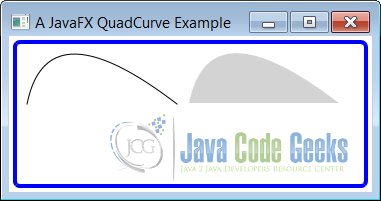
Bezier curves are used in computer graphics to draw smooth curves. An instance of the QuadCurve class represents a quadratic Bezier curve segment intersecting two specified points using a specified Bezier control point. The QuadCurve class contains six properties to specify the three points.
- startX
- startY
- controlX
- controlY
- endX
- endY
The QuadCurve class contains two constructors.
- QuadCurve()
- QuadCurve(double startX, double startY, double controlX, double controlY, double endX, double endY)
The following code snippet creates a QuadCurve:
// Create the QuadCurves
QuadCurve quadcurce1 = new QuadCurve(0, 100, 20, 0, 150, 100);
quadcurce1.setFill(Color.TRANSPARENT);
quadcurce1.setStroke(Color.BLACK);
8.2 The GUI
The following GUI shows the result of the above class:
9. Drawing Cubic Curves
9.1 The Code
Fx2DShapeExample9.java
import javafx.application.Application;
import javafx.scene.Scene;
import javafx.scene.layout.HBox;
import javafx.scene.paint.Color;
import javafx.scene.shape.CubicCurve;
import javafx.stage.Stage;

public class Fx2DShapeExample9 extends Application
{
	public static void main(String[] args)
	{
		Application.launch(args);
	}

	@Override
	public void start(Stage stage)
	{
		// Create the CubicCurves
		CubicCurve cubiccurve1 = new CubicCurve(0, 50, 20, 0, 50, 80, 50, 0);
		cubiccurve1.setFill(Color.TRANSPARENT);
		cubiccurve1.setStroke(Color.BLACK);
		CubicCurve cubiccurve2 = new CubicCurve(0, 50, 20, 0, 50, 80, 50, 0);
		cubiccurve2.setFill(Color.LIGHTGRAY);

		// Create the HBox
		HBox root = new HBox();
		// Add the Children to the HBox
		root.getChildren().addAll(cubiccurve1, cubiccurve2);
		// Set Spacing of the HBox
		root.setSpacing(10);

		// Set the Style of the HBox
		root.setStyle
		(
			"-fx-padding: 10;" +
			"-fx-border-style: solid inside;" +
			"-fx-border-width: 2;" +
			"-fx-border-insets: 5;" +
			"-fx-border-radius: 5;" +
			"-fx-border-color: blue;"
		);

		// Create the Scene
		Scene scene = new Scene(root);
		// Add the Scene to the Stage
		stage.setScene(scene);
		// Set the Title of the Stage
		stage.setTitle("A JavaFX CubicCurve Example");
		// Display the Stage
		stage.show();
	}
}
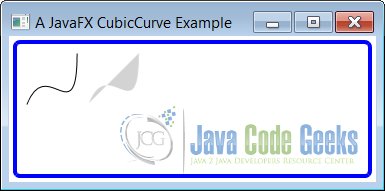
An instance of the CubicCurve class represents a cubic Bezier curve segment intersecting two specified points using two specified Bezier control points. The CubicCurve class contains eight properties to specify the four points.
- startX
- startY
- controlX1
- controlY1
- controlX2
- controlY2
- endX
- endY
The CubicCurve class contains two constructors.
- CubicCurve()
- CubicCurve(double startX, double startY, double controlX1, double controlY1, double controlX2, double controlY2, double endX, double endY)
The following snippet of code creates a transparent CubicCurve:
// Create the CubicCurves
CubicCurve cubiccurve1 = new CubicCurve(0, 50, 20, 0, 50, 80, 50, 0);
cubiccurve1.setFill(Color.TRANSPARENT);
cubiccurve1.setStroke(Color.BLACK);
9.2 The GUI
The following image shows the result of the above example:
10. Download
This was an example of javafx.scene.shape
You can download the full source code of this example here: JavaFx2DShapeExample.zip
