This is a JavaFX Animation Example. In real world, animation implies some kind of motion, which is generated by displaying images in quick succession. For example, when you watch a movie, you are watching images, which change so quickly that you get an illusion of motion.
In JavaFX, animation is defined as changing the property of a node over time. If the property that changes determines the location of the node, the animation in JavaFX will produce an illusion of motion as found in movies.
Not all animations have to involve motion; for example, changing the fill property of a shape over time is an animation in JavaFX that does not involve motion.
The following table shows an overview of the whole article:
Table Of Contents
The following examples uses Java SE 7 and JavaFX 2.2.
1. Introduction
To understand how Animation is performed, it is important to understand some key concepts.
- Timeline
- Key frame
- Key value
- Interpolator
Animation is performed over a period of time. A Timeline denotes the progression of time during animation with an associated key frame at a given instant. A key frame represents the state of the Node being animated at a specific instant on the timeline. A key frame has associated key values. A key value represents the value of a property of the node along with an Interpolator to be used.
1.1 The Duration Class
The Duration class is in the javafx.util package. It represents a duration of time in milliseconds, seconds, minutes, and hours. It is an immutable class. A Duration represents the amount of time for each cycle of an animation. A Duration can represent a positive or negative duration.
You can create a Duration object in three ways.
- Using the constructor
- Using factory methods
- Using the valueOf() method from a duration in String format
The constructor takes the amount of time in milliseconds.
Duration tenMillis = new Duration(10);
Factory methods create Duration objects for different units of time. They are millis(), seconds(), minutes(), and hours().
Duration tenMillis = Duration.millis(10);
Duration tenSeconds = Duration.seconds(10);
Duration tenMinutes = Duration.minutes(10);
Duration tenHours = Duration.hours(10);
The valueOf() static method takes a String argument containing the duration of time and returns a Duration object. The format of the argument is “number[ms|s|m|h]”, where number is the amount of time, and ms, s, m, and h denote milliseconds, seconds, minutes, and hours, respectively.
Duration tenMillis = Duration.valueOf("10.0ms");
Duration tenMililsNeg = Duration.valueOf("-10.0ms");
You can also represent a duration of an unknown amount of time and an indefinite time using the UNKNOWN and INDEFINITE constants of the Duration class, respectively. You can use the isIndefinite() and isUnknown() methods to check if a duration represents an indefinite or unknown amount of time.
1.2 The KeyValue Class
An instance of the KeyValue class represents a key value that is interpolated for a particular interval during animation. It encapsulates three things.
- A target
- An end value for the target
- An interpolator
The target is a WritableValue, which qualifies all JavaFX properties to be a target. The end value is the value for the target at the end of the interval. The Interpolator is used to compute the intermediate key frames.
A key frame contains one or more key values and it defines a specific point on a Timeline. A interval is defined by two or more key frames. Each key frame contains a key value.
An Animation may progress forward or backward on the Timeline. When an interval starts, the end value of the target is taken from the key value of the end key frame of the interval and its nterpolator is used to compute the intermediate key frames.
The KeyValue class is immutable. It provides two constructors:
- KeyValue(WritableValue target, T endValue)
- KeyValue(WritableValue target, T endValue, Interpolator interpolator)
The Interpolator.LINEAR is used as the default Interpolator that interpolates the animated property linearly with time.
The following snippet of code creates a Text object and two KeyValue objects. The translateX property is the target. 0 and 100 are the end values for the target. The default interpolator is used.
Text msg = new Text("This is a JavaFX Animation Example");
KeyValue startKeyValue = new KeyValue(msg.translateXProperty(), 0.0);
KeyValue endKeyValue = new KeyValue(msg.translateXProperty(), 100.0);
1.3 The KeyFrame Class
A key frame defines the target state of a Node at a specified point on the Timeline. The target state is defined by the key values associated with the key frame.
A key frame encapsulates four things:
- An instant on the timeline
- A set of KeyValues
- A name
- An ActionEvent handler
The instant on the Timeline with which the key frame is associated is defined by a Duration, which is an offset of the key frame on the timeline.
- The set of KeyValues defines the end value of the target for the key frame.
A key frame may optionally have a name that can be used as a cue point to jump to the instant defined by it during an animation. The getCuePoints() method of the Animation class returns a Map of cue points on the Timeline.
Optionally, you can attach an ActionEvent handler to a KeyFrame. The ActionEvent handler is called when the time for the key frame arrives during animation.
An instance of the KeyFrame class represents a key frame. The class provides several constructors:
- KeyFrame(Duration time, EventHandler onFinished, KeyValue… values)
- KeyFrame(Duration time, KeyValue… values)
- KeyFrame(Duration time, String name, EventHandler onFinished, Collection values)
- KeyFrame(Duration time, String name, EventHandler onFinished, KeyValue… values)
- KeyFrame(Duration time, String name, KeyValue… values)
The following snippet of code creates two instances of KeyFrame that specify the translateX property of a Text node at 0 seconds and 10 seconds on a Timeline:
Text msg = new Text("This is a JavaFX Animation Example");
KeyValue startKeyValue = new KeyValue(msg.translateXProperty(), 0.0);
KeyValue endKeyValue = new KeyValue(msg.translateXProperty(), 100.0);
KeyFrame startFrame = new KeyFrame(Duration.ZERO, startKeyValue);
KeyFrame endFrame = new KeyFrame(Duration.seconds(3), endKeyValue);
2. The Timeline Animation
2.1 The Code
FxAnimationExample1.java
import javafx.animation.KeyFrame;
import javafx.animation.KeyValue;
import javafx.animation.Timeline;
import javafx.application.Application;
import javafx.scene.Scene;
import javafx.scene.layout.VBox;
import javafx.scene.text.Font;
import javafx.scene.text.Text;
import javafx.stage.Stage;
import javafx.util.Duration;
public class FxAnimationExample1 extends Application
{
public static void main(String[] args)
{
Application.launch(args);
}
@Override
public void start(Stage stage)
{
// Create the Text
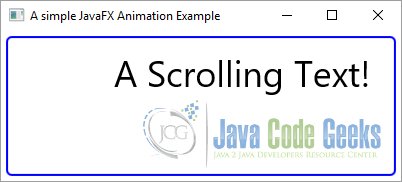
Text text = new Text("A Scrolling Text!");
// Set the Font of the Text
text.setFont(Font.font(36));
// Create the VBox
VBox root = new VBox(text);
// Set the Size of the Pane
root.setPrefSize(400, 100);
// Set the Style-properties of the Pane
root.setStyle("-fx-padding: 10;" +
"-fx-border-style: solid inside;" +
"-fx-border-width: 2;" +
"-fx-border-insets: 5;" +
"-fx-border-radius: 5;" +
"-fx-border-color: blue;");
// Create the Scene
Scene scene = new Scene(root);
// Add the Scene to the Stage
stage.setScene(scene);
// Set the Title of the Stage
stage.setTitle("A simple JavaFX Animation Example");
// Display the Stage
stage.show();
// Get the Width of the Scene and the Text
double sceneWidth = scene.getWidth();
double textWidth = text.getLayoutBounds().getWidth();
// Define the Durations
Duration startDuration = Duration.ZERO;
Duration endDuration = Duration.seconds(10);
// Create the start and end Key Frames
KeyValue startKeyValue = new KeyValue(text.translateXProperty(), sceneWidth);
KeyFrame startKeyFrame = new KeyFrame(startDuration, startKeyValue);
KeyValue endKeyValue = new KeyValue(text.translateXProperty(), -1.0 * textWidth);
KeyFrame endKeyFrame = new KeyFrame(endDuration, endKeyValue);
// Create a Timeline
Timeline timeline = new Timeline(startKeyFrame, endKeyFrame);
// Let the animation run forever
timeline.setCycleCount(Timeline.INDEFINITE);
// Run the animation
timeline.play();
}
}
A timeline animation is used for animating any properties of a Node. An instance of the Timeline class represents a timeline animation. Using a timeline animation involves the following steps:
- Construct key frames
- Create a Timeline object with key frames
- Set the animation properties
- Use the play() method to run the animation
You can add key frames to a Timeline at the time of creating it or after. The Timeline instance keeps all key frames in an ObservableList object. The getKeyFrames() method returns the list. You can modify the list of key frames at any time. If the timeline animation is already running, you need to stop and restart it to pick up the modified list of key frames.
The Timeline class contains several constructors.
- Timeline()
- Timeline(double targetFramerate)
- Timeline(double targetFramerate, KeyFrame… keyFrames)
- Timeline(KeyFrame… keyFrames)
The no-args constructor creates a Timeline with no key frames with animation running at the optimum rate. Other constructors let you specify the target frame rate for the animation, which is the number of frames per second, and the key frames. Note that the order in which the key frames are added to a Timeline is not important. Timeline will order them based on their time offset.
The logic to perform the animation is in the start() method. The method starts with creating a Text object, a VBox with the Text object, and setting up a Scene for the Stage. After showing the Stage, it sets up an animation. It gets the width of the Scene and the Text object.
// Get the Width of the Scene and the Text
double sceneWidth = scene.getWidth();
double textWidth = text.getLayoutBounds().getWidth();
Two key frames are created: one for time = 0 seconds and one for time = 10 seconds. The animation uses the translateX property of the Text object to change its horizontal position to make it scroll. At 0 seconds, the Text is positioned at the Scene width, so it is invisible. At 10 seconds, it is placed to the left of the scene at a distance equal to its length, so again it is invisible.
// Define the Durations
Duration startDuration = Duration.ZERO;
Duration endDuration = Duration.seconds(10);

// Create the start and end Key Frames
KeyValue startKeyValue = new KeyValue(text.translateXProperty(), sceneWidth);
KeyFrame startKeyFrame = new KeyFrame(startDuration, startKeyValue);
KeyValue endKeyValue = new KeyValue(text.translateXProperty(), -1.0 * textWidth);
KeyFrame endKeyFrame = new KeyFrame(endDuration, endKeyValue);

// Create a Timeline
Timeline timeline = new Timeline(startKeyFrame, endKeyFrame);
By default, the animation will run only one time. That is, the Text will scroll from right to left once and the animation will stop. You can set the cycle count for an animation, which is the number of times the animation needs to run. You run the animation forever by setting the cycle count to Timeline.INDEFINITE.
// Let the animation run forever
timeline.setCycleCount(Timeline.INDEFINITE);
Finally, the animation is started by calling the play() method.
// Run the animation
timeline.play();
2.2 The GUI
3. Controlling an Animation
The Animation class contains properties and methods that can be used to control animation in various ways. The following sections will explain those properties and methods and how to use them to control animation.
3.1 Playing, Stopping and Pausing an Animation
3.1.1 The Code
FxAnimationExample2.java
import javafx.animation.KeyFrame;
import javafx.animation.KeyValue;
import javafx.animation.Timeline;
import javafx.application.Application;
import javafx.event.ActionEvent;
import javafx.event.EventHandler;
import javafx.scene.Scene;
import javafx.scene.control.Button;
import javafx.scene.control.Label;
import javafx.scene.layout.HBox;
import javafx.scene.layout.VBox;
import javafx.scene.text.Font;
import javafx.scene.text.Text;
import javafx.stage.Stage;
import javafx.util.Duration;
public class FxAnimationExample2 extends Application
{
// Create the Timeline
Timeline timeline = new Timeline();
// Create the Label
Label status = new Label("Current State: " + timeline.getStatus());
public static void main(String[] args)
{
Application.launch(args);
}
@Override
public void start(Stage stage) throws InterruptedException
{
// Create the Text
Text text = new Text("A Scrolling Text!");
// Set the Font of the Text
text.setFont(Font.font(36));
// Create the Buttons
Button play = new Button("Play");
Button pause = new Button("Pause");
Button replay = new Button("RePlay");
Button stop = new Button("Stop");
// Create the Event-Handlers for the Buttons
play.setOnAction(new EventHandler <ActionEvent>()
{
public void handle(ActionEvent event)
{
timeline.play();
status.setText("Current State: " + timeline.getStatus());
}
});
replay.setOnAction(new EventHandler <ActionEvent>()
{
public void handle(ActionEvent event)
{
timeline.playFromStart();
status.setText("Current State: " + timeline.getStatus());
}
});
pause.setOnAction(new EventHandler <ActionEvent>()
{
public void handle(ActionEvent event)
{
timeline.pause();
status.setText("Current State: " + timeline.getStatus());
}
});
stop.setOnAction(new EventHandler <ActionEvent>()
{
public void handle(ActionEvent event)
{
timeline.stop();
status.setText("Current State: " + timeline.getStatus());
}
});
// Create the Button Box
HBox buttonBox = new HBox();
// Set Spacing to 10 pixels
buttonBox.setSpacing(10);
// Add the Children to the HBox
buttonBox.getChildren().addAll(play,pause,replay,stop);
// Create the VBox
VBox root = new VBox(buttonBox,status,text);
// Set Spacing to 10 pixels
root.setSpacing(10);
// Set the Size of the VBox
root.setPrefSize(500, 200);
// Set the Style-properties of the VBox
root.setStyle("-fx-padding: 10;" +
"-fx-border-style: solid inside;" +
"-fx-border-width: 2;" +
"-fx-border-insets: 5;" +
"-fx-border-radius: 5;" +
"-fx-border-color: blue;");
// Create the Scene
Scene scene = new Scene(root);
// Add the Scene to the Stage
stage.setScene(scene);
// Set the Title of the Stage
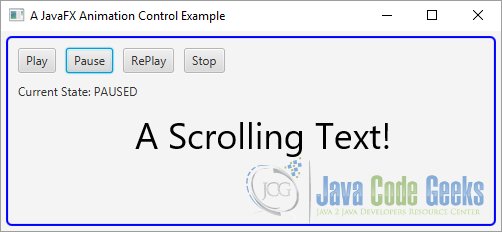
stage.setTitle("A JavaFX Animation Control Example");
// Display the Stage
stage.show();
// Get the Scene width and the Text width
double sceneWidth = scene.getWidth();
double textWidth = text.getLayoutBounds().getWidth();
// Define the Durations
Duration startDuration = Duration.ZERO;
Duration endDuration = Duration.seconds(10);
// Create the start and end Key Frames
KeyValue startKeyValue = new KeyValue(text.translateXProperty(), sceneWidth);
KeyFrame startKeyFrame = new KeyFrame(startDuration, startKeyValue);
KeyValue endKeyValue = new KeyValue(text.translateXProperty(), -1.0 * textWidth);
KeyFrame endKeyFrame = new KeyFrame(endDuration, endKeyValue);
// Create a Timeline
timeline = new Timeline(startKeyFrame, endKeyFrame);
// Let the animation run forever
timeline.setCycleCount(Timeline.INDEFINITE);
}
}
3.1.2 Playing an Animation
The Animation class contains four methods to play an animation:
- play()
- playFrom(Duration time)
- playFrom(String cuePoint)
- playFromStart()
The play() method plays an animation from its current position. If the animation was never started or stopped, it will play from the beginning. If the animation was paused, it will play from the position where it was paused. You can use the jumpTo(Duration time) and jumpTo(String cuePoint) methods to set the current position of the animation to a specific duration or a cue point, before calling the play() method.
Calling the play() method is asynchronous. The animation may not start immediately. Calling the play() method while animation is running has no effect.
// Create the Event-Handlers for the Buttons
play.setOnAction(new EventHandler <ActionEvent>()
{
    public void handle(ActionEvent event)
    {
	timeline.play();
	status.setText("Current State: " + timeline.getStatus());
    }
});
The playFrom() method plays an animation from the specified duration or the specified cue point. Calling this method is equivalent to setting the current position using the jumpTo() method and then calling the play() method.
The playFromStart() method plays the animation from the beginning (duration = 0).
The following snippet of code will play the animation after pressing the Play Button:
replay.setOnAction(new EventHandler <ActionEvent>()
{
    public void handle(ActionEvent event)
    {
	timeline.playFromStart();
	status.setText("Current State: " + timeline.getStatus());
    }
});
3.1.3 Stopping an Animation
Use the stop() method to stop a running animation. The method has no effect if the animation is not running. The animation may not stop immediately when the method is called as the method executes asynchronously. The method resets the current position to the beginning. That is, calling play() after stop() will play the animation from the beginning.
The following code snippet stops an animation after pressing the Stop Button:
stop.setOnAction(new EventHandler <ActionEvent>()
{
    public void handle(ActionEvent event)
    {
	timeline.stop();
	status.setText("Current State: " + timeline.getStatus());
    }
});
3.1.4 Pausing an Animation
Use the pause() method to pause an animation. Calling this method when animation is not running has no effect. This method executes asynchronously. Calling the play() method when the animation is paused plays it from the current position. If you want to play the animation from the start, call the playFromStart() method.
The following snippet of code will pause the animation:
pause.setOnAction(new EventHandler <ActionEvent>()
{
    public void handle(ActionEvent event)
    {
	timeline.pause();
	status.setText("Current State: " + timeline.getStatus());
    }
});
3.1.5 Knowing the State of an Animation
An Animation can be one of the following three states:
- Running
- Paused
- Stopped
The three states are represented by RUNNING, STOPPED, and PAUSED constants of the Animation.Status enum. You do not change the state of an animation directly. It is changed by calling one of the methods of the Animation class. The class contains a read-only status property that can be used to know the state of the animation at any time.
The following snippet of code reads the current status of the animation:
status.setText("Current State: " + timeline.getStatus());
3.1.6 The GUI
3.2 Delaying the Start of an Animation
3.2.1 The Code
FxAnimationExample3.java
import javafx.animation.KeyFrame;
import javafx.animation.KeyValue;
import javafx.animation.Timeline;
import javafx.application.Application;
import javafx.scene.Scene;
import javafx.scene.layout.VBox;
import javafx.scene.text.Font;
import javafx.scene.text.Text;
import javafx.stage.Stage;
import javafx.util.Duration;
public class FxAnimationExample3 extends Application
{
public static void main(String[] args)
{
Application.launch(args);
}
@Override
public void start(Stage stage)
{
// Create the Text
Text text = new Text("A Scrolling Text!");
// Set the Font of the Text
text.setFont(Font.font(36));
// Create the VBox
VBox root = new VBox(text);
// Set the Size of the VBox
root.setPrefSize(500, 100);
// Set the Style-properties of the VBox
root.setStyle("-fx-padding: 10;" +
"-fx-border-style: solid inside;" +
"-fx-border-width: 2;" +
"-fx-border-insets: 5;" +
"-fx-border-radius: 5;" +
"-fx-border-color: blue;");
// Create the Scene
Scene scene = new Scene(root);
// Add the Scene to the Stage
stage.setScene(scene);
// Set the Title of the Stage
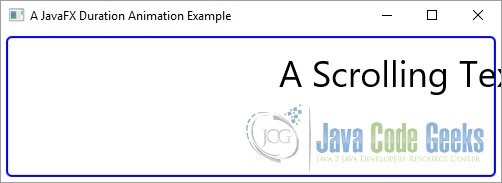
stage.setTitle("A JavaFX Duration Animation Example");
// Display the Stage
stage.show();
// Get the Width of the Scene and the Text
double sceneWidth = scene.getWidth();
double textWidth = text.getLayoutBounds().getWidth();
// Define the Durations
Duration startDuration = Duration.ZERO;
Duration endDuration = Duration.seconds(10);
// Create the start and end Key Frames
KeyValue startKeyValue = new KeyValue(text.translateXProperty(), sceneWidth);
KeyFrame startKeyFrame = new KeyFrame(startDuration, startKeyValue);
KeyValue endKeyValue = new KeyValue(text.translateXProperty(), -1.0 * textWidth);
KeyFrame endKeyFrame = new KeyFrame(endDuration, endKeyValue);
// Create a Timeline
Timeline timeline = new Timeline(startKeyFrame, endKeyFrame);
// Let the animation run forever
timeline.setCycleCount(Timeline.INDEFINITE);
// Delay the start of the animation by 2 seconds
timeline.setDelay(Duration.seconds(2));
// Run the animation
timeline.play();
}
}
You can specify a delay in starting the animation using the delay property. The value is specified in Duration. By default, it is 0 milliseconds.
In the following example, the animation starts with a delay of two seconds:
// Create a Timeline
Timeline timeline = new Timeline(startKeyFrame, endKeyFrame);
// Let the animation run forever
timeline.setCycleCount(Timeline.INDEFINITE);
// Delay the start of the animation by 2 seconds
timeline.setDelay(Duration.seconds(2));
// Run the animation
timeline.play();
3.2.2 The GUI
3.3 Looping an Animation
3.3.1 The Code
FxAnimationExample4.java
import javafx.animation.KeyFrame;
import javafx.animation.KeyValue;
import javafx.animation.Timeline;
import javafx.application.Application;
import javafx.scene.Scene;
import javafx.scene.layout.VBox;
import javafx.scene.text.Font;
import javafx.scene.text.Text;
import javafx.stage.Stage;
import javafx.util.Duration;

public class FxAnimationExample4 extends Application
{
	public static void main(String[] args)
	{
		Application.launch(args);
	}

	@Override
	public void start(Stage stage)
	{
		// Create the Text
		Text text = new Text("A Scrolling Text!");
		// Set the Font of the Text
		text.setFont(Font.font(36));

		// Create the VBox
		VBox root = new VBox(text);
		// Set the Size of the VBox
		root.setPrefSize(500, 100);
		// Set the Style-properties of the VBox
		root.setStyle("-fx-padding: 10;" +
				"-fx-border-style: solid inside;" +
				"-fx-border-width: 2;" +
				"-fx-border-insets: 5;" +
				"-fx-border-radius: 5;" +
				"-fx-border-color: blue;");

		// Create the Scene
		Scene scene = new Scene(root);
		// Add the Scene to the Stage
		stage.setScene(scene);
		// Set the Title of the Stage
		stage.setTitle("A JavaFX Loop Animation Example");
		// Display the Stage
		stage.show();

		// Get the Width of the Scene and the Text
		double sceneWidth = scene.getWidth();
		double textWidth = text.getLayoutBounds().getWidth();

		// Define the Durations
		Duration startDuration = Duration.ZERO;
		Duration endDuration = Duration.seconds(10);

		// Create the start and end Key Frames
		KeyValue startKeyValue = new KeyValue(text.translateXProperty(), sceneWidth);
		KeyFrame startKeyFrame = new KeyFrame(startDuration, startKeyValue);
		KeyValue endKeyValue = new KeyValue(text.translateXProperty(), -1.0 * textWidth);
		KeyFrame endKeyFrame = new KeyFrame(endDuration, endKeyValue);

		// Create a Timeline
		Timeline timeline = new Timeline(startKeyFrame, endKeyFrame);
		// Let the animation run forever
		timeline.setCycleCount(5);
		// Run the animation
		timeline.play();
	}
}
An animation can cycle multiple times, even indefinitely. The cycleCount property specifies the number of cycles in an animation, which defaults to 1. If you want to run the animation in an infinite loop, specify Animation.INDEFINITE as the cycleCount. The cycleCount must be set to a value greater than zero. If the cycleCount is changed while the animation is running, the animation must be stopped and restarted to pick up the new value.
In the following example, the animation will run five times.
// Create a Timeline
Timeline timeline = new Timeline(startKeyFrame, endKeyFrame);
// Let the animation run forever
timeline.setCycleCount(5);
// Run the animation
timeline.play();
3.3.2 The GUI

3.4 Auto Reversing an Animation
3.4.1 The Code
FxAnimationExample5.java
import javafx.animation.KeyFrame;
import javafx.animation.KeyValue;
import javafx.animation.Timeline;
import javafx.application.Application;
import javafx.scene.Scene;
import javafx.scene.layout.VBox;
import javafx.scene.text.Font;
import javafx.scene.text.Text;
import javafx.stage.Stage;
import javafx.util.Duration;

public class FxAnimationExample5 extends Application
{
	public static void main(String[] args)
	{
		Application.launch(args);
	}

	@Override
	public void start(Stage stage)
	{
		// Create the Text
		Text text = new Text("A Scrolling Text!");
		// Set the Font of te Text
		text.setFont(Font.font(36));

		// Create the VBox
		VBox root = new VBox(text);
		// Set the Size of the VBox
		root.setPrefSize(500, 100);
		// Set the Style-properties of the VBox
		root.setStyle("-fx-padding: 10;" +
				"-fx-border-style: solid inside;" +
				"-fx-border-width: 2;" +
				"-fx-border-insets: 5;" +
				"-fx-border-radius: 5;" +
				"-fx-border-color: blue;");

		// Create the Scene
		Scene scene = new Scene(root);
		// Add the Scene to the Stage
		stage.setScene(scene);
		// Set the Title of the Stage
		stage.setTitle("A JavaFX Auto Reverse Animation Example");
		// Display the Stage
		stage.show();

		// Get the Width of the Scene and the Text
		double sceneWidth = scene.getWidth();
		double textWidth = text.getLayoutBounds().getWidth();

		// Define the Durations
		Duration startDuration = Duration.ZERO;
		Duration endDuration = Duration.seconds(10);

		// Create the start and end Key Frames
		KeyValue startKeyValue = new KeyValue(text.translateXProperty(), sceneWidth);
		KeyFrame startKeyFrame = new KeyFrame(startDuration, startKeyValue);
		KeyValue endKeyValue = new KeyValue(text.translateXProperty(), -1.0 * textWidth);
		KeyFrame endKeyFrame = new KeyFrame(endDuration, endKeyValue);

		// Create a Timeline
		Timeline timeline = new Timeline(startKeyFrame, endKeyFrame);
		// Let the animation run forever
		timeline.setCycleCount(Timeline.INDEFINITE);
		// Reverse direction on alternating cycles
		timeline.setAutoReverse(true);
		// Run the animation
		timeline.play();
	}
}
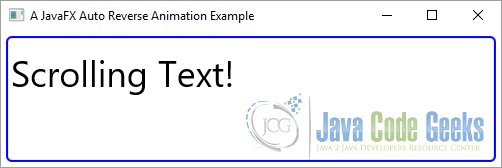
By default, an animation runs only in the forward direction. For example, our scrolling text animation scrolled the text from right to left in one cycle. In the next cycle, the scrolling occurs again from right to left. Using the autoReverse property, you can define whether the animation is performed in the reverse direction for alternating cycles. By default, it is set to false. Set it to true to reverse the direction of the animation.
// Create a Timeline
Timeline timeline = new Timeline(startKeyFrame, endKeyFrame);
// Let the animation run forever
timeline.setCycleCount(Timeline.INDEFINITE);
// Reverse direction on alternating cycles
timeline.setAutoReverse(true);
// Run the animation
timeline.play();
If you change the autoReverse, you need to stop and restart the animation for the new value to take effect.
3.4.2 The GUI
3.5 Adjusting the Speed of an Animation
3.5.1 The Code
FxAnimationExample6.java
import javafx.animation.KeyFrame;
import javafx.animation.KeyValue;
import javafx.animation.Timeline;
import javafx.application.Application;
import javafx.scene.Scene;
import javafx.scene.layout.VBox;
import javafx.scene.text.Font;
import javafx.scene.text.Text;
import javafx.stage.Stage;
import javafx.util.Duration;

public class FxAnimationExample6 extends Application
{
	public static void main(String[] args)
	{
		Application.launch(args);
	}

	@Override
	public void start(Stage stage)
	{
		// Create the Text
		Text text = new Text("A Scrolling Text!");
		// Set the Font of the Text
		text.setFont(Font.font(36));

		// Create the VBox
		VBox root = new VBox(text);
		// Set the Size of the VBox
		root.setPrefSize(500, 100);
		// Set the Style-properties of the VBox
		root.setStyle("-fx-padding: 10;" +
				"-fx-border-style: solid inside;" +
				"-fx-border-width: 2;" +
				"-fx-border-insets: 5;" +
				"-fx-border-radius: 5;" +
				"-fx-border-color: blue;");

		// Create the Scene
		Scene scene = new Scene(root);
		// Add the Scene to the Stage
		stage.setScene(scene);
		// Set the Title of the Stage
		stage.setTitle("A JavaFX Rate Animation Example");
		// Display the Stage
		stage.show();

		// Get the Width of the Scene and the Text
		double sceneWidth = scene.getWidth();
		double textWidth = text.getLayoutBounds().getWidth();

		// Define the Durations
		Duration startDuration = Duration.ZERO;
		Duration endDuration = Duration.seconds(10);

		// Create the start and end Key Frames
		KeyValue startKeyValue = new KeyValue(text.translateXProperty(), sceneWidth);
		KeyFrame startKeyFrame = new KeyFrame(startDuration, startKeyValue);
		KeyValue endKeyValue = new KeyValue(text.translateXProperty(), -1.0 * textWidth);
		KeyFrame endKeyFrame = new KeyFrame(endDuration, endKeyValue);

		// Create a Timeline
		Timeline timeline = new Timeline(startKeyFrame, endKeyFrame);
		// Let the animation run forever
		timeline.setCycleCount(Timeline.INDEFINITE);
		// Play the animation at double the normal rate
		timeline.setRate(2.0);
		// Run the animation
		timeline.play();
	}
}
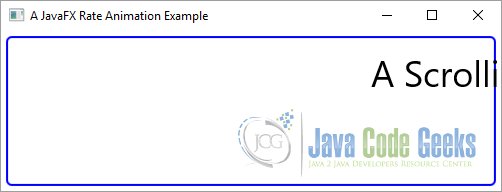
The rate property of the Animation class specifies the direction and the speed for the animation. The sign of its value indicates the direction. The magnitude of the value indicates the speed. A positive value indicates the play in the forward direction. A negative value indicates the play in the backward direction. A value of 1.0 is considered the normal rate of play, a value of 2.0 double the normal rate, 0.50 half the normal rate, and so on. A rate of 0.0 stops the play.
It is possible to invert the rate of a running animation. In that case, the animation is played in the reverse direction from the current position for the duration that has already elapsed. Note that you cannot start an animation using a negative rate. An animation with a negative rate will not start. You can change the rate to be negative only when the animation has played for a while.
// Create a Timeline
Timeline timeline = new Timeline(startKeyFrame, endKeyFrame);
// Let the animation run forever
timeline.setCycleCount(Timeline.INDEFINITE);
// Play the animation at double the normal rate
timeline.setRate(2.0);
// Run the animation
timeline.play();
3.5.2 The GUI
4. Understanding Cue Points
4.1 The Code
FxAnimationExample7.java
import javafx.animation.KeyFrame;
import javafx.animation.KeyValue;
import javafx.animation.Timeline;
import javafx.application.Application;
import javafx.geometry.VPos;
import javafx.scene.Scene;
import javafx.scene.control.ListView;
import javafx.scene.input.MouseEvent;
import javafx.scene.layout.BorderPane;
import javafx.scene.layout.Pane;
import javafx.scene.text.Font;
import javafx.scene.text.Text;
import javafx.stage.Stage;
import javafx.util.Duration;
import javafx.event.EventHandler;

public class FxAnimationExample7 extends Application
{
	// Create the Text
	Text text = new Text("A Scrolling Text!");
	// Create the Pane
	Pane pane = new Pane();
	// Create the Cue Points List View
	ListView<String> cuePointsListView = new ListView<String>();
	// Create the Timeline
	Timeline timeline = new Timeline();

	public static void main(String[] args)
	{
		Application.launch(args);
	}

	@Override
	public void start(Stage stage)
	{
		// Create the Text
		text.setTextOrigin(VPos.TOP);
		text.setFont(Font.font(24));

		// Set the Size of the ListView
		cuePointsListView.setPrefSize(100, 150);
		// Create the Pane
		pane = new Pane(text);

		// Create the BorderPane
		BorderPane root = new BorderPane();
		// Set the Size of the BorderPane
		root.setPrefSize(600, 250);

		// Set the Style-properties of the BorderPane
		root.setStyle("-fx-padding: 10;" +
				"-fx-border-style: solid inside;" +
				"-fx-border-width: 2;" +
				"-fx-border-insets: 5;" +
				"-fx-border-radius: 5;" +
				"-fx-border-color: blue;");

		// Add the Pane and ListView to the BorderPane
		root.setBottom(pane);
		root.setLeft(cuePointsListView);

		// Create the Scene
		Scene scene = new Scene(root);
		// Add the Scene to the Stage
		stage.setScene(scene);
		// Set the Title of the Stage
		stage.setTitle("Cue Points");
		// Display the Stage
		stage.show();

		// Setup the Animation
		this.setupAnimation();
		// Add the Cue Points to the List
		this.addCuePoints();
	}

	private void setupAnimation()
	{
		// Get width of Pane and Text
		double paneWidth = pane.getWidth();
		double textWidth = text.getLayoutBounds().getWidth();

		// Define the Durations
		Duration startDuration = Duration.ZERO;
		Duration endDuration = Duration.seconds(10);

		// Create the initial and final key frames
		KeyValue startKeyValue = new KeyValue(text.translateXProperty(), paneWidth);
		KeyFrame startKeyFrame = new KeyFrame(startDuration, startKeyValue);
		KeyValue endKeyValue = new KeyValue(text.translateXProperty(), -1.0 * textWidth);
		KeyFrame endKeyFrame = new KeyFrame(endDuration, endKeyValue);

		// Create the Timeline
		timeline = new Timeline(startKeyFrame,endKeyFrame);
		// Let the animation run forever
		timeline.setCycleCount(Timeline.INDEFINITE);
		// Play the Animation
		timeline.play();
	}

	private void addCuePoints()
	{
		// Add two cue points directly to the map
		timeline.getCuePoints().put("4", Duration.seconds(4));
		timeline.getCuePoints().put("7", Duration.seconds(7));

		// Add all cue points from the map to the ListView in the order
		// of their durations
		cuePointsListView.getItems().add(0, "Start");
		cuePointsListView.getItems().addAll(1, timeline.getCuePoints().keySet());
		cuePointsListView.getItems().add("End");

		// Add Event Handler to the List
		cuePointsListView.setOnMousePressed(new EventHandler<MouseEvent>()
		{
	        @Override
	        public void handle(MouseEvent event)
	        {
	            timeline.jumpTo(cuePointsListView.getSelectionModel().getSelectedItem());
	        }
	    });
	}
}
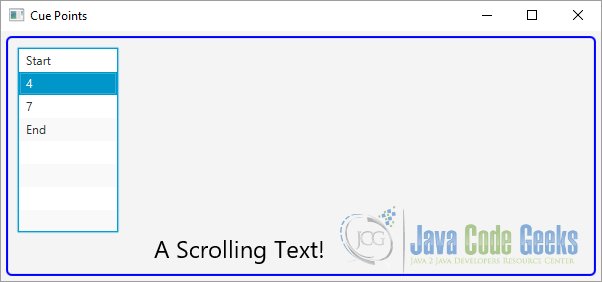
You can set up cue points on a Timeline. Cue points are named instants on the Timeline. An animation can jump to a cue point using the jumpTo(String cuePoint) method. An animation maintains an ObservableMap of cue points. The key in the map is the name of the cue points and the values are the corresponding duration on the timeline. Use the getCuePoints() method to get the reference of the cue points map.
There are two ways to add cue points to a Timeline.
- Giving a name to the KeyFrame you add to a timeline that adds a cue point in the cue point map
- Adding name-duration pairs to the map returned by the getCuePoints() method of the Animation class
The following snippet of code adds two cue points directly to the cue point map of a timeline:
// Add two cue points directly to the map
timeline.getCuePoints().put("4", Duration.seconds(4));
timeline.getCuePoints().put("7", Duration.seconds(7));

// Add all cue points from the map to the ListView in the order
// of their durations
cuePointsListView.getItems().add(0, "Start");
cuePointsListView.getItems().addAll(1, timeline.getCuePoints().keySet());
cuePointsListView.getItems().add("End");
The above example shows how to add and use cue points on a timeline. It adds two cue points, “4 seconds” and “7 seconds”, directly to the cue point map. The list of available cue points is shown in a ListView on the left side of the screen. A Text object scrolls with a cycle duration of 10 seconds.
4.2 The GUI
5. Download Java Source Code
This was an example of javafx.animation
You can download the full source code of this example here: JavaFxAnimationExample.zip
