Eclipse with Wildfly and JBoss Tools Example
1. Introduction
In this example, we will build a simple Java EE web project, also known as a “hello world” Java EE web application. We will be using Eclipse with Wildfly and JBoss Tools. First and foremost, let’s install the following:
For WildFly, we’ll use the Java EE Full and Web Distributioin. Follow the respective instructions in installing the above tools.
This example was built using a Windows 10 machine with Eclipse Oxygen.3a Release, WildFly 10.1.0.Final and JBoss Tools 4.5.3.Final.
2. Development Environment Setup
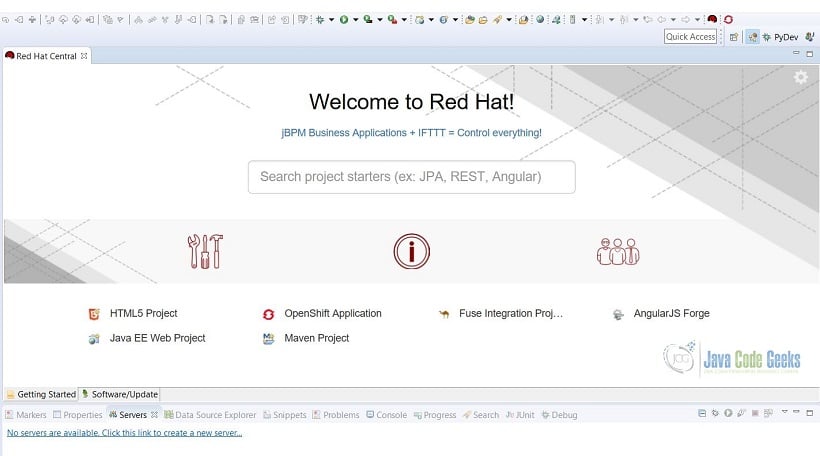
After installing JBoss Tools, we will see the Welcome to Red Hat page when we start up Eclipse.
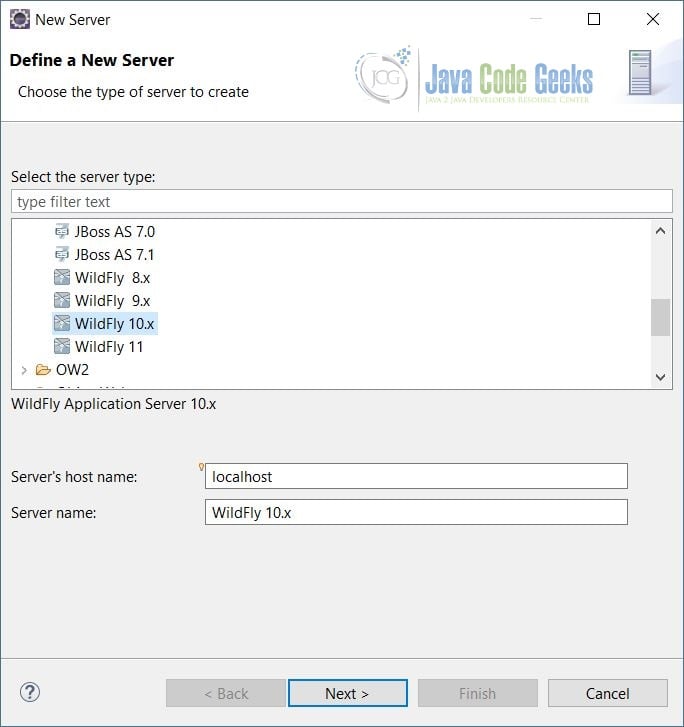
Next, let’s add WildFly to Eclipse. Right-click on the Servers tab, New -> Server. Pick WildFly 10.x.
Click Next. In the Create a new Server Adapter dialog, tick The server is “Local” and Controlled by “Filesystem and shell operations”. Click Finish.
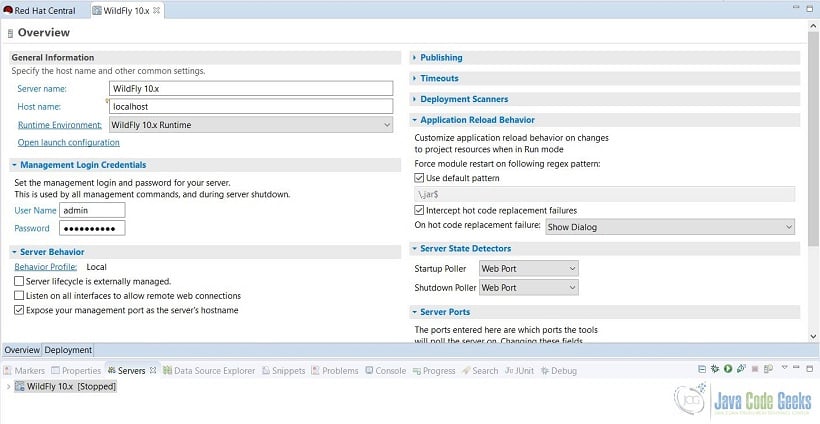
We should have WildFly 10.x in our Servers tab now. Double click the WildFly 10.x Server to open the WildFly 10.x Overview tab and click on the Runtime Environment.
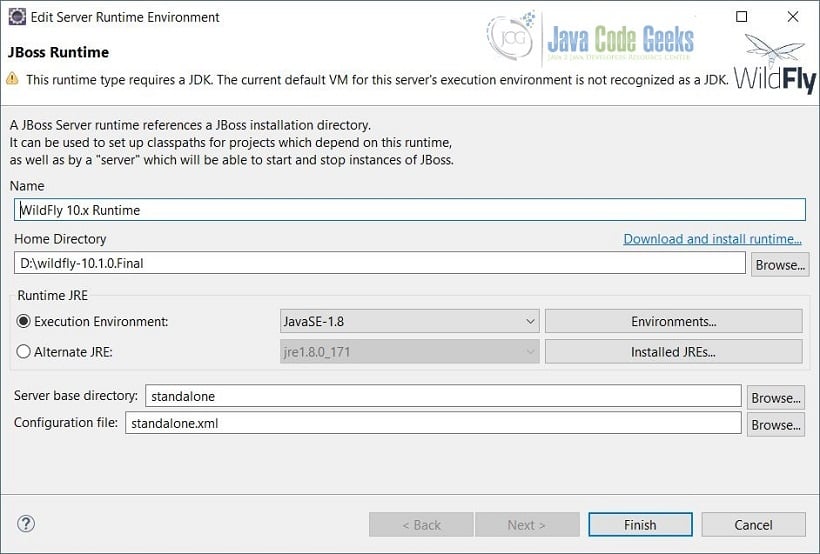
In the JBoss Runtime dialog, set up your home Directory to point to your WildFly directory, keep the defaults and click Finish.
We can now start and stop the WildFly server. Right-click on the server to start/stop it. By default, it is accessible at http://localhost:8080 where we can see a Welcome to WildFly 10 web page.
3. Eclipse with WildFly and JBoss Tools Configuration Tips
Here are some additional configuration tips for Eclipse with WildFly and JBoss Tools. Some of these configuration tips are not specific to Eclipse with WildFly and JBoss Tools development and can also be used in other Java development projects.
- Double-click on the server name to open the WildFly Overview tab. Uncheck the “Use default pattern” under the Application Reload Behavior section and use this pattern
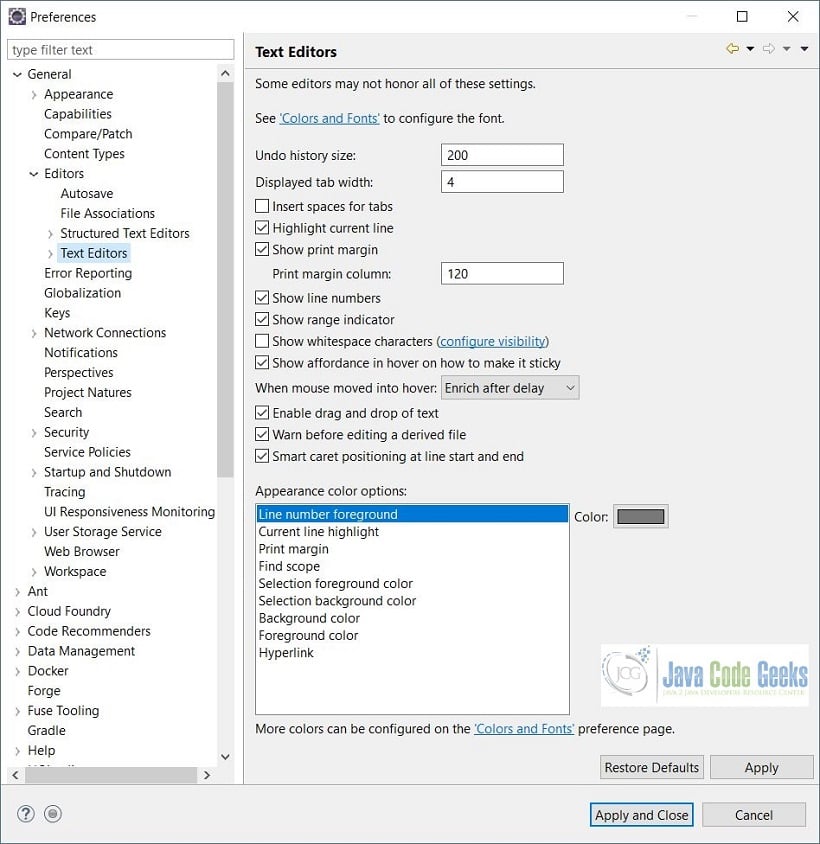
\.jar$|\.class$. This will reload our application whenever our class or jar files are changed. Please see the WildFly Overview Tab image above. - Windows -> Preferences – > General -> Editors -> Text Editors. Set Show print margin and print margin column to 120. This is a helpful indicator to not go beyond the 120 characters width.
- Windows -> Preferences – > General -> Editors -> Text Editors -> Spelling. Disable spell checking. We are not writing a novel here.
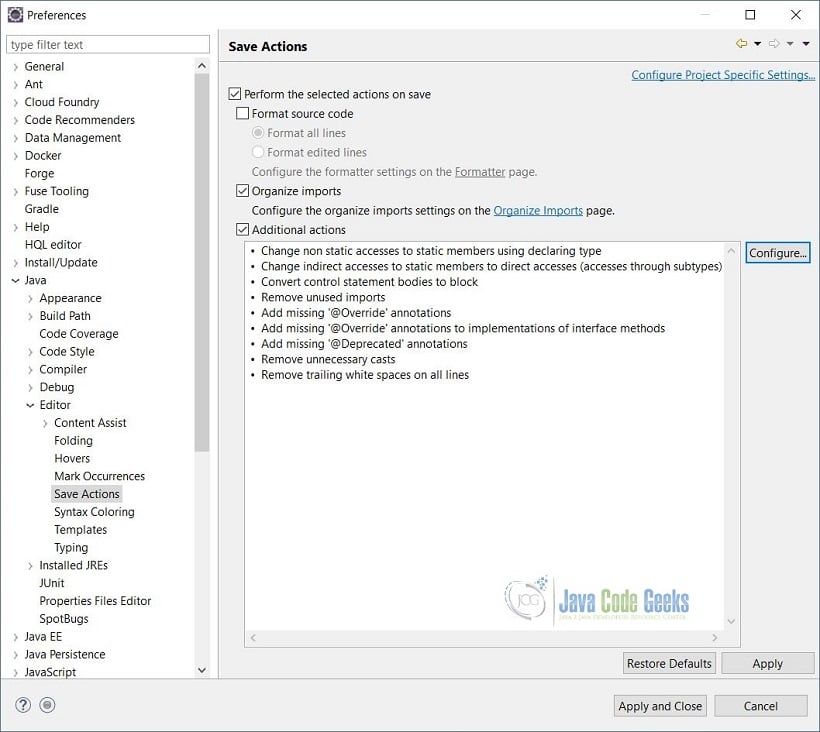
- Windows -> Preferences – > Java -> Editor -> Save Actions. Tick the “Perform the selected actions on save”, “Organize imports”, and “Additional actions”.
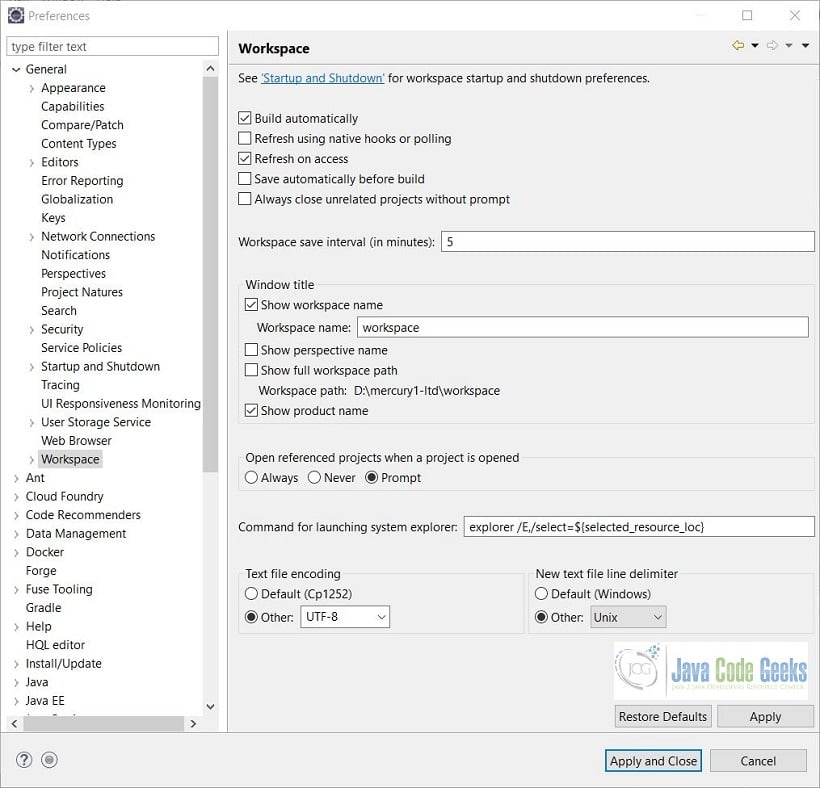
- General -> Workspace. Set Text file encoding to UTF-8. Why UTF-8? Because it can support every language on the planet. Set New text file line delimiter to Unix if you work on different operating systems.
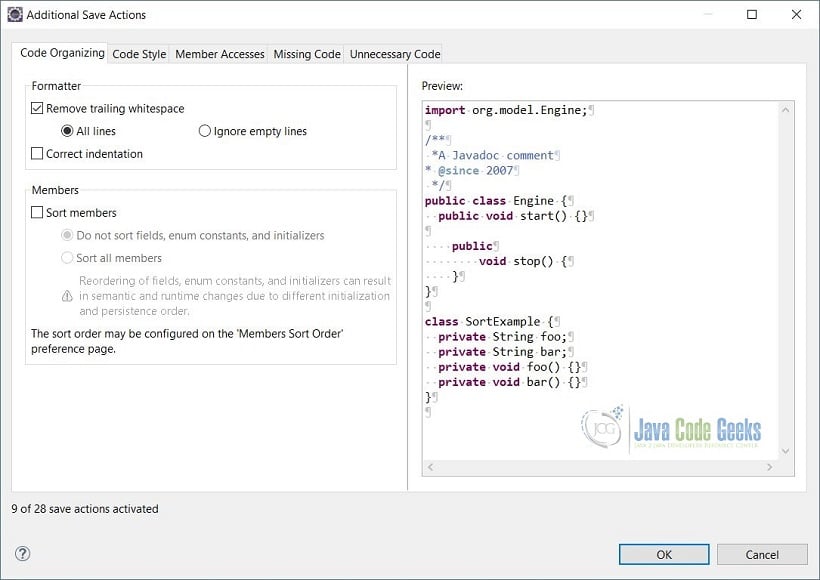
- Windows -> Preferences – > Java -> Editor -> Save Actions -> Configure. Under the Code Organizing tab, tick Remove trailing whitespace. Under the Code Style tab, tick Use blocks in if/while/for/do statements. Under the Member Accesses tabs, tick declaring class as qualifier. Under the Unnecessary Code, tick Remove unused imports.
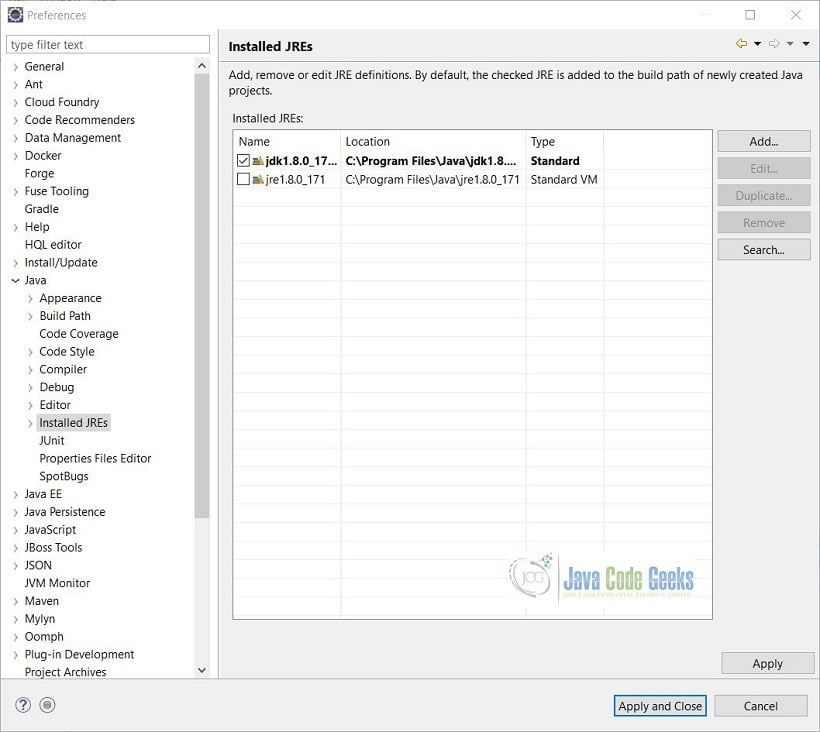
- Windows -> Preferences – > Java -> Installed JREs. Add and select the JDK.
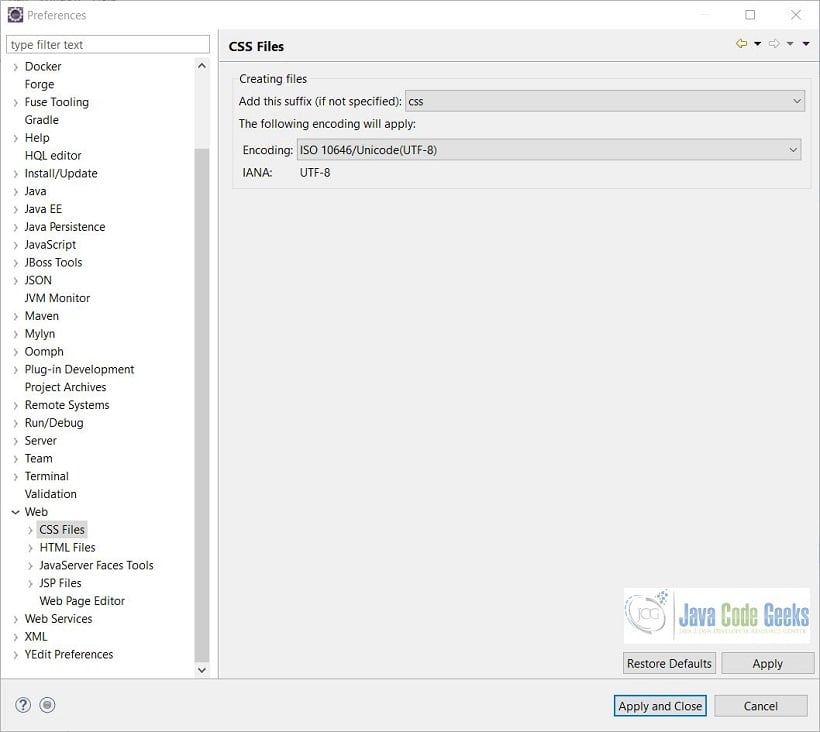
- Windows -> Preferences – > Web -> CSS Files and in HTML Files. Set Encoding to UTF-8.
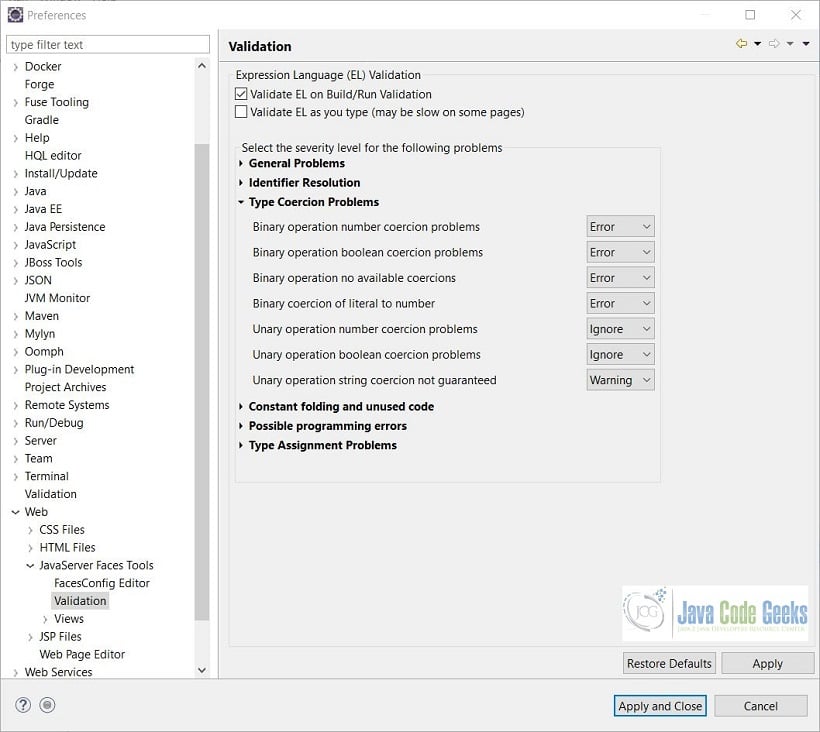
- Windows -> Preferences – > Web -> JavaServer Faces Tools -> Validation -> Type Coercion Problems. Set Unary operation number corection problems and Unary operation boolean coercion problems to Ignore.
- Windows -> Preferences – > Web -> JavaServer Faces Tools -> Validation -> Type Assignment Problems. Set Method expression signature incompatibility to Ignore. See JavaServer Faces Tools Validation image.
4. A Simple Java EE Web App using Eclipse with WildFly and JBoss Tools
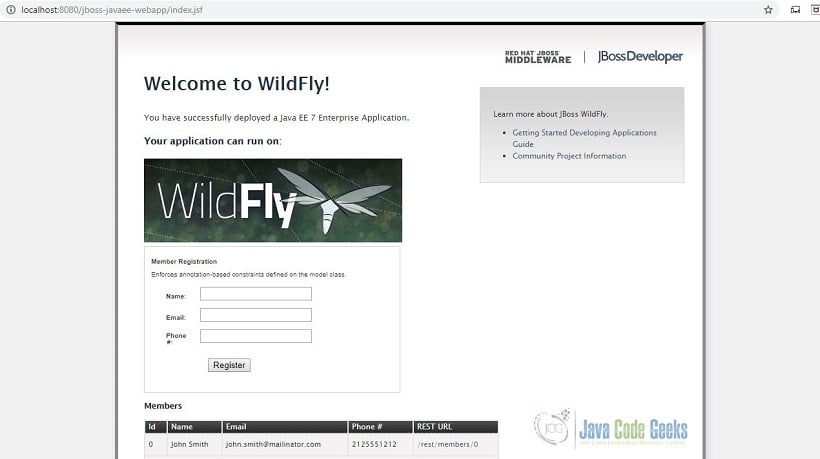
Our Eclipse IDE is now ready for some Java EE development. Let’s create our first “hello world” Java EE Web Project. Open Red Hat Central, click the guy with a red hat and click on the Java EE Web Project. Follow the instructions and this defaults to a jboss-javaee-webapp project name. Click Next -> Finish. After your project has been created, right-click -> Run As -> Run on Server and choose WildFly. YoWe should see something like below. Let us give thanks to JBoss Tools because this project has stub code in it. Thank you Red Hat!
5. Eclipse with WildFly and JBoss Tools Summary
In summary, the first thing we did was install Eclipse. Next, we installed WildFly and integrated to Eclipse. Then we installed JBoss tools and made some configuration tweaks on Eclipse to make development easier. Finally, we created our sample project with the help of JBoss tools by clickin on the Java EE Web Project link which gave us a Java EE Maven project.
6. Download the Source Code
This is an example of Eclipse with WildFly and JBoss Tools.
You can download the source code of this example here: jboss-javaee-webapp.zip.



It is a very nice detailed javaee web setup tutorial, thanks so much for your contribution!
You are welcome :)
Just what I needed. Thumbs up!
Thank you Birkan.