This is a tutorial about Eclipse Java (IDE) download. We are going to see the Eclipse Integrated Development Environment (IDE) for Java Developers, more specifically, the Mars release of the Eclipse IDE.
You will get a brief introduction about how to download Eclipse and use it with Java.
You can also check the following video on how to install and use Eclipse:
The following table shows an overview of the entire article:
Table of Contents
1. Introduction
Eclipse is a well-known and respected Integrated Development Environment (IDE) developed by the Eclipse Foundation. Eclipse is beneficial to programmers because it aids in the development process by providing the following key features:
- An easy to use graphical user interface that navigates through your code hierarchy.
- Syntax highlighting that displays source code in a color code format to improve readability.
- Code completion that makes recommendations on methods and parameters as you type.
- Recommendations on how to fix errors and automatic error correction.
- A graphical debugger that allows for line-by-line code inspection.
- Single key compilation and execution of a program.
- Automatic code generation for commonly used patterns.
- Integration with source code version control repositories.
There are several benefits to the experienced programmer; however, novice programmers should use IDEs cautiously. Oftentimes, novice programmers become dependent on IDEs without really understanding what is going on behind the scenes, especially as it relates to code generation. Once a programmer understands the basics of writing code from scratch, an IDE is a powerful tool to speed up application development.
2. Requirements
Let’s see some requirements for the Eclipse Java Download. In order to use the Mars release of Eclipse IDE for Java Developers, at a minimum, Java Development Kit (JDK) 7 is needed. The JDK includes the Java Runtime Environment (JRE), Java Virtual Machine (JVM), and all other tools needed to write, compile, and execute Java programs. If you already have JDK 7 or higher, you do not need to re-install it. However, if you do not have a JDK or an outdated version, go to Oracle and download the JDK.
3. Eclipse (IDE) Java Download Tutorial
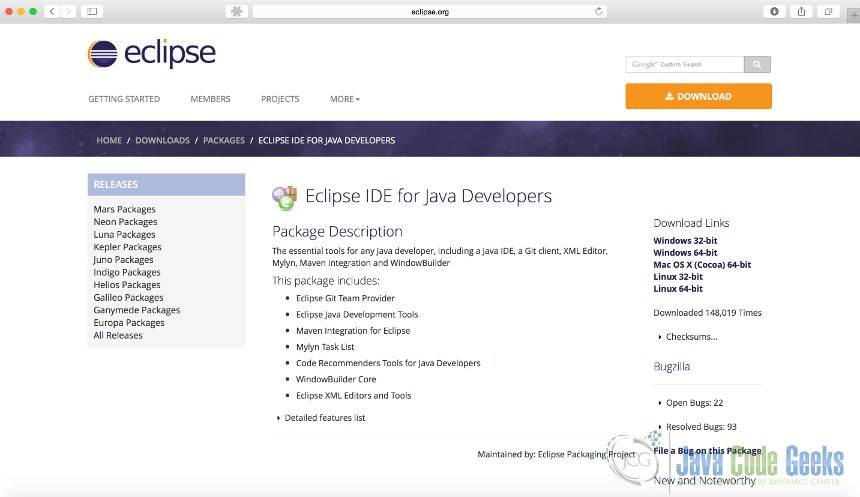
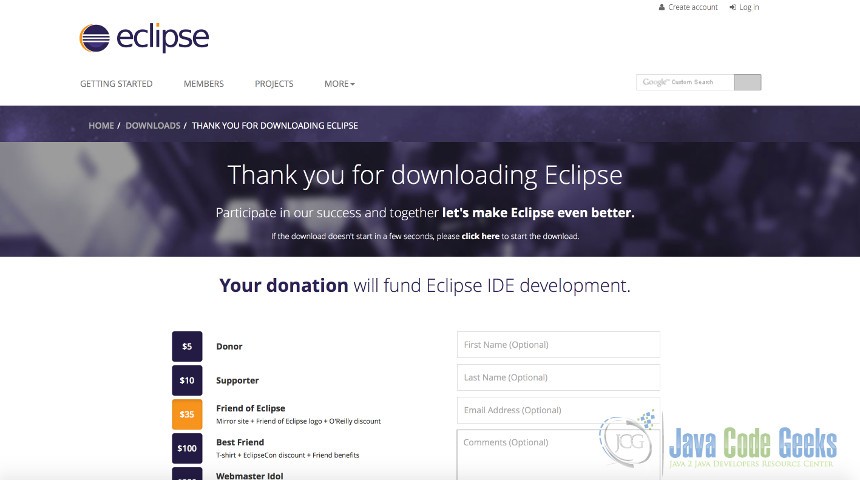
There are several versions of Eclipse that cover several different programming languages. Specifically, for this tutorial, we will cover the Mars release of Eclipse for Java Developers. To download Eclipse, go to the Eclipse IDE for Java Developers website. When you go to the website, you should see a page similar to what’s shown below.
Click on “Mars Packages” in the upper right hand corner, which will bring you to a screen similar to what’s shown below.
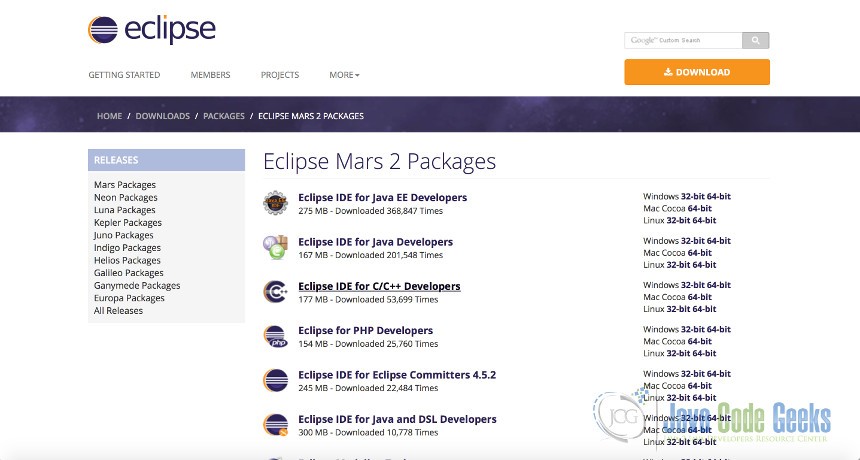
As mentioned, there are various versions of Eclipse IDE for several languages. This tutorial covers the Eclipse IDE for Java Developers. The version to download is the operating system and JDK version dependent, so make sure you download the version appropriate for your operating system and Java installation. For example, I am using a Mac with a 64-bit installation of Java, so I selected the “64-bit” link next to “Mac Cocoa” from the right-hand side of the screen.

After clicking the link, you should see a screen that is similar to what’s shown below:
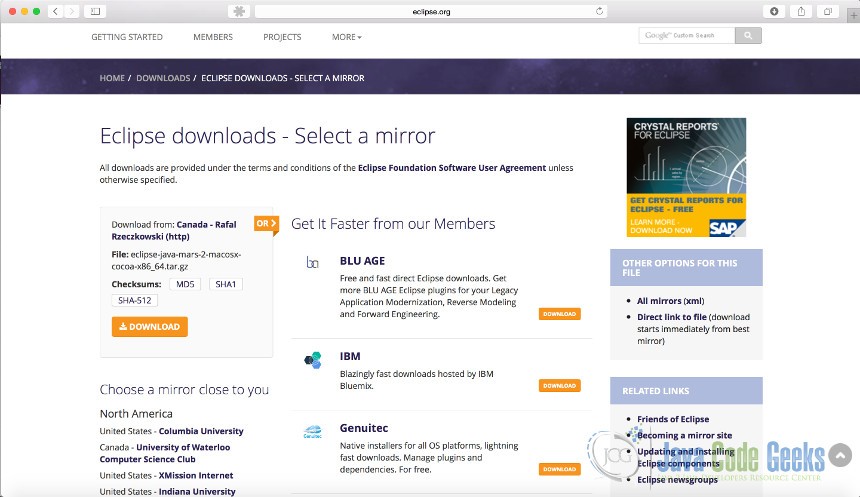
You should scroll down to view the mirror sites that are available in the “Choose a mirror close to you” section. Select the mirror that is closest to you in the list in order to speed up your download of the tool. Columbia University is the mirror closest to my location; therefore, I clicked on the Columbia University link, which displayed the screen below and started the download process.
4. Installation
Once your download completes, double click the file you downloaded to extract it to your chosen directory. After the compressed file is extracted, no further work is required to install Eclipse apart from making sure you have installed a JDK, which we covered in a previous step. If you are on a Mac, click on the “eclipse” icon file located in the folder where you extracted the file or if you are on Windows, double-click “eclipse.exe” to launch the application.
You may see startup errors if you have downloaded a version that doesn’t coincide with your operating system and/or Java installation version.
The Workspace Launcher dialog displays:
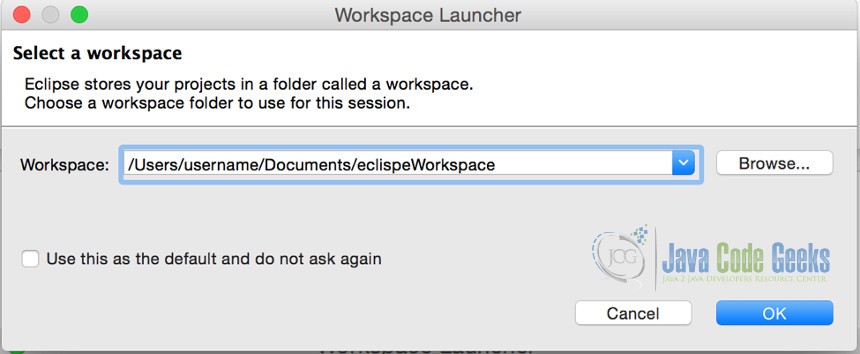
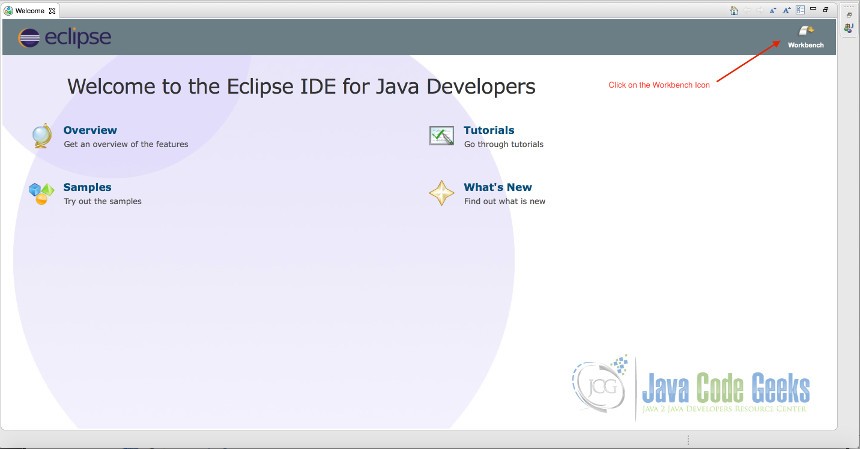
An Eclipse workspace stores your Eclipse configuration and workspace data. Determine a directory where you would like the workspace to reside, enter a name for the workspace, and click “OK”. For your information, a “workspace” just represents the physical location on your computer where your files will be stored. After clicking “OK”, the “Welcome to the Eclipse IDE for Java Developers” screen displays. In the upper right hand corner, click on “Workbench”.
5. Tool Overview
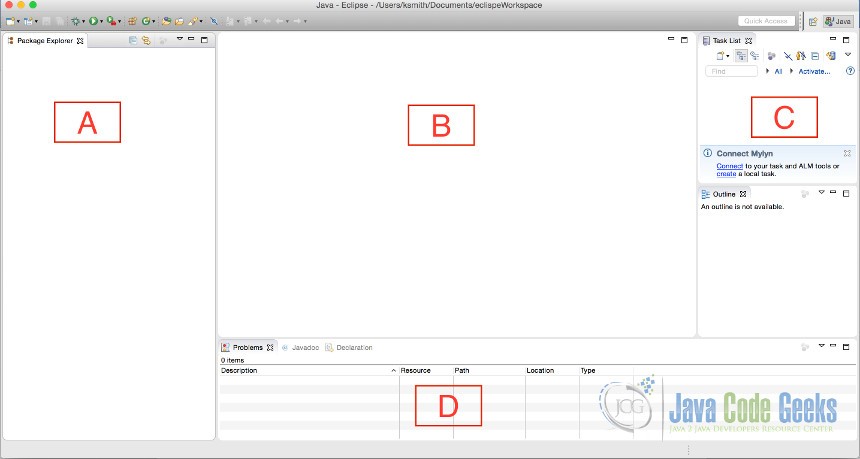
After clicking on Workbench, the following screen displays:
When Eclipse initially launches, it defaults to a view of the “Java Perspective”, which appears in the upper right-hand corner.
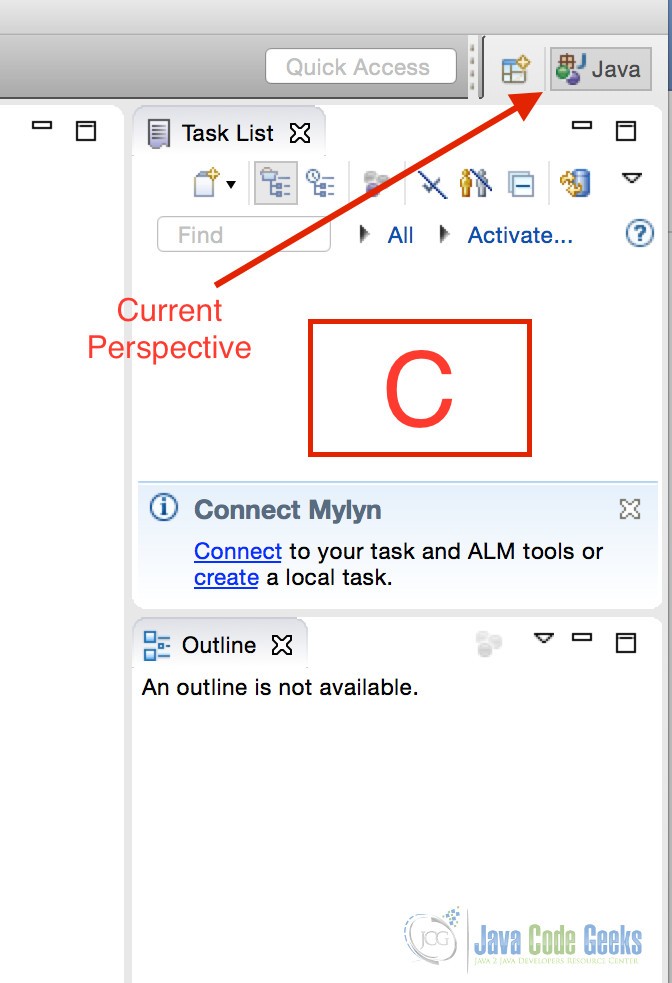
In Eclipse, a Perspective is a grouping of related windows and features that allows for a developer to perform a specific set of tasks. The Java Perspective offers views and editors for creating and executing Java applications.
By default, the main window of the Eclipse IDE includes the following sections:
- Section A – Package Explorer
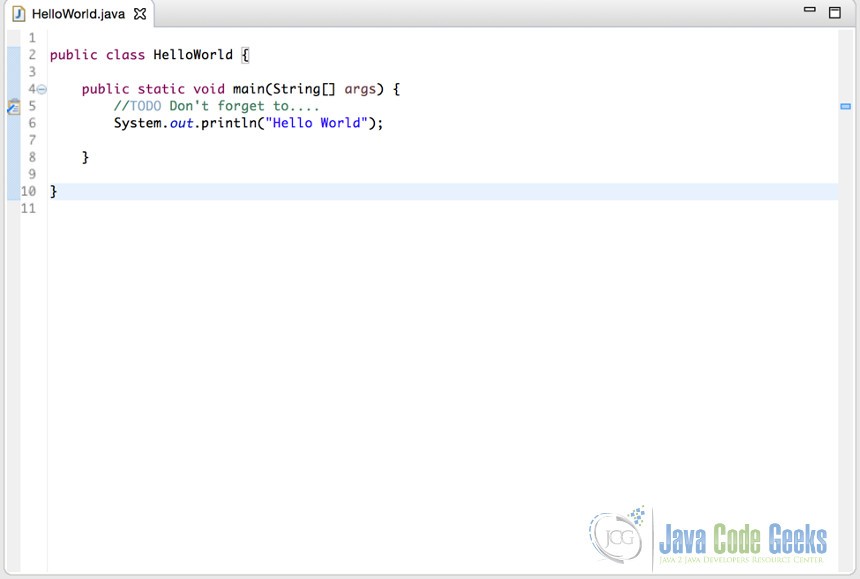
- Section B – Editor
- Section C – Task List
- Section D – Tabbed Views Pane
The Package Explorer allows you to navigate all of the files associated within a project.
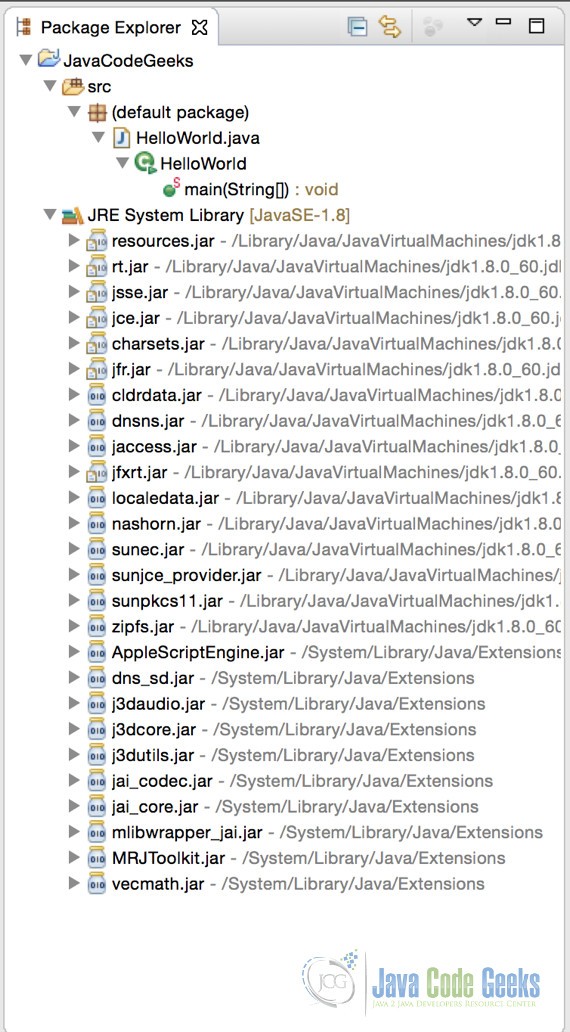
You may open a file by double-clicking on it; the opened file appears in the Editor window.
The Editor window allows you to modify Java source code or text-based files. You may have more than one Editor window opened at once, each displaying a different file. The example below shows one file called, “HelloWorld.java”.
The Task List links to external bug tracking systems and displays assigned tasks. To learn more about the Task List, read about Eclipse Mylyn.
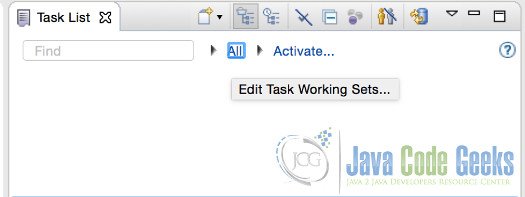
The Task List view is not to be confused with the “Tasks” view. The “Tasks” view is discussed in section the Tabbed Views Pane below.
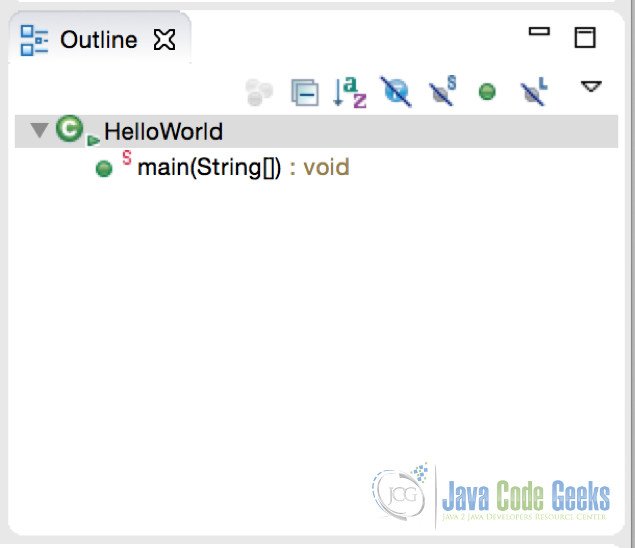
The Outline window displays the structure of the file currently selected in the Editor window.
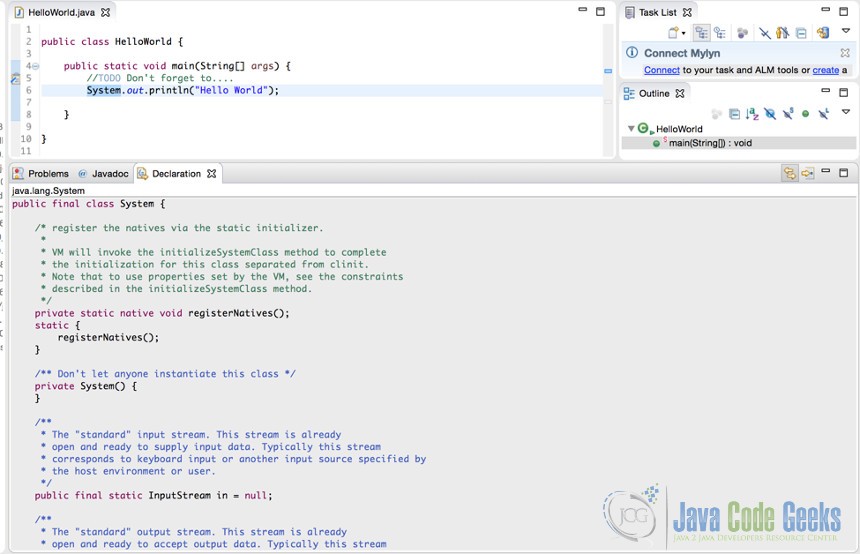
The Tabbed Views Pane is located at the bottom of the screen and houses various views that can be hidden or shown based on developer preference. The default views that display within the tabbed pane are Problems, JavaDoc, and Declarations.
The Problems view shows any error messages or warnings associated with source code found in your project.

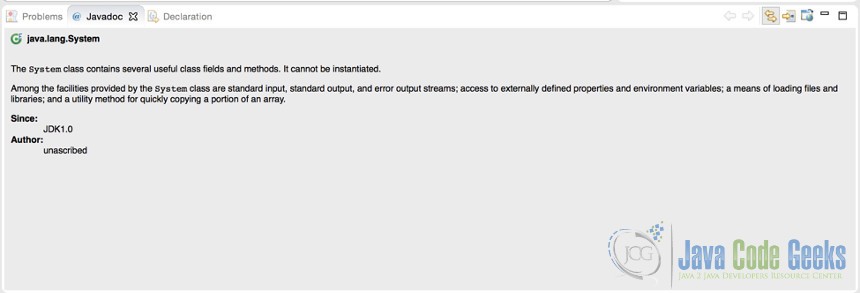
The JavaDoc window shows the documentation for an item selected in the Editor window.
The Declarations window tells you about the declaration of the Java object currently selected in the Editor.
You may add additional views to the bottom tabbed pane by clicking on “Window->Show View” and selecting what you want to see.
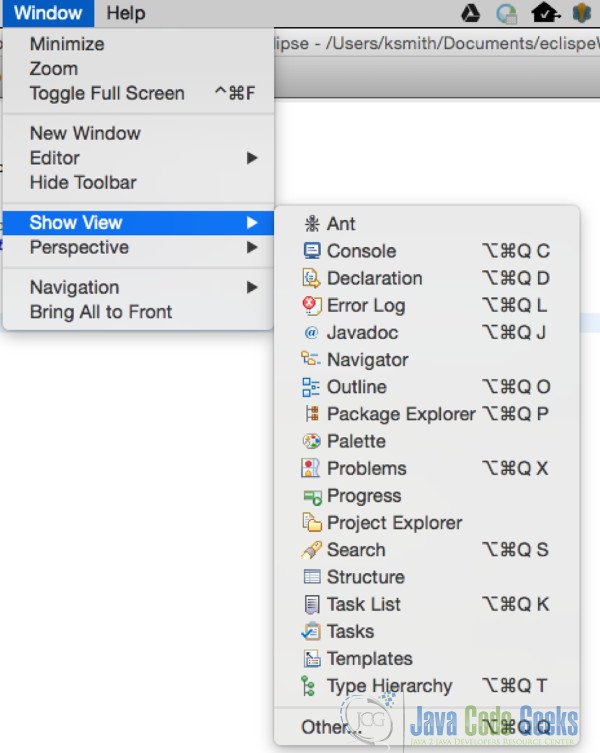
At a minimum, add the “Console” and “Task” tabs as they are very useful during development.
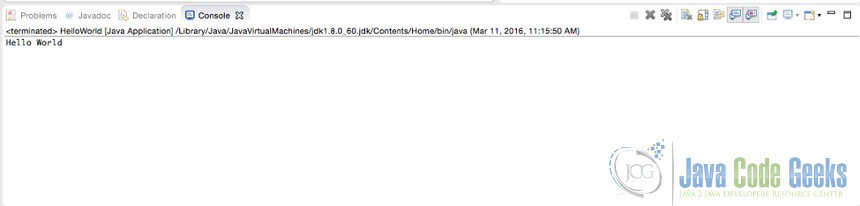
The “Console” view displays your program’s output or any runtime exceptions produced by your code.
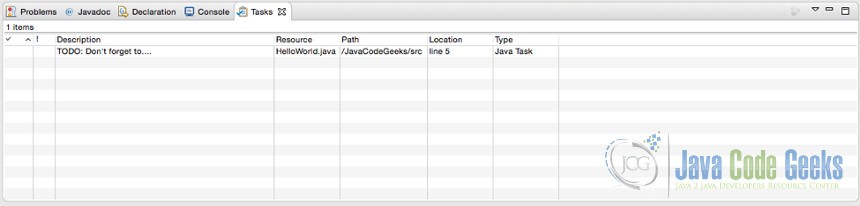
The “Tasks” view displays markers, such as, “//TODO” that you have placed in your source code as a reminder to yourself to do something.
6. Tool Configuration
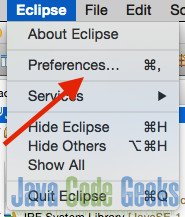
Before starting the first example, ensure that Eclipse is properly configured to your development preferences. From the Eclipse menu bar, select Eclipse->Preferences to open the Preferences dialog box.
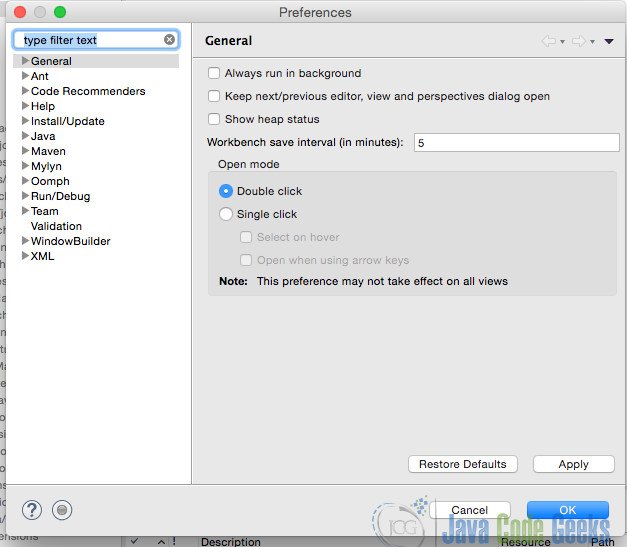
In the Preferences dialog, you can setup the configuration information for your workspace and set your own development preferences. Expand the “Java” category and select the “Installed JREs” option.
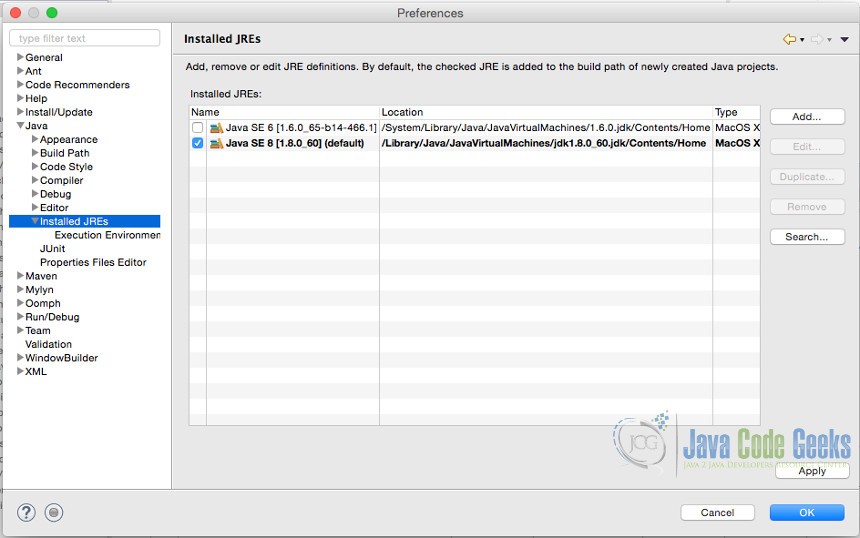
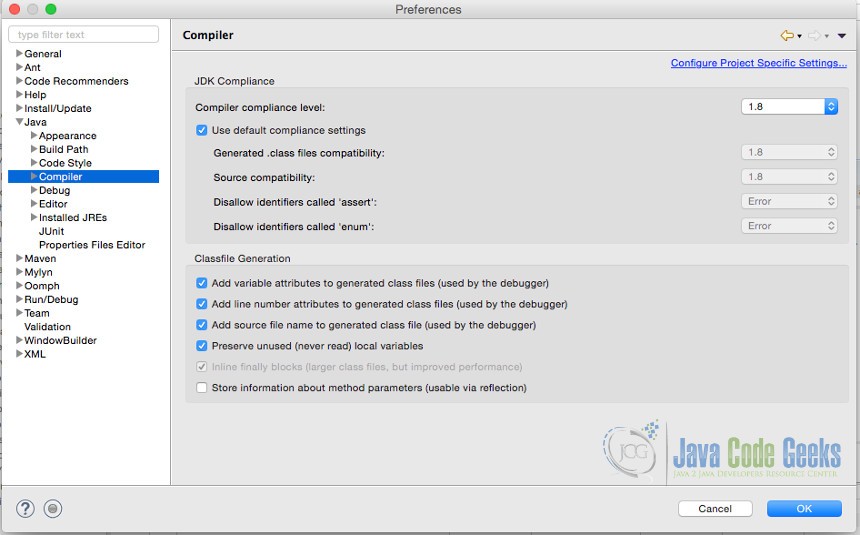
Eclipse is smart enough to locate the JREs already installed on your computer. If you have more than one, select the appropriate JRE based on your preferences. If your JRE does not appear in the list, you may add it by clicking “Add”. Next, under the “Java” category, select the “Compiler” option and set the “Compiler Compliance” Level to the corresponding version of the JDK version you are using.
Next, set your preferences for source code formatting by selecting “Java->Code Style->Formatter”.
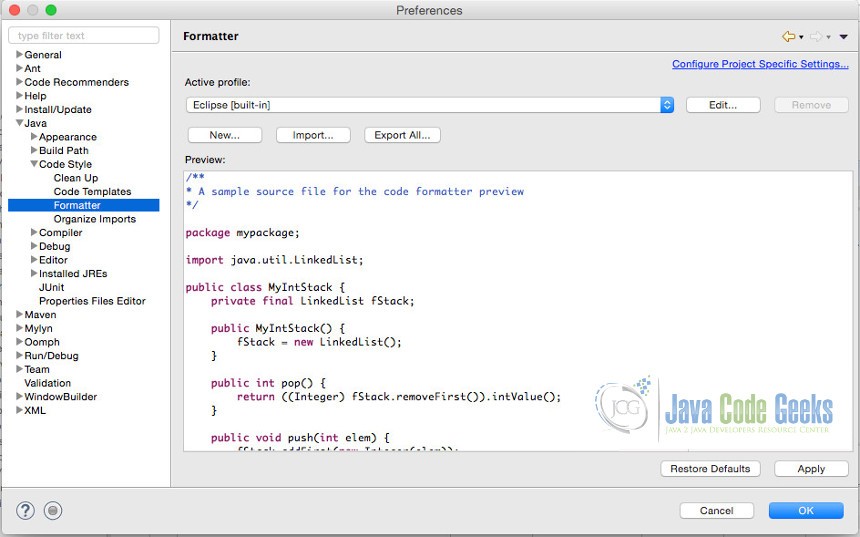
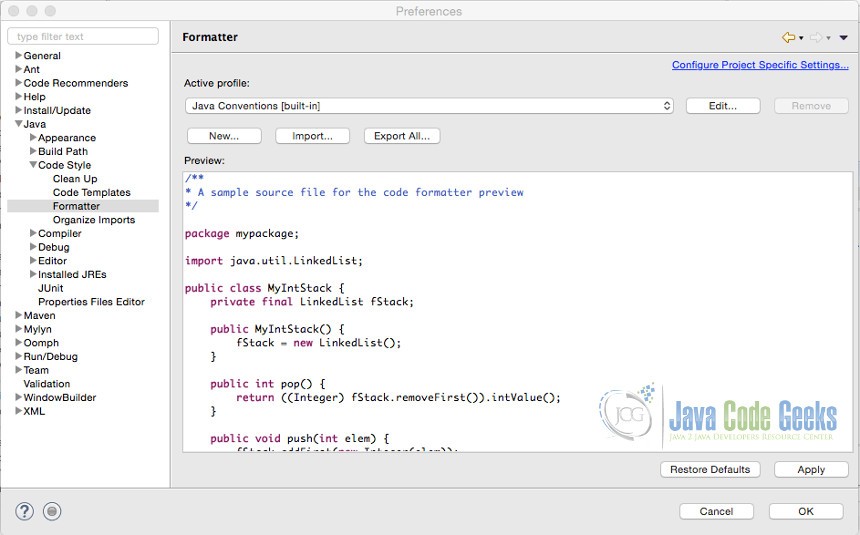
The “Formatter” section contains workspace preferences for formatting source code. Under the “Active Profile Option”, select the “Java Conventions [built-in]” option for the profile and click “Apply” and then “OK”.
Now, you are ready to start coding in the Eclipse IDE!
7. Eclipse Java Download – Hello World Example
7.1 Writing Your First Program
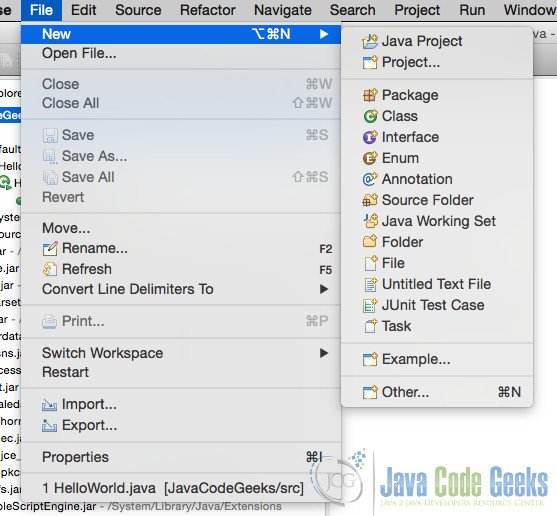
To begin developing a Java program using Eclipse, create a new project. A project groups source code, configuration settings, and other files into a deployable unit. From the “File” menu, select “New->Java” Project.
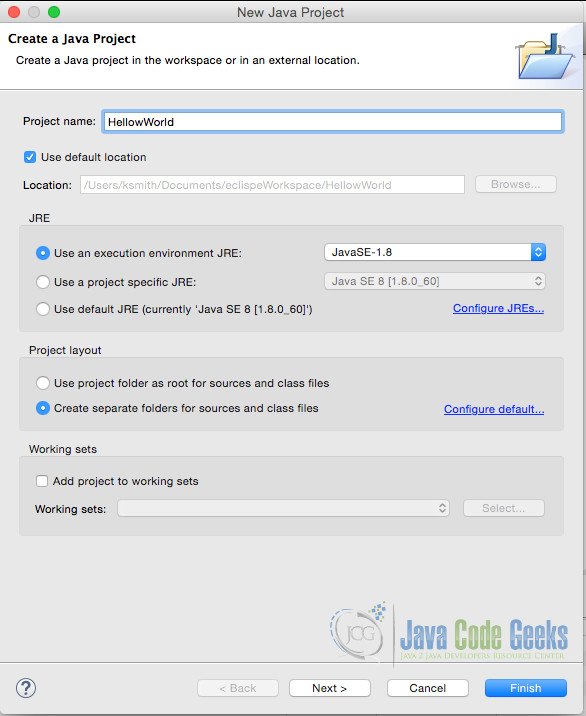
When the “New Java Project” wizard is displayed, enter a name for your new project; accept all defaults when stepping through the rest of the wizard and click ‘Finish’.
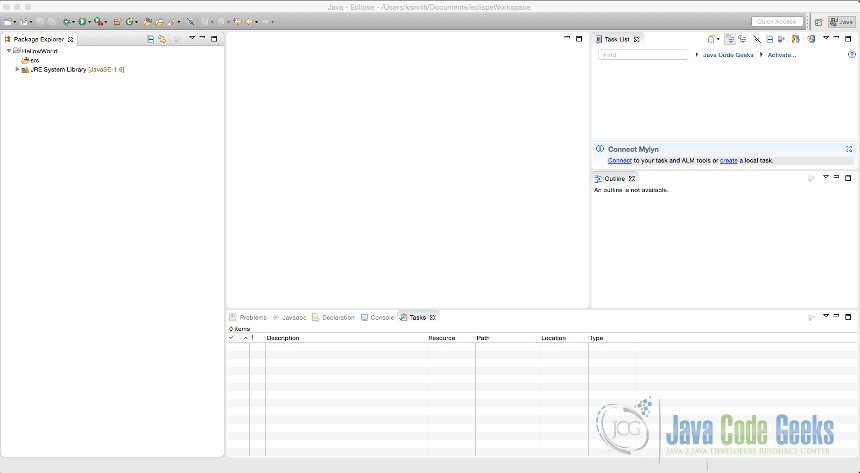
An empty project displays, as shown below.
To add a class to your workspace, right click on your class name and select “New->Class”. In my example, my project name is “HelloWorld” as shown below:
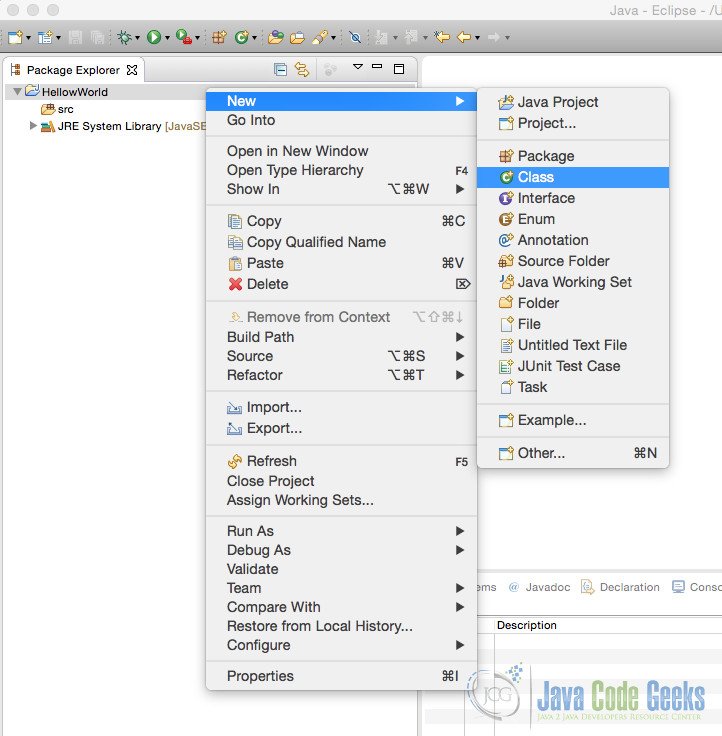
Right click the name of your newly created package in the Package Explorer and click “New->Class”. The New Java Class dialog displays.
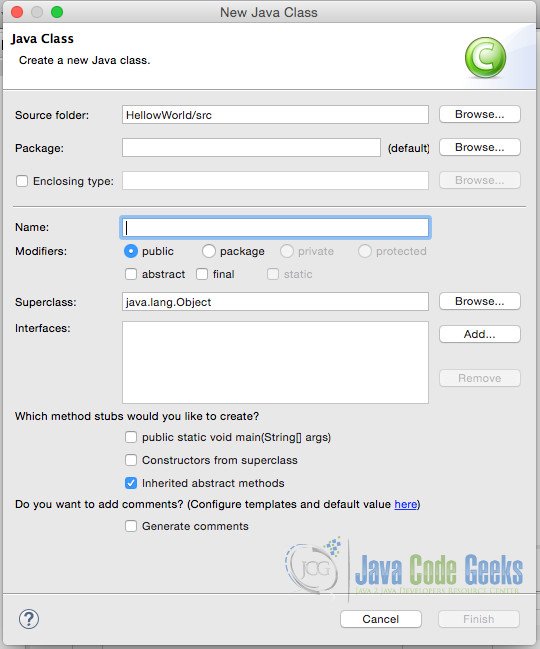
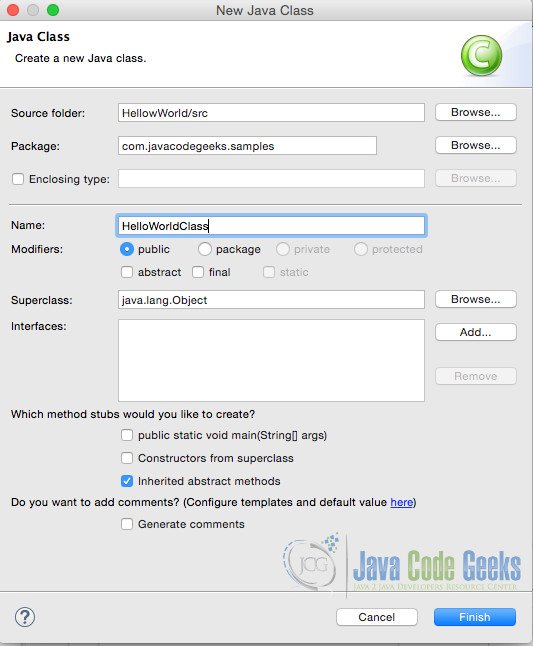
Enter a “Package” and “Name” for your class following the example below.
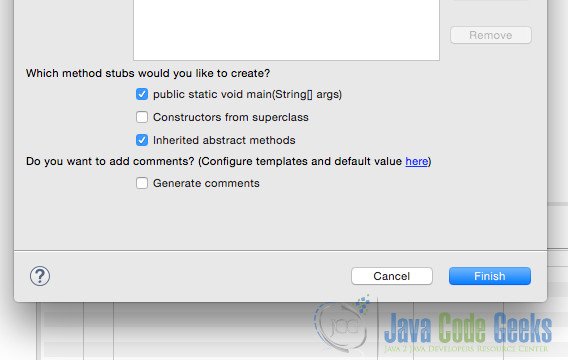
Under the “Which method stubs would you like to create?”, leave the default of “Inherited abstract methods” and also select “public static void main(String[] args)” and click “Finish”.
Eclipse generates a class stub that contains several necessary items:
- package line
- class name
- default main method
- default TODO statements
The next step is to add code to your main method.
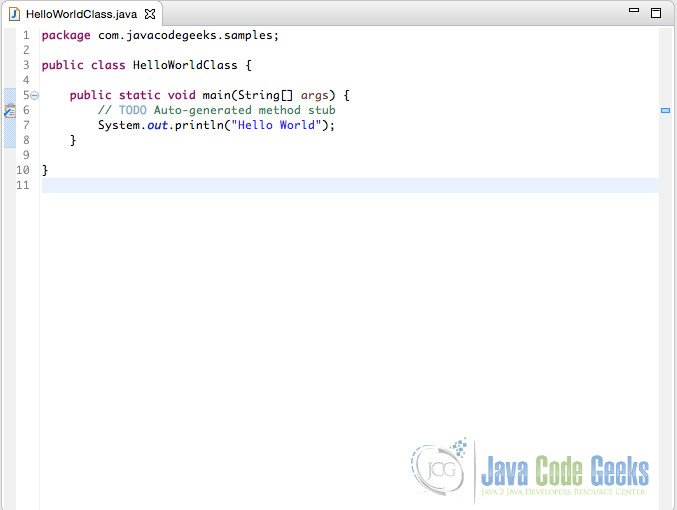
01 02 03 04 05 06 07 08 09 10 | package com.javacodegeeks.samples;public class HelloWorldClass { public static void main(String[] args) { // TODO Auto-generated method stub System.out.println("Hello World"); }} |
7.2 Executing Your First Program
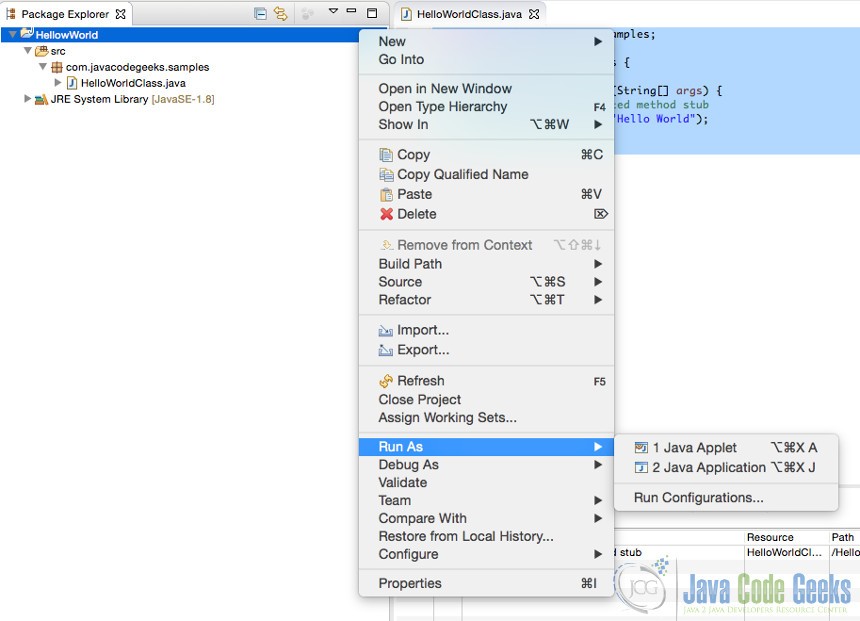
After adding code to the main method, the program can be executed within the Eclipse IDE environment. If you’ve added the Console view to the bottom tabbed pane of your Eclipse IDE, the execution output of your program will display there. To execute your program, right click on your project name and select “Run As->Java” Application.
The output will display in the Console tab.
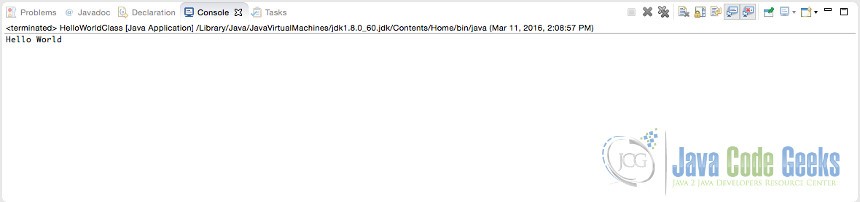
Congratulations! You have written and executed your first Java program in the Eclipse IDE.
7.3 Debugging Your First Program
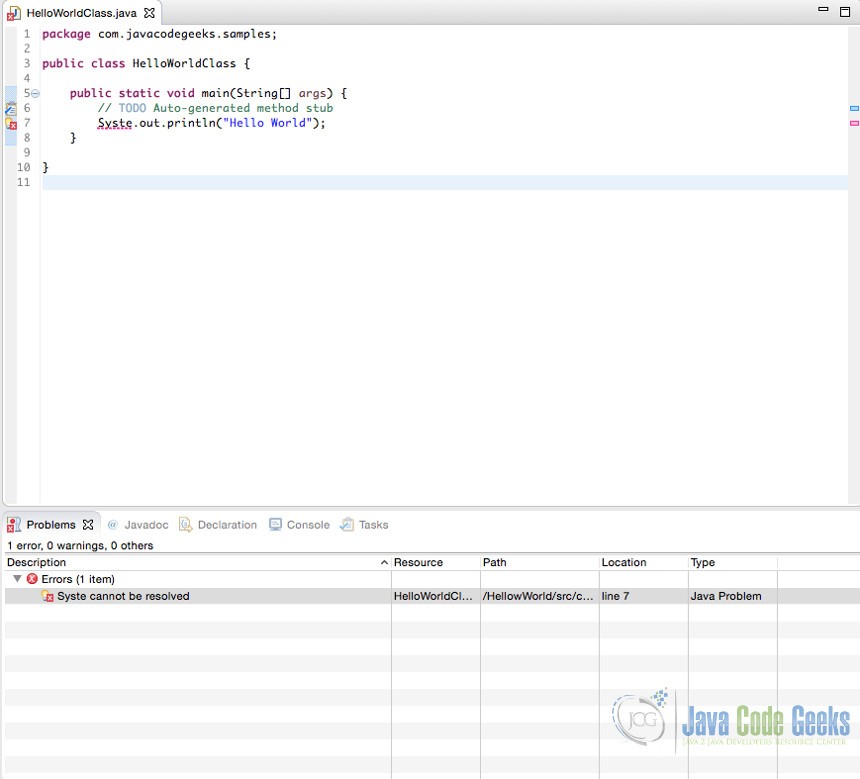
Even before compiling a program in Eclipse, the editor will display problems in your program using Eclipse’s auto-correction feature. Notice the red X in the left-most column as it indicates a problem in your code. Upon double-clicking on the red X, a description of the problem and some helpful options to fix the error display.
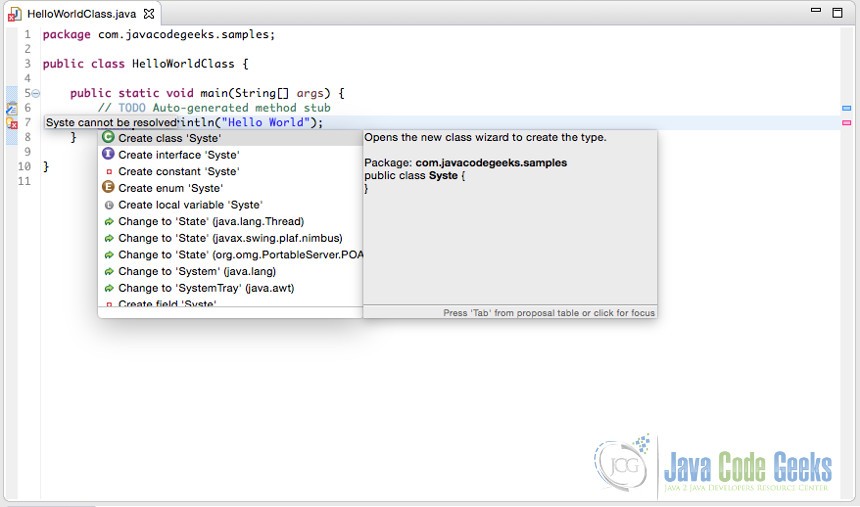
To fix the issue, click “Change to ‘System’ (java.lang)”; Eclipse automatically corrects the code for you.

This auto-correction feature is useful for correcting compilation errors; however, there are times when errors can only be found during the execution of your program. A debugger is a tool used to capture runtime errors that occur during the execution of your program. Luckily, the Eclipse IDE has a built-in debugger that helps you find the root cause of errors (i.e. bugs) in the code. The Eclipse IDE debugger allows you to examine and step through Java code line by line.
Now, let’s look at breakpoint debugging. To fully understand the power of the Eclipse IDE’s debugger, add a few more lines of code to your Hello World sample as shown below. The additional lines will be useful to highlight the flow of control during debugging. Ensure that the newly added code builds and executes correctly before continuing on.
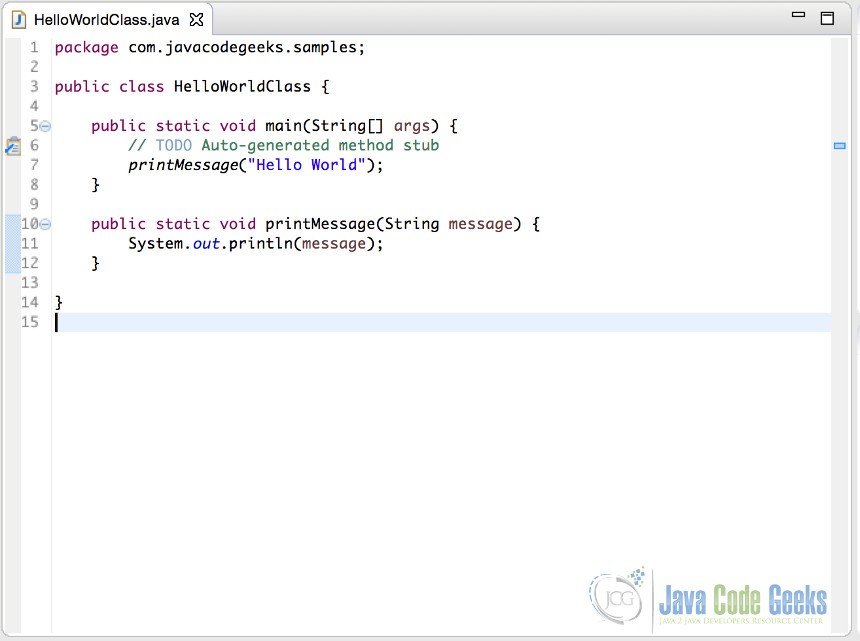
01 02 03 04 05 06 07 08 09 10 11 12 13 14 | package com.javacodegeeks.samples;public class HelloWorldClass { public static void main(String[] args) { // TODO Auto-generated method stub printMessage("Hello World"); } public static void printMessage(String message) { System.out.println(message); }} |
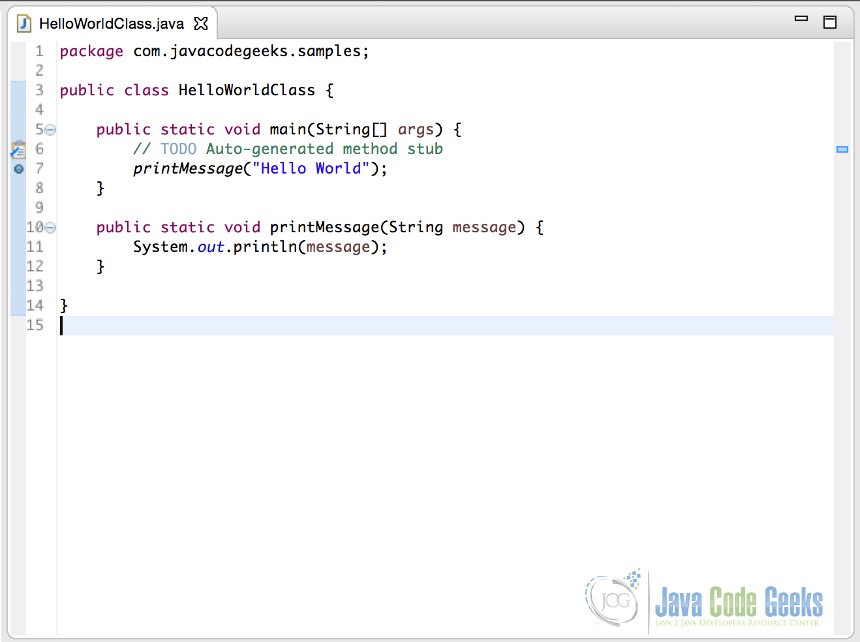
The first step to debugging your program is setting a breakpoint, which is a place in the code at which program execution suspends. If you do not set a breakpoint, your program will run to completion without letting you do any debugging. A breakpoint can be set by double-clicking in the gray margin on the left side of the editor, next to the line where the execution should stop. A blue dot appearing in the margin, indicates an active breakpoint.
After setting the breakpoint, select the menu option Run->Debug As->Java Application to start the debugger. Upon starting the debugger, Eclipse switches the display to the debugger perspective. The flow of execution pauses at the breakpoint that was set. Before switching to the Debug Perspective, the Confirm Perspective Switch dialog may appear.
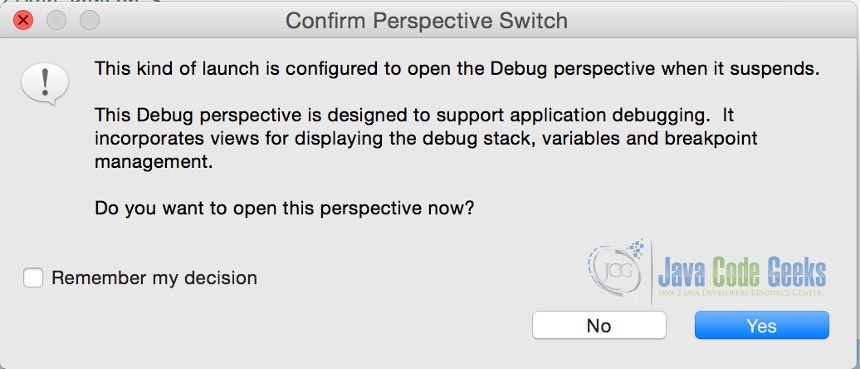
If it does appear, click Yes. Notice that in the Debug Perspective, execution suspends at the breakpoint.
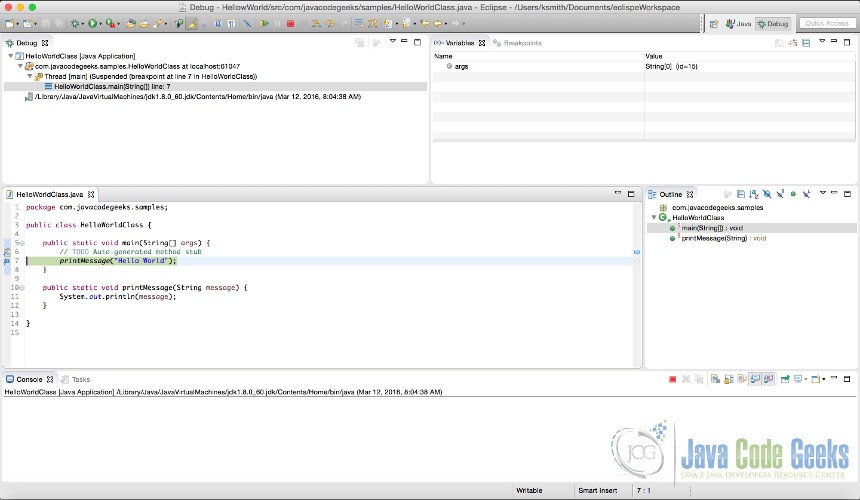
The perspective includes several new views useful for Debugging. One important view at the top left is the Debug view (not to be confused with the Debug Perspective), which shows the call stack, and the status of all current threads.
Stepping through the code is easy. The debug toolbar allows you to control the flow of the program execution.

The most useful menu options are:
- Resume
- Suspend
- Terminate
- Step Into
- Step Over
Resume – Starts debugging after suspending debugger.
Suspend – Pauses the debugger.
Terminate – Stops the debugger.
Step Into – This takes you into a method that is called.
Step Over – This allows you to call a method without stepping into it line by line.
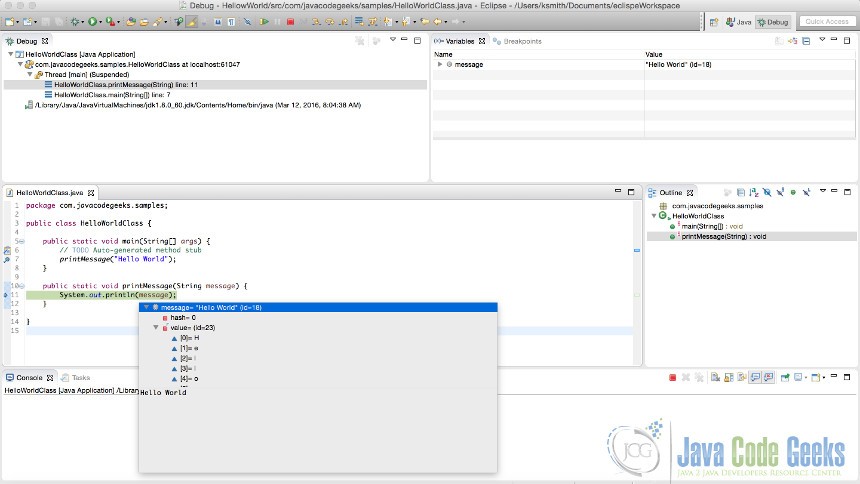
Now, let’s evaluate variables and expressions. Click the “Step-Into” button to bring the flow of control to the “printMessage” method. To see the value of a variable, simply hold the mouse pointer over the variable. The content of the variable is displayed in a small window next to the variable name, as shown below.
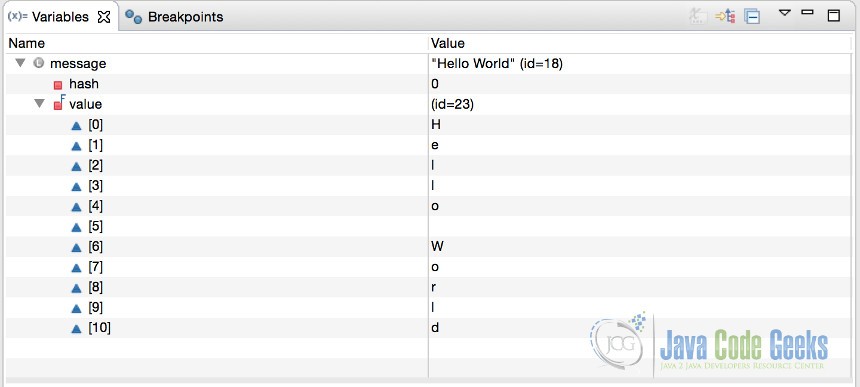
The other window views are useful to examine the state of the variables in your program. The Variables view shows the state of all the local variables active in the current method. The data can be examined by expanding the variable. This allows us to view recursively down the tree.
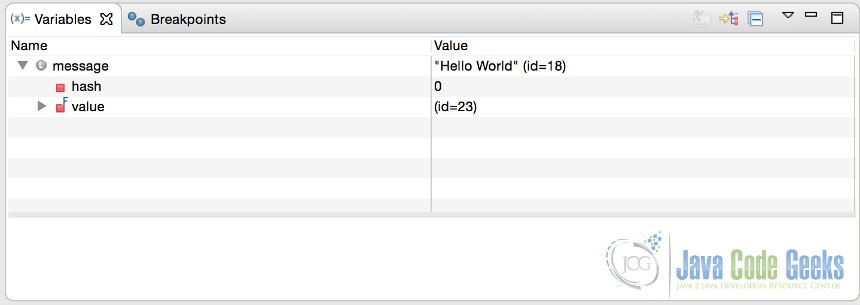
This additional information can prove useful when trying to track down errors in your code.
8. Useful Features
8.1 Code Formatting
Sometimes source code may be hard to read if you’ve copied the code from another source or opened source code written by someone else. The Eclipse IDE provides an easy way to reformat code with just one-click. For example, if we had code similar to what’s shown below and wanted to update the format, we would make use of the source code formatting.
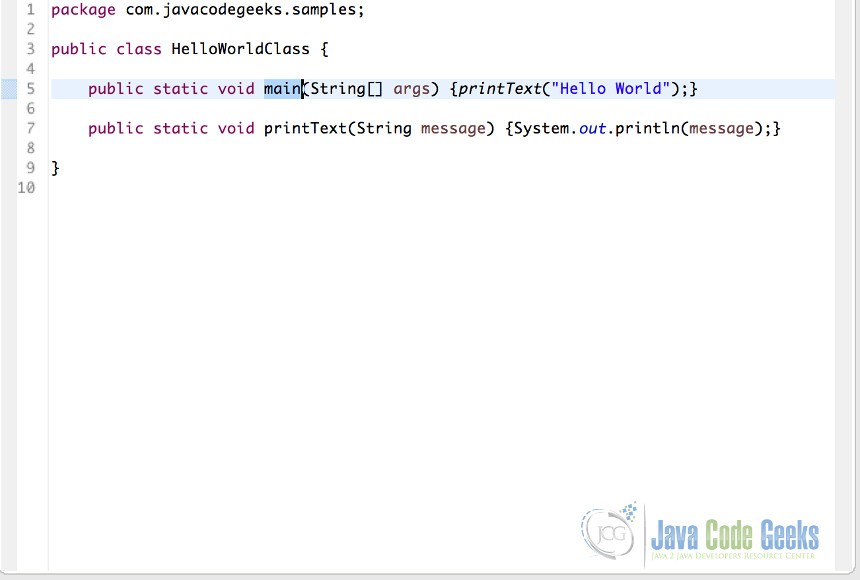
1 2 3 4 5 6 7 8 9 | package com.javacodegeeks.samples;public class HelloWorldClass { public static void main(String[] args) {printText("Hello World");} public static void printText(String message) {System.out.println(message);}} |
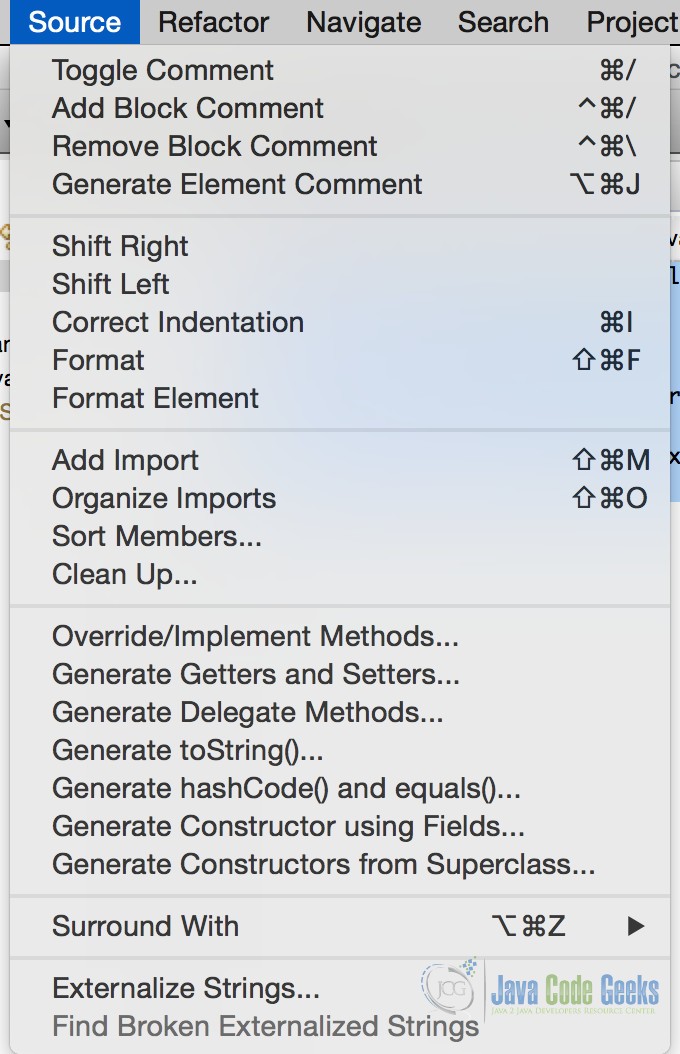
To format code, from the toolbar, select “Source->Format”:
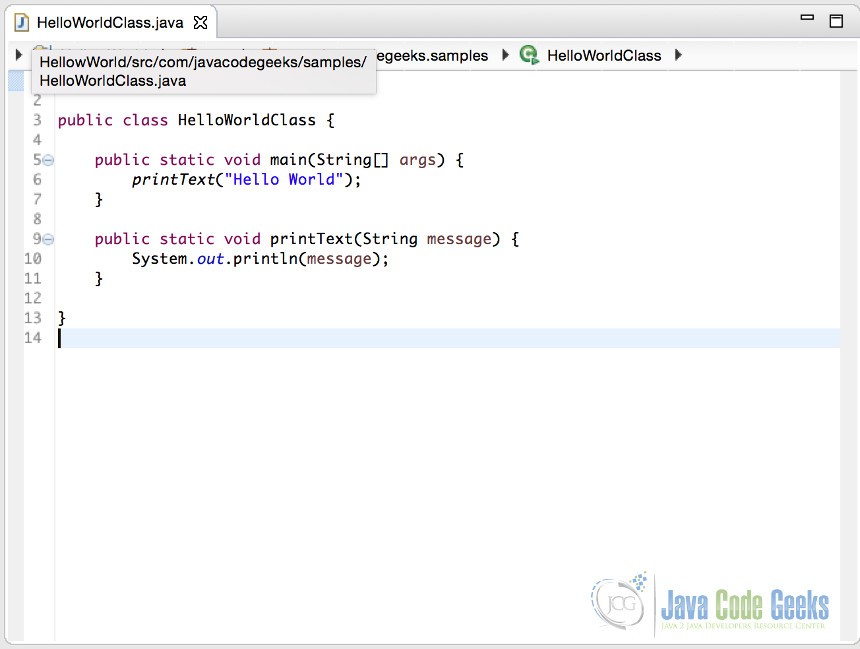
The code is automatically changed to what is shown below based on the preferences for source code formatting that were set earlier in the tutorial.
8.2 Refactoring
After a program is developed, renaming an object, class, or method requires a considerable amount of work. Typically, every place where that object, class, or method is used would have to be changed. Eclipse offers a way to make changes and ripple those changes across the entire application with just one-click using refactoring.
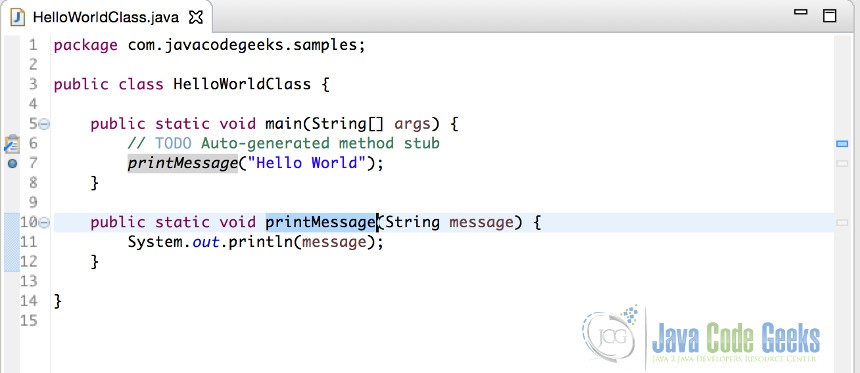
In this example, refactor the code by changing the name of the “printMessage” method to “printText”.
Highlight the name of the method:
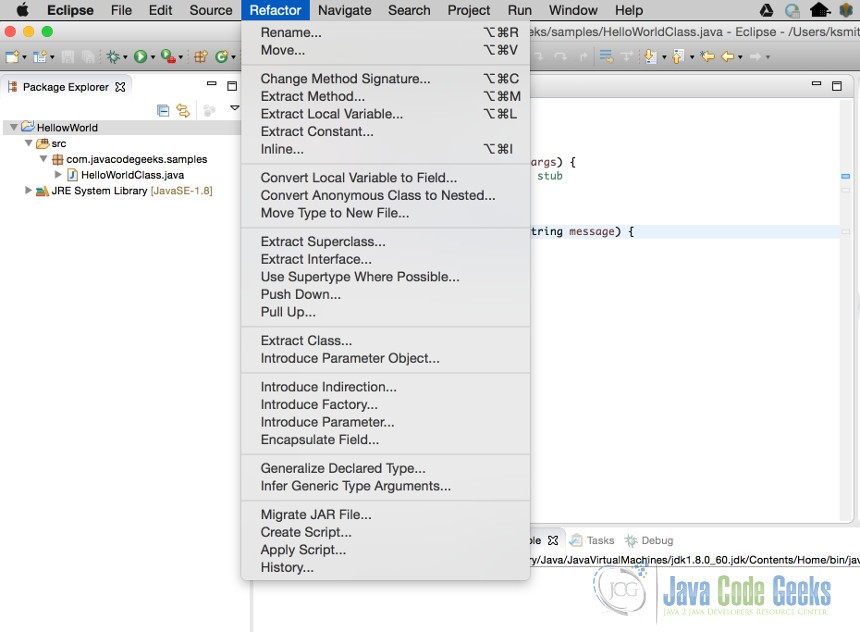
Select Refactor from the menu
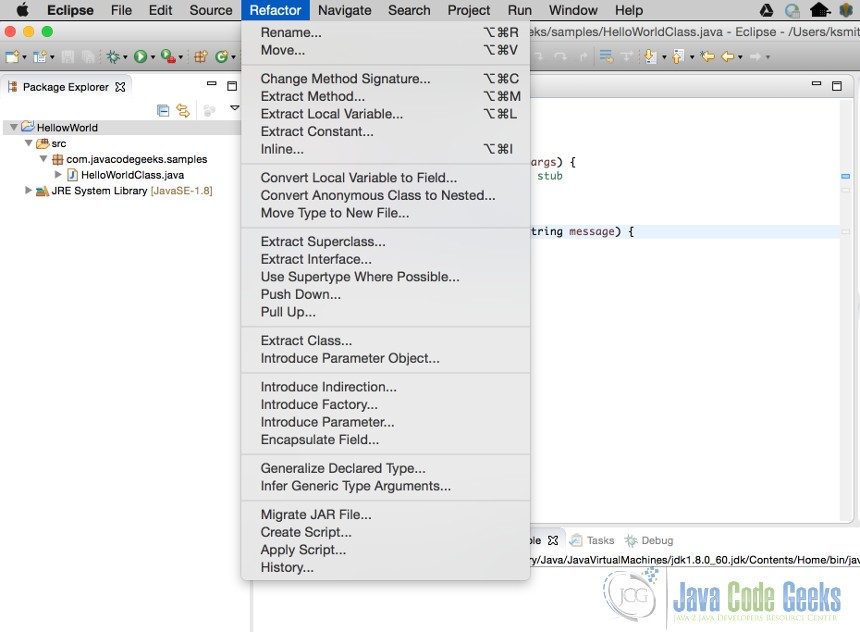
Select Rename, which displays a screen like below:
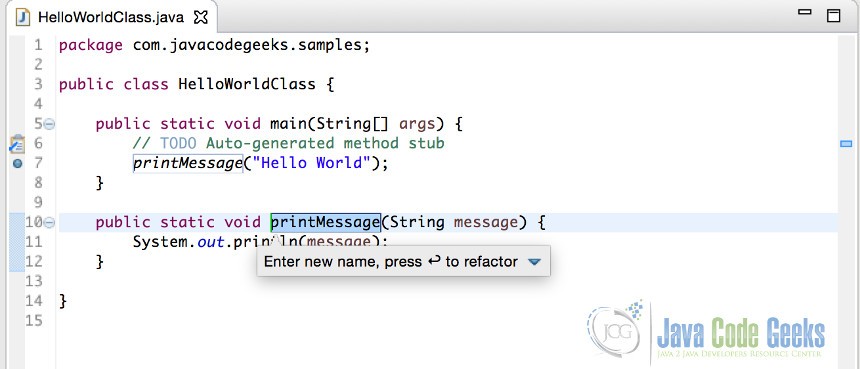
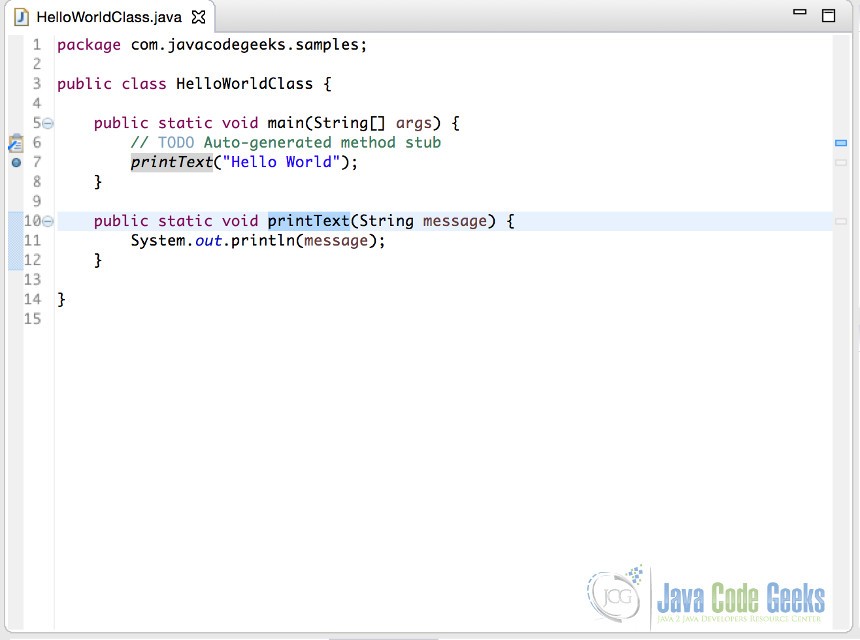
Enter the new name “printText” and press Enter. All occurrences of the method name are updated.
8.3 Call Hierarchy
When maintaining an application with a lot of classes and dependencies, it is sometimes hard to track other methods that call a particular method. The Call Hierarchy functionality lists all methods that call a given method.
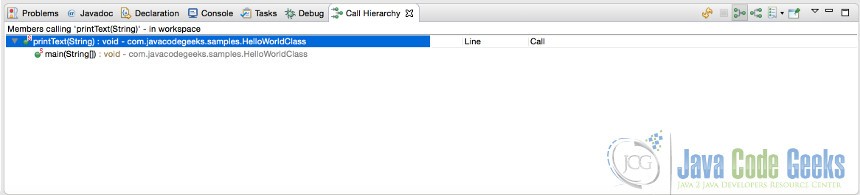
In this example, select the “PrintText” method and right click:
Select “Open Call Hierarchy”, which opens the “Call Hierarchy” view in the bottom tabbed pane.
8.4 Local History for Files
Eclipse IDE keeps a local history of files, which may prove useful when you need to review a previous version of a file that has not been committed to a version control system yet.
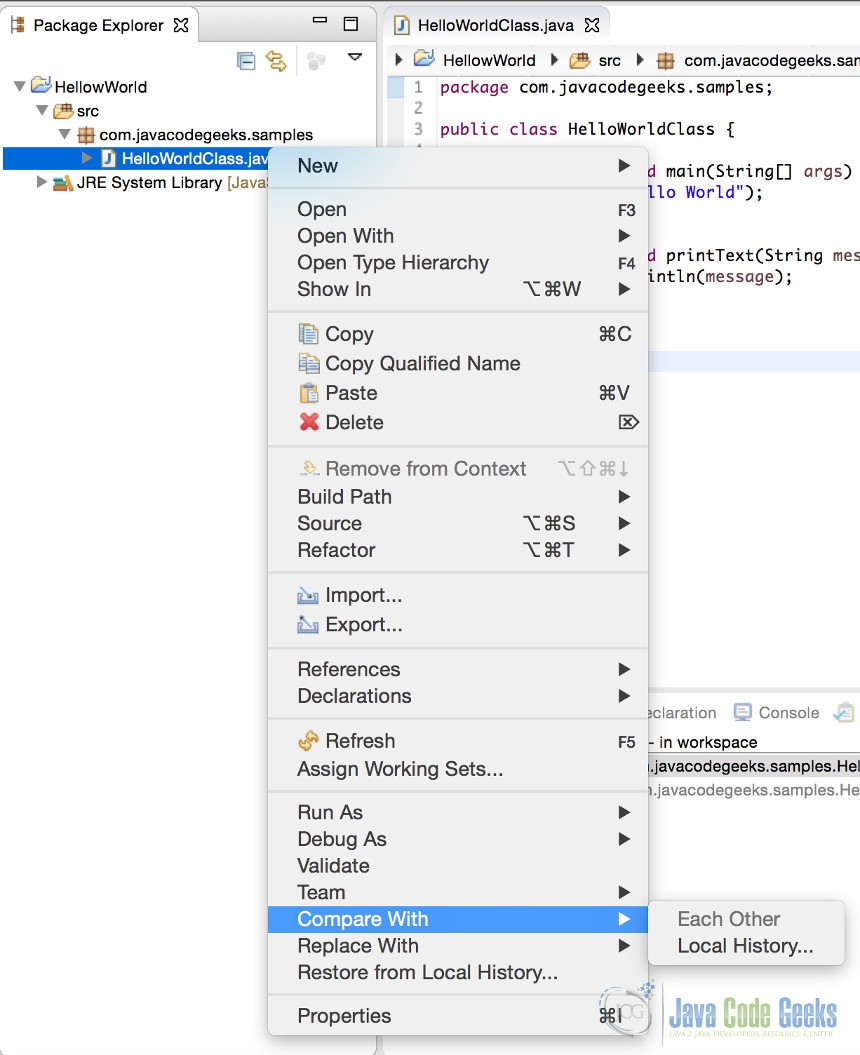
The local history for a file can be selected by right clicking on a file name in the Package Explorer and selecting “Compare With->Local History”.
The “History” view displays in the bottom tabbed pane of Eclipse.
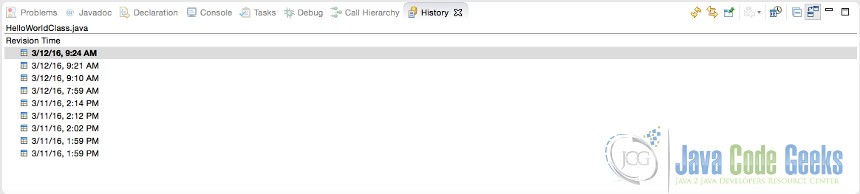
A previous version may be selected by double-clicking on it. In this example, I will double-click on “3/12/16, 7:59 AM”, which displays the following screen.
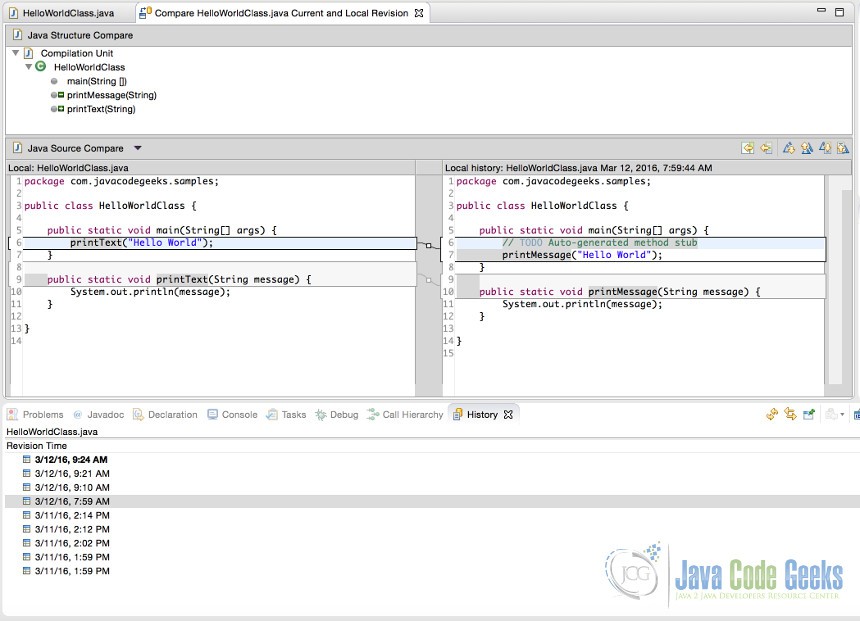
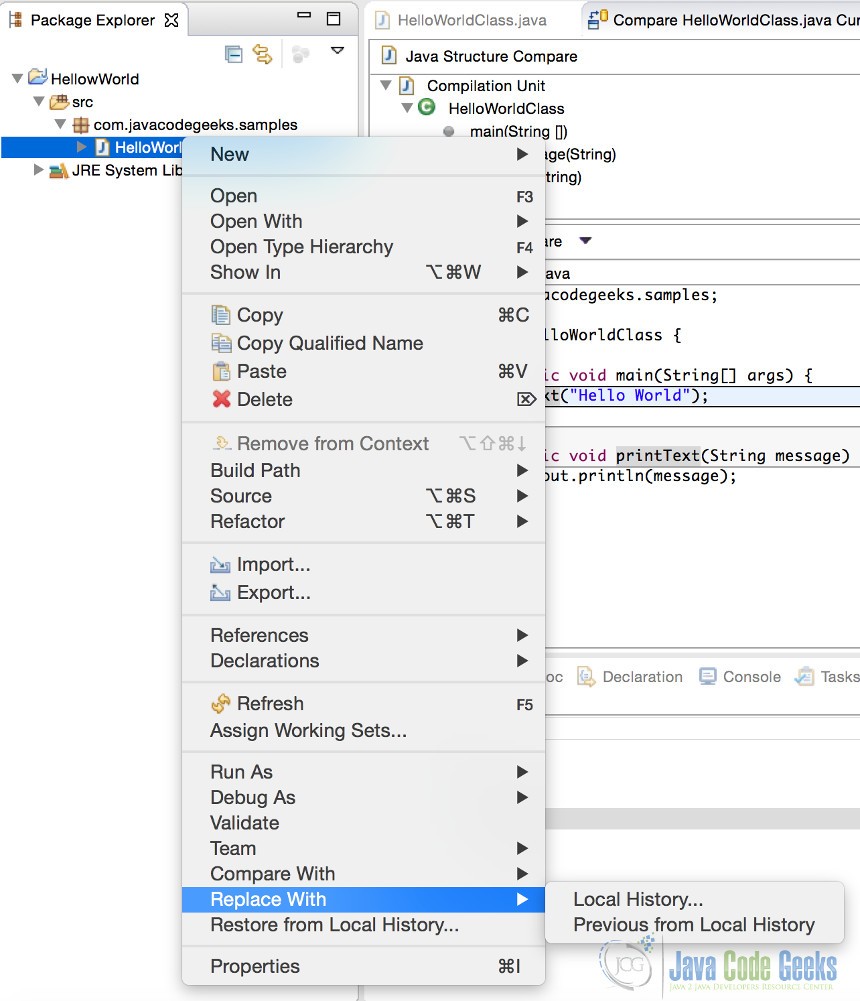
The current version is displayed on the left-hand side; the previous version is display on the right-hand side. Eclipse also provides the ability to replace the current version with a previous version by right clicking on a file name in the Package Explorer and selecting “Replace With->Local History” or “Restore From Local History”.
9. Download the Source Code
This was a tutorial on the Eclipse Java Download.
You can download the full source code of this example here: Eclipse Java Download Tutorial – How to download Eclipse
Last updated on Apr. 22nd, 2020

Very good introduction. I always have issues with starting Eclipse. I like that you included the Debugger and History features. This is helpful for beginners.