Checkstyle is a development tool to help programmers write Java code that adheres to a coding standard. It automates the process of checking Java code to spare humans of this boring (but important) task. This makes it ideal for projects that want to enforce a coding standard. Checkstyle is highly configurable and can be made to support almost any coding standard.
1. Introduction
The Eclipse Checkstyle Plugin (aka eclipse-cs) integrates the static source code analyzer Checkstyle into the Eclipse IDE. With the Checkstyle Eclipse Plugin your code is constantly inspected for coding standard deviations. Within the Eclipse workbench you are immediately notified of problems via the Eclipse Problems View and source code annotations similar to compiler errors or warnings. This ensures an extremely short feedback loop right at the developers fingertips.
2. Checkstyle
Checkstyle is an Open Source development tool to help you ensure that your Java code adheres to a set of coding standards. Checkstyle does this by inspecting your Java source code and pointing out items that deviate from a defined set of coding rules. If your development team consists of more than one person, then obviously a common ground for coding standards (formatting rules, line lengths etc.) must be agreed upon – even if it is just for practical reasons to avoid superficial, format related merge conflicts. Checkstyle (and the Eclipse Checkstyle Plugin for that matter) helps you define and easily apply those common rules. Checkstyle can check many aspects of your source code. It can find class design problems, method design problems. It also has the ability to check code layout and formatting issues.
Checkstyle is most useful if you integrate it in your build process or your development environment.
2.1. Plugin
The plugin uses a project builder to check your project files with Checkstyle. Assuming the Eclipse Auto-Build feature is enabled each modification of a project file will immediately get checked by Checkstyle on file save – giving you immediate feedback about the changes you made. To use a simple analogy, the Checkstyle Plug-in works very much like a compiler but instead of producing .class files it produces warnings where your code violates the Checkstyle rules. The discovered deviations are accessible in the Eclipse Problems View, as code editor annotations and via additional Checkstyle violations views.
2.2 Rules
The set of rules used to check your code is highly configurable. A Checkstyle configuration specifies which check rules are validated against your code and with which severity violations will be reported. Once defined a Checkstyle configuration can be used across multiple projects. The plugin comes with several pre-defined Checkstyle configurations. You can create custom configurations using the plugin’s Checkstyle configuration editor or even use an existing Checkstyle configuration file from an external location
3. How to install checkstyle plugin
In this section we will see how to install checkstyle plugin. If you don’t have Eclipse you can download from the official site: Eclipse. For this example I am using Luna 4.4.2.
Open Eclipse and go to Help->Eclipse Marketplace… In the Find: text box on top left type ‘Checkstyle’ and press ‘Enter’
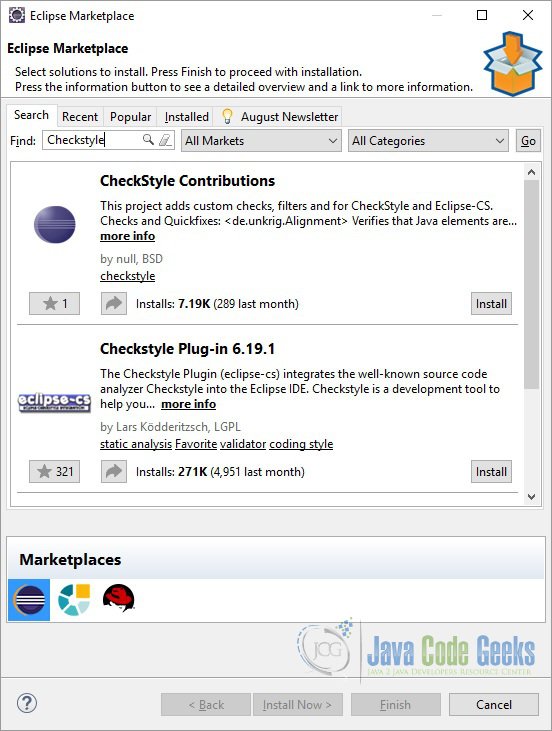
Click the ‘Install’ button for ‘Checkstyle Plug-in 6.19.1’. You might see different results here as eclipse will tell you which version of the checkstyle is compatible with your Eclipse version. Next you will see the screen as shown below:

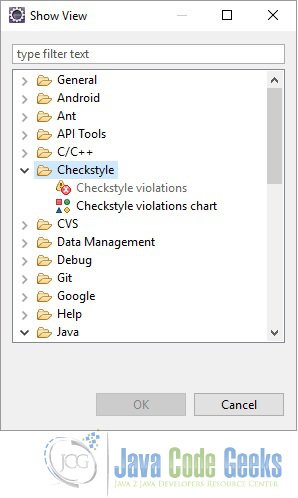
Click on ‘Confirm’ button. Next you will be asked to Review the Licenses. Accept the license agreement and click ‘Finish’. You might be displayed a warning pop-up. Click ‘OK’ on that pop-up. You will be asked to restart the Eclipse for the changes to take effect. Restart Eclipse. You check style plugin has now been installed. To verify that the plugin has been installed correctly go to Window->Show View->Other. You will see the ‘Checkstyle’ folder here:
4. Running Checkstyle
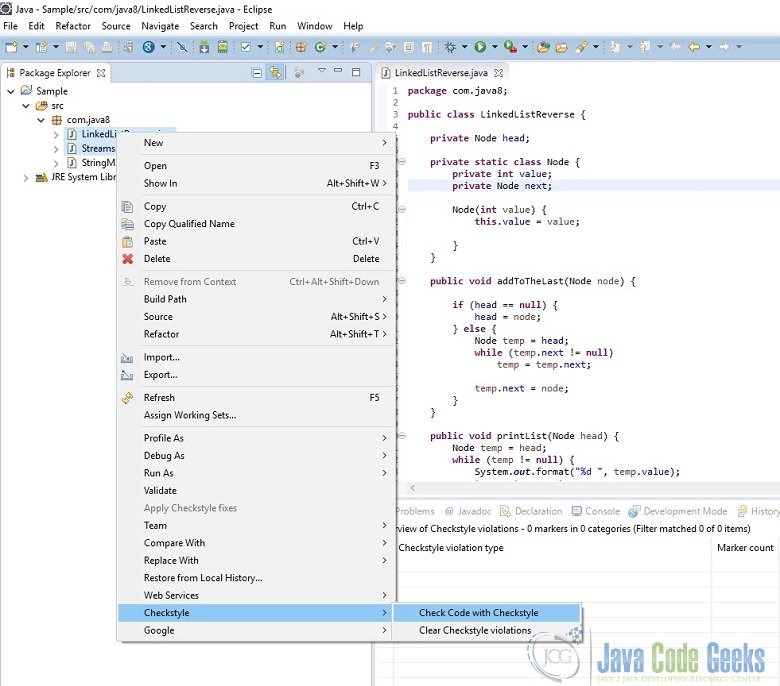
In this section we will see how to run checkstyle and how to analyse the report. We can run checkstyle on selected file, selected package or the whole project. To run the checkstyle on selected classes just select those classes and right click. Select Checkstyle->Check Code With Checkstyle
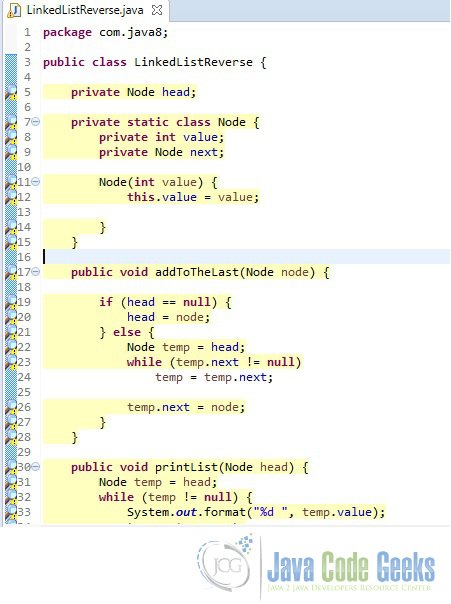
Once you click on this link the checkstyle errors (if any) will be displayed in the main window:
The list of errors can be seen in the ‘Problem’ window:
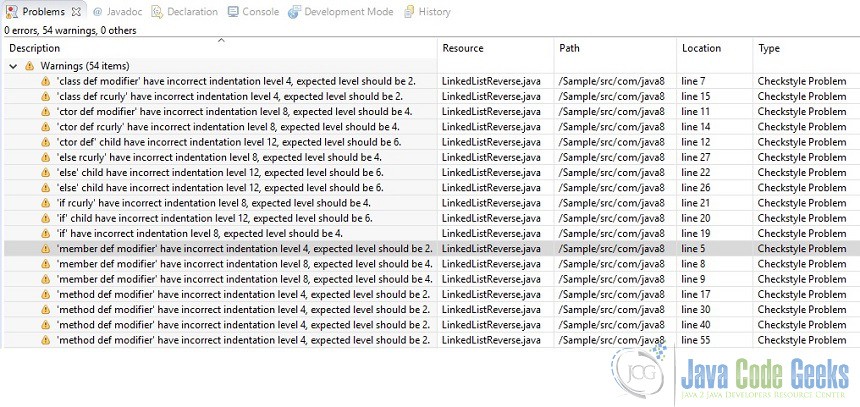
This gives the description of the checkstyle error, the file and the path. We can also clear all the checkstyle error by clicking ‘Clear Checkstyle Error’. We can activate/deactivate checkstyle per project. This can be done by right clicking on the project and choosing Checkstyle->Activate/Deactivate Checkstyle.
5. Configure checkstyle for project
To configure checkstyle for the project right click on the project and click ‘Properties’. Select ‘Checkstyle’:
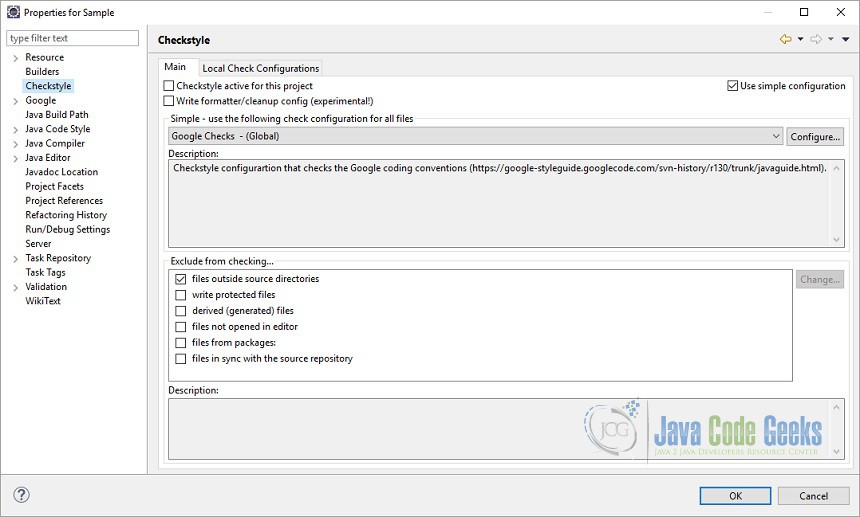
We can use this window to configure checkstyle properties. The first checkbox can be used to activate/deactivate the checkstyle for this project. From this we can choose different configurations:
Google Checks – (Global): Checkstyle configurartion that checks the Google coding conventions.
Sun Checks – (Global): Checkstyle configuration that checks the sun coding conventions.
Sun Checks (Eclipse) – (Global)): Slightly modified version of Sun Checks that better matches the default code formatter setting of Eclipse
6. Creating custom checkstyle configuration
In this section we will see how to create custom checkstyle. Click on Window->Preferences
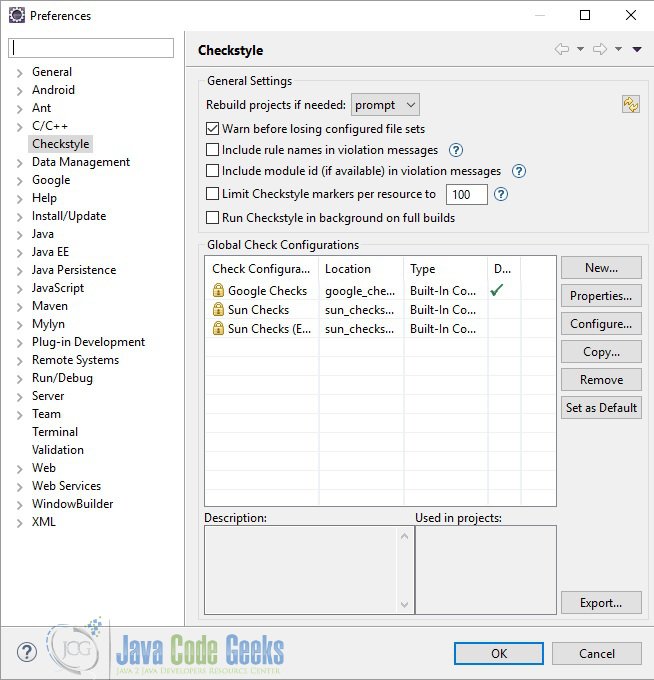
In the upper area are some general settings. The center/bottom area shows the Checkstyle configurations known to the plug-in. Only Checkstyle Configurations that are listed therein can be used with the plug-in. Sun Checks is a built-in standard configuration that comes delivered with Checkstyle and therefore also with the plug-in. Built-In configurations cannot be modified nor be deleted.
Rebuild projects if needed
Determines the plugin’s behavior when a configuration is changed via the configuration editor. This option can be set to automatically rebuild the affected projects, never to rebuild these projects or be prompted whether to rebuild.
Warn before losing configured file sets
Set if the plugin should warn you when you are about to lose configured file sets in the project properties. This can happen if you switch from an advanced project configuration using file sets to the simple setting.
Include rule names in violation messages
Controls if the name of the Checkstyle module reporting a problem is prepended to the message produced. If enabled this can be used to sort the problems via the Problems View alphabetically and group the warnings together.
Include module id (if available) in violation messages
In a Checkstyle configuration file each module can be assigned a unique id. This can be used to distinguish multiple instances of the same Checkstyle module using different settings. This preference setting controls whether this module id is being prepended to the Checkstyle messages produced.
Limit Checkstyle markers per resource to
Use this to limit the maximum amount of markers reported for a single file. A potential reason to use this is to avoid performance issues in case a huge amount of problems is reported for single files.
Run Checkstyle in background on full builds
By default Checkstyle execution runs within Eclipses build infrastructure, which means a full project build will only finish once the Checkstyle analysis has concluded. For very large projects this may be impractical, in which case you can use this setting to decouple the Checkstyle execution from the Eclipse build. In this case Checkstyle will still be triggered upon project build but will not block the build itself.
The tiny refresh button (upper right)
For performance reasons the plugin interally caches Checkstyle configurations (that is not the configuation file but the resulting in-memory object structure of Checkstyle modules). Modifications to the Checkstyle configuration file itself are discovered by the plugin automatically and the caches will be properly updated. However, a checkstyle configuration file can also reference supplemental configuration files (header definitions, suppression files etc.). At this point the plugin is not smart enough to detect modifications to theses additional files. If you’re modifying such files you may need to manually clear the plugin’s internal caches by using this little button.
Press the New button to create new checkstyle configuration:
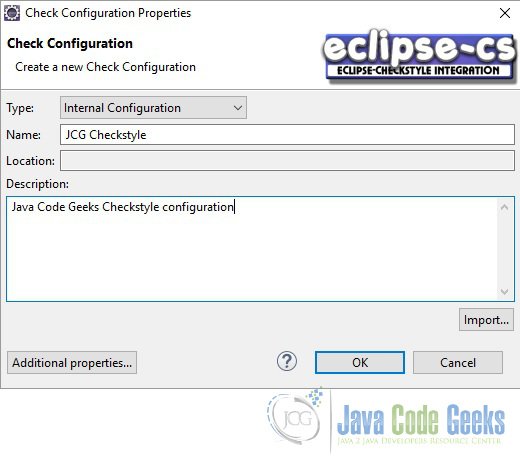
Press OK to return to the main configuration screen. The configuration you created should show up in the configuration table. If you want to change something in this newly created profile you can do that by selecting the checkstyle row and clicking Properties… button. To configure the checkstyle click Configure. You will be displayed the window below:
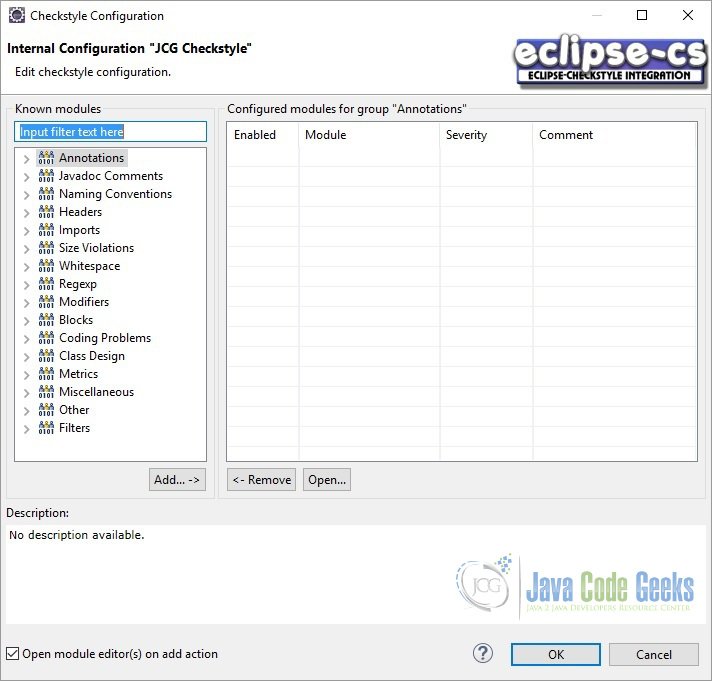
In the left hand side tree all modules known to the plug-in are shown. These are all modules that come with Checkstyle out-of-the-box. The modules are semantically grouped into categories. The table on the right side shows the modules your configuration is actually containing.
Based on the selection in the tree all modules in your configuration belonging to the selected group are shown. If you select a module in the tree or in the table a description of the module will be shown in the description area of the dialog. To add a particular module to your configuration you must select the module in the tree press the Add… button. For instance we open the second group Javadoc Comments and select the Method Javadoc module. Pressing the Add… button the property dialog for this module is shown:
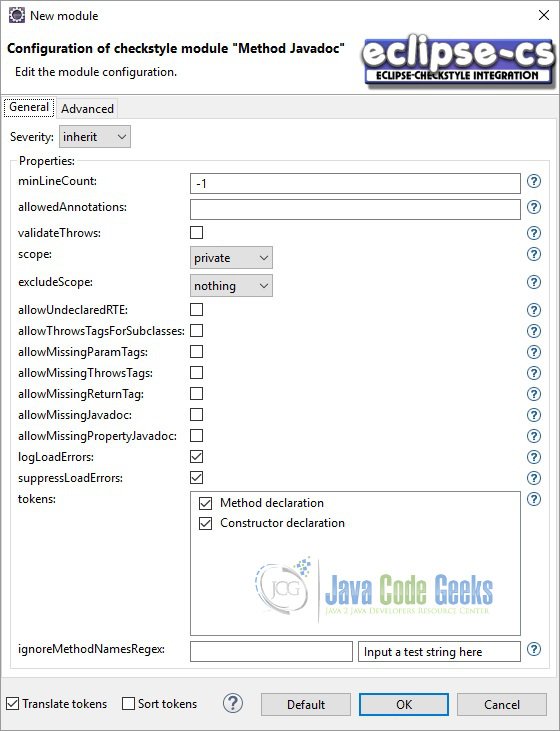
Using the dialog you can customize the check for your needs. Mostly all modules have a severity combo box. With this you can specify if a violation of the check results in an error, warning or an info. The other settings in the editor are highly specific to the module. But don’t bother for now, pressing OK will add the module to your configuration. The result should look like this:
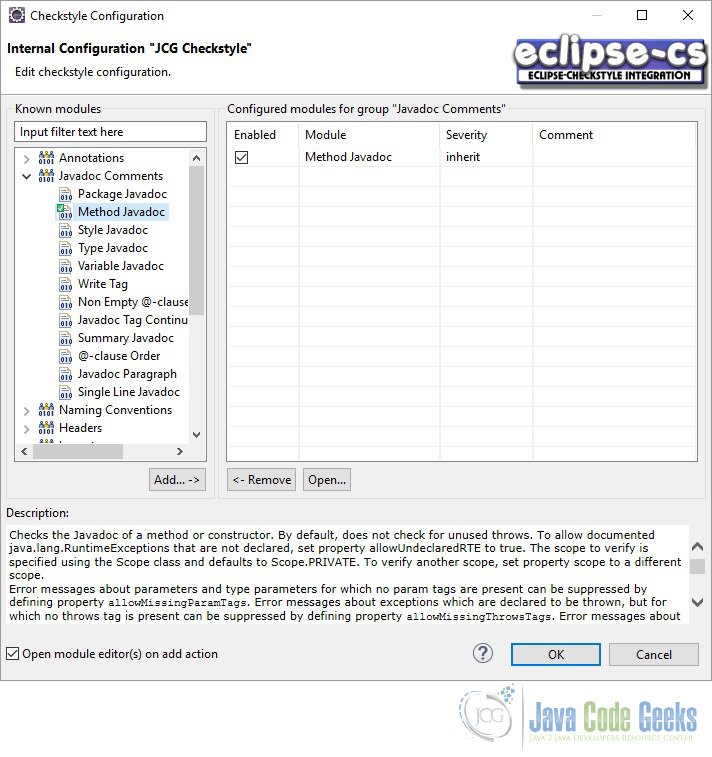
Press OK to save your configuration and return to the main configuration page. In the main dialog press OK to store all changes you made.
7. Conclusion
In this article we saw how we can install, configure and run checkstyle in our project. Checkstyle brings a lot of benefits in the code quality and helps organisations to define standards and coding practices. It’s easy to install and configure and can be customized to suit different needs.

How to create an customized rules in checkstyle