1. Introduction
Data fetching in nextjs allows us to render the content in a different way depending on the application’s use case. This includes pre-rendering with server-side rendering or static generation and updating or creating content at runtime with incremental static generation.
getStaticProps– Preloads all the data needed for a given page and renders pages ahead of the user’s request at build time. For faster retrieval data is cached on headless cms. It can be exported from the page file but not the component file and runs only at build time. Runs on every subsequent request in dev mode and its code are completely excluded from the client-side bundlegetStaticPaths– If a page has dynamic routes this method is used. It declares a list of paths that will be statically generated. The js will statically pre-render all the paths defined by thegetStaticPathswhen we export a function namedgetStaticPathsfrom a pagegetServerSideProps– Will pre-render the page on every subsequent request. It is slower compared togetStaticPropsbecause the page is rendered with every request. It is meant for dynamic routes and runs only at build time in the production
1.1 Setting up dependencies
To play with nextjs let us set up some of the required dependencies.
1.1.1 Setting up Node.js
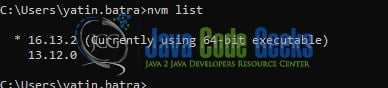
To set up Node.js on windows you will need to download the installer from this link. Click on the installer (also include the NPM package manager) for your platform and run the installer to start with the Node.js setup wizard. Follow the wizard steps and click on Finish when it is done. If everything goes well you can navigate to the command prompt to verify if the installation was successful as shown in Fig. 1.
1.1.2 Setting up the nextjs project
Once the Nodejs setup is successful we will use the below command to install the nextjs library and set up the project. I am using node v16 for working on the nextjs project.
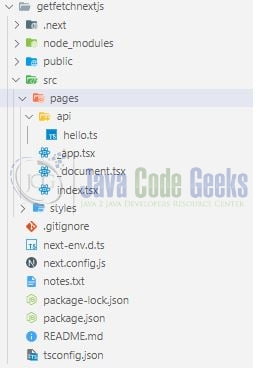
Create project structure
$ npx create-next-app getfetchnextjs
The above command will take some time to install the nextjs library and create a new project named – getfetchnextjs as shown below.
2. Data fetching in Next.js
To set up the application, we will need to navigate to a path where our project will reside and I will be using Visual Studio Code as my preferred IDE.
2.1 Setting up the nextjs code
To understand a practical implementation let us go through some hands-on exercises.
2.2.1 Updating the index.tsx
Remove the existing code from the file and add the below code to it. The new code is added to address the execution of getServerSideProps. The method will make a call to an open api to fetch the result and show it on the screen. The client will make a call to the server for each request.
index.tsx
// getServerSideProps should only be used if you need to pre-render a page with data fetched at request time
export const getServerSideProps = async () => {
  const req = await fetch(`https://pokeapi.co/api/v2/pokemon`, {
    method: "GET"
  });
  const resp = await req.json();
  const pokemons = resp.results;
  // console.log(pokemons);

  return {
    props: { pokemons }
  };
};

const index = ({ pokemons }: { pokemons: any }) => {
  return (
    <div>
      <h1>Data fetching in NextJs</h1>
      <ul>
        {pokemons.map((pokemon, index) => (
          <li key={index}>{pokemon.name}</li>
        ))}
      </ul>
    </div>
  );
};

export default index;
3. Run the setup
To run the application navigate to the project directory and enter the following command as shown below in the terminal.
Run command
$ npm run dev
The nextjs application will be started on the default port.
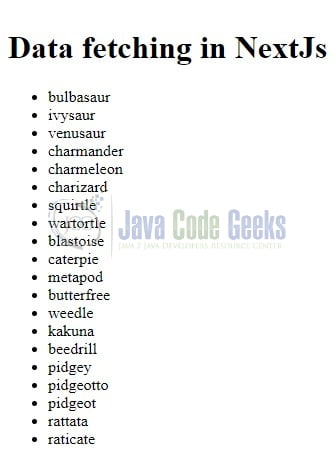
4. Demo
The application will be started in the default browser and a list showing the pokemon names will be shown on the console.
That is all for this tutorial and I hope the article served you with whatever you were looking for. Happy Learning and do not forget to share!
5. Summary
In this tutorial, we created a nextjs application and understood the basic concepts. You can download the source code from the Downloads section.
6. Download the Project
This was a tutorial to understand the data fetching in nextjs.
You can download the full source code of this example here: Data fetching in Next.js
