1. Introduction
In this example, we will explore the functionality of Selenium Grid and we will understand it’s significance. We will create a Page Object and then we will access that page object from test cases using JUnit. The example will cover the gmail login where we will be invoking the url in node and hub using test cases in JUnit.
Environment of the Project:
- Selenium Grid 3.6.0
- Maven 4.0
- JUnit
- JDK 1.8
- Mac OS Sierra
- Eclipse: Neon Release (4.6.0)
2. Selenium Grid
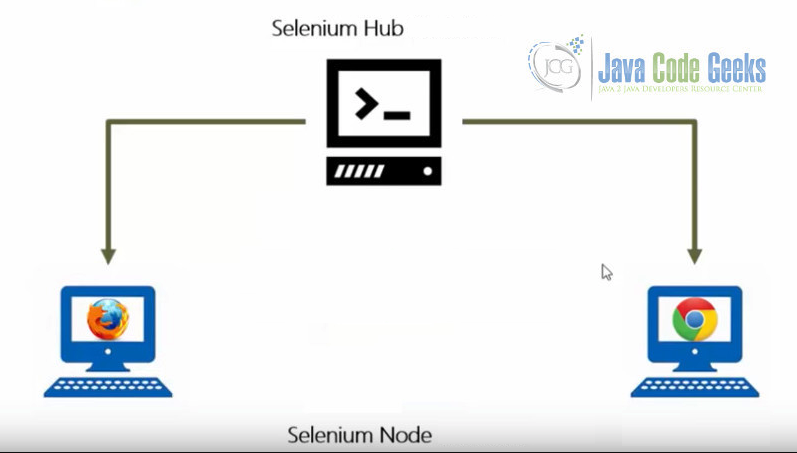
Selenium Grid allows to run test cases on different machines against browsers in parallel. That is, running multiple test cases at the same time against different machines that are running different browsers and operating systems. Importantly, Selenium-Grid allows distributed test execution.
3. Why Selenium Grid
- To run different test cases in different browsers, different version of browsers and browsers running in different operating system.
- To reduce the time of testing the test suites. The Selenium Grid consists of a single Hub and one or more Nodes. Hub is the central unit as it receives all the tests to be executed along with the information about type of browsers, platforms (operating systems) where the test has to be run. The nodes are then connected to Hub to receive the requests. Thus, the node runs the browser and execute the test cases.
3.1 Configuring Selenium Hub
In order to configure the Selenium Hub in your PC, you’ll need to download the Selenium standalone server. You can download it from http://www.seleniumhq.org/download/ .
Then, navigate to the folder where is downloaded. To register the hub type the command:
java –jar selenium-server-standalone -3.6.0.jar –role hub
By default, Selenium server runs on 4444 port. In order to configure it to another port just change the port to the desired port by typing:
java -jar selenium-server-standalone-2.53.1.jar -role hub -port{desired_port}

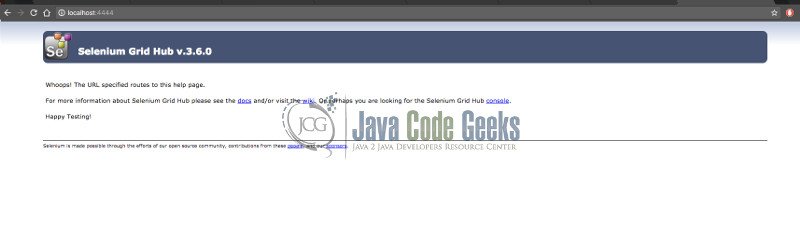
To check if the hub has been registered, login to local host http://localhost:4444/grid/console
Verify that you see the Grid console with the version similar to the one below. In my case, I am using 3.6.0 version.
3.2 Configuring Selenium Node
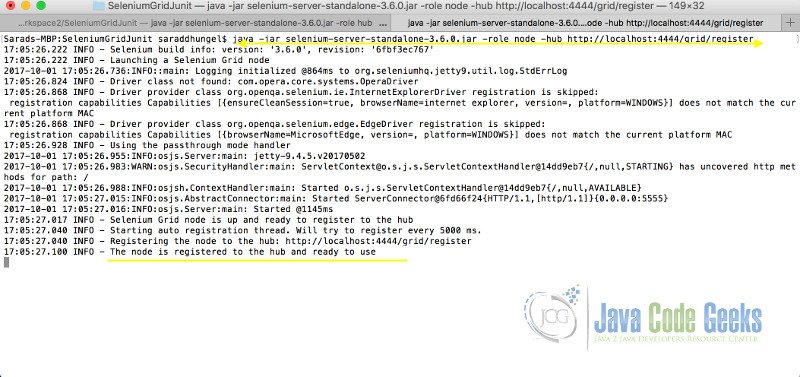
Navigate to the folder that contains the Selenium standalone server and then use the command:
java -jar selenium-server-standalone-3.6.0.jar -role webdriver -hub http://192.168.1.102:4444/grid/register
By default, the node will connect to hub at 5555 port, unless is specified with the desired port. In order to specify a port, just add -port value after registration:
java -jar selenium-server-standalone-3.6.0.jar -role webdriver -hub http://192.168.1.102:4444/grid/register -{desire_port}
Similarly, you can use the same command to add another node. Selenium Grid can support up to parallel execution of web drivers in 5 different nodes.
Then, navigate to http://localhost:4444/grid/console and confirm that the browsers are like below:
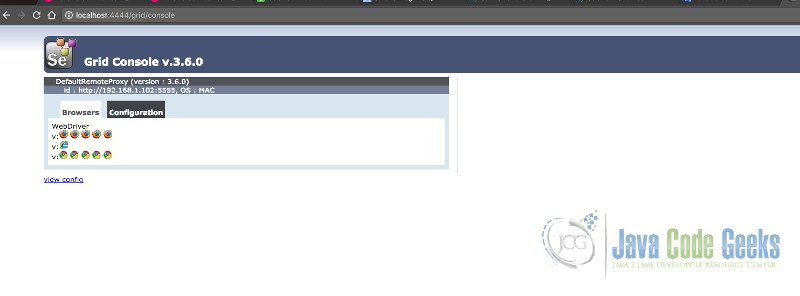
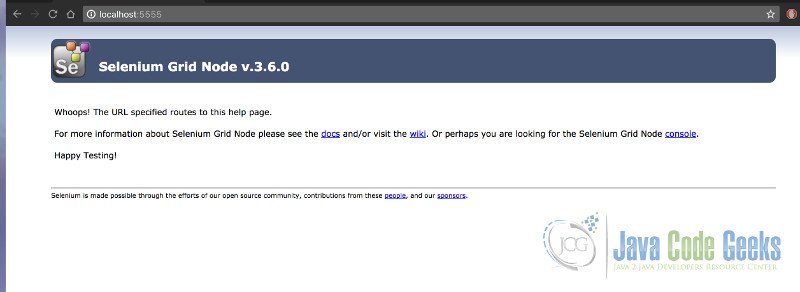
You can try using the port of the individual node on the browser to see if the node is active and running:
http://localhost:5555
4. Getting Started with the Project
We will be using Maven archetype to configure the Selenium Project. Create a Maven project and select the Group Id and Artifact Id for Selenium as shown in the picture below. Simply click on New > Maven > Maven Project and then type “Selenium”. You can also use classic way by adding the following dependency in pom.xml.
pom.xml
 <dependencies>
 <dependency>
       <groupId>junit </groupId>
       <artifactId>junit </artifactId>
       <version>4.11 </version>
     </dependency>
     <dependency>
       <groupId>org.seleniumhq.selenium </groupId>
       <artifactId>selenium-java </artifactId>
       <version>2.40.0 </version>
     </dependency>
     <dependency>
       <groupId>com.opera </groupId>
       <artifactId>operadriver </artifactId>
       <version>1.5 </version>
     </dependency>
     <dependency>
       <groupId>com.github.detro.ghostdriver </groupId>
       <artifactId>phantomjsdriver </artifactId>
       <version>1.1.0 </version>
       <exclusions>
         <exclusion>
           <groupId>org.seleniumhq.selenium </groupId>
           <artifactId>selenium-remote-driver </artifactId>
         </exclusion>
         <exclusion>
           <groupId>org.seleniumhq.selenium </groupId>
           <artifactId>selenium-server </artifactId>
         </exclusion>
       </exclusions>
     </dependency>
     <dependency>
       <groupId>ru.stqa.selenium </groupId>
       <artifactId>webdriver-factory </artifactId>
       <version>1.0 </version>
     </dependency>
   </dependencies>


5. Project Structure
We will be using javacodegeeks.junit package. It has an object of page elements as well as the url for node and hub. We will be running test cases from test directory using JUnit.
GmailLogin.java
package javacodegeeks.Junit;

import org.openqa.selenium.By;
import org.openqa.selenium.WebDriver;
import org.openqa.selenium.WebElement;
import org.openqa.selenium.remote.DesiredCapabilities;

public class GmailLogin {

	WebDriver driver;
	String nodeUrl = "http://192.168.1.102:5555/wd/hub";
	String hubUrl = "http://192.168.1.102:4444/wd/hub";

	System.setProperty("webdriver.chrome.driver","//Users//saraddhungel//Downloads//chromedriver");
	DesiredCapabilities caps = DesiredCapabilities.chrome();

	public GmailLogin(WebDriver driver)
	{
		this.driver = driver;
	}

	By username = By.xpath("//input[@id='Email']");
	By next = By.xpath("//input[@id='next']");
	By password = By.xpath("//input[@id='Passwd-hidden']");

	public WebElement username()
	{
		return driver.findElement(username);
	}

	public WebElement next()
	{
		return driver.findElement(next);
	}

	public WebElement password()
	{
		return driver.findElement(password);
	}

}
This class contains the parameterized constructor GmailLogin which takes a WebDriver as parameter to invoke the url of node and hub. The Web Elements of the page are stored as method of the classes. We will create an object of the GmailLogin class to access those methods for username and password. DesiredCapabilities class provides a method that determines the browser and the OS that can be used. In order to access an instance of the browser, we need to create an object of the DesiredCapabilities class.
LogintoGmail.java
package javacodegeeks.Junit;

import java.util.concurrent.TimeUnit;

import org.junit.Assert;
import org.junit.Before;
import org.junit.Test;
import org.openqa.selenium.WebDriver;
import org.openqa.selenium.chrome.*;

import javacodegeeks.Junit.GmailLogin;

public class LogintoGmail {

@Test
  public void hubLogin()
	  {
		  WebDriver driver = new RemoteWebDriver(new url("http://192.168.1.102:4444/wd/hub"), caps );
		  driver.get("https://accounts.google.com/ServiceLogin?continue=https%3A%2F%2Fmail.google.com%2Fmail%2F&service=mail&sacu=1&rip=1#identifier");
		  driver.manage().timeouts().implicitlyWait(10, TimeUnit.SECONDS);

		  GmailLogin gl = new GmailLogin(driver);
		  gl.username().sendKeys("test123@gmail.com");
		  gl.next().click();
		  gl.password().sendKeys("test123!");
		  driver.close();
	  }
@Test
  public void nodeLogin()
  {
	  WebDriver driver = new RemoteWebDriver(new url("http://192.168.1.102:5555/wd/hub"), caps );
	  driver.get("https://accounts.google.com/ServiceLogin?continue=https%3A%2F%2Fmail.google.com%2Fmail%2F&service=mail&sacu=1&rip=1#identifier");
	  driver.manage().timeouts().implicitlyWait(10, TimeUnit.SECONDS);

	  GmailLogin gl = new GmailLogin(driver);
	  gl.username().sendKeys("testing123@gmail.com");
	  gl.next().click();
	  gl.password().sendKeys("test123!");
          driver.close();

  }
 driver.close();
}
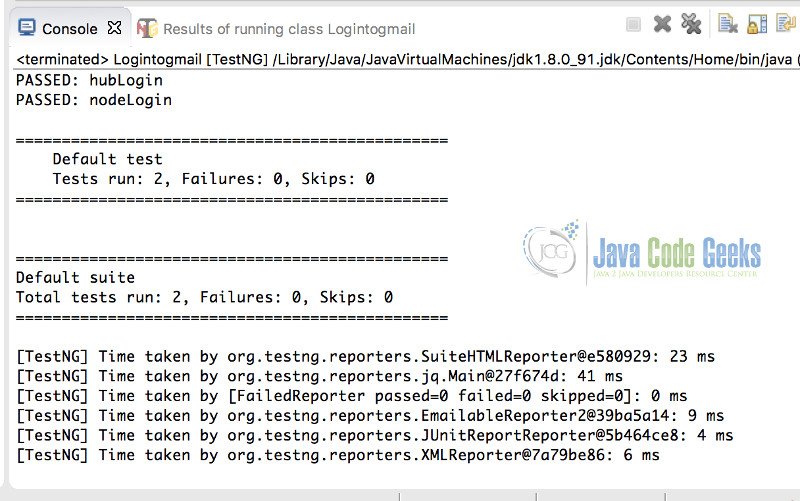
There are two test cases in this class. The hubLogin() and the nodeLogin() contain the Node and the Hub URL where the WebDriver interface will invoke the gmail url. The username() method from GmailLogin class is used to send the username to the page and also all the methods, such as username(), next() and password() from GmailLogin class, are implemented. Once the actions are completed the driver.close() method will close the browser.
6. Conclusion
This example was an attempt to display how we can use the Selenium Grid to run test cases across different browsers as well as different environments. Not only we can implement thread methods to run the parallel test across different browsers at the same time but we can support up to five different nodes. By creating an object of the DesiredCapabilities class, we can access different types of OS and browsers where we can run our test access simultaneously.
7. Download the Eclipse Project
That was an example of JUnit Selenium Grid.
You can download the full source code of this example here: Selenium Grid JUnit

What version of chrome driver did you use?