In this example , we will be discussing about using Apache Ant with Java. Before we start with our example, it is expected that we have a basic understanding of how software development works with java. It would also be good if we have an exposure to software build and deployment process to understand the usage and the working of the Apache Ant better.
Apache Ant is a software tool for automating the software build processes. It originated from Apache Software Foundation in year 2000 and was a replacement of unix MAKE build tool that created some problems. Apache Ant is implemented using java language, requires java platform and is best suited for building java projects.
1. Introduction
ANT stands for “Another Neat Tool”. Apache Ant is an open source Java library and command-line tool . The main known usage of Ant is the build of Java applications. It can also be used to build non-Java applications like C/C++. Basically, its mission is to drive processes described in build files as targets and extension points and tasks dependent on each other. Ant also provides a number of built in tasks allowing to compile, test, run and assemble Java applications.
Ant uses XML to describe the build process and its dependencies in the Ant build file. By default the Ant XML file is known as build.xml. In this tutorial, we will see how to use Apache Ant to automate the build and deployment process. We will be using Java v 1.8 , Eclipse Kepler and Apache Ant v 1.10.1
2. Installing Apache Ant
Assuming that you already have Java installed on your computer, you can follow the below steps to install Apache Ant:
- Download the latest version of Apache Ant from Apache Ant download.
- Unzip the zip file to a convenient location in your computer, for example –
C:\apache-ant-1.10.1. - Create a new environment variable ANT_HOME with value as the Ant installation folder where bin is present, for example –
C:\apache-ant-1.10.1. - Append the path of Ant bin folder to the PATH environment variable for example,
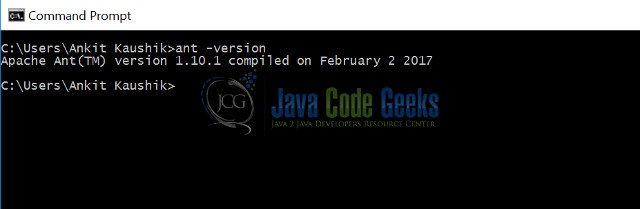
C:\apache-ant-1.10.1\bin. - To verify the installation and version of Apache ant, open command prompt and type the below command which shows you an output similar to the screen below.
ant -version
3. Using Apache Ant
3.1 Using Ant for Java Development
We will be creating a java project to demonstrate how to compile java classes, create executable JAR file and create Javadoc for my project using Apache Ant. The following example is demonstrated using Eclipse Kelper and Ant build.
3.2 Create Java project
Create a Java project in eclipse. Create a package com.example.java.ant.task and the class as follows:
PrimeNumber.java
package com.example.java.ant.task;

public class PrimeNumber{
	public boolean testPrime(int number){
		int quotient = number/2;
		boolean prime = true;
		for(int i=2; i<=quotient; i++){
			if(number%i == 0){
				prime = false;
				break;
			}
		}
		return prime;
	}
}
Now create the Main class to test the prime number program. See the code below.
Main.java
package com.example.java.ant.task;

public class Main {
	public static void main(String[] args) {
		PrimeNumber pm = new PrimeNumber();
		int number1 = 20;
		boolean prime = pm.testPrime(number1);
		System.out.println("Testing number1:::"+number1+":::is prime:::"+prime);
	}
}
3.3 Create build.xml
In eclipse, click on File menu ->New -> File. Create a new file with name build.xml. Check the following sample build.xml created below for the prime number program. The comments in the build.xml are self explanatory.
build.xml
<?xml version="1.0"?>
<project name="Ant-Test" default="main" basedir=".">
   <presetdef name="javac">
      <javac includeantruntime="false" />
   </presetdef>

<!-- Sets variables which can later be used. -->
<!-- The value of a property is accessed via ${} -->
   <property name="src.dir" location="src" />
   <property name="build.dir" location="bin" />
   <property name="dist.dir" location="dist" />
   <property name="docs.dir" location="docs" />

<!-- Deletes the existing build, docs and dist directory-->
   <target name="clean">
      <delete dir="${build.dir}" />
      <delete dir="${docs.dir}" />
      <delete dir="${dist.dir}" />
   </target>

<!-- Creates the  build, docs and dist directory-->
   <target name="makedir">
     <mkdir dir="${build.dir}" />
     <mkdir dir="${docs.dir}" />
     <mkdir dir="${dist.dir}" />
   </target>

<!-- Compiles the java code (including the usage of library for JUnit -->
   <target name="compile" depends="clean, makedir">
      <javac srcdir="${src.dir}" destdir="${build.dir}">
      </javac>
   </target>

<!-- Creates Javadoc -->
   <target name="docs" depends="compile">
      <javadoc packagenames="src" sourcepath="${src.dir}" destdir="${docs.dir}">
      <!-- Define which files / directory should get included, we include all -->
      <fileset dir="${src.dir}">
         <include name="**" />
      </fileset>
     </javadoc>
   </target>

<!--Creates the deployable jar file  -->
   <target name="jar" depends="compile">
      <jar destfile="${dist.dir}\AntTask.jar" basedir="${build.dir}">
         <manifest>
            <attribute name="Main-Class" value="com.example.java.ant.task.Main"/>
         </manifest>
      </jar>
   </target>

   <target name="main" depends="compile, jar, docs">
      <description>Main target</description>
   </target>
</project>
3.4 Running Ant build through Eclipse
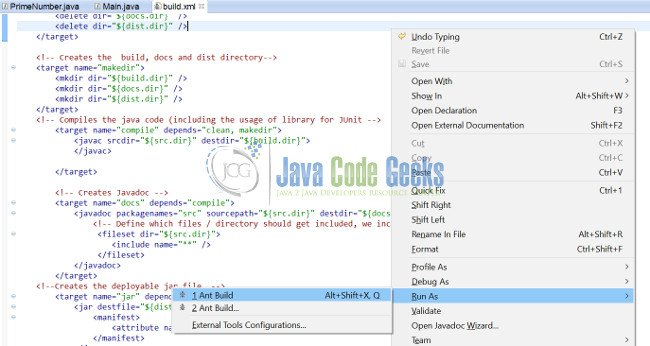
To run the Ant build.xml created above in Eclipse, Right click on build.xml ->Run As -> Ant Build.
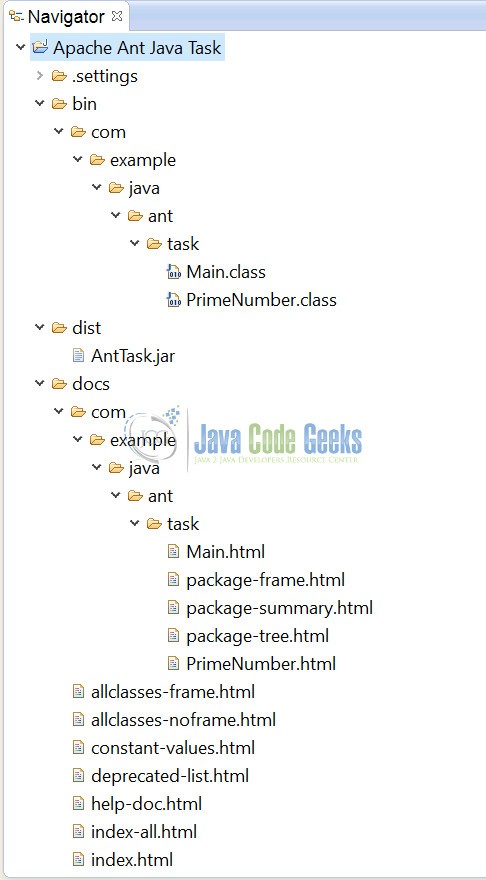
After running the Ant build in Eclipse, the project directory structure looks like the one below:
The console below shows the output of build.xml when you run via Eclipse.

3.5 Running Ant build through command line
Open command line and switch to project directory.
3.5.1 Running complete project build
To run the complete project build , type the following command.
ant -f build.xml
This is the referred screenshot:

3.5.2 Running specific targets in build.xml – Compile source code
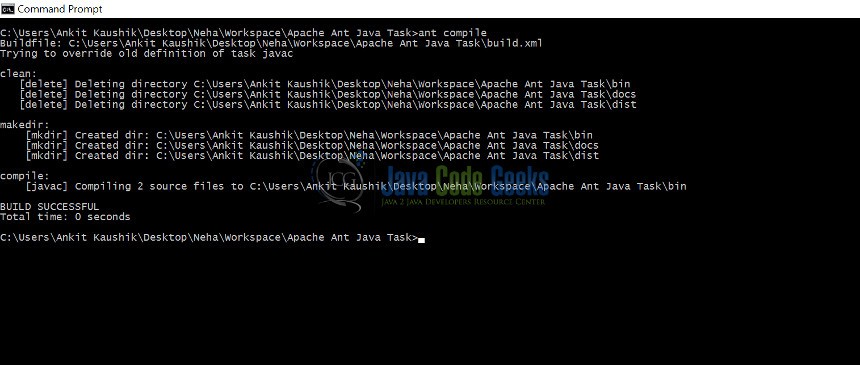
To compile the source code and run specific “compile” target in ant build.xml, specify the command as below. The ant just start with the “compile” target in build.xml and if you see the “compile” target depends on “clean” and “mkdir” targets. So the build first runs the “clean” and “mkdir” targets and then run the “compile” target. Check the screenshot below.
ant compile
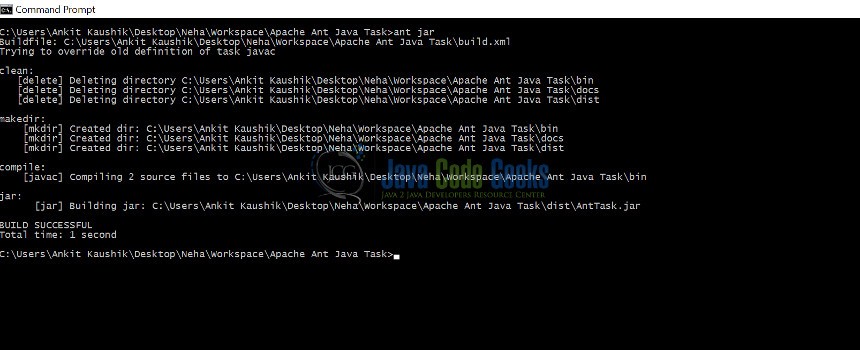
3.5.3 Running specific targets in build.xml – Package the project into an executable Jar file
To get a deployable jar file, we need to run the command as below. As we see in the build.xml, there is a target named “jar” which depends on target “compile”. So when we run the below command to create a jar file, first the “compile” target will be executed which in turn executes “clean” and “mkdir” targets first. Check the referred screenshot below.
ant jar
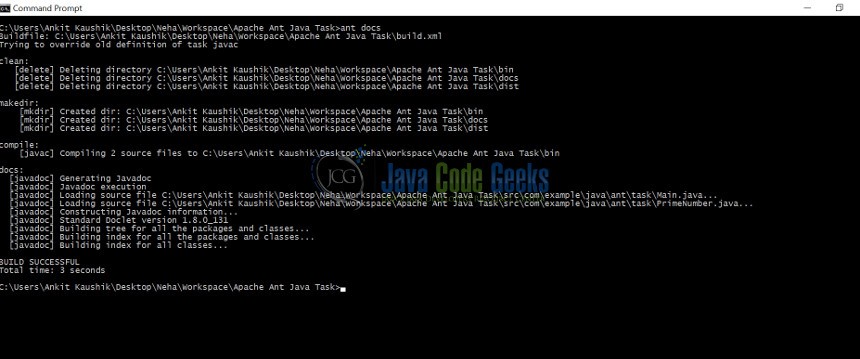
3.5.4 Running specific targets in build.xml – Creating Javadocs
We can execute “docs” target to generate java docs in destination folder i.e. docs directory in our project structure. As we see in the build.xml, there is a target named “docs” which depends on target “compile”. So when we run the below command to create a jar file, first the “compile” target will be executed which in turn executes “clean” and “mkdir” targets first. Check the referred screenshot below.
ant docs
4. Conclusion
Through this example, we have learned how to install Apache Ant and how it is used to create a build that can be deployed on a server. We have also seen how to run Ant build in Eclipse and through the command line. Running Ant build via command line gives us an option to run specific targets.
5. Download the Eclipse Project
This was an example of Using Apache Ant with Java.
You can download the full source code of this example here: Apache Ant Java Task.
