In this article, we will demonstrate an Apache Solr Clustering Example. We are going to show you how to set up and run a SolrCloud with two Solr servers and an embedded ZooKeeper instance on your local machine.
Once it is up and running, we will show you how to use it to index our sample article collection and how to do a basic search.
1. What is a Apache Solr cluster?
A cluster is a group of servers working together as one system. An Apache Solr cluster is called SolrCloud which consists of a cluster of Solr servers. It provides capabilities for distributed search and indexing with fault tolerance and high availability.
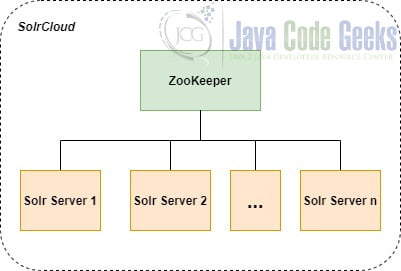
As we can see from the diagram above, SolrCould doesn’t have a master node to allocate other slave nodes, shards, and replicas. Instead, Apache ZooKeeper is used to manage the entire cluster’s information such as Solr servers’ addresses, ports, etc. in a centralized way. In the production environment, normally a ZooKeeper cluster will be used to guarantee high availability. As SolrCloud works as one system, queries and updates can be sent to any Solr server of the cluster. SolrCloud will use the information stored in ZooKeeper to figure out which servers need to handle the request.
The steps and commands described in this example are for Apache Solr 8.5 on Windows 10. The JDK version we use to run the SolrCloud in this example is OpenJDK 13. Before we start, please make sure your computer meets the system requirements. Also, please download the binary release of Apache Solr 8.5.
2. Run a SolrCloud Locally
2.1 Unzip Solr
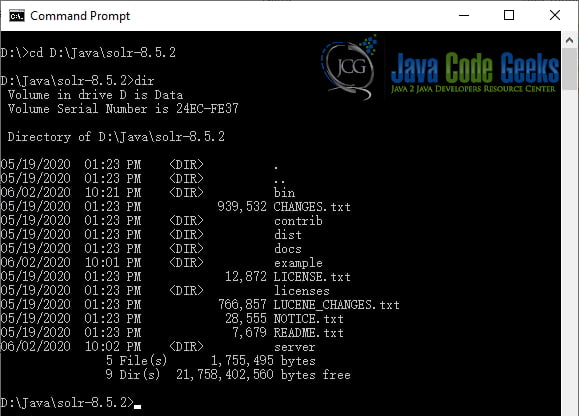
Unzip solr-8.5.2.zip to a local directory and change your working directory to the sub-directory where Solr is unpacked. For example, on Windows, we unzip solr-8.5.2.zip to the directory “D:\Java” and then “cd D:\Java\solr-8.5.2”. The directory layout is shown below:
For more details, please check out the directory layout page.
2.2 Lauch SolrCloud
To launch Solr in SolrCloud mode, run: bin\solr.cmd start -c on Windows; bin/solr start -c on Unix or macOS.
Firstly, let’s start the first Solr server on the default port 8983 in SolrCloud mode. When starting in SolrCloud mode without specifying the ZooKeeper instance to connect to, an embedded ZooKeeper instance is started on Solr port + 1000, such as 9983 if Solr is bound to 8983. Open a Command Prompt on Windows, change your working directory to the Solr installation directory and run the following command:
bin\solr.cmd start -c
-c means SolrCloud mode. Once the command finishes running, we will see the output below and the first Solr server is up and running on port 8983. Note that as we didn’t provide a ZooKeeper instance to connect to when running in SolrCloud mode, the embedded ZooKeeper instance has also been started on port 9983.
D:\Java\solr-8.5.2>bin\solr.cmd start -c
Waiting up to 30 to see Solr running on port 8983
Started Solr server on port 8983. Happy searching!
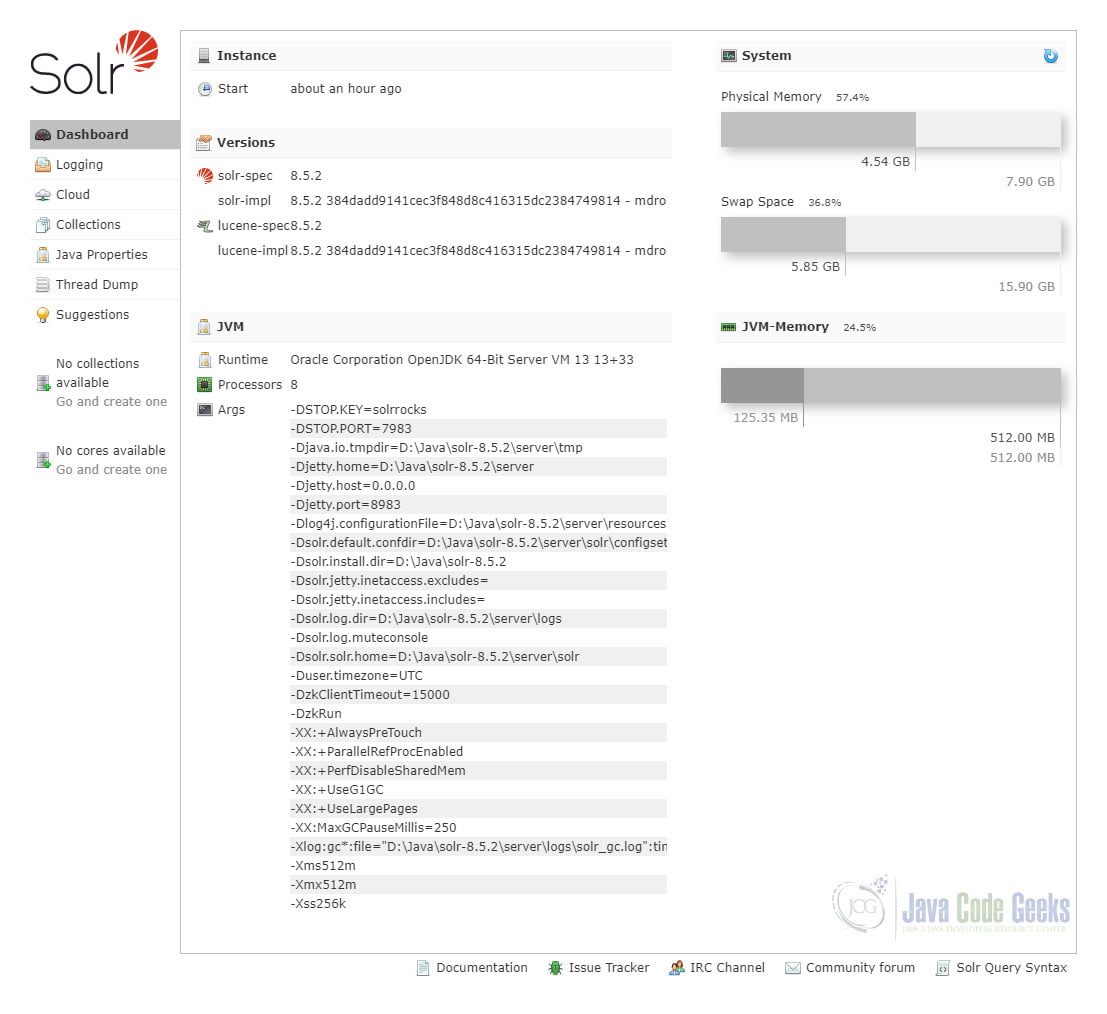
How do we know the first Solr server and the ZooKeeper are running? An easy way is to use the Solr Admin. Solr Admin is a web-based admin console that can be accessed from browser. It provides several easy-to-use functions for users to check the status and manage Solr instances. Open a browser such as Chrome and type the URL http://localhost:8983/solr/ in the address bar. We can see the dashboard page of Solr Admin as below:
Then, we can start the second Solr server on another port 8984 other than the default port 8983 in SolrCloud mode. To let the second Solr server join the cluster with the first Solr server, we need to specify the ZooKeeper instance to connect to. Because the embedded ZooKeeper instance has already been running after the previous step, we can simply add -z localhost:9983 to the command as below:
bin\solr.cmd start -c -p 8984 -z localhost:9983
Once the command finishes running, we will see the output below and the second Solr server is up and running on port 8984.
D:\Java\solr-8.5.2>bin\solr.cmd start -c -p 8984 -z localhost:9983
Waiting up to 30 to see Solr running on port 8984
Started Solr server on port 8984. Happy searching!
Now we have started two Solr servers and one ZooKeeper instance on our local machine. To verify everything is working as expected, open Solr Admin and navigate to the “Cloud –> Nodes” section from the navigation menu on the left side of the screen.
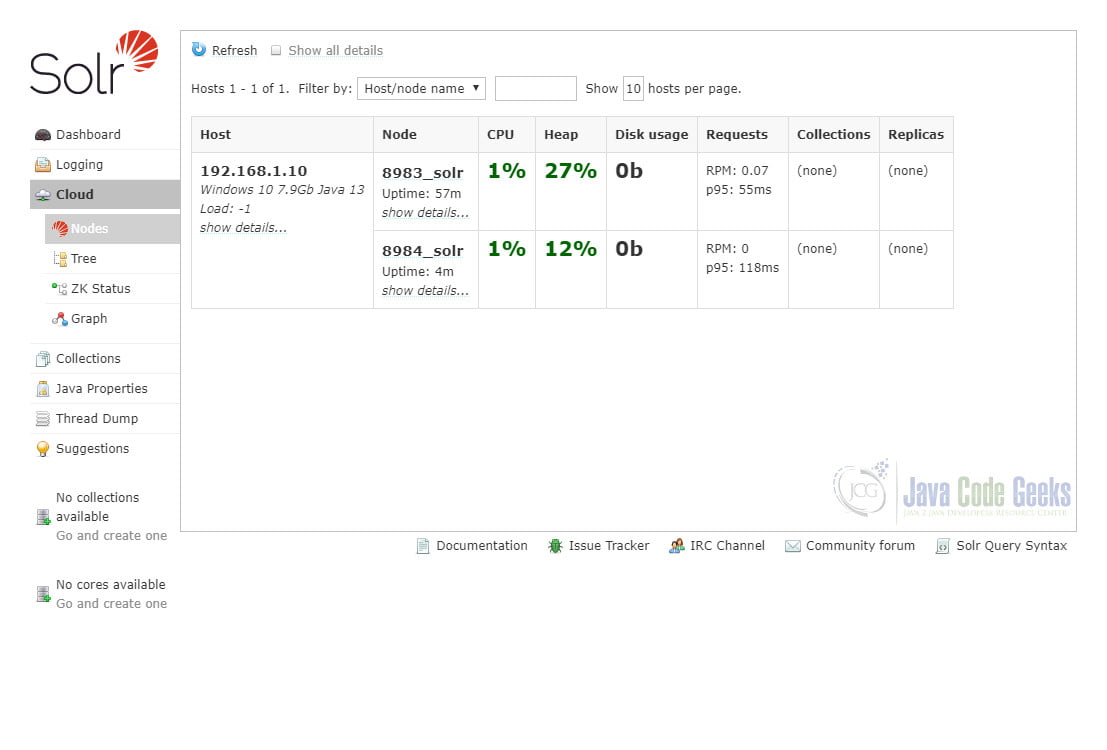
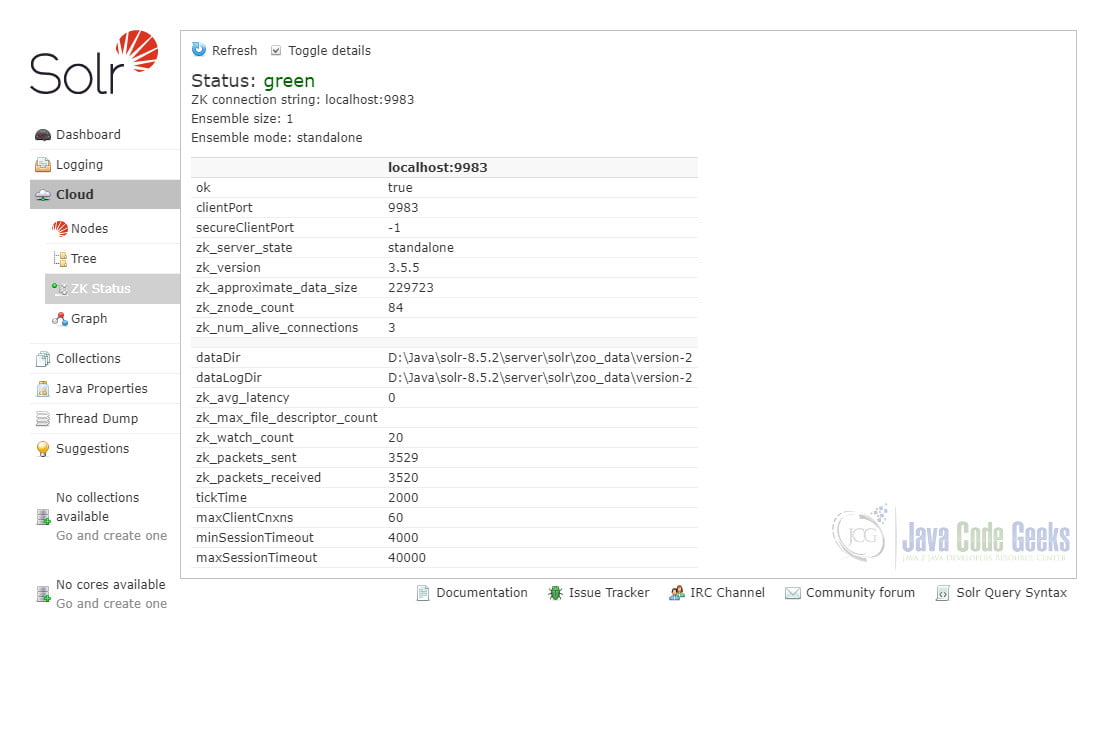
We can see that there are two Solr nodes running on port 8983 and 8984 on the local machine with some statistics. Also, we can check out the status of the ZooKeeper instance as below by clicking the “ZK Status” menu item.
3. Indexing Data
3.1 Create a Collection
A collection is a complete logical index in a SolrCloud cluster which is used for indexing data. We can refer to it by the collection name. It has a config set and contains one or more shards. If the number of shards is more than one, it is a distributed index.
There are a few ways to create a new collection in SolrCloud. For example, we can use the Collection Management Commands to create a collection. Alternatively, Solr Admin provides a handy user interface for us to create a collection as well.
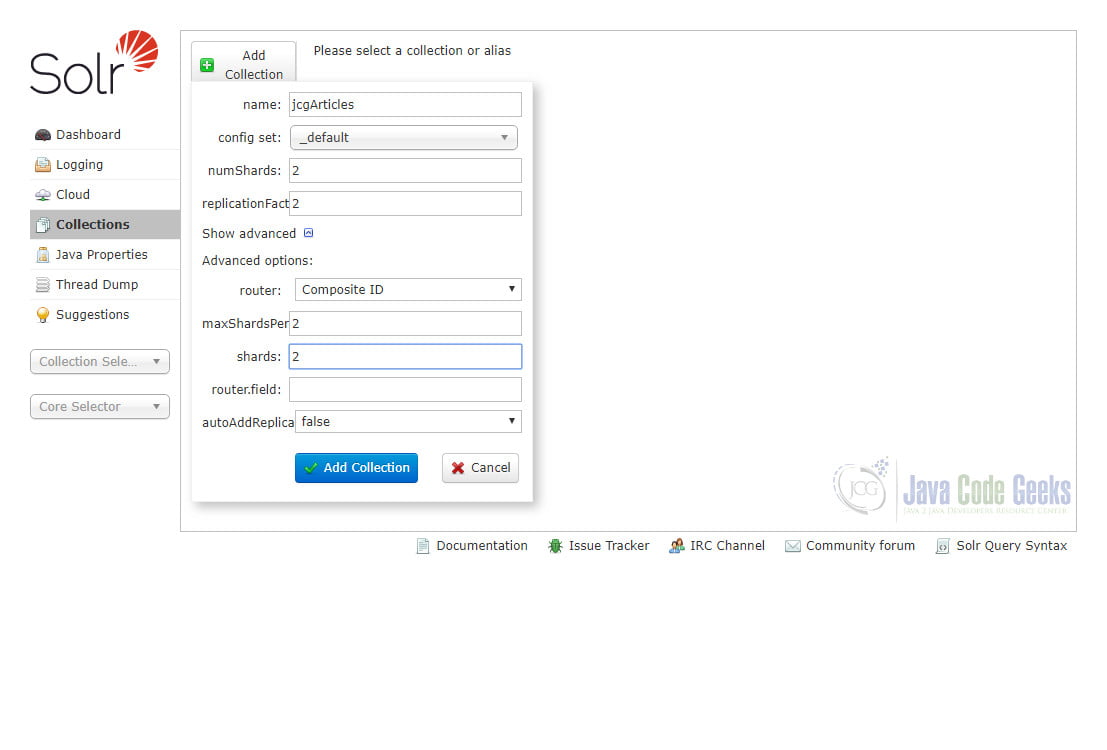
Open Solr Admin and navigate to the “Collections” section from the left navigation menu. Click the “+ Add Collection” button, fill in the collection name, config set, number of shards and replication factor, and then click the “Add Collection” button. As we are running two Solr nodes in our SolrCloud, we can specify the number of shards to 2 to let each node contain a shard which is a portion of the whole logic index. Please see the parameters of creating a collection with two shards in the screenshot below:
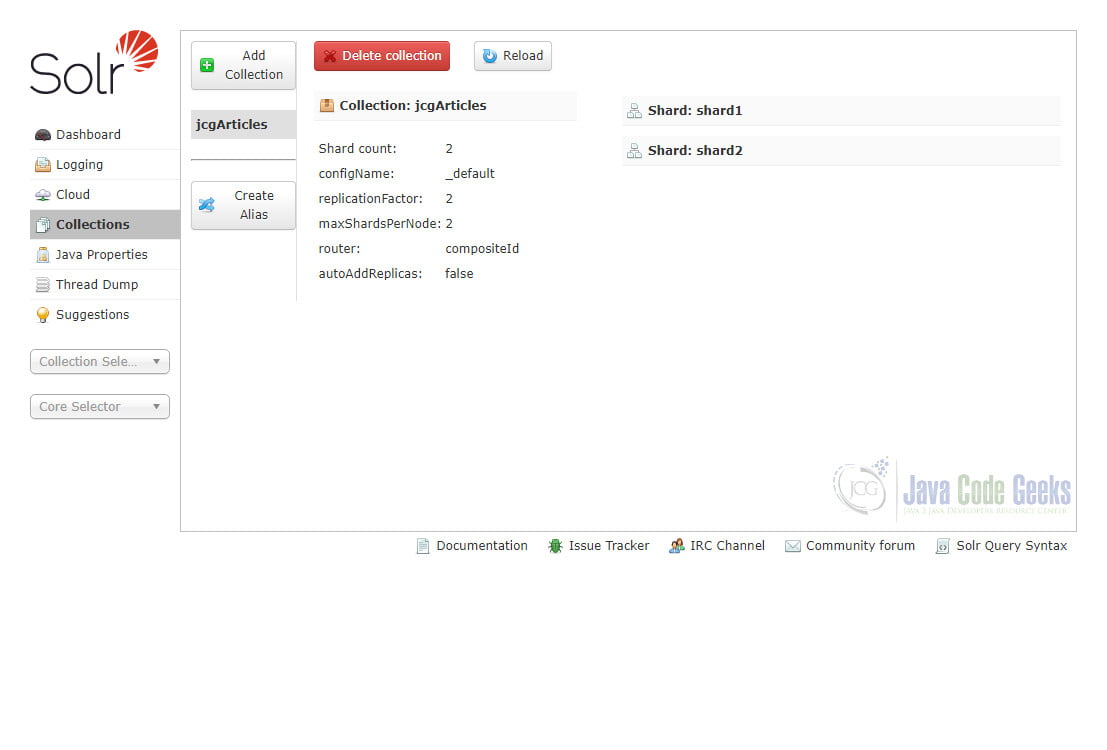
It takes a few seconds for Solr to finish creation and then we can see our collection jcgArticles has been created successfully.

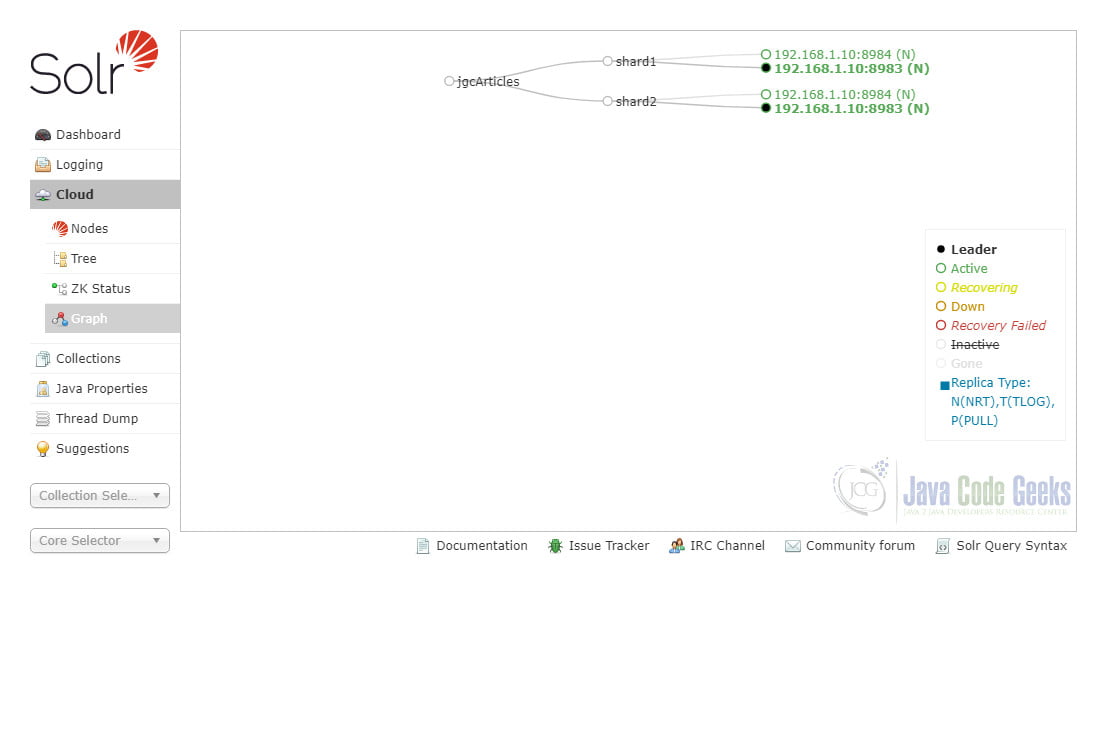
Now if we click the “Cloud –> Graph” menu item, we can see that the newly created collection jcgArticles consists of two shards and each shard have two replicas on two Solr servers.
Note that we chose the _default config set for our jcgArticles collection. The _default config set is minimum configurations with field-guessing and managed schema turned on by default, so as to start indexing data in Solr without having to design a schema up front. Later on, we can update the schema when our indexing requirements change.
3.2 Import Data
Solr will now be running two “nodes”, one on port 8983 and the other one on port 8984. There is one collection created, jcgArticles, a two shard collection, each with two replicas. But the collection doesn’t contain any data yet. Let’s feed some data to it. Solr provides bin/post tool which can be used to index various types of documents with minimum effort. Currently, the bin/post tool does not have a comparable Windows script, but the underlying Java program is available. In addition, Solr Admin also provides a simple form for users to index documents.
Open Solr Admin, select collection jcgArticles from the drop-down list, and click the Documents menu. Copy the content of articles.csv file downloaded from this example and paste it into the “Documents” text box. Select “CSV” from the drop-down list as “Document Type” and click the “Submit Document” button.
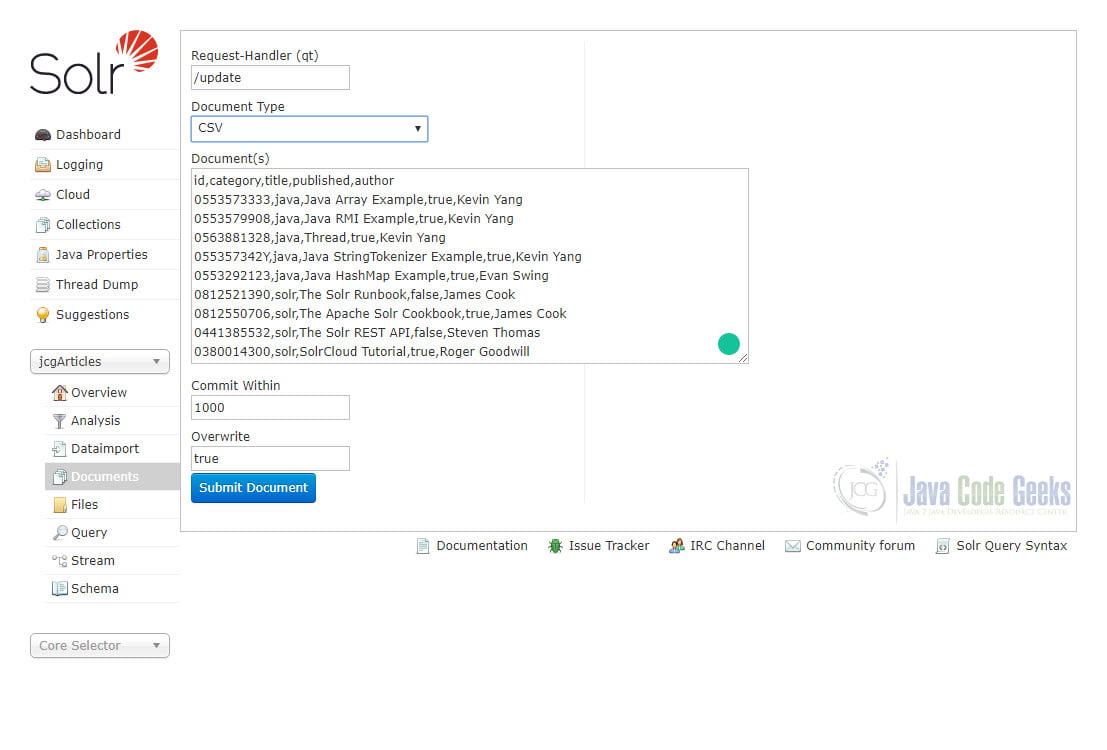
Once documents are indexed, we can see a response below:
Status: success
Response:
{
  "responseHeader": {
    "rf": 2,
    "status": 0,
    "QTime": 1541
  }
}
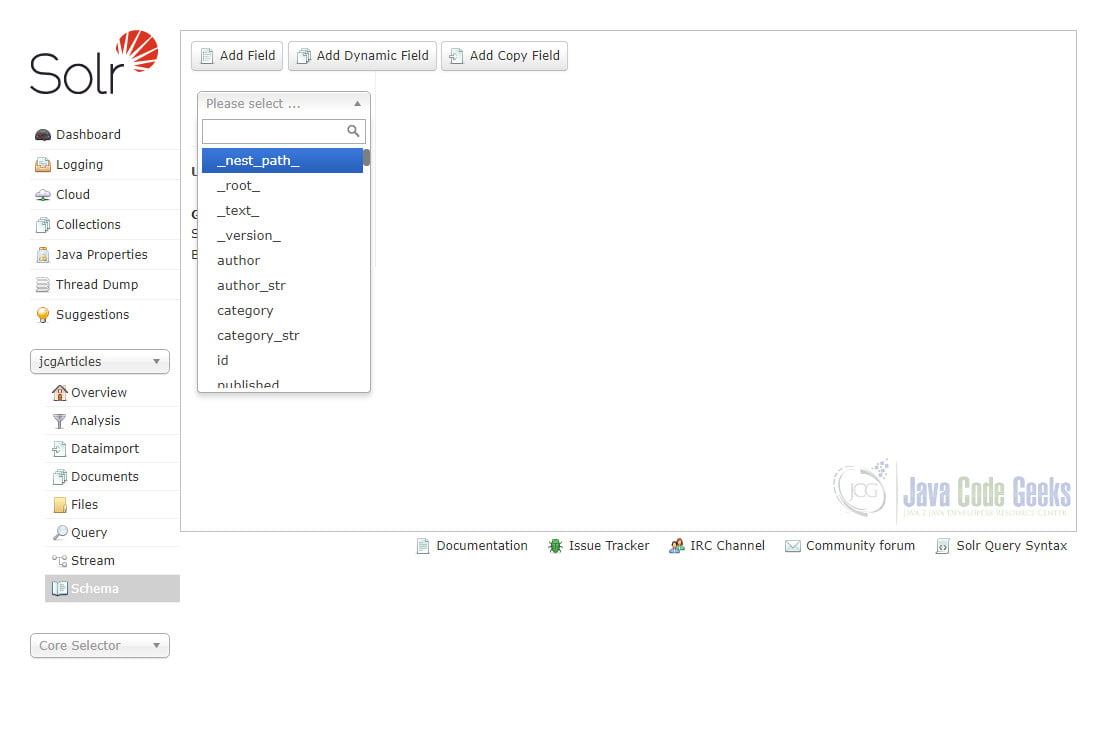
If we click the “Schema” menu, we can see that fields such as id, title, category, author, etc. have been added to the schema of jcgArticles collection automatically. This is because the managed schema, field-guessing and automatic schema field addition features which are part of Schemaless Mode are turned on by the _default config set.
4. Search
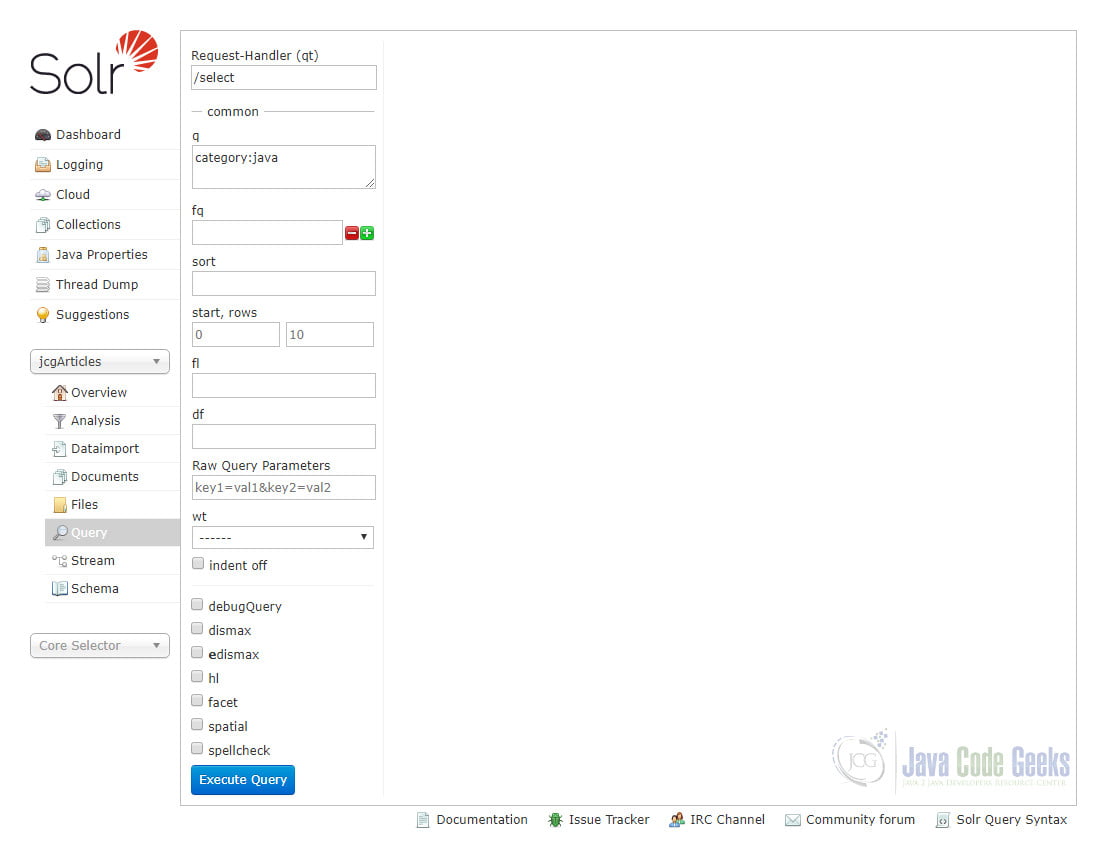
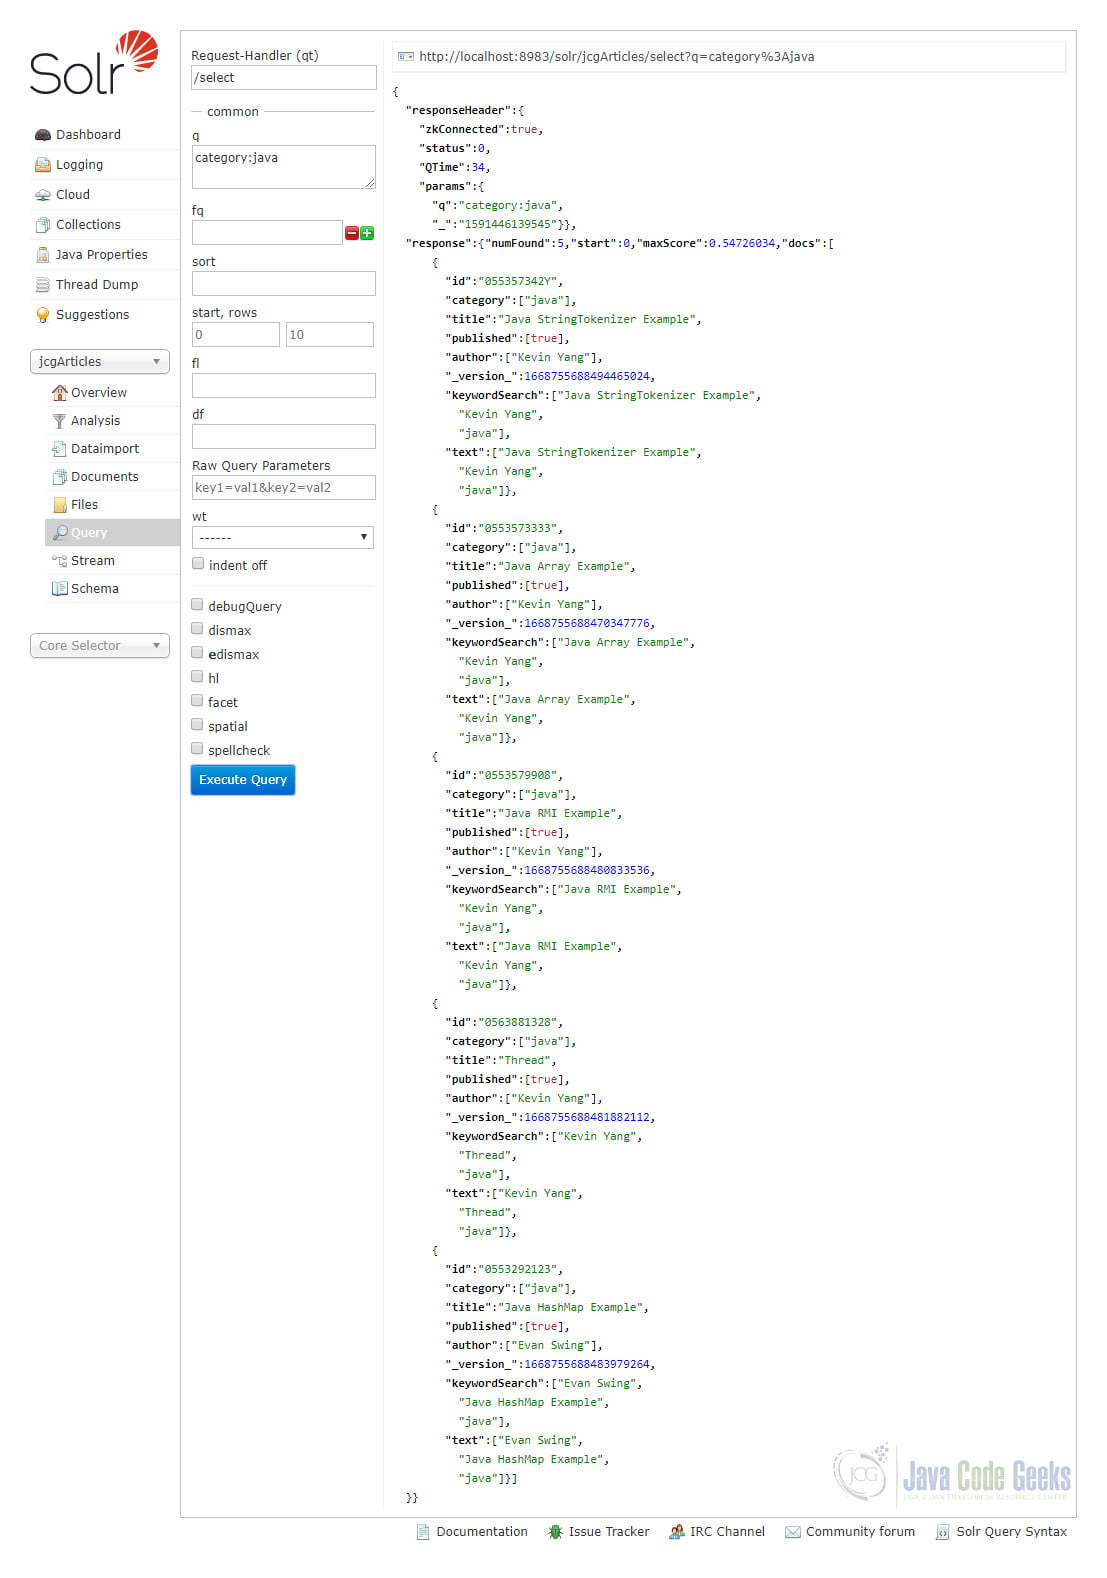
To search for something, we use a Solr query. A Solr query looks for documents from a collection using some fields. For example, we can search for articles in Java category from jcgArticles collection. Open Solr Admin UI Query screen and replace *:* with category:java as the q parameter value.
Click “Execute Query” button and we will get 5 results like this:
You can try to search in other fields by yourself. For example, you can search articles written by Kevin with author:kevin as q parameter in the query.
5. Shutdown SolrCloud
The SolrCloud servers are running in the background as services. To stop them gracefully, run the following command on the local machine. The -all parameter means to find and stop all running Solr servers on this host.
bin\solr.cmd stop -all
The output is below:
D:\Java\solr-8.5.2>bin\solr.cmd stop -all
Stopping Solr process 13676 running on port 8983
Waiting for 0 seconds, press a key to continue ...
Stopping Solr process 14372 running on port 8984
Waiting for 0 seconds, press a key to continue ...
6. Download the Sample Data File
You can download the sample data of this example here: Apache Solr Clustering Example
