Android Auto Complete Example
Sometimes we want from our application, to provide suggestions to the user, when he/she types in an editable text field. We can do that via AutoCompleteTextView, that gives suggestions automatically and display them to a drop down menu, from which the user can choose a preferred item. Moreover, Android give us the opportunity to input multiple items than only one, in the editable text field by using MultiAutoCompleteTextView class. Through this example, the user is allowed to ender one and/or multiple items in an edit text, where suggestions automatically are displayed on the screen.
For this tutorial, we will use the following tools in a Windows 64-bit platform:
- JDK 1.7
- Eclipse 4.2 Juno
- Android SDK 4.4
1. Create a New Android Application Project
Open Eclipse IDE and go to File → New → Project → Android Application Project.
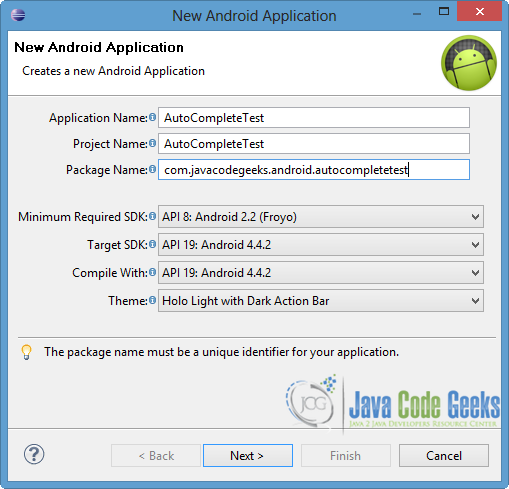
Fill in the name of the application, the project and the package in the appropriate fields and then click Next.
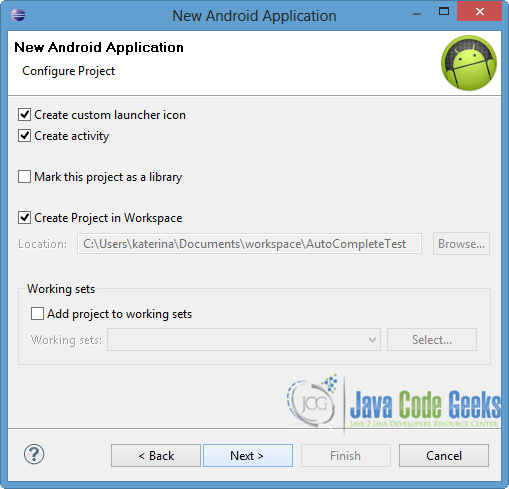
In the next window, the “Create Activity” option should be checked. The new created activity will be the main activity of your project. Then press Next button.
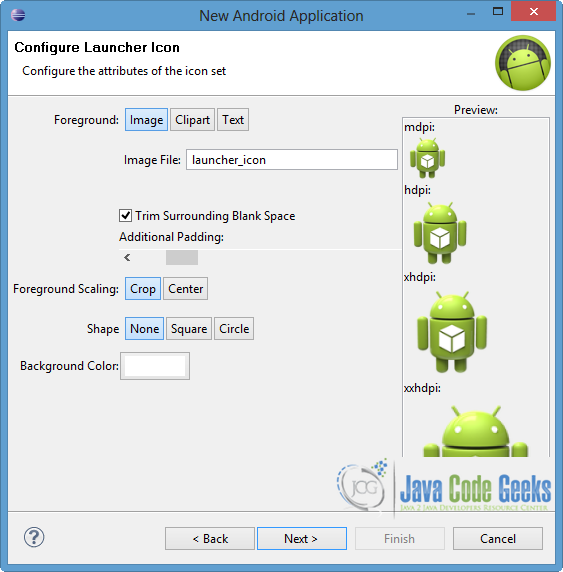
In “Configure Launcher Icon” window you should choose the icon you want to have in your app. We will use the default icon of android, so click Next.
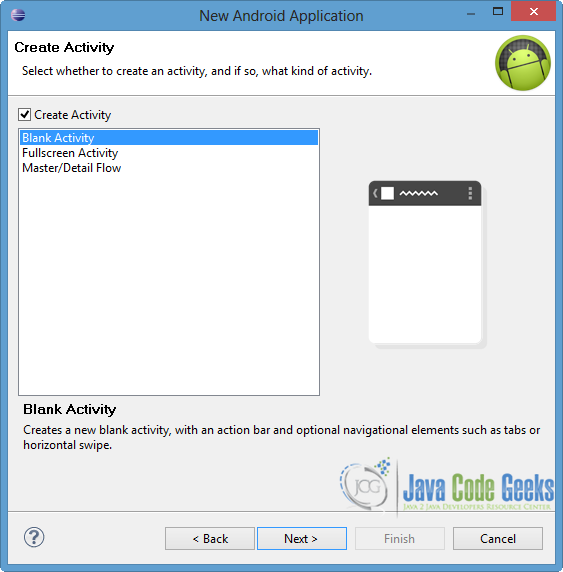
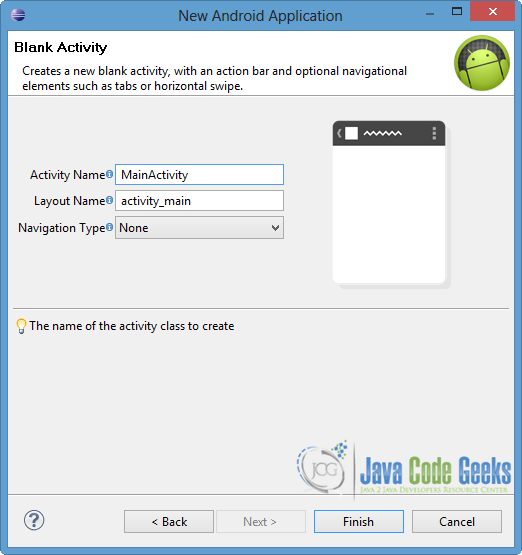
Select the “Blank Activity” option and press Next.
You have to specify a name for the new Activity and a name for the layout description of your app. The .xml file for the layout will automatically be created in the res/layout folder. Finally, press Finish.
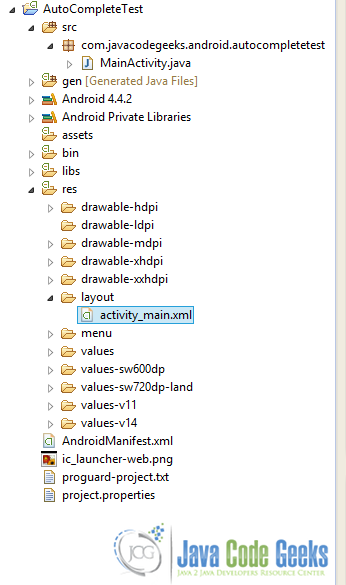
Now that the project is created, you can see the final structure of the project in the image below.
2. Create the layout of the Main Activity
As we mentioned, we want to define auto complete for one item and for multiple items. For this reason, we are going to define AutoCompleteTextView and MultiAutoCompleteTextView components in the layout.
Open res/layout/main_activity.xml, go to the respective xml tab and paste the following.
activity_main.xml:
<RelativeLayout xmlns:android="http://schemas.android.com/apk/res/android"
    xmlns:tools="http://schemas.android.com/tools"
    android:layout_width="match_parent"
    android:layout_height="match_parent"
    tools:context=".MainActivity" >

    <TextView
      android:id="@+id/text1"
      android:layout_width="wrap_content"
      android:layout_height="wrap_content"
      android:text="@string/auto_complete_colors"
      android:textAppearance="?android:attr/textAppearanceMedium" />

    <AutoCompleteTextView
      android:id="@+id/autoComplete"
      android:layout_width="wrap_content"
      android:layout_height="wrap_content"
      android:layout_below="@+id/text1"
      android:layout_marginTop="20dp"
      android:ems="8" />

    <TextView
      android:id="@+id/text2"
      android:layout_width="wrap_content"
      android:layout_height="wrap_content"
      android:layout_below="@+id/autoComplete"
      android:layout_marginTop="30dp"
      android:text="@string/multi_auto_complete_colors"
      android:textAppearance="?android:attr/textAppearanceMedium" />

   <MultiAutoCompleteTextView
      android:id="@+id/multiAutoComplete"
      android:layout_width="wrap_content"
      android:layout_height="wrap_content"
      android:layout_below="@+id/text2"
      android:layout_marginTop="20dp"
      android:ems="13" />

</RelativeLayout>
3. Create the string array for suggestions
We should specify an array that will consist the suggestions, when the user tries to fill in the edit text. There are two different ways to do such a thing. We can define the array into our Activity, where auto complete functionality is included. The other way is to define an array-string into strings.xml file and then bring it into our Activity by calling it.
In this example will use the second way, where the string-array includes colors. So open res/values/strings.xml go to the xml tab and paste the code below.
strings.xml:
<?xml version="1.0" encoding="utf-8"?>
<resources>

    <string name="app_name">AutoCompleteTest</string>
    <string name="action_settings">Settings</string>
    <string name="hello_world">Hello world!</string>
    <string name="auto_complete_colors">Auto Complete Colors...</string>
    <string name="multi_auto_complete_colors">Multi Auto Complete Colors...</string>

    <string-array name="colorList">
   		<item >Black</item>
        <item >White</item>
        <item >Red</item>
        <item >Blue</item>
        <item >Yellow</item>
        <item >Green</item>
        <item >Brown</item>
        <item >Pink</item>
        <item >Orange</item>
        <item >Purple</item>
    </string-array>

</resources>
3. Code the Main Activity
As we said by using AutoCompleteTextView and MultiAutoCompleteTextView, that extends AutoCompleteTextView, a drop down menu of suggestions is appeared so the user can choose ore or more items instead of typing the whole thing. The list of suggestions is displayed when the user types a given number of characters, set by setThreshold() method. setAdapter() method is used in order to define the ArrayAdapter, which displays the data of the string array as suggestion list.
For MultiAutoCompleteTextView we should set the Tokenizer to separate the different tokens-items, that the user will ender in the edit text. Also, in this example we will set OnItemClickListener for the MultiAutoCompleteTextView, in order to handle the case where the user picks an item.
Open src/com.javacodegeeks.android.autocompletetest/MainActivity.java and paste the following code.
MainActivity.java
package com.javacodegeeks.android.autocompletetest;

import android.os.Bundle;
import android.app.Activity;
import android.view.View;
import android.widget.AdapterView;
import android.widget.AdapterView.OnItemClickListener;
import android.widget.ArrayAdapter;
import android.widget.AutoCompleteTextView;
import android.widget.MultiAutoCompleteTextView;
import android.widget.Toast;

public class MainActivity extends Activity {

	 private AutoCompleteTextView autoComplete;
	 private MultiAutoCompleteTextView multiAutoComplete;
	 private ArrayAdapter<String> adapter;

	@Override
	protected void onCreate(Bundle savedInstanceState) {
		super.onCreate(savedInstanceState);
		setContentView(R.layout.activity_main);

		// get the defined string-array
		String[] colors = getResources().getStringArray(R.array.colorList);

		adapter = new ArrayAdapter<String>(this,android.R.layout.simple_list_item_1,colors);

		autoComplete = (AutoCompleteTextView) findViewById(R.id.autoComplete);
		multiAutoComplete = (MultiAutoCompleteTextView) findViewById(R.id.multiAutoComplete);

		// set adapter for the auto complete fields
		autoComplete.setAdapter(adapter);
		multiAutoComplete.setAdapter(adapter);

		// specify the minimum type of characters before drop-down list is shown
		autoComplete.setThreshold(1);
		multiAutoComplete.setThreshold(2);
		// comma to separate the different colors
		multiAutoComplete.setTokenizer(new MultiAutoCompleteTextView.CommaTokenizer());

		// when the user clicks an item of the drop-down list
		multiAutoComplete.setOnItemClickListener(new OnItemClickListener() {

			@Override
			public void onItemClick(AdapterView<?> arg0, View arg1, int arg2,
					long arg3) {
				 Toast.makeText(getBaseContext(), "MultiAutoComplete: " +
				    		"you add color "+arg0.getItemAtPosition(arg2),
				    		Toast.LENGTH_LONG).show();
			}
		});
	}

}
4. Run the application
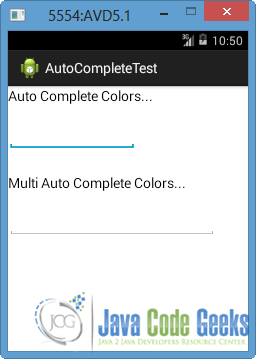
To run our application, right click on our project → Run as → Android Application. The AVD will appear with the app loaded.
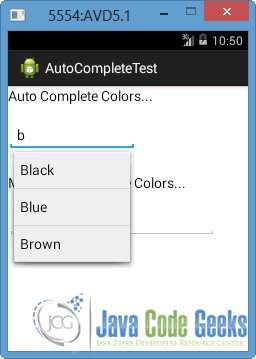
Lets say that we want to type a color in autocomplete edit text, that begins with the letter “B”. As we can see in the image below, three different suggestions are displayed in the drop down menu. Notice that we set the threshold to 1, so the suggestion list is appeared from the first letter that the user enders.
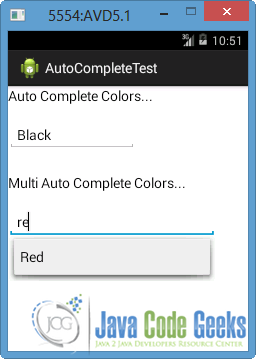
Now lets put another color to multi auto complete edit text. In this occasion, the suggestion list will be displayed when the user types the second letter, as the threshold is set to 2.
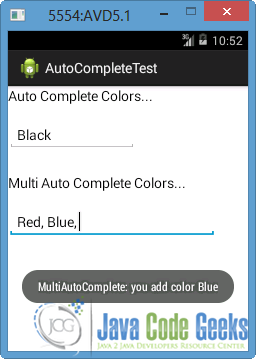
When we choose the Red color, a comma will automatically be added because we set it as CommaTokenizer in our MainActivity. Also if we add a second color to that edit text, a Toast will appear, as shown in the image below.
Download Eclipse Project
This was an example of Auto Complete in Android. Download the Eclipse Project of this example: AutoCompleteTest

