Android Drag and Drop Example
The Android System provides Drag and Drop framework, which facilitates users especially to move data from one View to another within the current layout. It is good to mention that many apps take advantage of the graphical drag and drop gesture that the system procures. The framework contains the following three components, which support drag and drop functionality:
- Drag event class
- Drag listeners
- Helper methods and classes
This example shows a simple drag and drop functionality, in which an item can be moved from one View to another, but not back to first View again.
For this tutorial, we will use the following tools in a Windows 64-bit platform:
- JDK 1.7
- Eclipse 4.2 Juno
- Android SDK 4.4
1. Create a New Android Application Project
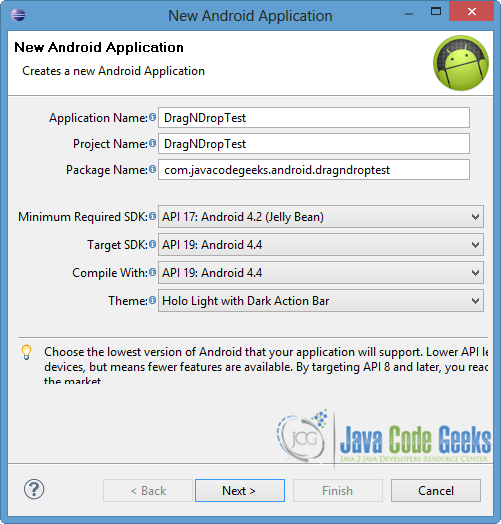
Open Eclipse IDE and go to File → New → Project → Android Application Project.
Fill in the name of the application, the project and the package in the appropriate fields. Also, choose as “Minimum Required SDK” the API 17 or larger and then click Next button.
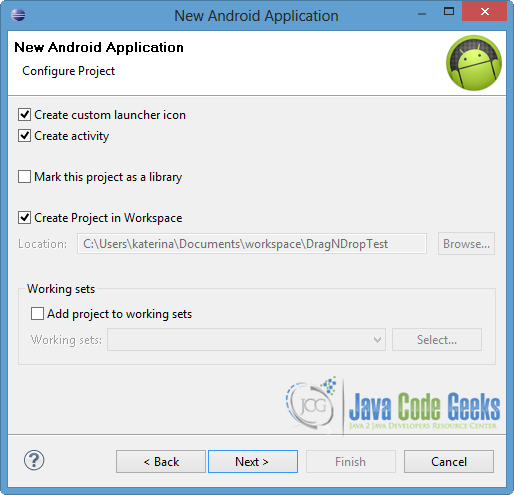
In the next window, the “Create Activity” option should be checked. The new activity will be the main activity of your project. Then press Next.
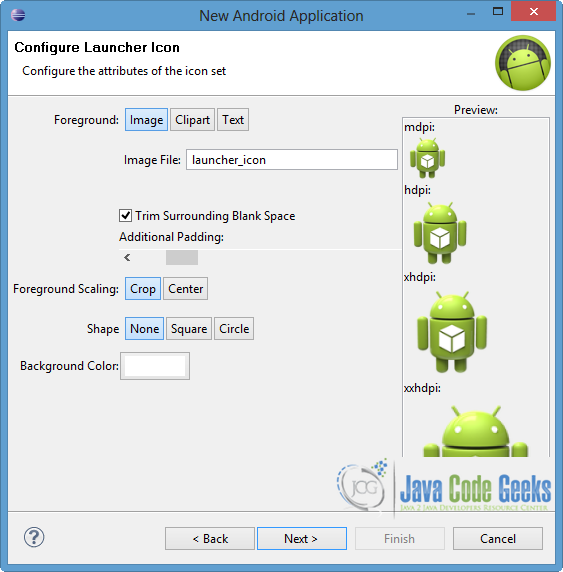
In “Configure Launcher Icon” window you should choose the icon you want to have in your app. In our occasion, we will use the default icon of android, so just press Next.
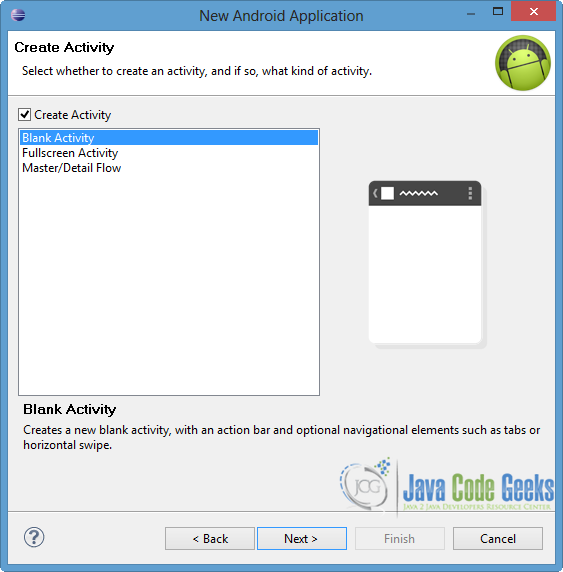
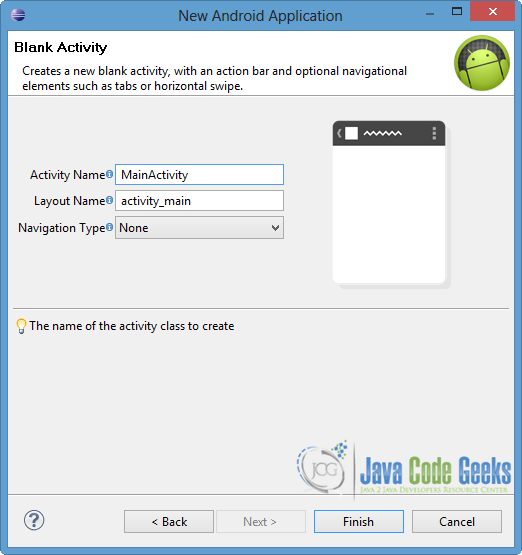
Select the “Blank Activity” option and then press the Next button.
Specify a name for the new Activity and a name for the layout description of your app. The .xml file for the layout will automatically be created in the res/layout folder. In our occasion, we will leave the default names for both files. Press Finish.
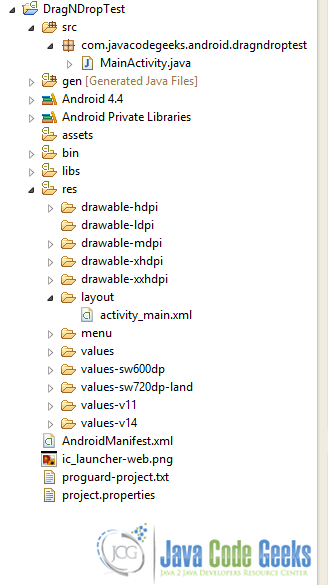
The final structure of the created project is shown in the image below.
2. Create XML drawbles
We want to make some drawables in order to distinguish the different views in the layout, when we drag and drop an item.
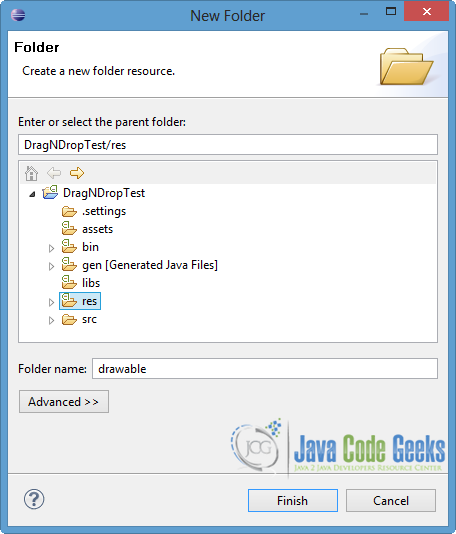
To make the drawables, we have fist of all to create a drawable folder in the res directory of the project, that contains these drawables.
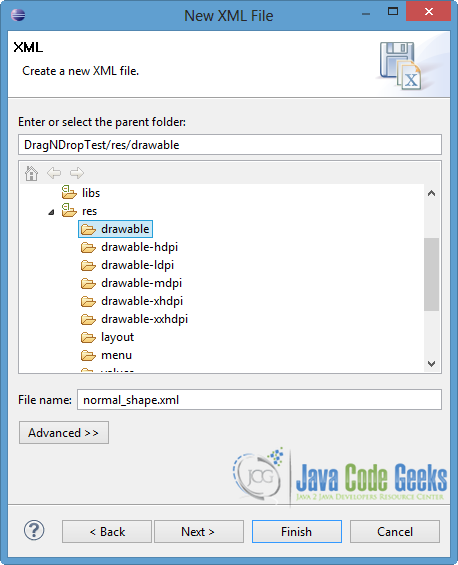
Right click on res folder → New → Folder. Put drawable as the name of the folder, as shown in the image below and press Finish.
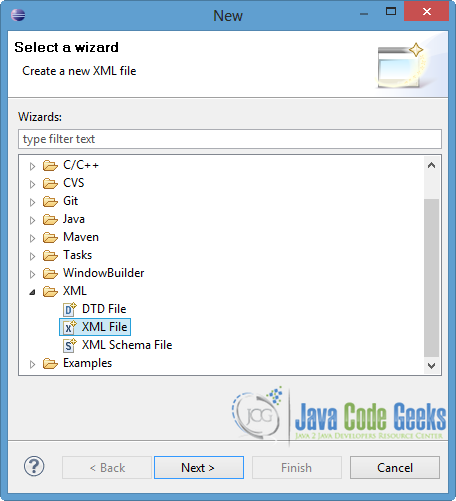
To make the xml files, right click on res/drawable → New → Other. In the pop up window, extend the XML folder, choose XML File and press Next.
Then, spesify the name of the xml file and press Finish.
Open res/drawable/normal_shape.xml and paste the following code. The normal_shape.xml file will show the normal shape of the Views, before and after the drop of the item.
normal_shape.xml:
<?xml version="1.0" encoding="UTF-8"?>
<color
    xmlns:android="http://schemas.android.com/apk/res/android"
	android:color="#aaaaaa" />
In the same way, right click on res/drawable → New → Other. In the pop up window, extend the XML folder, choose XML File and press Next. In addition, specify the name of the xml file and lets name it target_shape.xml.
Open res/drawable/target_shape.xml and paste the code below. The target_shape.xml file will show the shape of each View, in which the item will be displayed when it is dragged.
target_shape.xml:
<?xml version="1.0" encoding="UTF-8"?>
<color
    xmlns:android="http://schemas.android.com/apk/res/android"
	android:color="#555555" />
3. Create the layout of the Main Activity
In this application the main purpose is to find out how it works drag and drop within a layout. So, in the same GridLayout, we are going to define two different LinearLayouts. The first one will contain an ImageView, which the user will drag and drop it in the second one.
Open res/layout/activity_main.xml file and paste the following.
activity_main.xml:
<?xml version="1.0" encoding="utf-8"?>
<GridLayout xmlns:android="http://schemas.android.com/apk/res/android"
    android:layout_width="match_parent"
    android:layout_height="match_parent"
    android:orientation="vertical" >

    <LinearLayout
        android:id="@+id/toplinear"
        android:layout_width="fill_parent"
        android:layout_height="170dp"
        android:background="@drawable/normal_shape"
        android:layout_marginBottom="10dp" >

        <ImageView
            android:id="@+id/image"
            android:layout_width="wrap_content"
            android:layout_height="wrap_content"
            android:src="@drawable/ic_launcher" />

    </LinearLayout>

    <LinearLayout
        android:id="@+id/bottomlinear"
        android:layout_width="fill_parent"
        android:layout_height="170dp"
        android:background="@drawable/normal_shape" >

        <TextView
            android:id="@+id/text"
            android:layout_width="100dp"
            android:layout_height="100dp"
            android:text="Drag the image and drop it here..." />

    </LinearLayout>

</GridLayout>
4. Code the Main Activity
A drag and drop event occurs when a user starts dragging data, so the application tells the system to start a drag by calling startDrag() method. After that, the system calls back the application, in order to take the drag shadow, and it sends a DragEvent. If we want every View object in the layout to respond to the sending drag event, we should register a listener (onDragListener or onTouchListener) for each one or setup a callback method (onDragEvent or onTouchEvent respectively) and define other Views as possible “drop targets”. If we use both listener and callback method for the View, the system calls the listener first and then the callback, as long as the listener still handles successfully the drag event.
In our example, we will use the setOnLongClickListener() event listener along with OnDragListener(), because there are used mostly in new versions of Android.
Open src/com.javacodegeeks.android.dragndroptest/MainActivity.java file and paste the following code.
MainActivity.java:
package com.javacodegeeks.android.dragndroptest;

import android.app.Activity;
import android.content.ClipData;
import android.content.ClipDescription;
import android.content.Context;
import android.graphics.drawable.Drawable;
import android.os.Bundle;
import android.view.DragEvent;
import android.view.View;
import android.view.View.DragShadowBuilder;
import android.view.View.OnDragListener;
import android.view.View.OnLongClickListener;
import android.view.ViewGroup;
import android.widget.ImageView;
import android.widget.LinearLayout;
import android.widget.TextView;
import android.widget.Toast;

public class MainActivity extends Activity {

	private ImageView myImage;
	private static final String IMAGEVIEW_TAG = "The Android Logo";

/** Called when the activity is first created. */

	@Override
  	public void onCreate(Bundle savedInstanceState) {
		super.onCreate(savedInstanceState);

	    setContentView(R.layout.activity_main);
	    myImage = (ImageView)findViewById(R.id.image);
	    // Sets the tag
	    myImage.setTag(IMAGEVIEW_TAG);

	    // set the listener to the dragging data
	    myImage.setOnLongClickListener(new MyClickListener());

	    findViewById(R.id.toplinear).setOnDragListener(new MyDragListener());
	    findViewById(R.id.bottomlinear).setOnDragListener(new MyDragListener());

	}

	private final class MyClickListener implements OnLongClickListener {

	    // called when the item is long-clicked
		@Override
		public boolean onLongClick(View view) {
		// TODO Auto-generated method stub

			// create it from the object's tag
			ClipData.Item item = new ClipData.Item((CharSequence)view.getTag());

	        String[] mimeTypes = { ClipDescription.MIMETYPE_TEXT_PLAIN };
	        ClipData data = new ClipData(view.getTag().toString(), mimeTypes, item);
	        DragShadowBuilder shadowBuilder = new View.DragShadowBuilder(view);

	        view.startDrag( data, //data to be dragged
	        				shadowBuilder, //drag shadow
	        				view, //local data about the drag and drop operation
	        				0   //no needed flags
	        			  );


	        view.setVisibility(View.INVISIBLE);
	        return true;
		}
	}

	class MyDragListener implements OnDragListener {
		Drawable normalShape = getResources().getDrawable(R.drawable.normal_shape);
		Drawable targetShape = getResources().getDrawable(R.drawable.target_shape);

		@Override
		public boolean onDrag(View v, DragEvent event) {

			// Handles each of the expected events
		    switch (event.getAction()) {

		    //signal for the start of a drag and drop operation.
		    case DragEvent.ACTION_DRAG_STARTED:
		        // do nothing
		        break;

		    //the drag point has entered the bounding box of the View
		    case DragEvent.ACTION_DRAG_ENTERED:
		        v.setBackground(targetShape);	//change the shape of the view
		        break;

		    //the user has moved the drag shadow outside the bounding box of the View
		    case DragEvent.ACTION_DRAG_EXITED:
		        v.setBackground(normalShape);	//change the shape of the view back to normal
		        break;

		    //drag shadow has been released,the drag point is within the bounding box of the View
		    case DragEvent.ACTION_DROP:
		        // if the view is the bottomlinear, we accept the drag item
		    	  if(v == findViewById(R.id.bottomlinear)) {
		    		  View view = (View) event.getLocalState();
		    		  ViewGroup viewgroup = (ViewGroup) view.getParent();
		    		  viewgroup.removeView(view);

		    		  //change the text
		    		  TextView text = (TextView) v.findViewById(R.id.text);
		    		  text.setText("The item is dropped");

		    		  LinearLayout containView = (LinearLayout) v;
		    		  containView.addView(view);
		    		  view.setVisibility(View.VISIBLE);
		    	  } else {
		    		  View view = (View) event.getLocalState();
		    		  view.setVisibility(View.VISIBLE);
		    		  Context context = getApplicationContext();
		    		  Toast.makeText(context, "You can't drop the image here",
                                                 Toast.LENGTH_LONG).show();
		    		  break;
		    	   }
		    	  break;

		    //the drag and drop operation has concluded.
		    case DragEvent.ACTION_DRAG_ENDED:
		        v.setBackground(normalShape);	//go back to normal shape

		    default:
		        break;
		    }
		    return true;
		}
	}
}
As you can notice in the code above, for the dragging data you can use the ClipData or the ClipData.Item, which contains data that is dropped to the “target-drop” Views. The ClipData object includes ClipDescription, which stores important meta-data about the clip. In addition, DragShadowBuilder is used in order to display an image during the drag and drop operation.
As we mentioned above, in this application we want to drag and drop an item only in one View, but not back to the previous one. Also, we want to change the shape of each chosen “target drop” View, when the drag shadow gets in it’s bounding box. For these reasons, we added some code in the appropriate actions of the DragEvent, as you can see in the MainActivity.java file.
5. Run the application
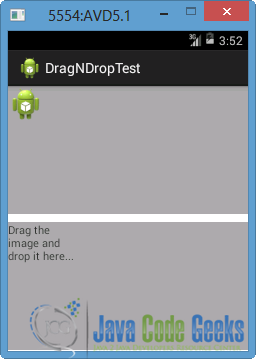
To run our application, right click on our project → Run as → Android Application. The AVD will appear with the app loaded. The image below shows the screen of the application.
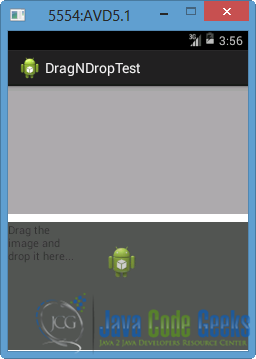
Now, left and right click to the image and drag it to the view with the text “Drag the image and drop it here…”. You will see how it’s shape is changing and that is happening because the ACTION_DRAG_ENTERED is called.
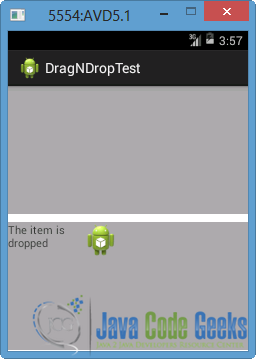
Then drop the image to that View. The ACTION_DROP is called in that situation. You can notice that the image is successfully been dropped into the View and the text changed.
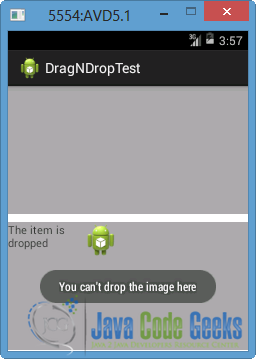
If we try to drag and drop the image into the previous view, the message “You can’t drop the image here” will appear. Nevertheless the ACTION_DROP is called again, we decided to exclude this View of “drop-target” views, as we mentioned.
Download Eclipse Project
This was an example of Drag and Drop in Android. Download the Eclipse Project of this example: DragNDropTest.zip


Doesnt work