After the implementation of an Android application, the last step is to publish your app in order to be available to the users. You can sell your app or release it for free via an Android application marketplace (like Google Play), via your website or even by distribute it directly to the users.
In this example we will show how to prepare the deliver of your application and finally publish it to the Google Play marketstore, the digital distribution platform for Android apps operated by Google.
1. Prepare your application for release
Before releasing your app to the market, you should perform some basic tasks in order to check it.
- You need to remove the Logs and any debugging attributes of your implementation.
- You should test you application to different devices (phones and tablets) in order to ensure the desirable result. It is important to make sure that your app runs properly in the targeted Android versions.
- Be sure that the resources you are using (multimedia and graphics) are updated and are included to your app. It is recommended to use high-quality graphic assets, as well as the application icon be compatible with the
icon guidelines. - You should ensure the security of the external servers or services, if any is used.
There are many other tasks as part of preparation process, as Dev Guide in Preparing For Release show us.
The launch of an application on Google Play requires more preparation. Except for understanding the polices and agreement part, there are some other tasks:
Google Playrequires to use promotional materials, such as screenshots, videos, localized descriptions etc, in order to further your application.- Also you have to declare the content rating for your app to show the maturity level. The available current ratings are
Everyone, Low maturity, Medium maturity, High maturity - It is important to decide if you want to sell or distribute for free your application. For paid apps you have to decide the currencies and the price you want to sell it in different countries. If you want to deliver it for free, remember that this app will always remain free.
Google Playgives you the opportunity to release your application worldwide or in targeted groups. So you have to control the setting of timezone, localization, the listing languages you want to use etc.- Although the current maximum size of the
APKis set to 50MB, you can useAPK Expansion Files.
Also there is a Launch CheckList that provide us advice for successful product launch on Google Play.
2. Export Android Application
To release your application and to deliver it to users, you should make a signed .apk file. So, you have to go to Eclipse and export the application as an APK (Android Package) file before distribute it to the market.
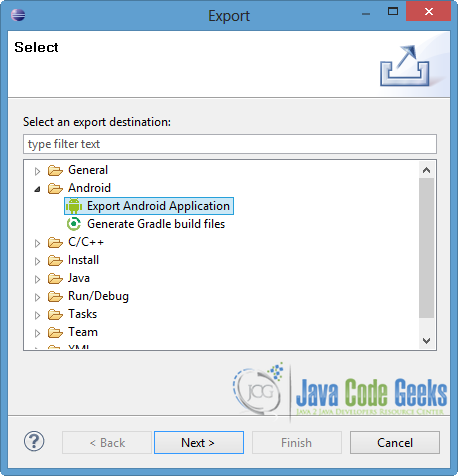
After you insert the application in the Package Explorer of Eclipse, go to the central menu and click on File → Export.
In the popup window, select “Export Android Application” from Android folder. Then press Next button.
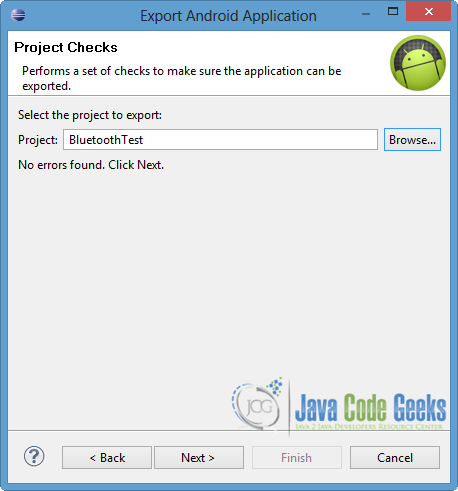
Click “Browse…” button and choose the project you want to export. If it has no errors, click Next. Otherwise you can’t continue and you have to fix the errors. You can go to the next picture directly, if you right click on the current project → Android Tools → Export Signed Application Package.
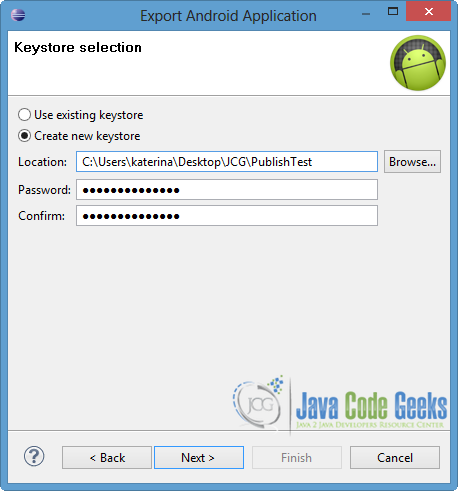
In the next window, choose “Create new keystore”. Then, click “Browse…” to put it in a location locally to your pc and write down a password. After the password confirmation, press again Next button.
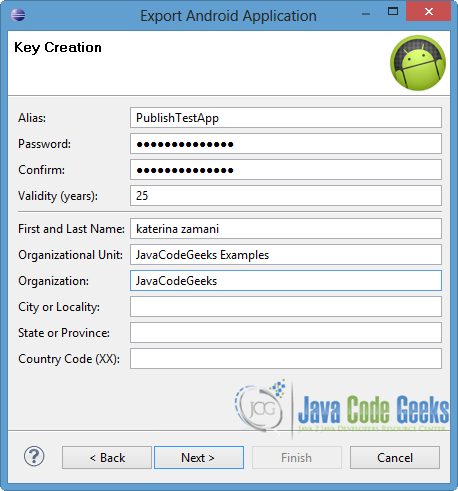
Now you have to create the key, so you should complete some of the fields, like shown in the image below. It is necessary to fill in some of these fields, but not all of them. Then click Next.
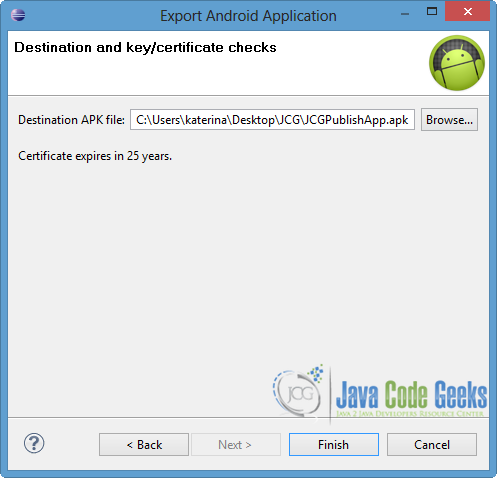
Specify the destination of the .apk file that you want to export and give it an appropriate name, like in the next picture. Finally press Finish.
You can ensure the certification of your APK file from Eclipse Console, as you can see in the image below.

3. Register in Google Play
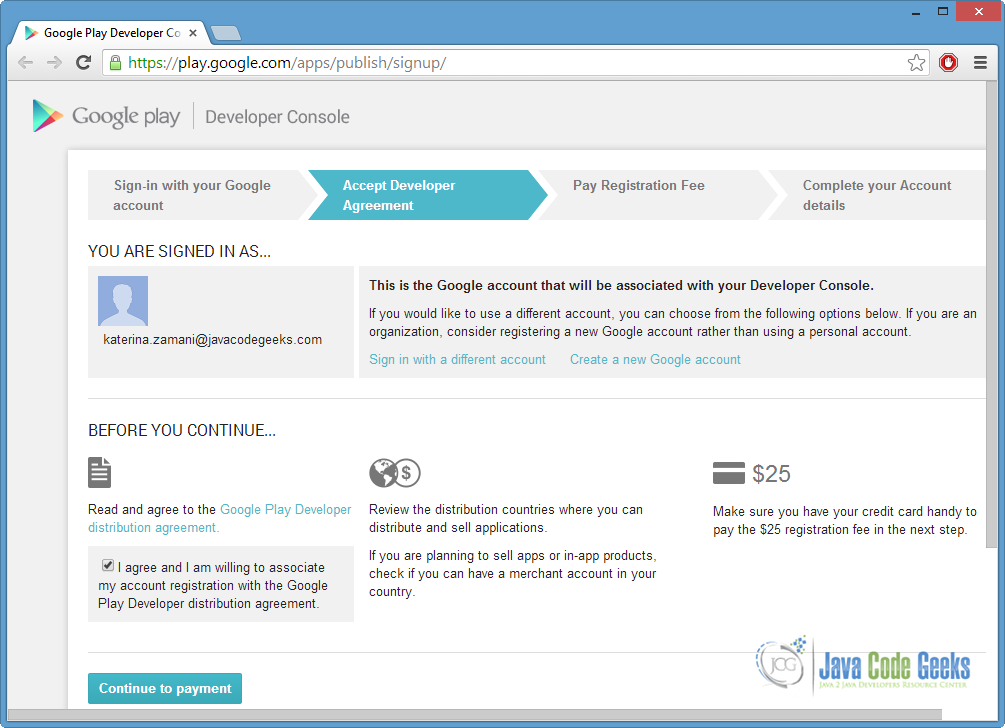
The first step is to register in Google Play Developer Console, in order to have a publisher account. If you already have a Google account you can use it, otherwise you have to create a new one.
After you read and accept the Developer Distribution Agreement, you have to click “Continue to payment” button, in order to proceed. That step requires a payment of $25 as a registration fee, using Google Wallet. If you don’t have a Google Wallet account, you can easily set up one during the procedure. The next picture shows the main part of Google Play registration page.
Finally, you can enter basic information about your developer identity and your account details.
After the success of your registration you can sign in to Developer Console of Google Play, where you can find all the tools and operations for publishing process.
Now, you can upload your release-ready APK in order to publish it. The application remains at Drafts and you can publish it any time you are ready. It is important to mention that you can unpublish it wherever you want.
