Android devices are equipped with hardware input devices such as microphone, camera etc, from which we can capture audio or video in our applications. The most common class that is used is MediaRecorder, which records audio and video.
In this example, we are going to capture audio from the device’s microphone, store it to the device and then play it back and/or stop playing it.
For this tutorial, we will use the following tools in a Windows 64-bit platform:
- JDK 1.7
- Eclipse 4.2 Juno
- Android SDK 4.4
1. Create a New Android Application Project
Open Eclipse IDE and go to File → New → Project → Android Application Project.
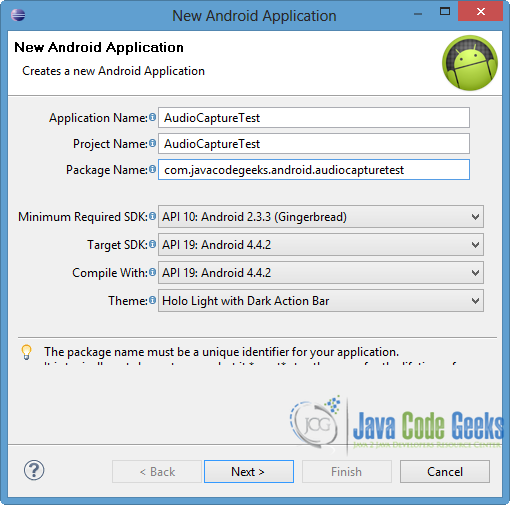
Specify the name of the application, the project and the package. Also, set 10 API or larger as the minimum Required SDK, in order to support the classes we are going to use. Then press Next button.
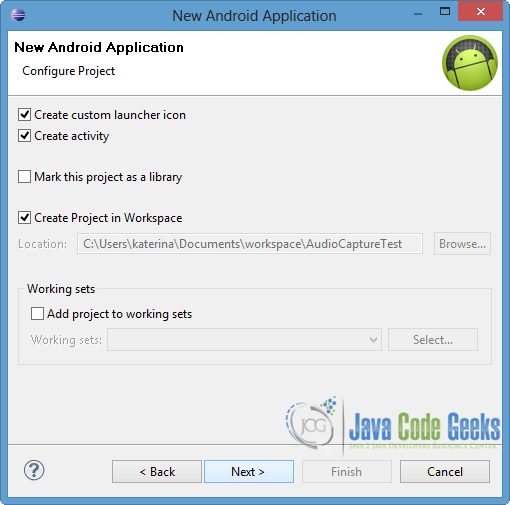
In the next window, the “Create Activity” option should be checked. The new created activity will be the main activity of your project. Then click Next.
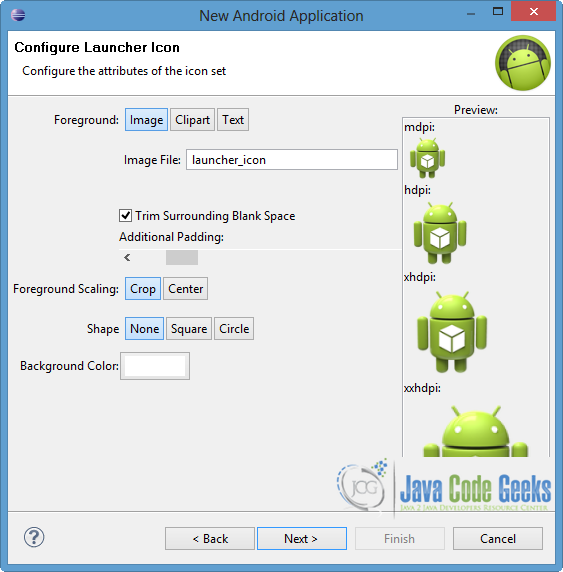
In “Configure Launcher Icon” window you should choose the icon you want to have in your app. We will use the default icon of android, so click Next.
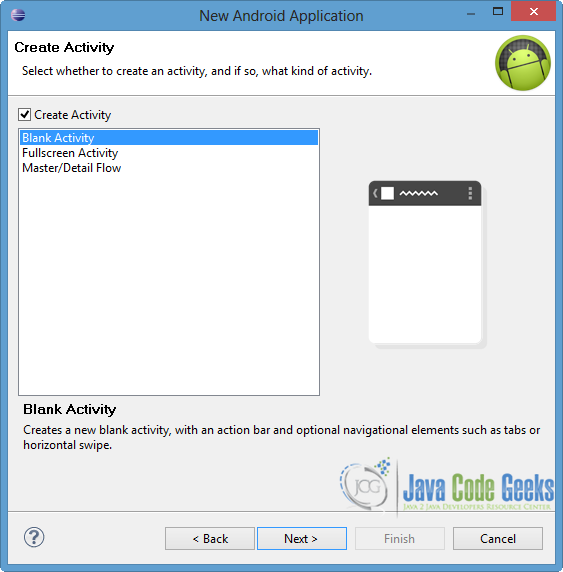
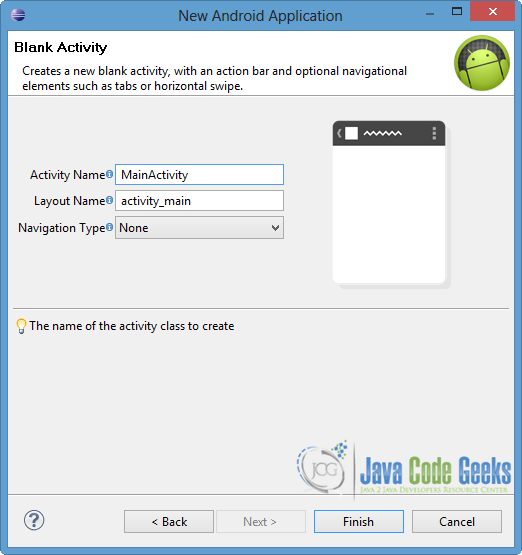
Select the “Blank Activity” option and press Next.
You have to specify a name for the new Activity and a name for the layout description of your app. The .xml file for the layout will automatically be created in the res/layout folder. Finally, press Finish.
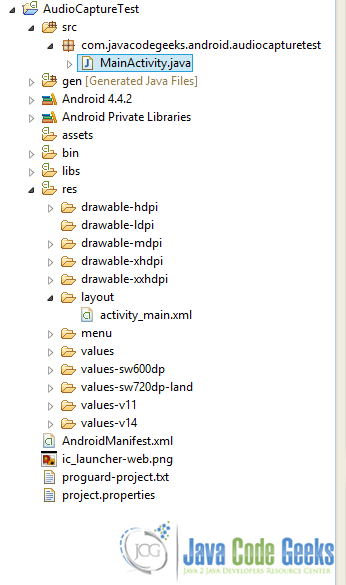
You can see the final structure of the created project in the image below.
2. Create the layout of the Main Activity
In this application, we want to start and stop recording, as well as start and stop playing the recording sound. For this reason we are going to add four different Buttons in the layout, where each one enables the appropriate functionality. Also, a TextView will be used to show us the current situation.
Open res/layout/activity_main.xml go to the xml tab and paste the following.
activity_main.xml:
<RelativeLayout xmlns:android="http://schemas.android.com/apk/res/android"
   xmlns:tools="http://schemas.android.com/tools"
   android:layout_width="match_parent"
   android:layout_height="match_parent"
   tools:context=".MainActivity" >

   <TextView
      	android:id="@+id/text1"
      	android:layout_width="wrap_content"
      	android:layout_height="wrap_content"
      	android:layout_marginTop="10dp"
      	android:text="Recording Point: -"
      	android:textAppearance="?android:attr/textAppearanceMedium" />

   <ImageView
   		android:id="@+id/micImage"
      	android:layout_width="60dp"
      	android:layout_height="60dp"
      	android:layout_below="@+id/text1"
      	android:layout_centerHorizontal="true"
      	android:layout_marginTop="20dp"
      	android:src="@android:drawable/presence_audio_online" />

   <LinearLayout  android:layout_width="match_parent"
   		android:layout_height="wrap_content"
   		android:layout_marginTop="10dp"
   		android:layout_below="@+id/micImage"
   		android:id="@+id/linear1"
   		android:orientation="horizontal" >

	   <Button
	      	android:id="@+id/start"
	      	android:layout_width="wrap_content"
	      	android:layout_height="wrap_content"
	      	android:text="start" />

	   <Button
	      	android:id="@+id/stop"
	      	android:layout_width="wrap_content"
	      	android:layout_height="wrap_content"
	      	android:layout_marginLeft="10dp"
	      	android:enabled="false"
	      	android:text="stop" />

   </LinearLayout>

   <LinearLayout  android:layout_width="match_parent"
   		android:layout_height="wrap_content"
   		android:layout_marginTop="10dp"
   		android:layout_below="@+id/linear1"
   		android:id="@+id/linear2"
   		android:orientation="horizontal" >

	   <Button
	      	android:id="@+id/play"
	      	android:layout_width="wrap_content"
	      	android:layout_height="wrap_content"
	      	android:enabled="false"
	      	android:text="play" />

	   <Button
	      	android:id="@+id/stopPlay"
	      	android:layout_width="wrap_content"
	      	android:layout_height="wrap_content"
	      	android:enabled="false"
	      	android:layout_marginLeft="10dp"
	      	android:text="stop playing" />
	</LinearLayout>

</RelativeLayout>
Notice that we added an ImageView where it’s content is a picture of audio recording, that Android provide us through the drawable.
3. Code the Main Activity
For audio record, we should create an instance of MediaRecorder class and set some information about the source and the output file. We use MediaRecorder.AudioSource.MIC in order to set the microphone of the device as the audio source. In addition, we have to set the format and the name of the output file, as well as the audio encoder for the output file in order to contain an audio track. Notice that in our example, we also set the path that the output file will be located.
Before starting the recording is very important to prepare capturing and encoding data. For this reason, prepare() and start() methods are called. It is important to mention that prepare() method must be called before start() method, but after the setting of source, format and encoding information. In contrast, to stop sound recording stop() method should be called. After that, if the instance of MediaRecorder is not used any more, it is recommended to free the resource, by calling release() method. If you notice in the code below, appropriate Exceptions are called for the specific methods.
In our example, we want to playback the sound we just recorded, so we create an instance of MediaPlayer class. After specifying the source file that we want to use, prepare() and start() methods are called in order to start playing the audio track. Respectively, stop() and release() methods are called to stop the playback and to free the MediaPlayer object resources.
Open src/com.javacodegeeks.android.audiocapturetest/MaainActivity.java file and paste the code below.
MainActivity.java:
package com.javacodegeeks.android.audiocapturetest;

import java.io.IOException;
import android.media.MediaPlayer;
import android.media.MediaRecorder;
import android.os.Bundle;
import android.os.Environment;
import android.app.Activity;
import android.view.View;
import android.view.View.OnClickListener;
import android.widget.Button;
import android.widget.TextView;
import android.widget.Toast;

public class MainActivity extends Activity {

   private MediaRecorder myRecorder;
   private MediaPlayer myPlayer;
   private String outputFile = null;
   private Button startBtn;
   private Button stopBtn;
   private Button playBtn;
   private Button stopPlayBtn;
   private TextView text;

   @Override
   protected void onCreate(Bundle savedInstanceState) {
      super.onCreate(savedInstanceState);
      setContentView(R.layout.activity_main);

      text = (TextView) findViewById(R.id.text1);
      // store it to sd card
      outputFile = Environment.getExternalStorageDirectory().
    		  getAbsolutePath() + "/javacodegeeksRecording.3gpp";

      myRecorder = new MediaRecorder();
      myRecorder.setAudioSource(MediaRecorder.AudioSource.MIC);
      myRecorder.setOutputFormat(MediaRecorder.OutputFormat.THREE_GPP);
      myRecorder.setAudioEncoder(MediaRecorder.OutputFormat.AMR_NB);
      myRecorder.setOutputFile(outputFile);

      startBtn = (Button)findViewById(R.id.start);
      startBtn.setOnClickListener(new OnClickListener() {

		@Override
		public void onClick(View v) {
			// TODO Auto-generated method stub
			start(v);
		}
      });

      stopBtn = (Button)findViewById(R.id.stop);
      stopBtn.setOnClickListener(new OnClickListener() {

  		@Override
  		public void onClick(View v) {
  			// TODO Auto-generated method stub
  			stop(v);
  		}
      });

      playBtn = (Button)findViewById(R.id.play);
      playBtn.setOnClickListener(new OnClickListener() {

  		@Override
  		public void onClick(View v) {
  			// TODO Auto-generated method stub
				play(v);
  		}
      });

      stopPlayBtn = (Button)findViewById(R.id.stopPlay);
      stopPlayBtn.setOnClickListener(new OnClickListener() {

  		@Override
  		public void onClick(View v) {
  			// TODO Auto-generated method stub
  			stopPlay(v);
  		}
      });
   }

   public void start(View view){
	   try {
          myRecorder.prepare();
          myRecorder.start();
       } catch (IllegalStateException e) {
          // start:it is called before prepare()
    	  // prepare: it is called after start() or before setOutputFormat()
          e.printStackTrace();
       } catch (IOException e) {
           // prepare() fails
           e.printStackTrace();
        }

       text.setText("Recording Point: Recording");
       startBtn.setEnabled(false);
       stopBtn.setEnabled(true);

       Toast.makeText(getApplicationContext(), "Start recording...",
    		   Toast.LENGTH_SHORT).show();
   }

   public void stop(View view){
	   try {
	      myRecorder.stop();
	      myRecorder.release();
	      myRecorder  = null;

	      stopBtn.setEnabled(false);
	      playBtn.setEnabled(true);
	      text.setText("Recording Point: Stop recording");

	      Toast.makeText(getApplicationContext(), "Stop recording...",
	    		  Toast.LENGTH_SHORT).show();
	   } catch (IllegalStateException e) {
			//  it is called before start()
			e.printStackTrace();
	   } catch (RuntimeException e) {
			// no valid audio/video data has been received
			e.printStackTrace();
	   }
   }

   public void play(View view) {
	   try{
		   myPlayer = new MediaPlayer();
		   myPlayer.setDataSource(outputFile);
		   myPlayer.prepare();
		   myPlayer.start();

		   playBtn.setEnabled(false);
		   stopPlayBtn.setEnabled(true);
		   text.setText("Recording Point: Playing");

		   Toast.makeText(getApplicationContext(), "Start play the recording...",
				   Toast.LENGTH_SHORT).show();
	   } catch (Exception e) {
			// TODO Auto-generated catch block
			e.printStackTrace();
		}
   }

   public void stopPlay(View view) {
	   try {
	       if (myPlayer != null) {
	    	   myPlayer.stop();
	           myPlayer.release();
	           myPlayer = null;
	           playBtn.setEnabled(true);
	           stopPlayBtn.setEnabled(false);
	           text.setText("Recording Point: Stop playing");

	           Toast.makeText(getApplicationContext(), "Stop playing the recording...",
					   Toast.LENGTH_SHORT).show();
	       }
	   } catch (Exception e) {
			// TODO Auto-generated catch block
			e.printStackTrace();
		}
   }

}
4. Set the permissions
We have to declare the permissions in the AndroidManifest.xml file of our project. WRITE_EXTERNAL_STORAGE is to write the output file into the external storage of our device (sd card). RECORD_AUDIO is necessary for MediaRecorder class to capture audio.
Open AndroidManifest.xml file and paste the following code.
AndroidManifest.xml:
<?xml version="1.0" encoding="utf-8"?>
<manifest xmlns:android="http://schemas.android.com/apk/res/android"
    package="com.javacodegeeks.android.audiocapturetest"
    android:versionCode="1"
    android:versionName="1.0" >

    <uses-sdk
        android:minSdkVersion="10"
        android:targetSdkVersion="19" />

    <uses-permission android:name="android.permission.WRITE_EXTERNAL_STORAGE"/>
    <uses-permission android:name="android.permission.RECORD_AUDIO" />

    <application
        android:allowBackup="true"
        android:icon="@drawable/ic_launcher"
        android:label="@string/app_name"
        android:theme="@style/AppTheme" >
        <activity
            android:name="com.javacodegeeks.android.audiocapturetest.MainActivity"
            android:label="@string/app_name" >
            <intent-filter>
                <action android:name="android.intent.action.MAIN" />

                <category android:name="android.intent.category.LAUNCHER" />
            </intent-filter>
        </activity>
    </application>

</manifest>
5. Run the application
In this example, we can’t use the android emulator to run our application, because is hasn’t the ability to capture audio. For this reason we have to connect Eclipse with our Android device and run the application through it.
So, connect your Android device with your pc through USB. Don’t forget to enable USB debugging option, by following Settings → Applications → Development path.
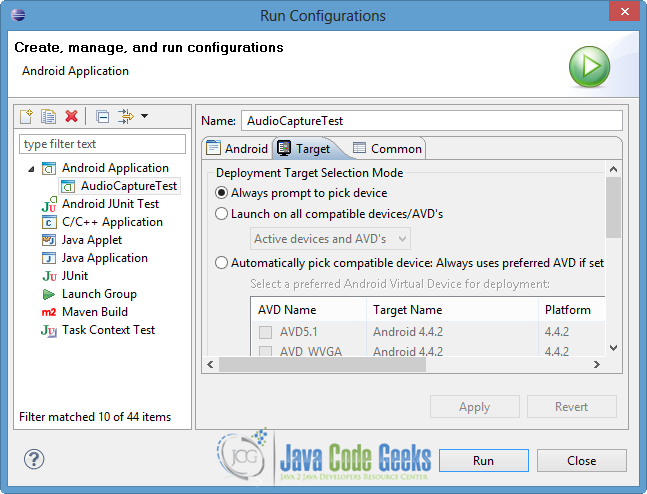
Then go to Eclipse, right click on our project → Run as → Run Configurations.
In the popup window choose the current project, go to the Target tab and choose “Always prompt to pick device” option. Then click Next.
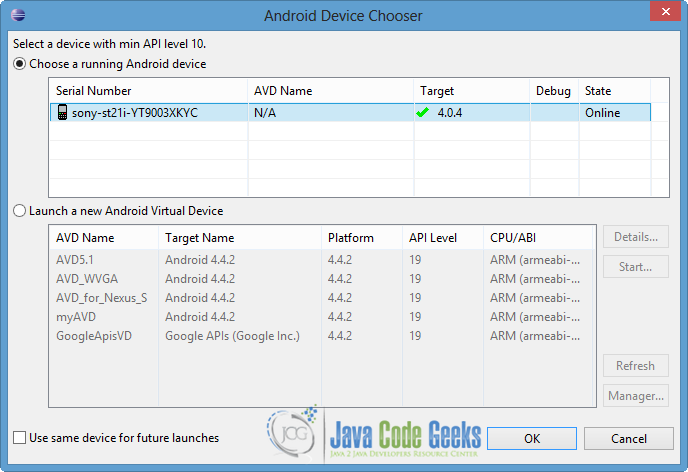
Finally choose the running Android device and press OK, as shown in the next picture.
The app will be loaded in your Android device, as you can see in the image below.

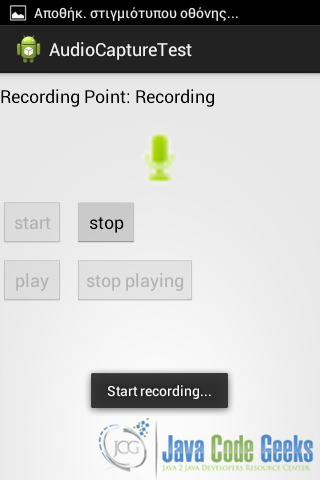
Lets press “start” button in order to start audio recording. As you can see in the picture below, a Toast appears and the TextView is set to “Recording”.
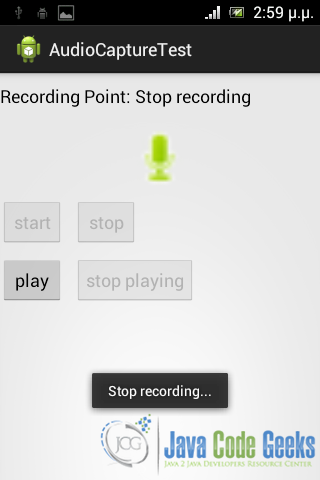
Now click “stop” button. The audio track will automatically be stored into your external card. Notice that “stop” button is not clickable any more.
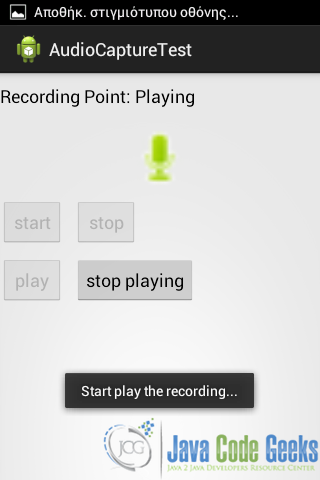
If you want to listen to the audio you just recorded, press “play” button. The TextView will change again and a Toast message will be enabled.
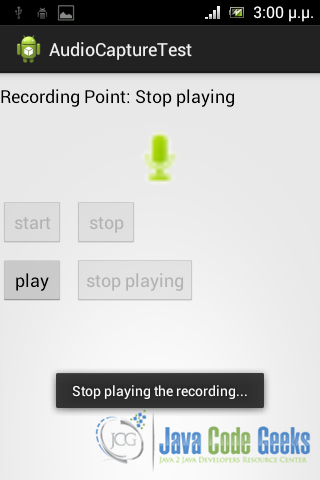
Finally, press “stop playing” button before the audio track ends. This move, will stop the audio and will enable “play” button again, in order to listen to it again.
Download Eclipse Project
This was an example of Audio Capture in Android. Download the Eclipse Project of this example: AudioCaptureTest.zip

Very nice and clean article.