The great power of mobile applications software, is that it gives us the opportunity to develop many ideas that use hardware features, in order to complete simple everyday tasks. One idea that is implemented in a very good way in the mobile applications world, is the use of maps and the location based applications, that help us in multiple ways in our every day life. So, the use of maps is very important in various mobile applications.
Google provides via Google Play Services a library for using maps. This library is the second attempt of Google Maps and this version provides significant improvements to the older API version. So, in this example, we are going to work with Google Maps v2 and see how we will import a fully working map Fragment in an Activity, as well as, we are going to work with basic Markers and CameraPosition on Google Map.
For our example will use the following tools in a Windows 64-bit or an OS X platform:
- JDK 1.7
- Eclipse 4.2 Juno
- Android SDK 4.4.2
Let’s take a closer look:
1. Create a Google Maps API key
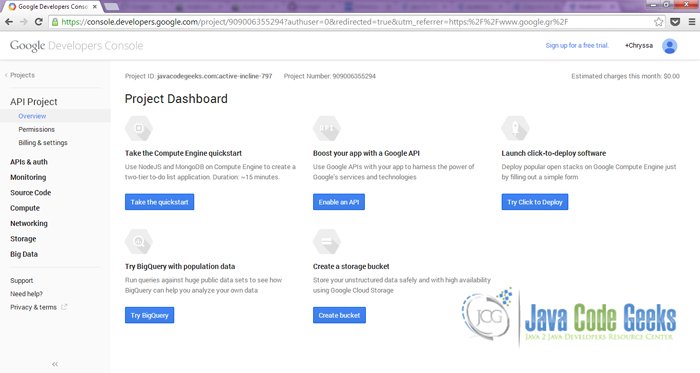
To begin with, we should create a new Google Maps API key and subscribe our application in order to grant access for our application to succesfully use Google Maps v2. In order to use this API, we will have to enter the Google API console portal. If you do not have an account, just create one or login with your current Google account.
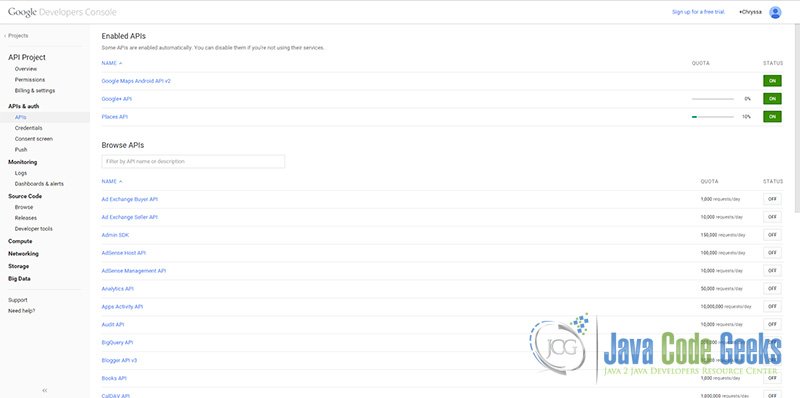
After we enter the console, we are going to see the full list, of all the APIs that Google serves. Now we can see the enabled APIs that this console user has.

After we enter the console,we are going to see the full list, of all the APIs that Google serves. The API that we are going to use, is the Google Maps v2 API. We click on the right service, and we turn it on. We have to accept the terms of Google Maps v2 API, by ticking the checkbox and by clicking the “Accept” button.
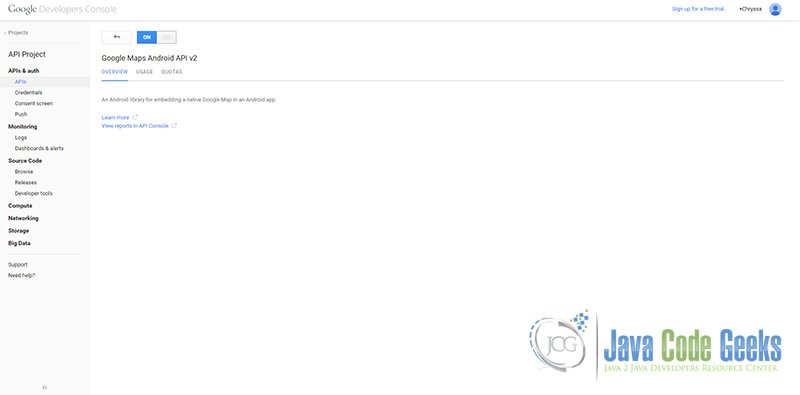
We should see the Google Maps v2 API enabled.
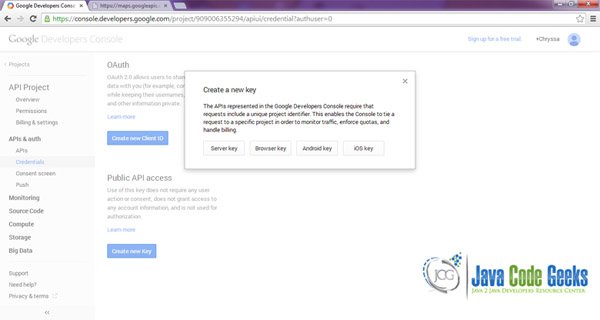
We are going to create a Public API access credential, in order to take the right response from the Google Places API search call. We only have to go to APIs&auth > Credentials tab.
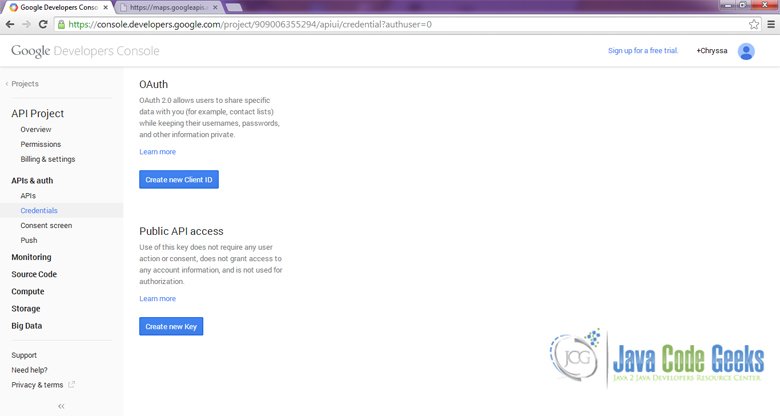
We click the “Create new Key” button, and select the “Android Key” in order to make a Key that will both work from our Android Application and from our browser. We are going to do this, exclusively for our example scope.
Tip
If you want to publish an application to the Google Play Store, that uses any of these Google API calls, you should create an Android key, by using the SHA-1 key of your original keystore (not the debug one) of the application to be exported.
We are going to do this, exclusively for our application scope. So we have to provide our application’s name and package. We have also to fill the SHA-1 cerificate fingerprint.
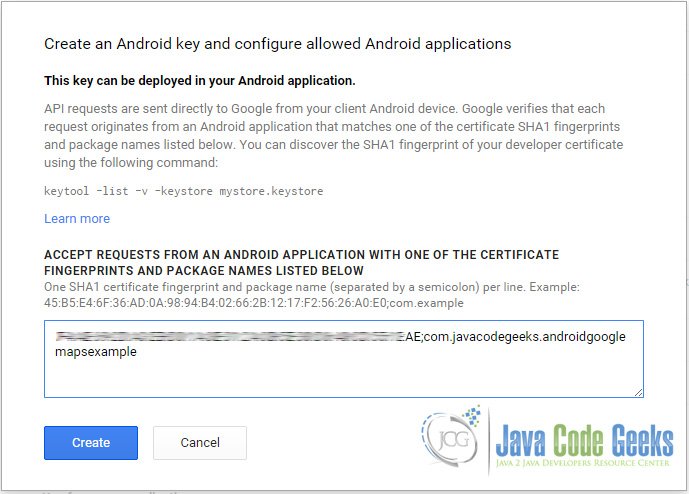
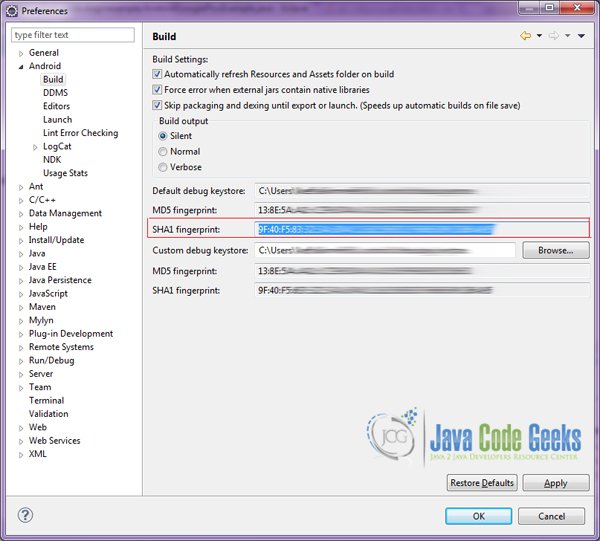
If you are not familiar on how to get your SHA-1 cerificate fingerprint, the easiest way to reach this certificate, is inside your Eclipse IDE, from Window > Preferences > Android > Build.
2. Create a New Android Application Project
Tip
You may skip project creation and jump directly to the beginning of the example below.
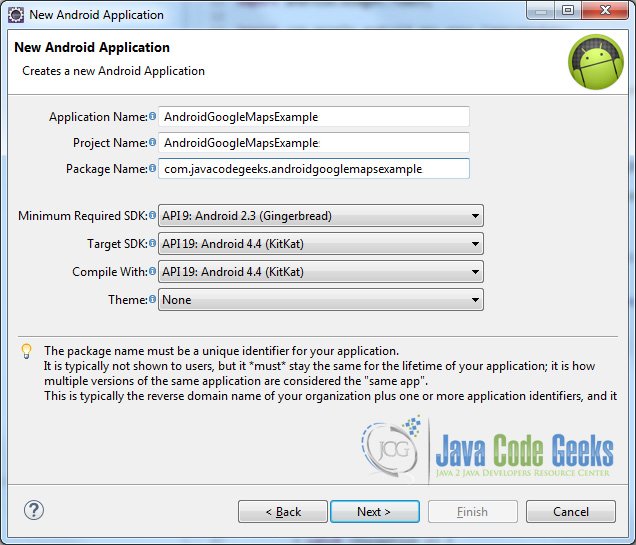
Open Eclipse IDE and go to File → New → Project → Android Application Project.
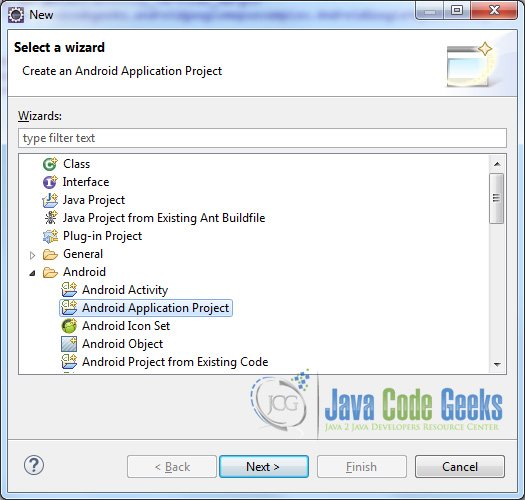
Specify the name of the application, the project and the package and then click Next.
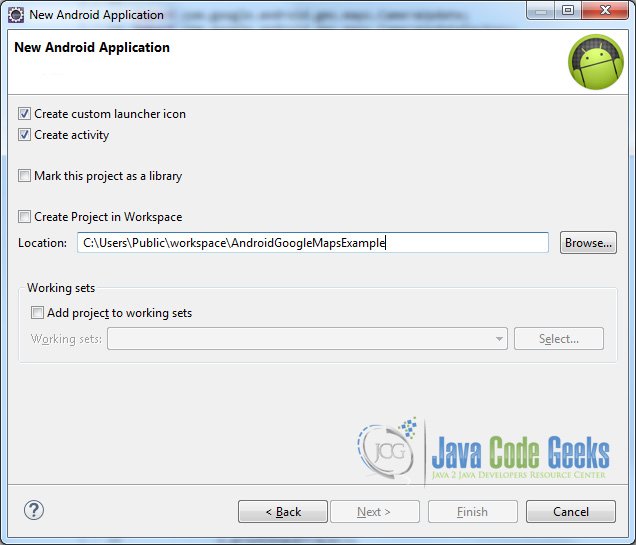
In the next window, the “Create Activity” option should be checked. The new created activity will be the main activity of your project. Then press Next button.
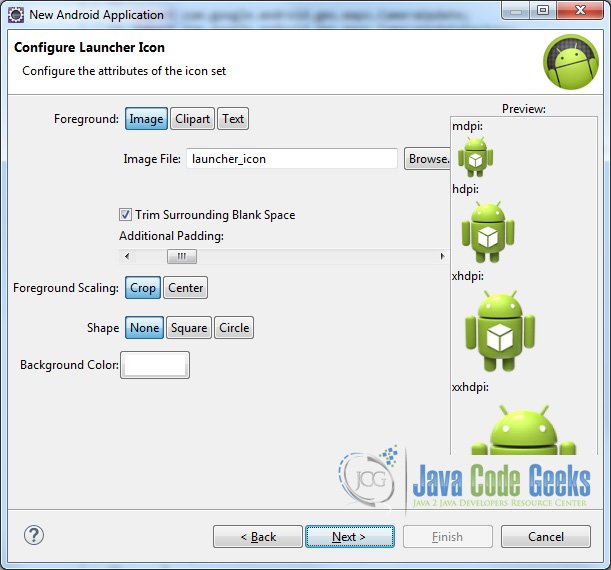
In “Configure Launcher Icon” window you should choose the icon you want to have in your app. We will use the default icon of android, so click Next.
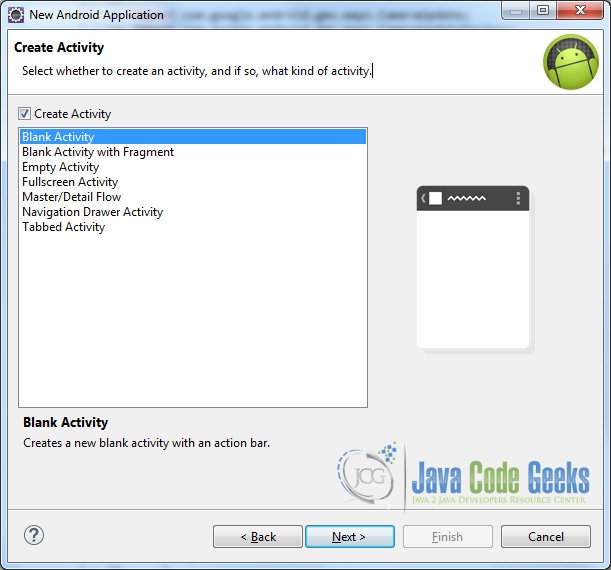
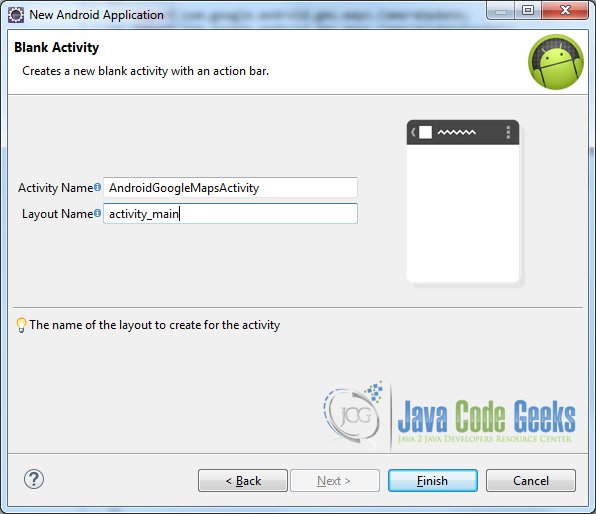
Select the “Blank Activity” option and press Next.
You have to specify a name for the new Activity and a name for the layout description of your app. The .xml file for the layout will automatically be created in the res/layout folder. It will also be created a fragment layout xml, that we are not going to use in this project and you can remove it if you want. Then press Finish.
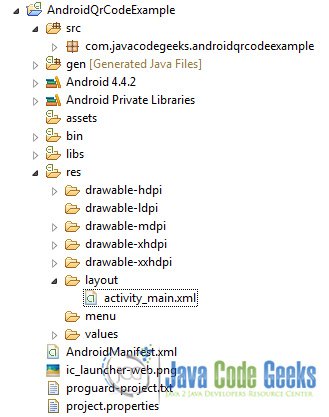
Here you can see, how will the structure of the project become when finished:
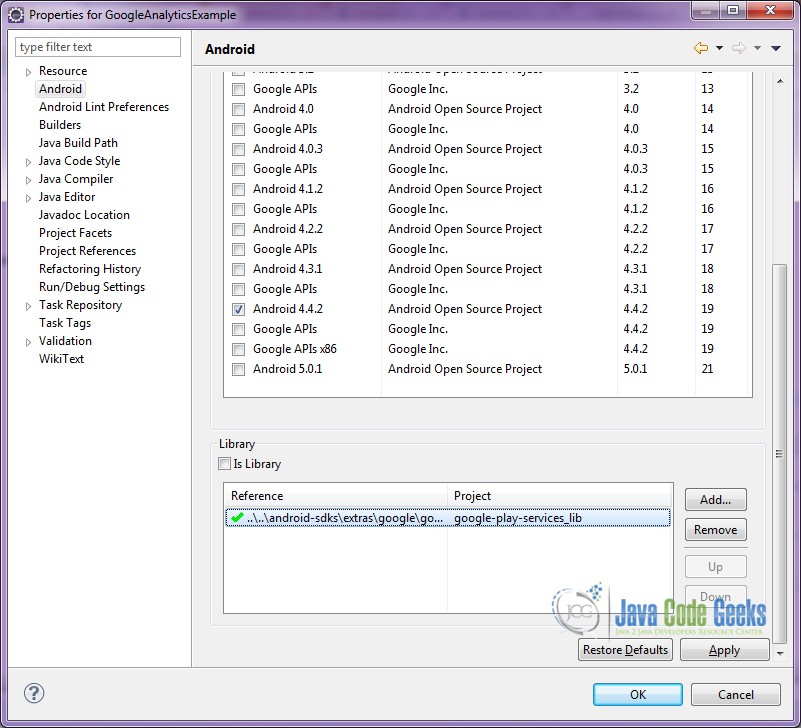
3. Importing Google Play Services in your project
In order to be able to work with Google Maps v2, we have to import the Google Play Services library in the project.
Tip
Google Maps v2 will work only on devices that do have Google Play Services. If your mobile device does not have Google Play Services you have to download and use the Google Play Services application from Google Play.
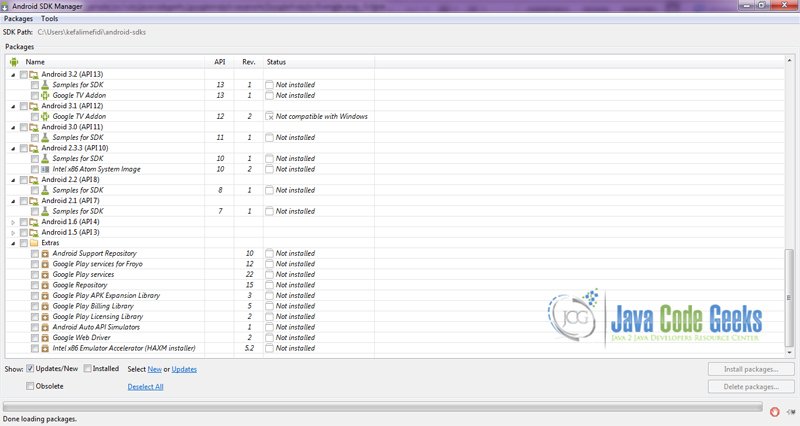
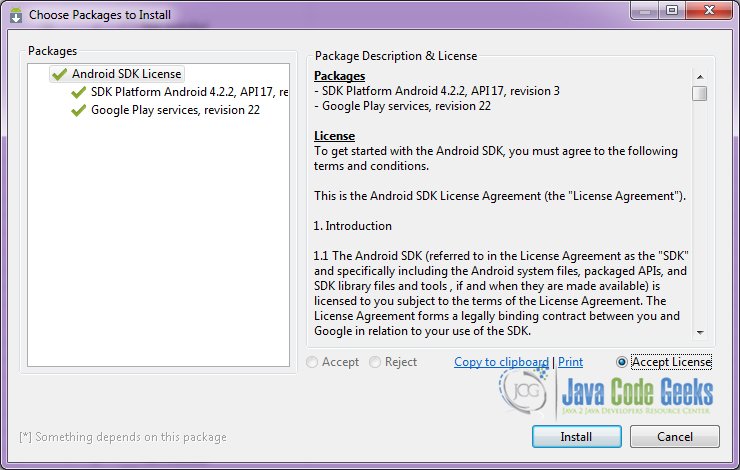
Download Google Play Services SDK. We have to launch Android SDK Manager and install the Google Play services package.

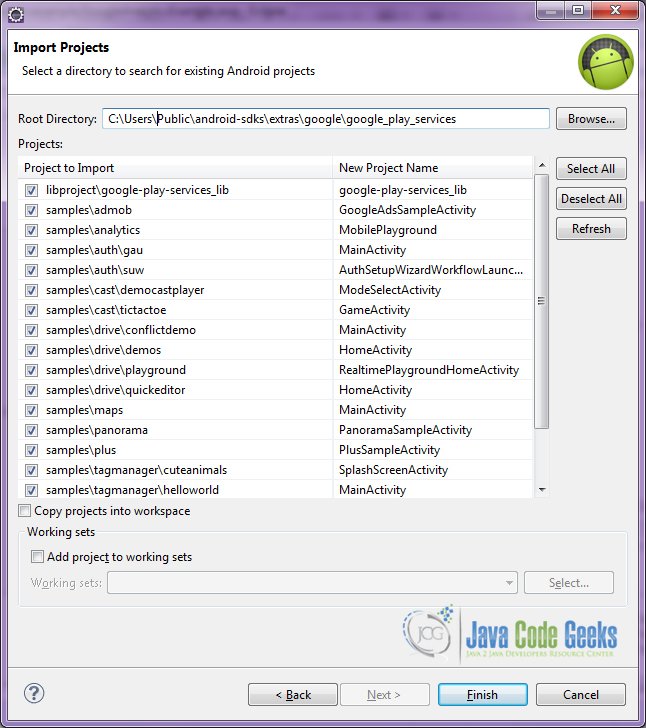
After downloading the Google Play Service package, just import this project into the main Android Google Maps v2 project.
3. Create the layout of the main Google Maps v2
We are going to make a simple layout xml for the AndroidGoogleMapsExample.java, that consists of a parent RelativeLayout and a child LinearLayout with vertical orientation, that includes a Google Map Fragment and a horizontal LinearLayout that includes 3 Buttons that lister to the corresponding actions.
Open res/layout/activity_main.xml, go to the respective xml tab and paste the following:
activity_main.xml
<RelativeLayout xmlns:android="http://schemas.android.com/apk/res/android"
    xmlns:tools="http://schemas.android.com/tools"
    android:layout_width="match_parent"
    android:layout_height="match_parent"
    tools:context="com.javacodegeeks.androidgooglemapsexample.AndroidGoogleMapsActivity" >

    <LinearLayout
        android:layout_width="fill_parent"
        android:layout_height="fill_parent"
        android:orientation="vertical" >

        <fragment
            android:id="@+id/mapFragment"
            android:layout_width="fill_parent"
            android:layout_height="0dp"
            android:layout_weight="1"
            class="com.google.android.gms.maps.SupportMapFragment" />

        <LinearLayout
            android:layout_width="fill_parent"
            android:layout_height="wrap_content"
            android:gravity="center"
            android:orientation="horizontal" >

            <Button
                android:id="@+id/button1"
                android:layout_width="0dp"
                android:layout_height="fill_parent"
                android:layout_weight="1"
                android:onClick="startAnimation"
                android:text="Animate Marker" />

            <Button
                android:id="@+id/button2"
                android:layout_width="0dp"
                android:layout_height="fill_parent"
                android:layout_weight="1"
                android:onClick="zoomToMarkers"
                android:text="Zoom to markers" />

            <Button
                android:id="@+id/button3"
                android:layout_width="0dp"
                android:layout_height="fill_parent"
                android:layout_weight="1"
                android:onClick="animateBack"
                android:text="Animate back to position" />
        </LinearLayout>
    </LinearLayout>

</RelativeLayout>
4. Create the source code of the main AndroidGoogleMapsActivity
Open src/com.javacodegeeks.androidgooglemapsexample/AndroidGoogleMapsActivity.java file and paste the code below.
AndroidGoogleMapsActivity.java
package com.javacodegeeks.androidgooglemapsexample;

import java.util.ArrayList;
import java.util.HashMap;
import java.util.Iterator;
import java.util.Map;
import java.util.Map.Entry;

import android.os.Bundle;
import android.support.v4.app.FragmentActivity;
import android.view.View;
import android.widget.Toast;

import com.google.android.gms.maps.CameraUpdate;
import com.google.android.gms.maps.CameraUpdateFactory;
import com.google.android.gms.maps.GoogleMap;
import com.google.android.gms.maps.SupportMapFragment;
import com.google.android.gms.maps.model.BitmapDescriptorFactory;
import com.google.android.gms.maps.model.LatLng;
import com.google.android.gms.maps.model.LatLngBounds;
import com.google.android.gms.maps.model.Marker;
import com.google.android.gms.maps.model.MarkerOptions;
import com.javacodegeeks.androidgooglemapsexample.LatLngInterpolator.LinearFixed;

public class AndroidGoogleMapsActivity extends FragmentActivity {

	// Google Map
	private GoogleMap googleMap;
	private HashMap markersHashMap;
	private Iterator<Entry> iter;
	private CameraUpdate cu;
	private CustomMarker customMarkerOne, customMarkerTwo;

	@Override
	protected void onCreate(Bundle savedInstanceState) {
		super.onCreate(savedInstanceState);
		setContentView(R.layout.activity_main);

		try {
			// Loading map
			initilizeMap();
			initializeUiSettings();
			initializeMapLocationSettings();
			initializeMapTraffic();
			initializeMapType();
			initializeMapViewSettings();

		} catch (Exception e) {
			e.printStackTrace();
		}
	}

	@Override
	protected void onResume() {
		super.onResume();
		// initilizeMap();
	}

	private void initilizeMap() {

		googleMap = ((SupportMapFragment) getSupportFragmentManager().findFragmentById(R.id.mapFragment)).getMap();

		// check if map is created successfully or not
		if (googleMap == null) {
			Toast.makeText(getApplicationContext(), "Sorry! unable to create maps", Toast.LENGTH_SHORT).show();
		}

		(findViewById(R.id.mapFragment)).getViewTreeObserver().addOnGlobalLayoutListener(
				new android.view.ViewTreeObserver.OnGlobalLayoutListener() {

					@Override
					public void onGlobalLayout() {
						if (android.os.Build.VERSION.SDK_INT >= 16) {
							(findViewById(R.id.mapFragment)).getViewTreeObserver().removeOnGlobalLayoutListener(this);
						} else {
							(findViewById(R.id.mapFragment)).getViewTreeObserver().removeGlobalOnLayoutListener(this);
						}
						setCustomMarkerOnePosition();
						setCustomMarkerTwoPosition();
					}
				});
	}

	void setCustomMarkerOnePosition() {
		customMarkerOne = new CustomMarker("markerOne", 40.7102747, -73.9945297);
		addMarker(customMarkerOne);
	}

	void setCustomMarkerTwoPosition() {
		customMarkerTwo = new CustomMarker("markerTwo", 43.7297251, -74.0675716);
		addMarker(customMarkerTwo);
	}

	public void startAnimation(View v) {
		animateMarker(customMarkerOne, new LatLng(40.0675716, 40.7297251));
	}

	public void zoomToMarkers(View v) {
		zoomAnimateLevelToFitMarkers(120);
	}

	public void animateBack(View v) {
		animateMarker(customMarkerOne, new LatLng(32.0675716, 27.7297251));
	}

	public void initializeUiSettings() {
		googleMap.getUiSettings().setCompassEnabled(true);
		googleMap.getUiSettings().setRotateGesturesEnabled(false);
		googleMap.getUiSettings().setTiltGesturesEnabled(true);
		googleMap.getUiSettings().setZoomControlsEnabled(true);
		googleMap.getUiSettings().setMyLocationButtonEnabled(true);
	}

	public void initializeMapLocationSettings() {
		googleMap.setMyLocationEnabled(true);
	}

	public void initializeMapTraffic() {
		googleMap.setTrafficEnabled(true);
	}

	public void initializeMapType() {
		googleMap.setMapType(GoogleMap.MAP_TYPE_NORMAL);
	}


	public void initializeMapViewSettings() {
		googleMap.setIndoorEnabled(true);
		googleMap.setBuildingsEnabled(false);
	}


	//this is method to help us set up a Marker that stores the Markers we want to plot on the map
	public void setUpMarkersHashMap() {
		if (markersHashMap == null) {
			markersHashMap = new HashMap();
		}
	}

	//this is method to help us add a Marker into the hashmap that stores the Markers
	public void addMarkerToHashMap(CustomMarker customMarker, Marker marker) {
		setUpMarkersHashMap();
		markersHashMap.put(customMarker, marker);
	}

	//this is method to help us find a Marker that is stored into the hashmap
	public Marker findMarker(CustomMarker customMarker) {
		iter = markersHashMap.entrySet().iterator();
		while (iter.hasNext()) {
			Map.Entry mEntry = (Map.Entry) iter.next();
			CustomMarker key = (CustomMarker) mEntry.getKey();
			if (customMarker.getCustomMarkerId().equals(key.getCustomMarkerId())) {
				Marker value = (Marker) mEntry.getValue();
				return value;
			}
		}
		return null;
	}


	//this is method to help us add a Marker to the map
	public void addMarker(CustomMarker customMarker) {
		MarkerOptions markerOption = new MarkerOptions().position(
				new LatLng(customMarker.getCustomMarkerLatitude(), customMarker.getCustomMarkerLongitude())).icon(
				BitmapDescriptorFactory.defaultMarker());

		Marker newMark = googleMap.addMarker(markerOption);
		addMarkerToHashMap(customMarker, newMark);
	}

	//this is method to help us remove a Marker
	public void removeMarker(CustomMarker customMarker) {
		if (markersHashMap != null) {
			if (findMarker(customMarker) != null) {
				findMarker(customMarker).remove();
				markersHashMap.remove(customMarker);
			}
		}
	}

	//this is method to help us fit the Markers into specific bounds for camera position
	public void zoomAnimateLevelToFitMarkers(int padding) {
		LatLngBounds.Builder b = new LatLngBounds.Builder();
		iter = markersHashMap.entrySet().iterator();

		while (iter.hasNext()) {
			Map.Entry mEntry = (Map.Entry) iter.next();
			CustomMarker key = (CustomMarker) mEntry.getKey();
			LatLng ll = new LatLng(key.getCustomMarkerLatitude(), key.getCustomMarkerLongitude());
			b.include(ll);
		}
		LatLngBounds bounds = b.build();

		// Change the padding as per needed
		cu = CameraUpdateFactory.newLatLngBounds(bounds, padding);
		googleMap.animateCamera(cu);
	}

	//this is method to help us move a Marker.
	public void moveMarker(CustomMarker customMarker, LatLng latlng) {
		if (findMarker(customMarker) != null) {
			findMarker(customMarker).setPosition(latlng);
			customMarker.setCustomMarkerLatitude(latlng.latitude);
			customMarker.setCustomMarkerLongitude(latlng.longitude);
		}
	}

	//this is method to animate the Marker. There are flavours for all Android versions
	public void animateMarker(CustomMarker customMarker, LatLng latlng) {
		if (findMarker(customMarker) != null) {

			LatLngInterpolator latlonInter = new LinearFixed();
			latlonInter.interpolate(20,
					new LatLng(customMarker.getCustomMarkerLatitude(), customMarker.getCustomMarkerLongitude()), latlng);

			customMarker.setCustomMarkerLatitude(latlng.latitude);
			customMarker.setCustomMarkerLongitude(latlng.longitude);

			if (android.os.Build.VERSION.SDK_INT >= 14) {
				MarkerAnimation.animateMarkerToICS(findMarker(customMarker), new LatLng(customMarker.getCustomMarkerLatitude(),
						customMarker.getCustomMarkerLongitude()), latlonInter);
			} else if (android.os.Build.VERSION.SDK_INT >= 11) {
				MarkerAnimation.animateMarkerToHC(findMarker(customMarker), new LatLng(customMarker.getCustomMarkerLatitude(),
						customMarker.getCustomMarkerLongitude()), latlonInter);
			} else {
				MarkerAnimation.animateMarkerToGB(findMarker(customMarker), new LatLng(customMarker.getCustomMarkerLatitude(),
						customMarker.getCustomMarkerLongitude()), latlonInter);
			}
		}
	}

}
Let’s take a closer look:
	private void initilizeMap() {

		googleMap = ((SupportMapFragment) getSupportFragmentManager().findFragmentById(R.id.mapFragment)).getMap();

		if (googleMap == null) {
			Toast.makeText(getApplicationContext(), "Sorry! unable to create maps", Toast.LENGTH_SHORT).show();
		}

		(findViewById(R.id.mapFragment)).getViewTreeObserver().addOnGlobalLayoutListener(
				new android.view.ViewTreeObserver.OnGlobalLayoutListener() {

					@Override
					public void onGlobalLayout() {
						// gets called after layout has been done but before display
						// so we can get the height then hide the view
						if (android.os.Build.VERSION.SDK_INT >= 16) {
							(findViewById(R.id.mapFragment)).getViewTreeObserver().removeOnGlobalLayoutListener(this);
						} else {
							(findViewById(R.id.mapFragment)).getViewTreeObserver().removeGlobalOnLayoutListener(this);
						}
						setCustomMarkerOnePosition();
						setCustomMarkerTwoPosition();
						// plotMarkers(markerList);
					}
				});
	}
With this method initilizeMap(), we set up our map in the Fragment. We use SupportMapFragment in order to make our map compatible with versions older than the Android version 4.0. Also by using the OnGlobalLayoutListener that is called after layout has been done, but before display, in order to avoid making any changes to the map, before the map is fully set up in our layout. Otherwise an error that says, that map is not ready yet, may appear.

	public void initializeUiSettings() {
		googleMap.getUiSettings().setCompassEnabled(true);
		googleMap.getUiSettings().setRotateGesturesEnabled(false);
		googleMap.getUiSettings().setTiltGesturesEnabled(true);
		googleMap.getUiSettings().setZoomControlsEnabled(true);
		googleMap.getUiSettings().setMyLocationButtonEnabled(true);
	}
With the method above, we initialize the map Ui settings, we set the compass, the gestures, the tilt gestures, the zoom controls and the button that centers us to our location spot.
	public void initializeMapLocationSettings() {
		googleMap.setMyLocationEnabled(true);
	}
With the method above, we enable the blue location spot, that shows our position on the map.
	public void initializeMapTraffic() {
		googleMap.setTrafficEnabled(true);
	}
With the method above, we enable the traffic lines layer on the map.
	public void initializeMapType() {
		googleMap.setMapType(GoogleMap.MAP_TYPE_NORMAL);
	}
With the method above, we set the Map Type to the GoogleMap.MAP_TYPE_NORMAL.
	public void initializeMapViewSettings() {
		googleMap.setIndoorEnabled(true);
		googleMap.setBuildingsEnabled(false);
	}
With the method above, we initialize the Map View settings, meaning the basic view map and buildings settings.
	public void zoomAnimateLevelToFitMarkers(int padding) {
		LatLngBounds.Builder b = new LatLngBounds.Builder();
		iter = markersHashMap.entrySet().iterator();

		while (iter.hasNext()) {
			Map.Entry mEntry = (Map.Entry) iter.next();
			CustomMarker key = (CustomMarker) mEntry.getKey();
			LatLng ll = new LatLng(key.getCustomMarkerLatitude(), key.getCustomMarkerLongitude());
			b.include(ll);
		}
		LatLngBounds bounds = b.build();

		// Change the padding as per needed
		cu = CameraUpdateFactory.newLatLngBounds(bounds, padding);
		googleMap.animateCamera(cu);
	}
With the above method, we want to zoom the map, at a zoom that we will be able to view every marker that we added on the map. So, this is method to help us fit an array of Markers into specific bounds for camera position.
5. Creating the source code of the helper class CustomMarker.java
We are going to create the CustomMarker.java in order to help us make multiple markers and store them in an array, so that we can use them in the AndroidGoogleMapsActivity. This is a helper class.
Open src/com.javacodegeeks.androidgooglemapsexample/CustomMarker.java file and paste the code below.
CustomMarker.java
package com.javacodegeeks.androidgooglemapsexample;

public class CustomMarker {

	private String id;
	private Double latitude;
	private Double longitude;

	public CustomMarker(String id, Double latitude, Double longitude) {

		this.id = id;
		this.latitude = latitude;
		this.longitude = longitude;
	}

	public CustomMarker() {
		this.id = "";
		this.latitude = 0.0;
		this.longitude = 0.0;
	}

	public String getCustomMarkerId() {
		return id;
	}

	public void setCustomMarkerId(String id) {
		this.id = id;
	}

	public Double getCustomMarkerLatitude() {
		return latitude;
	}

	public void setCustomMarkerLatitude(Double mLatitude) {
		this.latitude = mLatitude;
	}

	public Double getCustomMarkerLongitude() {
		return longitude;
	}

	public void setCustomMarkerLongitude(Double mLongitude) {
		this.longitude = mLongitude;
	}
}
As you can see below, we have added an id attribute in our helper class, in order to have an identifier for our CustomMarker. This will help us find the right marker that we have created and change, or remove it separately.
	public void setCustomMarkerId(String id) {
		this.id = id;
	}
6. Creating the source code of the helper class LatLngInterpolator.java
Open src/com.javacodegeeks.androidgooglemapsexample/LatLngInterpolator.java file and paste the code below.
LatLngInterpolator.java
package com.javacodegeeks.androidgooglemapsexample;

import static java.lang.Math.asin;
import static java.lang.Math.atan2;
import static java.lang.Math.cos;
import static java.lang.Math.pow;
import static java.lang.Math.sin;
import static java.lang.Math.sqrt;
import static java.lang.Math.toDegrees;
import static java.lang.Math.toRadians;

import com.google.android.gms.maps.model.LatLng;

public interface LatLngInterpolator {
	public LatLng interpolate(float fraction, LatLng a, LatLng b);

	public class Linear implements LatLngInterpolator {
		@Override
		public LatLng interpolate(float fraction, LatLng a, LatLng b) {
			double lat = (b.latitude - a.latitude) * fraction + a.latitude;
			double lng = (b.longitude - a.longitude) * fraction + a.longitude;
			return new LatLng(lat, lng);
		}
	}

	public class LinearFixed implements LatLngInterpolator {
		@Override
		public LatLng interpolate(float fraction, LatLng a, LatLng b) {
			double lat = (b.latitude - a.latitude) * fraction + a.latitude;
			double lngDelta = b.longitude - a.longitude;

			if (Math.abs(lngDelta) > 180) {
				lngDelta -= Math.signum(lngDelta) * 360;
			}
			double lng = lngDelta * fraction + a.longitude;
			return new LatLng(lat, lng);
		}
	}

	public class Spherical implements LatLngInterpolator {

		@Override
		public LatLng interpolate(float fraction, LatLng from, LatLng to) {

			double fromLat = toRadians(from.latitude);
			double fromLng = toRadians(from.longitude);
			double toLat = toRadians(to.latitude);
			double toLng = toRadians(to.longitude);
			double cosFromLat = cos(fromLat);
			double cosToLat = cos(toLat);

			double angle = computeAngleBetween(fromLat, fromLng, toLat, toLng);
			double sinAngle = sin(angle);
			if (sinAngle < 1E-6) {
				return from;
			}
			double a = sin((1 - fraction) * angle) / sinAngle;
			double b = sin(fraction * angle) / sinAngle;

			double x = a * cosFromLat * cos(fromLng) + b * cosToLat * cos(toLng);
			double y = a * cosFromLat * sin(fromLng) + b * cosToLat * sin(toLng);
			double z = a * sin(fromLat) + b * sin(toLat);

			double lat = atan2(z, sqrt(x * x + y * y));
			double lng = atan2(y, x);
			return new LatLng(toDegrees(lat), toDegrees(lng));
		}

		private double computeAngleBetween(double fromLat, double fromLng, double toLat, double toLng) {

			double dLat = fromLat - toLat;
			double dLng = fromLng - toLng;
			return 2 * asin(sqrt(pow(sin(dLat / 2), 2) + cos(fromLat) * cos(toLat) * pow(sin(dLng / 2), 2)));
		}
	}
}
7. Creating the source code of the helper class MarkerAnimation.java
Open src/com.javacodegeeks.androidgooglemapsexample/MarkerAnimation.java file and paste the code below.
MarkerAnimation.java
package com.javacodegeeks.androidgooglemapsexample;

import android.animation.ObjectAnimator;
import android.animation.TypeEvaluator;
import android.animation.ValueAnimator;
import android.annotation.TargetApi;
import android.os.Build;
import android.os.Handler;
import android.os.SystemClock;
import android.util.Property;
import android.view.animation.AccelerateDecelerateInterpolator;
import android.view.animation.Interpolator;

import com.google.android.gms.maps.model.LatLng;
import com.google.android.gms.maps.model.Marker;

public class MarkerAnimation {

	static void animateMarkerToGB(final Marker marker, final LatLng finalPosition, final LatLngInterpolator latLngInterpolator) {
		final LatLng startPosition = marker.getPosition();
		final Handler handler = new Handler();
		final long start = SystemClock.uptimeMillis();
		final Interpolator interpolator = new AccelerateDecelerateInterpolator();
		final float durationInMs = 500;

		handler.post(new Runnable() {
			long elapsed;
			float t;
			float v;

			@Override
			public void run() {
				// Calculate progress using interpolator
				elapsed = SystemClock.uptimeMillis() - start;
				t = elapsed / durationInMs;
				v = interpolator.getInterpolation(t);

				marker.setPosition(latLngInterpolator.interpolate(v, startPosition, finalPosition));

				if (t < 1) {

					handler.postDelayed(this, 16);
				}
			}
		});
	}

	@TargetApi(Build.VERSION_CODES.HONEYCOMB)
	static void animateMarkerToHC(final Marker marker, final LatLng finalPosition, final LatLngInterpolator latLngInterpolator) {
		final LatLng startPosition = marker.getPosition();

		ValueAnimator valueAnimator = new ValueAnimator();
		valueAnimator.addUpdateListener(new ValueAnimator.AnimatorUpdateListener() {
			@Override
			public void onAnimationUpdate(ValueAnimator animation) {
				float v = animation.getAnimatedFraction();
				LatLng newPosition = latLngInterpolator.interpolate(v, startPosition, finalPosition);
				marker.setPosition(newPosition);
			}
		});
		valueAnimator.setFloatValues(0, 1);
		valueAnimator.setDuration(500);
		valueAnimator.start();
	}

	@TargetApi(Build.VERSION_CODES.ICE_CREAM_SANDWICH)
	static void animateMarkerToICS(Marker marker, LatLng finalPosition, final LatLngInterpolator latLngInterpolator) {
		TypeEvaluator typeEvaluator = new TypeEvaluator() {
			@Override
			public LatLng evaluate(float fraction, LatLng startValue, LatLng endValue) {
				return latLngInterpolator.interpolate(fraction, startValue, endValue);
			}
		};
		Property property = Property.of(Marker.class, LatLng.class, "position");
		ObjectAnimator animator = ObjectAnimator.ofObject(marker, property, typeEvaluator, finalPosition);
		animator.setDuration(500);
		animator.start();
	}
}
8. Modifying the AndroidManifest.xml
In order to make our map visible, we should have access to the Internet. This must be specified in the manifest, so that, our application will be granted the permission to use the Internet connection, with INTERNET, ACCESS_NETWORK_STATE and WRITE_EXTERNAL_STORAGE. Also, a good idea is to give permission ACCESS_COARSE_LOCATION and ACCESS_FINE_LOCATION for better Location results.
Also, in order to add and use the Google Play Services library, we have to add the specific meta-data tag in our xml. Also, we should not forget the API KEY meta-data tag in our xml, in order to get permission to use Google Maps.
The AndroidManifest.xml of our project is simple and contains the permissions:
AndroidManifest.xml
<?xml version="1.0" encoding="utf-8"?>
<manifest xmlns:android="http://schemas.android.com/apk/res/android"
    package="com.javacodegeeks.androidgooglemapsexample"
    android:versionCode="1"
    android:versionName="1.0" >

    <uses-sdk
        android:minSdkVersion="9"
        android:targetSdkVersion="19" />

    <uses-feature
        android:glEsVersion="0x00020000"
        android:required="true" />

    <uses-permission android:name="android.permission.INTERNET" />
    <uses-permission android:name="android.permission.ACCESS_NETWORK_STATE" />
    <uses-permission android:name="android.permission.WRITE_EXTERNAL_STORAGE" />

    <!--
     The following two permissions are not required to use
     Google Maps Android API v2, but are recommended.
    -->
    <uses-permission android:name="android.permission.ACCESS_COARSE_LOCATION" />
    <uses-permission android:name="android.permission.ACCESS_FINE_LOCATION" />

    <application
        android:allowBackup="true"
        android:icon="@drawable/ic_launcher"
        android:label="@string/app_name" >
        <activity
            android:name=".AndroidGoogleMapsActivity"
            android:label="@string/app_name" >
            <intent-filter>
                <action android:name="android.intent.action.MAIN" />

                <category android:name="android.intent.category.LAUNCHER" />
            </intent-filter>
        </activity>

        <meta-data
            android:name="com.google.android.gms.version"
            android:value="@integer/google_play_services_version" />
        <meta-data
            android:name="com.google.android.maps.v2.API_KEY"
            android:value="AIzaSyAU9ShujnIg3IDQxtPrafaf7Q1qOvFVdwNmWc4" />
    </application>

</manifest>
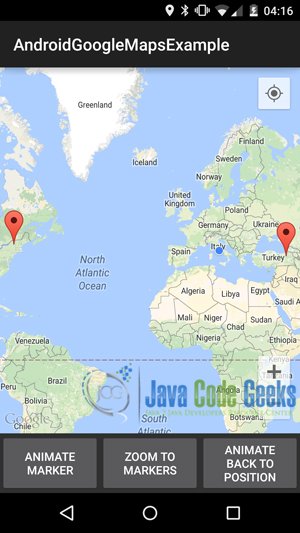
9. Build, compile and run
When we build, compile and run our project, the main AndroidGoogleMapsExample should look like this:


Download the Eclipse Project
This was the example of Android Google Maps v2.
You can download the full source code of this example here: AndroidGoogleMapsExample
References
Animating Markers by Chris Broadfoot on: http://gist.github.com/broady/6314689

I am getting errors after careful copying and pasting the code. Is Chryssa there or is this website no longer maintained?