Android Animation Example
Android give us the opportunity to add animations in our applications in order to achieve a better sense of the interface quality. There are many animation types but in this tutorial we are going to use tween animations, a widely used type on Views. Tween animation define simple transformations on the components of a View object and can perform series of them. Animations can be performed through either XML or android code, but XML file is recommended because it is more reusable.
In this example we will define animations through a sequence of XML instructions in order to show simple transformations (fade, zoom, rotation and motion). Also, we will learn how to use the AnimationListener class in animations.
For this tutorial, we will use the following tools in a Windows 64-bit platform:
- JDK 1.7
- Eclipse 4.2 Juno
- Android SDK 4.4
1. Create a New Android Application Project
Open Eclipse IDE and go to File → New → Project → Android Application Project.
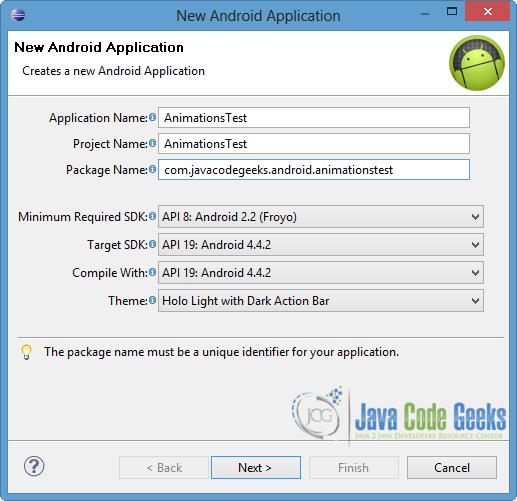
Specify the name of the application, the project and the package and then click Next.
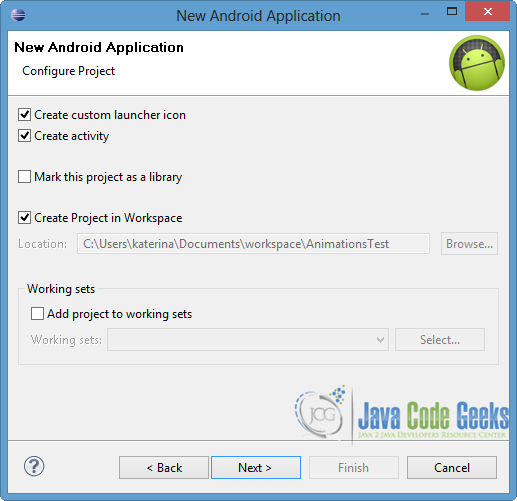
In the next window, the “Create Activity” option should be checked. The new created activity will be the main activity of your project. Then press Next button.
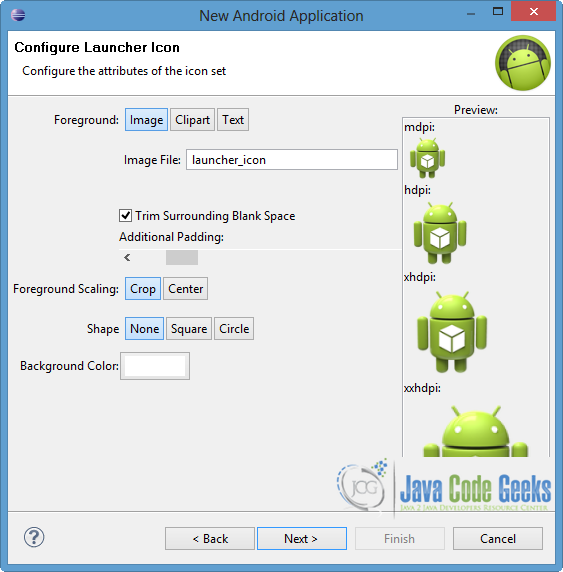
In “Configure Launcher Icon” window you should choose the icon you want to have in your app. We will use the default icon of android, so click Next.
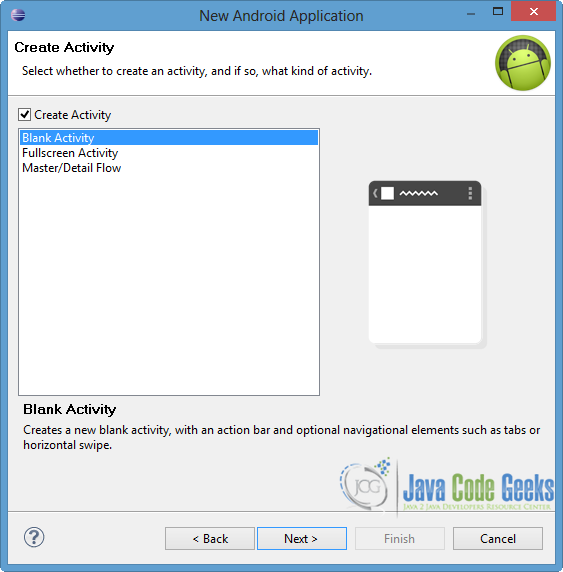
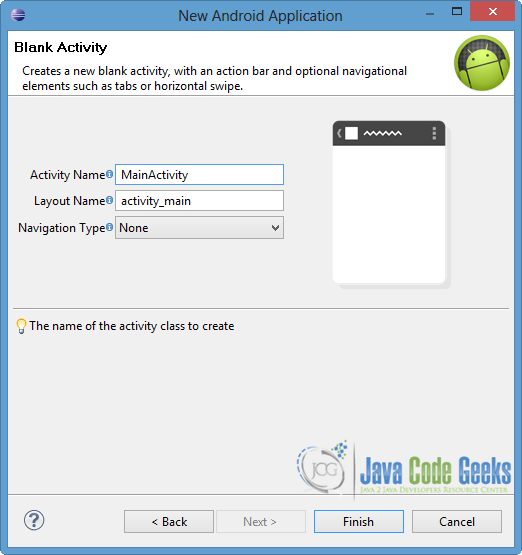
Select the “Blank Activity” option and press Next.
You have to specify a name for the new Activity and a name for the layout description of your app. The .xml file for the layout will automatically be created in the res/layout folder. Then press Finish.
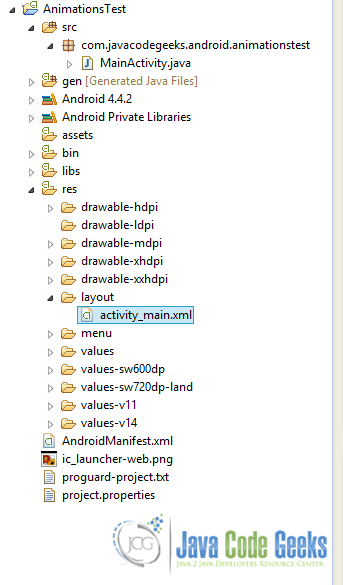
You can see the structure of the project in the next picture.
2. Create the layout of the Main Activity
As we mentioned, we want to show four simple transformations, so for each one we will define a Button that enables a specific animation. Also we will add two different contents of View, more specifically a TextView and an ImageView, in which the transformations will be performed.
Open res/layout/activity_main.xml, go to the respective xml tab and paste the following.
activity_main.xml:
<RelativeLayout xmlns:android="http://schemas.android.com/apk/res/android"
   xmlns:tools="http://schemas.android.com/tools"
   android:layout_width="match_parent"
   android:layout_height="match_parent"
   tools:context=".MainActivity" >

    <Button
        android:id="@+id/fade"
        android:layout_width="wrap_content"
        android:layout_height="wrap_content"
        android:layout_alignParentLeft="true"
        android:layout_alignParentTop="true"
        android:layout_marginLeft="20dp"
        android:layout_marginTop="20dp"
        android:text="Fade In" />

    <Button
        android:id="@+id/rotate"
        android:layout_width="wrap_content"
        android:layout_height="wrap_content"
        android:layout_alignParentLeft="true"
        android:layout_below="@+id/fade"
        android:layout_marginLeft="20dp"
        android:text="Rotate" />

     <Button
        android:id="@+id/move"
        android:layout_width="wrap_content"
        android:layout_height="wrap_content"
        android:layout_alignParentRight="true"
        android:layout_below="@+id/zoom"
        android:layout_marginRight="20dp"
        android:text="Move-Intent" />

     <Button
         android:id="@+id/zoom"
         android:layout_width="wrap_content"
         android:layout_height="wrap_content"
         android:layout_above="@+id/rotate"
         android:layout_alignLeft="@+id/move"
         android:text="Zoom +/-" />

     <TextView
         android:id="@+id/text"
         android:layout_width="wrap_content"
	     android:layout_height="wrap_content"
	     android:layout_alignParentTop="true"
	     android:layout_centerHorizontal="true"
	     android:layout_marginTop="150dp"
	     android:textAppearance="?android:attr/textAppearanceLarge"
	     android:textStyle="bold"
	     android:text="Fade In Text ..." />

     <ImageView
	     android:id="@+id/image"
	     android:layout_width="wrap_content"
	     android:layout_height="wrap_content"
	     android:layout_alignParentTop="true"
	     android:layout_centerHorizontal="true"
	     android:layout_marginTop="200dp"
	     android:src="@drawable/ic_launcher" />

</RelativeLayout>
3. Create the xml for the animations
We should create XML files which consist of XML notations, in order to specify animations. Each xml file should located into the anim folder of the res directory.
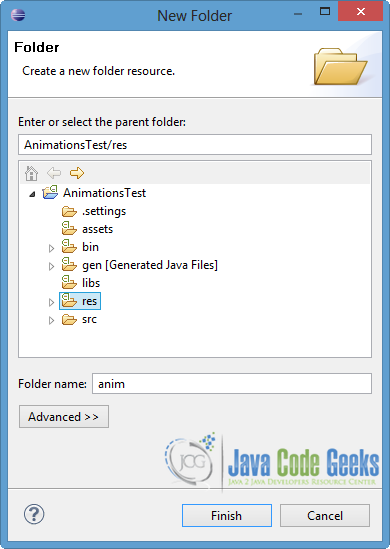
For this reason right click on res folder → New → Folder. Then specify the name and choose the res directory as the parent folder, like in the image below.
For every transformation we will create a separate XML file. Firstly, we will create the fade.xml file for defining fade in at an animation, so <alpha> tag is necessary. The attributes android:fromAlpha and android:toAlpha can take values between 0.0 and 1.0 and android:duration defines the time for an animation to be completed.
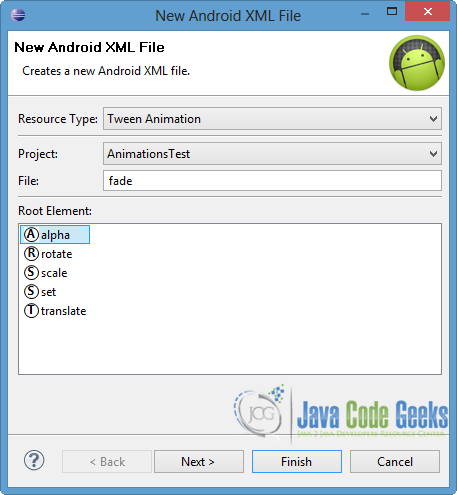
Right click on res/anim → New → Android XML File. Specify the name and choose alpha as root element.
Now go to res/anim/fade.xml file, open it and paste the following.
fade.xml:
<?xml version="1.0" encoding="utf-8"?>

   <alpha xmlns:android="http://schemas.android.com/apk/res/android"
   		android:interpolator="@android:anim/accelerate_interpolator"
      	android:fromAlpha="0.0"
      	android:toAlpha="1.0"
      	android:duration="3000" >
   </alpha>
Now, we will create the xml file for the zoom. Right click on res/anim → New → Android XML File. Specify the name as zoom and choose set as root element. Then, open res/anim/zoom.xml file and paste the following code.
zoom.xml:
<?xml version="1.0" encoding="utf-8"?>
<set xmlns:android="http://schemas.android.com/apk/res/android">

   <scale xmlns:android="http://schemas.android.com/apk/res/android"
   		android:fromXScale="0.5"
      	android:toXScale="2.5"
      	android:fromYScale="0.5"
      	android:toYScale="2.5"
      	android:duration="3000"
      	android:pivotX="50%"
      	android:pivotY="50%" >

   </scale>


   <scale xmlns:android="http://schemas.android.com/apk/res/android"
      	android:startOffset="5000"
      	android:fromXScale="2.5"
      	android:toXScale="0.5"
      	android:fromYScale="2.5"
      	android:toYScale="0.5"
      	android:duration="3000"
      	android:pivotX="50%"
      	android:pivotY="50%" >

   </scale>

</set>
As you can see in the code above, we use two XML notations, so we have to use <set> tag. In this code we try to zoom in fist, and then to zoom out. For this reason <scale> tag is used in both situations. We set pivotX="50%" and pivotY="50%" because we want to have zoom from the center of the View object. Also, android:fromXScale, android:fromYScale, android:toXScale and android:toYScale elements define the start and the end size of the object, when we zoom in and out respectively.
For rotate transformation, <rotate> tag is used. We can specify the type of the rotation (clockwise or anti-clockwise) and the rotation angles by setting the android:fromDegrees and android:toDegrees attributes with the appropriate values. For clockwise rotation we should set positive values to android:fromDegrees and android:toDegrees attributes, while the opposite happens for anti-clockwise rotation.
In the same way, right click on res/anim → New → Android XML File. Specify the name as rotate and choose set as root element. Then, open res/anim/rotate.xml file and paste the following code.
rotate.xml:
<?xml version="1.0" encoding="utf-8"?>
<set xmlns:android="http://schemas.android.com/apk/res/android">

   <rotate xmlns:android="http://schemas.android.com/apk/res/android"
   		android:fromDegrees="0"
      	android:toDegrees="360"
      	android:pivotX="50%"
      	android:pivotY="50%"
      	android:duration="1000" >

   </rotate>

   <rotate xmlns:android="http://schemas.android.com/apk/res/android"
      	android:startOffset="1500"
      	android:fromDegrees="360"
      	android:toDegrees="0"
      	android:pivotX="50%"
      	android:pivotY="50%"
      	android:duration="1000" >

   </rotate>

</set>
Finally, <translate> tag is used for vertical and/or horizontal motion. In our example we use android:fromXDelta and android:toXDelta attributes to define the offset in percentage (%p). The respective attributes (android:fromYDelta and android:toYDelta) exist for a vertical movement.
In the same way, right click on res/anim → New → Android XML File. Specify the name as move and choose set as root element. Then, open res/anim/move.xml file and paste the following.
move.xml:
<?xml version="1.0" encoding="utf-8"?>
<set xmlns:android="http://schemas.android.com/apk/res/android"
  	android:interpolator="@android:anim/accelerate_interpolator" >

    <translate  xmlns:android="http://schemas.android.com/apk/res/android"
    	android:fromXDelta="-75%p"
        android:toXDelta="75%p"
        android:duration="2000" >

    </translate>

     <translate  xmlns:android="http://schemas.android.com/apk/res/android"
     	android:startOffset="800"
        android:fromXDelta="75%p"
        android:toXDelta="-75%p"
        android:duration="2000" >

    </translate>


</set>
It is very important to mention that we can make more complex animations by using a sequence of the above tags-transformations by setting the attributes with the appropriate values. To have this result we must use the <set> tag.
4. Code the Main Activity
In our example, we are going to enable each animation which is defined in the above XML files, by pressing the appropriate Button. Also, we will use a different approach for motion animation. We are going to use an explicit Intent which implements the AnimationListener class.
In order to perform animation, the xml animation should be loaded. For this reason loadAnimation() of the AnimationUtils class is called. The loadAnimation() method returns an Animation object. Then, startAnimation() method is called in order to start the instance of that animation object.
Open src/com.javacodegeeks.android.animationstest/MainActivity.java file and paste the code below.
MainActivity.java:
package com.javacodegeeks.android.animationstest;

import android.os.Bundle;
import android.app.Activity;
import android.content.Intent;
import android.view.View;
import android.view.View.OnClickListener;
import android.view.animation.Animation;
import android.view.animation.AnimationUtils;
import android.widget.Button;
import android.widget.ImageView;
import android.widget.TextView;
import android.widget.Toast;

public class MainActivity extends Activity {

	private Button fade;
	private Button zoom;
	private Button moveIntent;
	private Button rotate;
	private TextView mytext;
	private ImageView myimage;

   @Override
   protected void onCreate(Bundle savedInstanceState) {
      super.onCreate(savedInstanceState);
      setContentView(R.layout.activity_main);

      mytext = (TextView) findViewById(R.id.text);
      myimage = (ImageView) findViewById(R.id.image);

      fade = (Button) findViewById(R.id.fade);
      fade.setOnClickListener(new OnClickListener() {

		@Override
		public void onClick(View v) {
			// TODO Auto-generated method stub
			fadeAnimation(v);
		}
      });

      zoom = (Button) findViewById(R.id.zoom);
      zoom.setOnClickListener(new OnClickListener() {

		@Override
		public void onClick(View v) {
			// TODO Auto-generated method stub
			zoomAnimation(v);
		}
      });

      moveIntent = (Button) findViewById(R.id.move);
      moveIntent.setOnClickListener(new OnClickListener() {

		@Override
		public void onClick(View v) {
			// TODO Auto-generated method stub
			moveAnimation(v);
		}
      });

      rotate = (Button) findViewById(R.id.rotate);
      rotate.setOnClickListener(new OnClickListener() {

		@Override
		public void onClick(View v) {
			// TODO Auto-generated method stub
			rotateAnimation(v);
		}
      });
   }

   private void fadeAnimation(View view) {
	   Animation animation = AnimationUtils.loadAnimation(getApplicationContext(), R.anim.fade);
       mytext.startAnimation(animation);
   }

   private void zoomAnimation(View view) {
	   Animation animation = AnimationUtils.loadAnimation(getApplicationContext(), R.anim.zoom);
       myimage.startAnimation(animation);
   }

   private void rotateAnimation(View view) {
	   Animation animation = AnimationUtils.loadAnimation(getApplicationContext(), R.anim.rotate);
       myimage.startAnimation(animation);
   }

   private void moveAnimation(View view) {
	   try{
	   		Intent intent = new Intent(this, MoveActivity.class);
	   		startActivity(intent);
	   }catch(Exception e) {
		   Toast.makeText(getApplicationContext(), "Error with the Intent",
				   Toast.LENGTH_SHORT).show();
		   e.printStackTrace();
	   }
   }

}
5. Code the explicit Intent with animation listener
This Activity will implement the AnimationListener, which receives notifications when animation events occur. When AnimationListener is used, we should override onAnimationStart(), onAnimationEnd() and onAnimationRepeat() functions. It is important to mention that AnimationListener is optional, because we can perform an animation by using the above way that we showned.
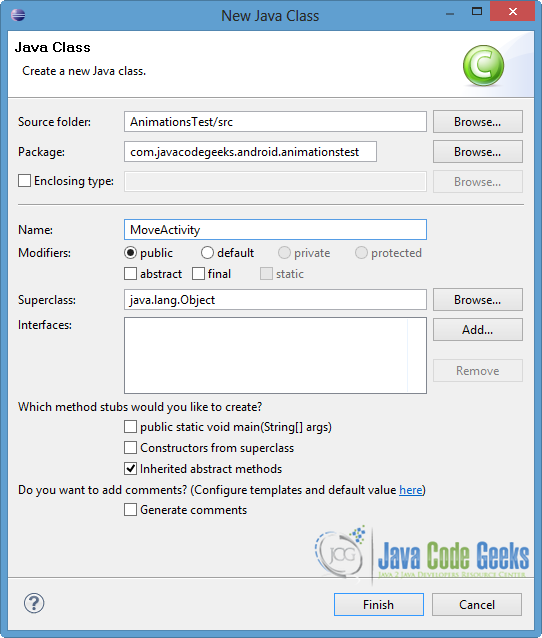
Right click on src/com.javacodegeeks.android.animationstest package → New → Class and then specify the name and the new file, as shown in the next picture.
Now open src/com.javacodegeeks.android.animationstest/MoveActivity.java file and paste the following.
MoveActivity.java:
package com.javacodegeeks.android.animationstest;

import android.app.Activity;
import android.os.Bundle;
import android.view.View;
import android.view.View.OnClickListener;
import android.view.animation.Animation;
import android.view.animation.Animation.AnimationListener;
import android.view.animation.AnimationUtils;
import android.widget.Button;
import android.widget.TextView;
import android.widget.Toast;

public class MoveActivity extends Activity implements AnimationListener {

	private TextView movetxt;
	private Button startBtn;

	private Animation animation;

	protected void onCreate(Bundle savedInstanceState) {
        // TODO Auto-generated method stub
        super.onCreate(savedInstanceState);
        setContentView(R.layout.move_view);

        // load the animation
        animation = AnimationUtils.loadAnimation(getApplicationContext(), R.anim.move);

        // set animation listener
        animation.setAnimationListener(this);

        movetxt = (TextView) findViewById(R.id.moveText);
        startBtn = (Button) findViewById(R.id.start);
        startBtn.setOnClickListener(new OnClickListener() {

            @Override
            public void onClick(View v) {
                // start the animation
                movetxt.startAnimation(animation);
            }
        });

    }
	@Override
	public void onAnimationEnd(Animation an) {
		// when animation ends
		 if (an == animation) {
	            Toast.makeText(getApplicationContext(), "Animation Stopped",
	                    Toast.LENGTH_SHORT).show();
	     }
	}

	@Override
	public void onAnimationRepeat(Animation an) {
		// if the animation repeats
		if (an == animation) {
            Toast.makeText(getApplicationContext(), "Animation Repeated",
                    Toast.LENGTH_SHORT).show();
		}
	}

	@Override
	public void onAnimationStart(Animation an) {
		// when the animation is started
		if (an == animation) {
            Toast.makeText(getApplicationContext(), "Animation Started",
                    Toast.LENGTH_SHORT).show();
		}
	}

}
6. Create the layout of the explicit Intent
The interface of the MoveActivity will be very simple. We want to have a Button, which indicates the start of the animation, and a TextView that will be for the performance of the animation.
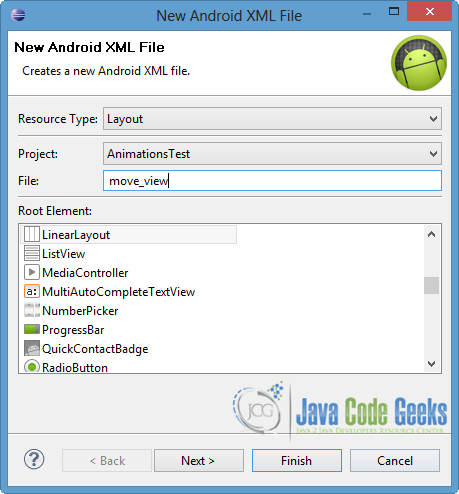
To create the file for the layout, right click on res/layout → New → Android XML File. Specify the name as move_view and choose LinearLayout as the root element.
Open res/layout/move_view.xml, go to the xml tab and paste the following.
move_view.xml:
<?xml version="1.0" encoding="utf-8"?>
<LinearLayout xmlns:android="http://schemas.android.com/apk/res/android"
    android:layout_width="match_parent"
    android:layout_height="match_parent"
    android:orientation="vertical" >

     <TextView
         android:id="@+id/moveText"
         android:layout_width="wrap_content"
         android:layout_height="wrap_content"
         android:layout_marginTop="20dp"
         android:text="Javacodegeeks"
         android:textAppearance="?android:attr/textAppearanceLarge"
         android:textStyle="bold" />

     <Button
         android:id="@+id/start"
         android:layout_width="wrap_content"
         android:layout_height="wrap_content"
         android:layout_marginTop="20dp"
         android:text="Start the animation" />

</LinearLayout>
7. Define the new Activity
Now we have to define the MoveActivity in our AndroidManifest file.
Open AndroidManifest.xml file and go to the respective xml tab. Then paste the code below.
AndroidManifest.xml:
<?xml version="1.0" encoding="utf-8"?>
<manifest xmlns:android="http://schemas.android.com/apk/res/android"
    package="com.javacodegeeks.android.animationstest"
    android:versionCode="1"
    android:versionName="1.0" >

    <uses-sdk
        android:minSdkVersion="8"
        android:targetSdkVersion="19" />

    <application
        android:allowBackup="true"
        android:icon="@drawable/ic_launcher"
        android:label="@string/app_name"
        android:theme="@style/AppTheme" >
        <activity
            android:name="com.javacodegeeks.android.animationstest.MainActivity"
            android:label="@string/app_name" >
            <intent-filter>
                <action android:name="android.intent.action.MAIN" />

                <category android:name="android.intent.category.LAUNCHER" />
            </intent-filter>
        </activity>
        <activity
             android:name="com.javacodegeeks.android.animationstest.MoveActivity"
            android:label="AnimationsTest: Move-Intent" >

        </activity>
    </application>

</manifest>
8. Run the application
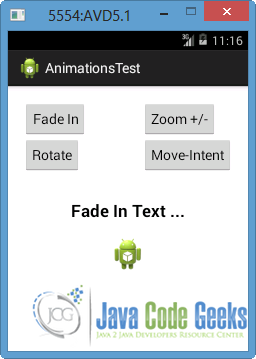
To run our application, right click on our project → Run as → Android Application. The AVD will appear with the app loaded, as you can see in the picture below.
To see how this application works, we will show some instances of the animations.
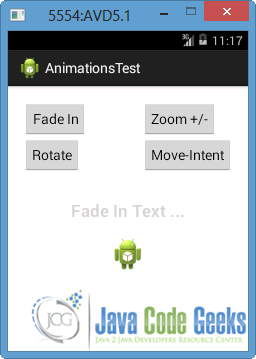
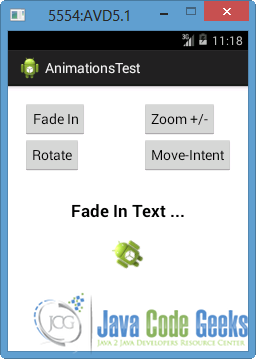
Lets press “Fade In” button. As you can see in the next image, the TextView “Fade In Text…” is fading in.
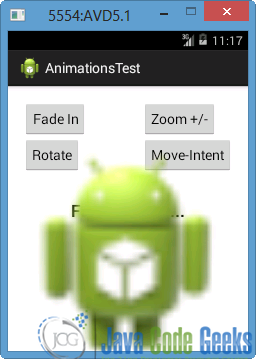
If we press the “Zoom +/-” button, the image will zoom in and then it will zoom out until it reaches it’s original size.
In parallel if we click the “Rotate” button, the image will start rotate clockwise and then anti-clockwise. In the next picture you can see an instance of the rotation of the ImageView.
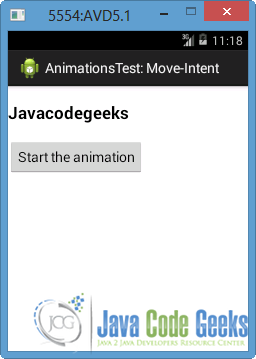
Now lets press “Move-Intent” button. The MoveActivity of the explicit Intent will launch.
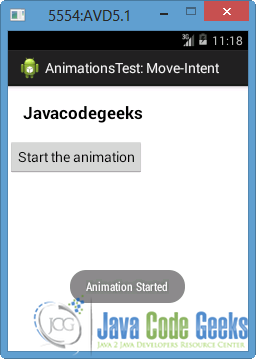
If we press the “Start Animation” button, the text will begin to move horizontally and the onAnimationStart() method will be called.
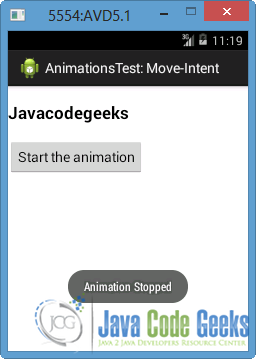
When the motion of the text stops, the onAnimationEnd() method is called by the AnimationListener, as you can see in the image below.
Download Eclipse Project
This was an example of Animation in Android. Download the Eclipse Project of this example: AnimationsTest.zip



Thanks a lot! It helped me to finally get a grip with animations, it never worked before ;-)