What is Selenium WebDriver
In this article, we are going to explain what is Selenium WebDriver.
WebDriver is a remote control interface that enables introspection and control of user agents. It provides a platform- and language-neutral wire protocol as a way for out-of-process programs to remotely instruct the behavior of web browsers.
1. Introduction
Selenium WebDriver is a W3C Recommendation
- WebDriver is designed as a simple and concise programming interface.
- WebDriver is a compact object-oriented API.
- It controls the browser effectively.
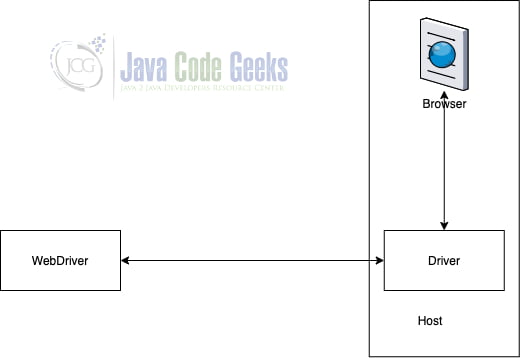
WebDriver talks to a browser through a driver. Communication is two-way: WebDriver passes commands to the browser through the driver and receives information back via the same route.
The driver is specific to the browser, such as ChromeDriver for Google’s Chrome/Chromium, GeckoDriver for Mozilla’s Firefox, etc. The driver runs on the same system as the browser. This may, or may not be, the same system where the tests themselves are executing.

The above is the first setup where the WebDriver is connecting to Driver in the host machine to control the browser. This is the simplest form of setup.

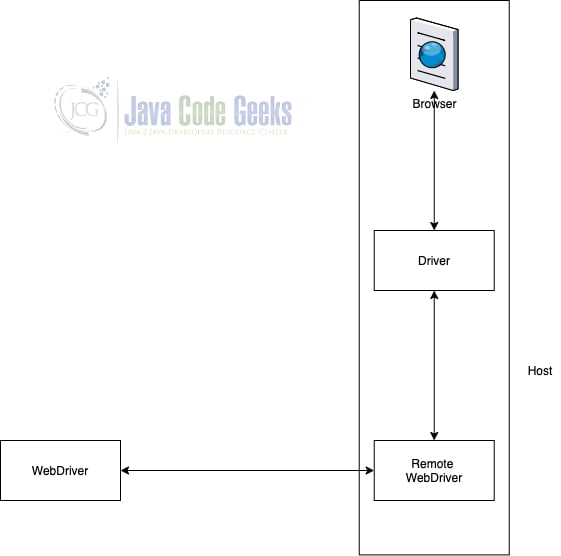
Communication to the browser can be remote communication through Selenium Server or RemoteWebDriver. RemoteWebDriver runs on the same system as the driver and the browser.

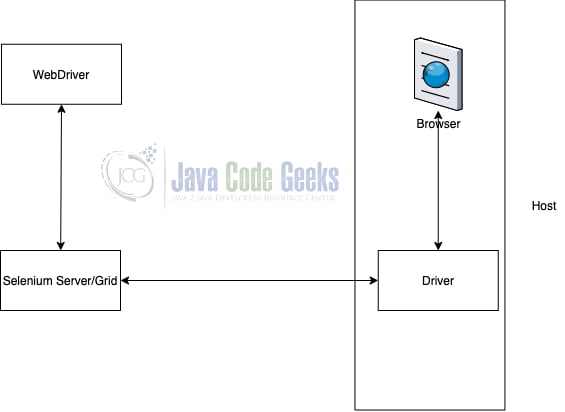
Remote communication can also take place using Selenium Server or Selenium Grid which talks to the driver in the host machine. Selenium Grid allows us to run tests in parallel on multiple machines, and to manage different browser versions and browser configurations centrally.
To reiterate, WebDriver’s aim is to emulate a real user’s interaction with the browser as closely as possible.
2. Project setup
We will look at how to create a simple selenium project with Java through this Selenium tutorial. Maven is used to adding the dependencies needed for the project. We will explore the maven file first to understand the setup for this project.pom.xml
pom.xml
<project xmlns="http://maven.apache.org/POM/4.0.0"
    xmlns:xsi="http://www.w3.org/2001/XMLSchema-instance"
    xsi:schemaLocation="http://maven.apache.org/POM/4.0.0 https://maven.apache.org/xsd/maven-4.0.0.xsd">
    <modelVersion>4.0.0</modelVersion>
    <groupId>com.jcg</groupId>
    <artifactId>selenium</artifactId>
    <version>0.0.1-SNAPSHOT</version>
    <name>Selenium</name>
    <dependencies>
        <dependency>
            <groupId>org.junit.jupiter</groupId>
            <artifactId>junit-jupiter-api</artifactId>
            <version>5.6.2</version>
            <scope>test</scope>
        </dependency>
        <dependency>
            <groupId>org.seleniumhq.selenium</groupId>
            <artifactId>selenium-java</artifactId>
            <version>3.141.59</version>
            <scope>test</scope>
        </dependency>
    </dependencies>
</project>
groupIdis used to indicate the umbrella under which this project belongs.artifactIdrefers to the name provided for the artifact for consumption by other projects.- the name refers to the project name.
- dependencies contain all the dependencies for this project.
- Here, selenium is specified as a dependency for the project with a version number of 3.141.59
- The only other dependency for our project is JUnit which is specified with a version number of 5.6.2
Maven downloads all the dependencies mentioned from the maven repository available. The next step is to download the chrome driver to execute the test case using Selenium. In the case of Firefox, download the web driver for Firefox. The latest Chrome version as on date is 83 and hence the corresponding link for web driver is available here. After downloading the chrome driver, extract the chromedriver.exe file and add it to the root of the project.
3. Selenium Demo
We will use selenium to test the google.com website. Create the file SeleniumTest.java under the src/test/java folder following convention for maven project
SeleniumTest.java
public class SeleniumTest {

    WebDriver webDriver;

    @BeforeAll
    public static void setUp() {
        System.setProperty("webdriver.chrome.driver", "chromedriver.exe");
    }

    @BeforeEach
    public void initializeDriver() {
        ChromeOptions options = new ChromeOptions();
        webDriver = new ChromeDriver(options);
    }

        @AfterEach
    public void closeDriver() {
        webDriver.quit();
    }
}
@BeforeAllruns before any of the test cases are run. We set the chrome driver executable path to be available in the execution path.@BeforeEachruns before every test case. We initialize the chrome driver with default chrome options.@AfterEachruns after every test case. We close the web driver to ensure the browser instance is closed. For each test case, a new browser window is opened and this closes the instance after the test case finishes.
@Test
    public void testCase1() {
        webDriver.navigate().to("http://www.google.com");
        assertEquals("Google", webDriver.getTitle(), "Title is not google");
    }
This is the first test case of the application. It fires the Chrome browser to open google.com and checks if the title of the opened web page is Google. If not, the test case fails and error is thrown.
@Test
    public void testCase2() {
        webDriver.navigate().to("http://www.google.com");
        webDriver.findElement(By.cssSelector("input[type=submit")).click();
    }
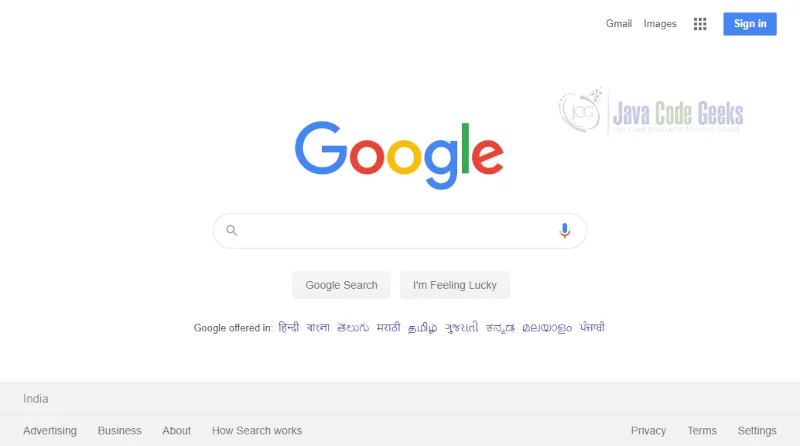
The second case is similar to browser automation. We navigate to google.com and click on the search icon without typing anything in the input. The below screenshot shows how the google.com is rendered in the browser during selenium testing.

4. Download the Source Code
You can download the full source code of this example here: Selenium WebDriver Example


