Git Clone Repository Example
In Git, git clone is a very important command. It can be understood by cloning or downloading a repository into a new directory from a remote server, like Github. It’s commonly used to connect to Github, based on knowing the project git link.
1. Introduction
In addition, Git has multiple different repositories that we need to pay attention to, like the local workspace, the index(stating area also), local repository and the remote repository. So we need to have a good understanding about all these repositories.
In this article, I’ll explain some aspects of git clone repository and the common usage of the command. For other aspects of Git, you can check out my other articles on Git.
All the examples below is shown in MacOS EI Capitan Version 10.11.5 and the Git version is 2.7.4.
2. Github settings and git installation
Before we go to the real examples, we need to install Git firstly. Also we want to have a Github account and set it up.
To download Git, you can go to the download webpage and install it according to the operating system. It supports different operating systems: MacOS, Windows, Linux and Solaris.
After the instruction for installation, you can check the Git version via command git --version in your terminal. Mine is like below after the version checking command:
WXMs-MacBook-Pro:~ WXM$ git --version
git version 2.7.4 (Apple Git-66)
Then you need to register your own account from the webpage of Github. Coming back to the Github settings. Open the terminal on your computer/laptop. Then type the following command to make sure that Git knows your user name.
$ git config --global user.name "YOUR NAME"
After this, you need to associate your email address with your Git commit. You can use the following command in your terminal to connect them. Here, be sure that the email address is the one that you used for register the Github account.
$ git config --global user.email "YOUR EMAIL ADDRESS"
Next, you need to authenticate with Github from Git. When you want to connect Github from your Git, you need authentication from Github. Two methods could be chosen for this:
- Clone with HTTPS: the detailed instructions could be found here
- Clone with SSH: the detailed instructions could be found here
After all these steps, the Github settings are done. You can go to the further part.
3. git clone repository
3.1 git clone command
As we mentioned in the beginning, git clone is a very important git command. Developers use it quite a lot to connect to Github.
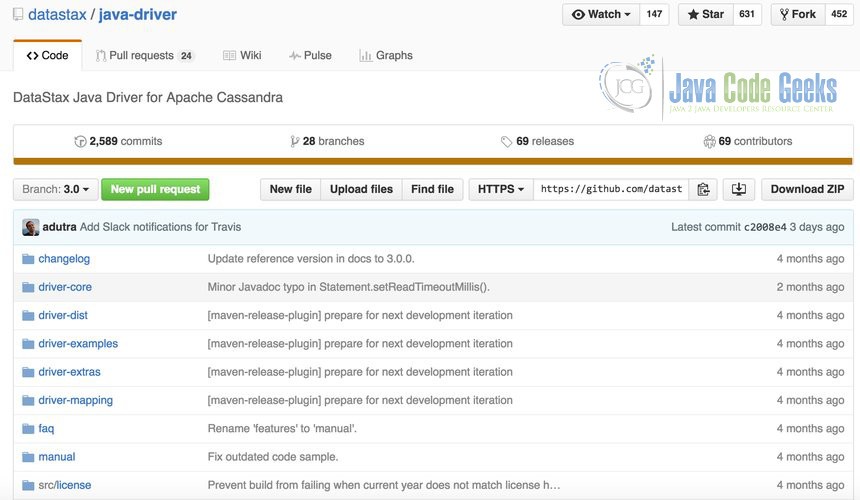
For example, you may be interested in the Datastax Java driver for NoSQL database Apache Cassandra. You can go to the Github link https://github.com/datastax/java-driver. Below is the figure to show how the command looks for this Git project.

Furthermore, if you want to download it and work on this project on your own machine. You can use git clone command. To do this, you need to find the git link for this project. For this project, the git link is https://github.com/datastax/java-driver.git. The position of this link is below with blue part marked.
Then open your terminal and go to the directory that you want to save this project. Type command git clone https://github.com/datastax/java-driver.git. Then this will download the project to your local machine like below:

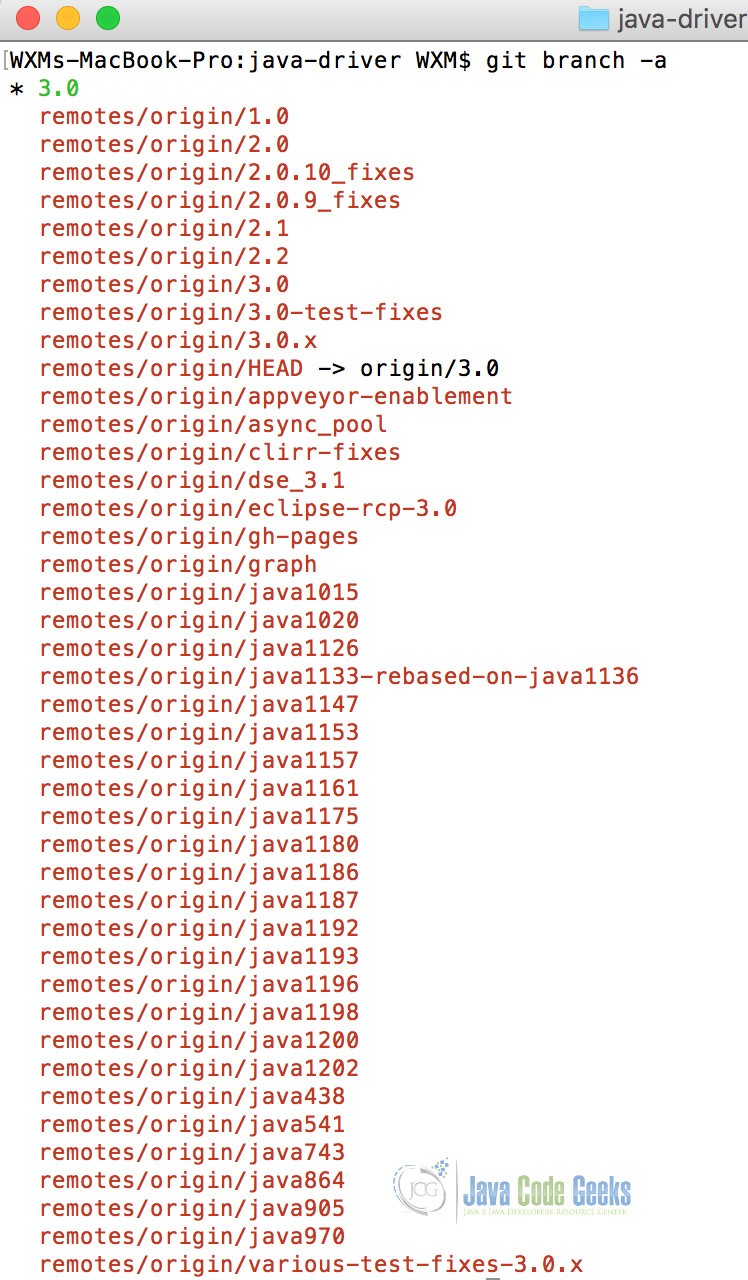
Here, you should notice that all versions of the project have been downloaded to your local repository. With the usage of command git branch -a, you can get the list of all branches in this project. Similarly, you can see our example below:
You may find there’s a star “*” before the the “3.0”. This means that the current header is pointing to version 3.0.
In Git, branch is another name for version. You can switch to different branches with command git branch. For more information about the branches, go to my previous article on Git clone branch example.
3.2. Git repositories
Another important part for Git is the Git repository.
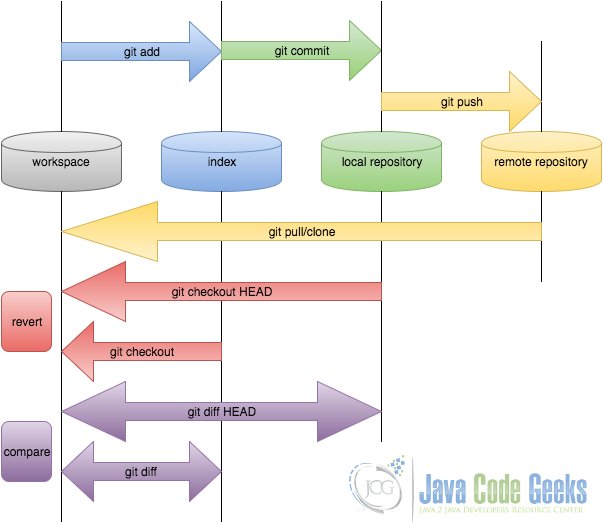
Firstly, we need to be familiar with the repository concepts. In Git, there will be three repositories or areas. If we consider the usage of Github, then we need to add another one with remote repository (normally this will be Github). To make it clear, we use the following flow to demonstrate how the this works:
- Workspace: it’s the place where you see in your computer system, or the directory where you check out your files. Files in the workspace could be added to the Git by using
git addcommand. Basically it could be any folders/directories in your computer. - Index: it’s also called stating area. It’s an invisible space where you can add files that you want to commit. To add commit, you can use
git commitcommand. - Local repository: it’s also an invisible repository. Actually it’s stored in the .git folder, which is hidden in the folder you created.
- Remote repository: this could be another computer. Or it could be the server of others, such as
Github. And we can considerGithubas a remote repository. To access to the remote repository, you can use the commandsgit pushorgit pull/clone.
3.3 git clone repository
Finally, let’s go to the usage of git clone repository. Mostly, the usage is quite the same as git clone, with the git link followed.
Furthermore, the git link works like a URL. This link contains information about the transport protocol, the address of the remote server and the path to the repository. Take the java driver like as an example: https://github.com/datastax/java-driver.git. https is the protocol, github.com is the remote server and datastax/java-driver is the repository that you want to work on.
In addition, you can also set up the ssh. Then you may use the links like ssh://[user@]host.xz[:port]/path/to/repo.git/. Also, for local repositories, they also support Git. You can use the syntax similar to /path/to/repo.git/.
4. Conclusion
In conclusion, command git clone is used for cloning repository from remote server. You can work in different repositories, like local repository and remote one.


