JavaFX HTML Editor Example
This is a JavaFX HTMLEditor Example. The HTMLEditor control provides a rich text editing capability to JavaFX application. It uses HTML as its data model. That is, the formatted text in HTMLEditor is stored in HTML format.
The following table shows an overview of the whole article:
Table Of Contents
The following examples use Java SE 8 and JavaFX 2.2.
1. Creating an HTML Editor
1.1 The Code
FxHtmlEditorExample1.java
import javafx.application.Application;
import javafx.scene.Scene;
import javafx.scene.web.HTMLEditor;
import javafx.stage.Stage;

public class FxHtmlEditorExample1 extends Application
{
	public static void main(String[] args)
	{
		Application.launch(args);
	}

	@Override
	public void start(Stage stage)
	{
		// Create the HTMLEditor
		HTMLEditor htmlEditor = new HTMLEditor();
        // Set the Height of the HTMLEditor
		htmlEditor.setPrefHeight(300);
        // Set the Width of the HTMLEditor
		htmlEditor.setPrefWidth(600);

        // Create the Scene
        Scene scene = new Scene(htmlEditor);
		// Add the Scene to the Stage
        stage.setScene(scene);
		// Set the Title of the Stage
		stage.setTitle("A simple HTMLEditor Example");
		// Display the Stage
        stage.show();
	}
}
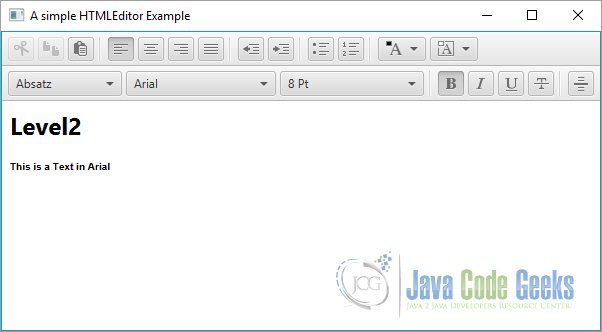
A HTMLEditor displays formatting toolbars with it. You cannot hide the toolbars. They can be styled using a CSS. Using the toolbars, you can:
- Copy, cut, and paste text using the system clipboard
- Apply text alignment
- Indent text
- Apply bulleted list and numbered list styles
- Set foreground and background colors
- Apply paragraph and heading styles with font family and font size
- Apply formatting styles such as bold, italic, underline, and strikethrough
- Add horizontal rulers
The control supports HTML5. Note that the toolbars do not allow you to apply all kinds of HTML. However, if you load a document that uses those styles, it allows you to edit them.
For example, you cannot create an HTML table directly in the control. However, if you load HTML content having HTML tables into the control, you will be able to edit the data in the tables.
The HTMLEditor does not provide API to load HTML content from a file to save its content to a file. You will have to write your own code to accomplish this.
An instance of the HTMLEditor class represents an HTMLEditor control. The class is included in the javafx.scene.web package. Use the default constructor, which is the only constructor provided, to create the HTMLEditor:
// Create the HTMLEditor
HTMLEditor htmlEditor = new HTMLEditor();
// Set the Height of the HTMLEditor
htmlEditor.setPrefHeight(300);
// Set the Width of the HTMLEditor
htmlEditor.setPrefWidth(600);
1.2 The GUI
The following image shows a very simple example of an HTMLEditor:
2. Styling HTML Editor with CSS
2.1 The Code
FxHtmlEditorExample2.java
import javafx.application.Application;
import javafx.scene.Scene;
import javafx.scene.web.HTMLEditor;
import javafx.stage.Stage;

public class FxHtmlEditorExample2 extends Application
{
	public static void main(String[] args)
	{
		Application.launch(args);
	}

	@Override
	public void start(Stage stage)
	{
		// Create the HTMLEditor
		HTMLEditor htmlEditor = new HTMLEditor();
        // Set the Height of the HTMLEditor
		htmlEditor.setPrefHeight(300);
        // Set the Width of the HTMLEditor
		htmlEditor.setPrefWidth(600);

        // Create the Scene
        Scene scene = new Scene(htmlEditor);
		// Add the Scene to the Stage
        stage.setScene(scene);
		// Add the Stylesheet to the Scene
		scene.getStylesheets().add(getClass().getResource("htmleditor.css").toExternalForm());
		// Set the Title of the Stage
		stage.setTitle("A HTMLEditor Example with a Stylesheet");
		// Display the Stage
        stage.show();
	}
}
2.2 The Stylesheet
htmleditor.css
/* Set the background colors for all buttons and toggle buttons */
.html-editor
{
	-fx-font: 12 cambria;
	-fx-border-color: blue;
	-fx-border-style: solid;
	-fx-border-width: 2;
}

.html-editor .button, .html-editor .toggle-button
{
	-fx-background-color: lightblue;
}

.html-editor-background
{
	-fx-color-label-visible: true;
}

.html-editor-foreground
{
	-fx-color-label-visible: true;
}
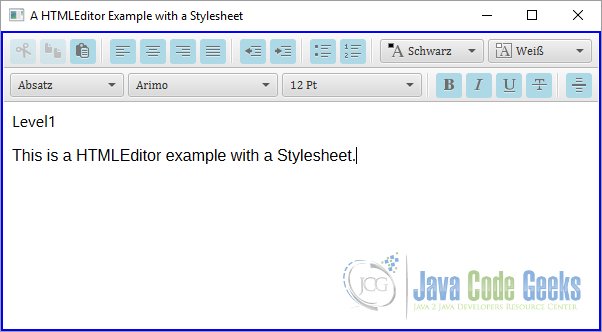
The default CSS style-class name for an HTMLEditor is html-editor. The HTMLEditor uses styles of a Control such as padding, borders, and background color.
You can style each button in the toolbar separately. The following are the list of style-class names for the toolbar buttons. The names are self-explanatory, for example, html-editor-align-right and html-editor-hr are the style-class names for the toolbar buttons used to right align text and draw a horizontal ruler, respectively.
- html-editor-cut
- html-editor-copy
- html-editor-paste
- html-editor-align-left
- html-editor-align-center
- html-editor-align-right
- html-editor-align-justify
- html-editor-outdent
- html-editor-indent
- html-editor-bullets
- html-editor-numbers
- html-editor-bold
- html-editor-italic
- html-editor-underline
- html-editor-strike
- html-editor-hr
Use the button and toggle-button style-class names if you want to apply styles to all toolbar buttons and toggle buttons:
.html-editor .button, .html-editor .toggle-button
{
	-fx-background-color: lightblue;
}
The HTMLEditor shows two ColorPickers for users to select the background and foreground colors.
Their style-class names are html-editor-background and html-editor-foreground. The following code shows the selected color labels in the ColorPickers:
.html-editor-background
{
	-fx-color-label-visible: true;
}

.html-editor-foreground
{
	-fx-color-label-visible: true;
}
2.3 The GUI
The following image shows the effect of using a Stylesheet in an HTMLEditor:
3. Setting an Initial Text to the HTML Editor
3.1 The Code
FxHtmlEditorExample3.java
import javafx.application.Application;
import javafx.scene.Scene;
import javafx.scene.web.HTMLEditor;
import javafx.stage.Stage;

public class FxHtmlEditorExample3 extends Application
{
	public static void main(String[] args)
	{
		Application.launch(args);
	}

	@Override
	public void start(Stage stage)
	{
		// Create the HTMLEditor
		HTMLEditor htmlEditor = new HTMLEditor();
        // Set the Height of the HTMLEditor
		htmlEditor.setPrefHeight(300);
        // Set the Width of the HTMLEditor
		htmlEditor.setPrefWidth(600);

		// Set the Initial Text
        String INITIAL_TEXT =
			"An HTMLEditor displays formatting toolbars with it. "
	        + "Using the toolbars, you can: </br></br>"
	        + "<ul><li>Copy, cut, and paste text using the system clipboard</li>"
	        + "<li>Apply text alignment</li>"
	        + "<li>Indent text</li>"
	        + "<li>Apply bulleted list and numbered list styles</li>"
	        + "<li>Set foreground and background colors</li>"
	        + "<li>Apply paragraph and heading styles with font family and font size</li>"
	        + "<li>Apply formatting styles such as bold, italic, underline, and strikethrough</li>"
	        + "<li>Add horizontal rulers</li></ul>";

        htmlEditor.setHtmlText(INITIAL_TEXT);

        // Create the Scene
        Scene scene = new Scene(htmlEditor);
		// Add the Scene to the Stage
        stage.setScene(scene);
		// Add the Stylesheet to the Scene
		scene.getStylesheets().add(getClass().getResource("htmleditor.css").toExternalForm());
		// Set the Title of the Stage
		stage.setTitle("A HTMLEditor Example with an Initial Text");
		// Display the Stage
        stage.show();
    }
}
The HTMLEditor class has a very simple API that consists of only three methods:
- getHtmlText()
- setHtmlText(String htmlText)
- print(PrinterJob job)
The getHTMLText() method returns the HTML content as a string. The setHTMLText() method sets the content of the control to the specified HTML string. The print() method prints the content of the control.
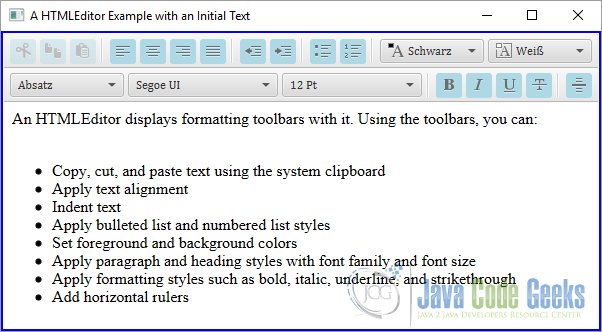
The following code snippet shows the usage of the setHTMLText() method:
// Set the Initial Text
String INITIAL_TEXT =
	"An HTMLEditor displays formatting toolbars with it. "
	+ "Using the toolbars, you can: </br></br>"
	+ "<ul><li>Copy, cut, and paste text using the system clipboard</li>"
	+ "<li>Apply text alignment</li>"
	+ "<li>Indent text</li>"
	+ "<li>Apply bulleted list and numbered list styles</li>"
	+ "<li>Set foreground and background colors</li>"
	+ "<li>Apply paragraph and heading styles with font family and font size</li>"
	+ "<li>Apply formatting styles such as bold, italic, underline, and strikethrough</li>"
	+ "<li>Add horizontal rulers</li></ul>";

htmlEditor.setHtmlText(INITIAL_TEXT);
3.2 The GUI
The following GUI shows an HTMLEditor with a given content:
4. Using the HTML Editor
4.1 The Code
FxHtmlEditorExample4.java
import javafx.application.Application;
import javafx.event.ActionEvent;
import javafx.event.EventHandler;
import javafx.geometry.Insets;
import javafx.geometry.Pos;
import javafx.scene.Scene;
import javafx.scene.control.*;
import javafx.scene.layout.HBox;
import javafx.scene.layout.VBox;
import javafx.scene.web.HTMLEditor;
import javafx.stage.Stage;

public class FxHtmlEditorExample4 extends Application
{
	public static void main(String[] args)
	{
		Application.launch(args);
	}

	@Override
	public void start(Stage stage)
	{
		// Create the HTMLEditor
		final HTMLEditor htmlEditor = new HTMLEditor();
        // Set the Height of the HTMLEditor
		htmlEditor.setPrefHeight(300);
        // Set the Width of the HTMLEditor
		htmlEditor.setPrefWidth(600);
		// Set the Initial Text
        htmlEditor.setHtmlText("");

        // Create the TextArea
		final TextArea textArea = new TextArea();
		// Set the Size of the TextArea
		textArea.setPrefSize(600, 300);
		// Set the Style of the TextArea
		textArea.setStyle("-fx-font-size:10pt; -fx-font-family: \"Courier New\";");

        // Create the Buttons
		Button htmlToText = new Button("Convert HTML to Text");
		Button textToHtml = new Button("Convert Text to HTML");

        // Define the Actions for the Buttons
		htmlToText.setOnAction(new EventHandler<ActionEvent>()
        {
            @Override public void handle(ActionEvent arg0)
            {
            	htmlEditor.setHtmlText(textArea.getText());
            }
        });

		textToHtml.setOnAction(new EventHandler<ActionEvent>()
        {
            @Override public void handle(ActionEvent arg0)
            {
            	textArea.setText(htmlEditor.getHtmlText());
            }
        });

		// Create the HBox for the Buttons
		HBox buttons = new HBox(htmlToText, textToHtml);
		// Set Spacing to the HBox
		buttons.setSpacing(10);

        // Create the VBox
        VBox root = new VBox();
        // Set the Padding of the VBox
        root.setPadding(new Insets(8, 8, 8, 8));
        // Set Spacing to 5 px
        root.setSpacing(5);
        // Set the Position of the VBox
        root.setAlignment(Pos.BOTTOM_LEFT);
		// Set the Style-properties of the VBox
		root.setStyle("-fx-padding: 10;" +
			"-fx-border-style: solid inside;" +
			"-fx-border-width: 2;" +
			"-fx-border-insets: 5;" +
			"-fx-border-radius: 5;" +
			"-fx-border-color: blue;");

		// Add the Children to The VBox
        root.getChildren().addAll(htmlEditor, buttons, textArea);

        // Create the Scene
        Scene scene = new Scene(root);
		// Add the Stylesheet to the Scene
		scene.getStylesheets().add(getClass().getResource("htmleditor.css").toExternalForm());
		// Add the Scene to the Stage
        stage.setScene(scene);
        // Set the Width and Heigth of the Stage
        stage.setWidth(500);
        stage.setHeight(500);
		// Set the Title of the Stage
		stage.setTitle("A HTMLEditor Converter Example");
		// Display the Stage
        stage.show();
	}
}
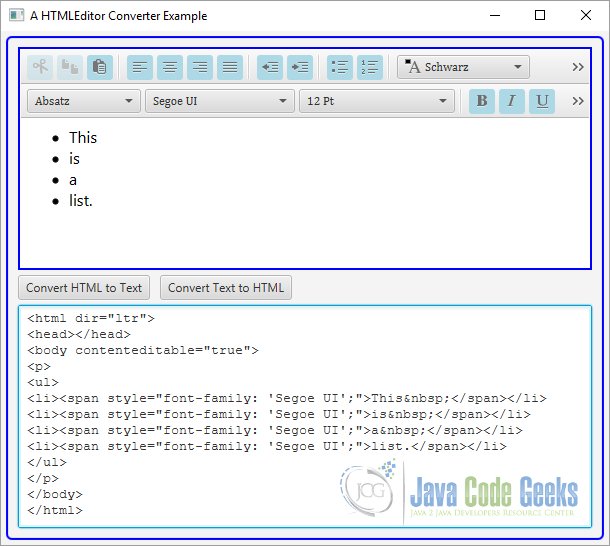
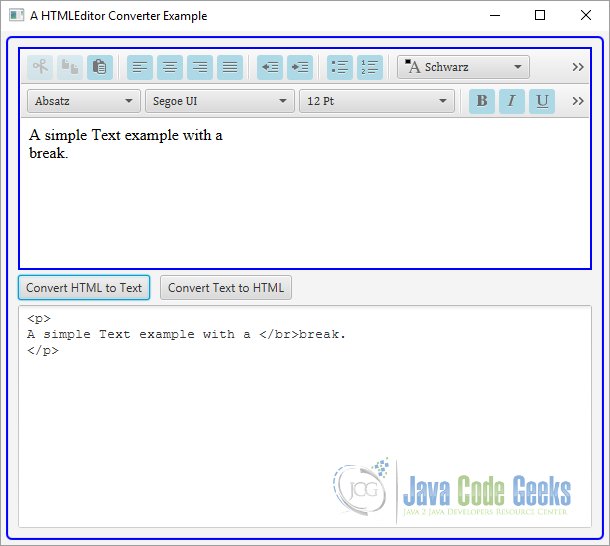
The above program shows how to use the getHtmlText() and the setHtmlText(String htmlText) method of an HTMLEditor.
It displays an HTMLEditor, a TextArea, and two buttons. You can use the buttons to convert text in the HTMLEditor to HTML code and vice versa.
The following code snippet shows the EventHandler, which converts the Plain Text to HTML code:
// Define the Actions for the Buttons
htmlToText.setOnAction(new EventHandler<ActionEvent>()
{
	@Override public void handle(ActionEvent arg0)
	{
		htmlEditor.setHtmlText(textArea.getText());
	}
});
The following code snippet shows the EventHandler, which converts the HTML code to Plain Text:
textToHtml.setOnAction(new EventHandler<ActionEvent>()
{
	@Override public void handle(ActionEvent arg0)
	{
		textArea.setText(htmlEditor.getHtmlText());
	}
});
4.2 The GUI
The following image shows the result of the conversation from Text to HTML:
The following image shows the result of the conversation from HTML to Text:
5. Download Java Source Code
This was an example of javafx.scene.web.HTMLEditor
You can download the full source code of this example here: JavaFxHTMLEditorExample.zip


