Git Create Branch Example
In this example we shall learn how to create a branch with Git Version Control tool.
1. Introduction to Version Control
Version control is an application that records changes to a file or set of files over time so that one can recall specific versions later. One can see file change history and track changes.
There are three type of version control tools available:
1.1 Local Version Control Systems
Local VCSs has a simple database that keeps all the changes to files under revision control. One of the more popular VCS tools was a system called RCS, which is still distributed with many computers today.
1.2 Centralized Version Control Systems
Centralized Version Control Systems (CVCSs) was developed to help developers work in a collaborative manner. These applications, such as CVS, Subversion, have a single server that contains all the versioned files.
1.3 Distributed Version Control Systems
In a DVCS (such as Git, Mercurial, Bazaar or Darcs), clients don’t just check out the latest snapshot of the files: they fully mirror the repository. Thus if any server crashes, any of the client repositories can be copied back up to the server to restore it.
2. Introduction to Git
As we read in previous section Git is one of the available Distributed Version Control Systems.
The major difference between Git and any other VCS is the way Git stores data. In Git, every time one commit, or save the state of project, it basically takes a picture of what all files look like at that moment and stores a reference to that snapshot. To be efficient, if files have not changed, Git doesn’t store the file again, just a link to the previous identical file it had already stored.
3. Pre-requisites
To see this example in action, Git should be installed. It can be downloaded from here.
4. Creating branch on Git
Git branches aren’t like SVN branches which most of us use. The main purpose of SVN branches is to capture large-scale development effort which is again very occasional. On the other hand, Git branches are an integral part of one’s everyday workflow.
A Git branch represents an independent line of development and this serve as an abstraction for the edit/stage/commit process. One can think of them as a way to request a brand new working directory, staging area, and project history. And all the new commits are recorded in the history for the current branch.
The git branch command helps in creating, listing, renaming, and deleting of branches.
Usage:
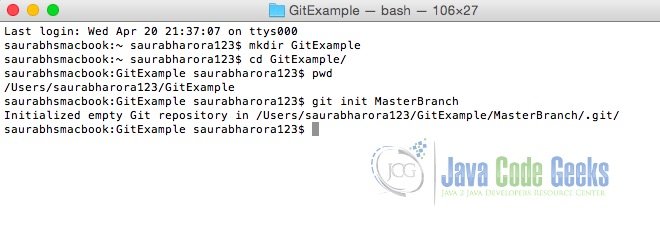
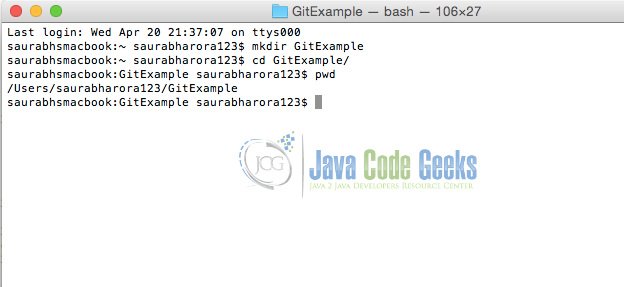
First let’s create a new directory where we shall create the master branch.
Now, we shall initialize our master branch with git init command.
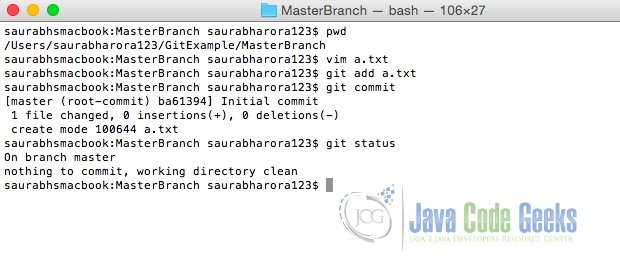
Next step we shall add some files to the master branch and shall commit the same.
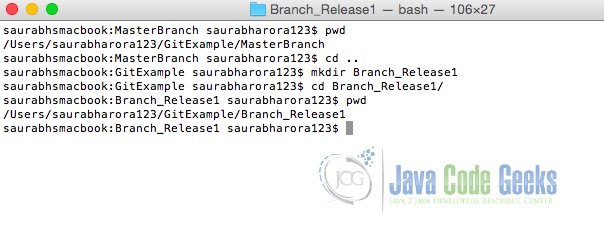
Now we shall create a new dir for our branch.
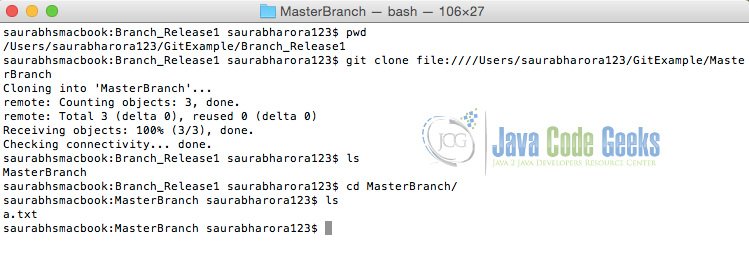
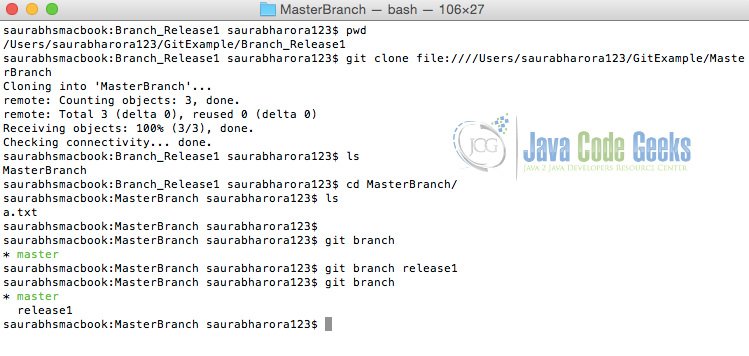
And after we have created a directory, we shall clone the original master branch into this directory. This shall be done using git clone command.
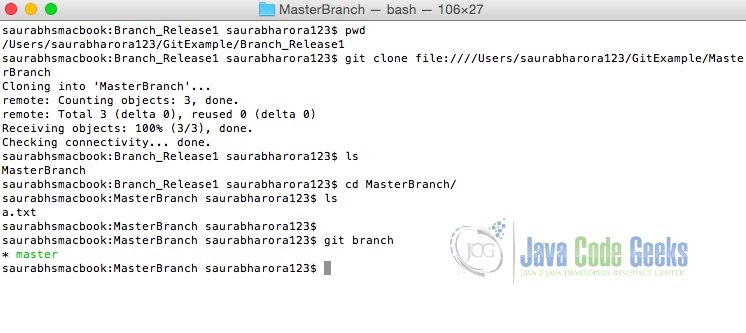
Now we shall use command git branch to see the available branches.
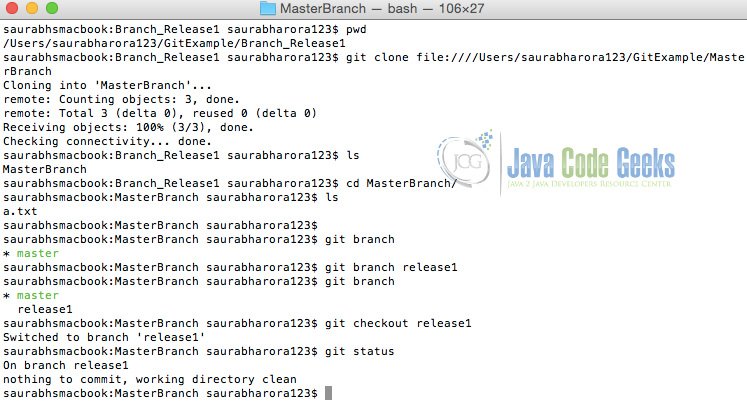
Next we shall create branch using command git branch <branch name>.
And at last, now that we have created branch we shall be switching to the branch using command git checkout.
5. Conclusion
In this example, we learnt basics of git branch command and how to create git branches.

