Vaadin Calendar Example
With Vaadin Calendar widget, you get a complete calendar solution that allows you to do all sorts of calendar related tasks, visually stunning out of the box, can be customizable to fill all your needs in a online calendar solution, easy to use and free, Vaadin offers a nice solution to use in enterprise applications where you need this kind of solution.
1. The tools
- Java JDK 8
- Latest Eclipse Mars
- Vaadin 7.6.2
2. Introduction
In this example we are going to make a calendar, customize the visible range and then add two example events, a week event and hour event also we are going to add butons to change the calendar view to day, week and month view.
3. Prerequisites
- JDK installed
- Eclipse Mars installed and working
- Vaadin Plugin 7.6.2
4. Create the project
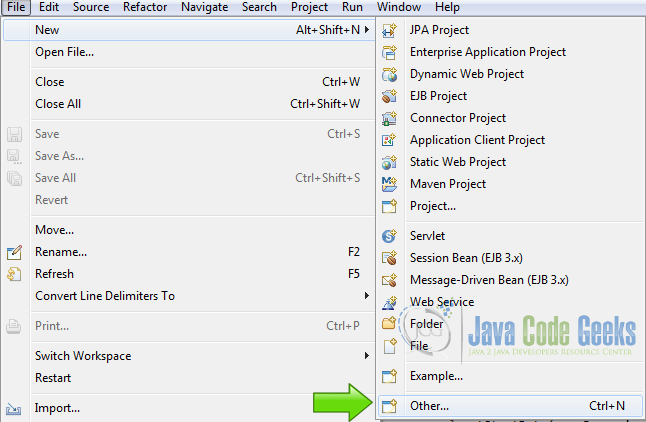
Start eclipse and create a new Vaadin 7 application File -> New -> Other…
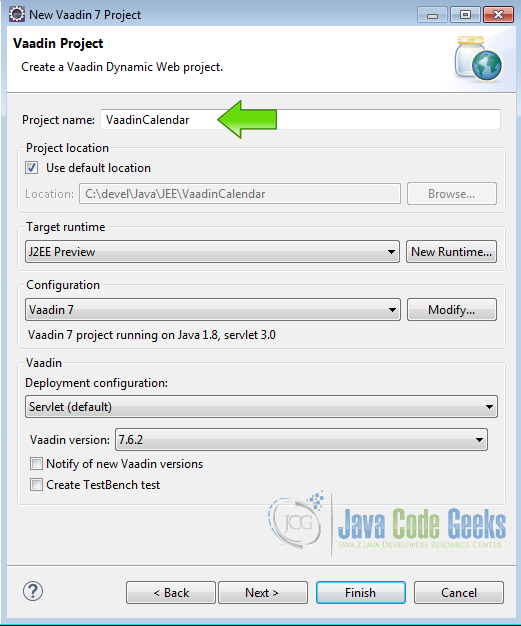
and choose Vaadin 7 Project from the list.
Hit next and write the project name
Hit next twice and choose the option generate web.xml deployment descriptor
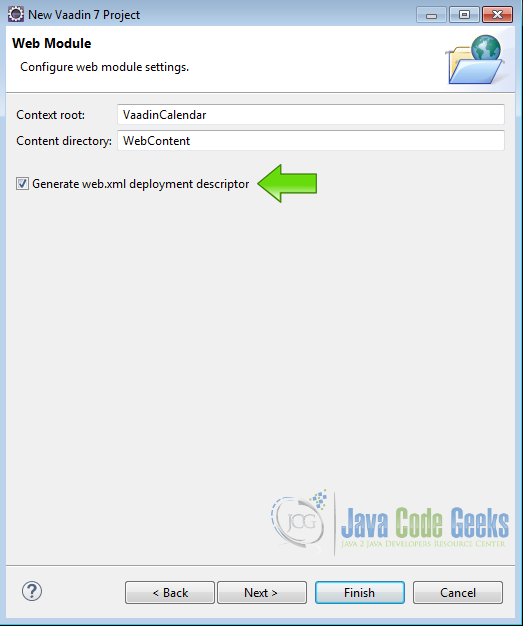
and then hit finish, now we are ready to code.
5. Modify web.xml
Open the file WebContent -> WEB-INF -> web.xml and modify as follows
web.xml
<?xml version="1.0" encoding="UTF-8"?>
<web-app xmlns:xsi="http://www.w3.org/2001/XMLSchema-instance" xmlns="http://java.sun.com/xml/ns/javaee" xsi:schemaLocation="http://java.sun.com/xml/ns/javaee http://java.sun.com/xml/ns/javaee/web-app_3_0.xsd" id="WebApp_ID" version="3.0">
  <display-name>VaadinCalendar</display-name>
  <servlet>
    <servlet-name>myservlet</servlet-name>
    <servlet-class>
		com.vaadin.server.VaadinServlet
	</servlet-class>
    <init-param>
      <param-name>UI</param-name>
      <param-value>com.example.vaadincalendar.VaadincalendarUI</param-value>
    </init-param>
  </servlet>
  <servlet-mapping>
    <servlet-name>myservlet</servlet-name>
    <url-pattern>/*</url-pattern>
  </servlet-mapping>
</web-app>
I prefer to use web.xml to publish my servlet but you can use annotations if you like
6. Create the layouts
Create layouts
final VerticalLayout layout = new VerticalLayout();
layout.setMargin(true);
setContent(layout);

HorizontalLayout btLayout = new HorizontalLayout();
layout.addComponent(btLayout);
I created a vertical layout for the main layout and a horizontal layout to add the buttons to change the calendar view
7. Create the calendar
Create the calendar
Calendar cal = new Calendar("My Calendar");
cal.setWidth("800px");
cal.setHeight("600px");
cal.setStartDate(new GregorianCalendar(2016, 1, 16, 13, 00, 00).getTime());
cal.setEndDate(new GregorianCalendar(2016, 2, 16, 13, 00, 00).getTime());
I change the width and height of the calendar and set the initial range with setStartDate and setEndDate, that sets the dates used to show the calendar, Vaadin under the hood, choose the best view for the range.
8. Add test events
Add events
GregorianCalendar eStaOne = new GregorianCalendar(2016, 1, 17, 13, 00, 00);
GregorianCalendar eEndOne = new GregorianCalendar(2016, 1, 17, 16, 00, 00);
BasicEvent beOne= new BasicEvent("Event One", "Event One", eStaOne.getTime(), eEndOne.getTime());
cal.addEvent(beOne);

GregorianCalendar eStaTwo = new GregorianCalendar(2016, 1, 21, 0, 00, 00);
GregorianCalendar eEndTwo = new GregorianCalendar(2016, 1, 27, 0, 00, 00);
BasicEvent beTwo = new BasicEvent("Event Two", "Event Two", eStaTwo.getTime(),eEndTwo.getTime());
beTwo.setAllDay(true);
cal.addEvent(beTwo);
I added two BasicEvent using the standard java.util.GregorianCalendar to set the date without hassle, the BasicEvent constructor offers two strings parameters to assign a caption and a description to the event.
9. Add the Buttons
Buttons
		Button buttonDay = new Button("Day view");
		buttonDay.addClickListener(new Button.ClickListener() {
			public void buttonClick(ClickEvent event) {
				cal.setStartDate(new GregorianCalendar(2016, 1, 16, 13, 00, 00).getTime());
				cal.setEndDate(new GregorianCalendar(2016, 1, 16, 13, 00, 00).getTime());
			}
		});

		btLayout.addComponent(buttonDay);
		Button buttonWeek = new Button("Week view");
		buttonWeek.addClickListener(new Button.ClickListener() {
			public void buttonClick(ClickEvent event) {
				cal.setStartDate(new GregorianCalendar(2016, 1, 16, 13, 00, 00).getTime());
				cal.setEndDate(new GregorianCalendar(2016, 1, 23, 13, 00, 00).getTime());
			}
		});
		btLayout.addComponent(buttonDay);
		Button buttonMonth = new Button("Month view");
		buttonMonth.addClickListener(new Button.ClickListener() {
			public void buttonClick(ClickEvent event) {
				cal.setStartDate(new GregorianCalendar(2016, 1, 16, 13, 00, 00).getTime());
				cal.setEndDate(new GregorianCalendar(2016, 2, 16, 13, 00, 00).getTime());
			}
		});
		btLayout.addComponent(buttonDay);
		btLayout.addComponent(buttonWeek);
		btLayout.addComponent(buttonMonth);
I added three buttons to change the calendar view, Vaadin choose the right view from the range in the dates.
10. The complete source code
VaadinCalendarUI.java
package com.example.vaadincalendar;

import java.util.GregorianCalendar;
import java.util.Locale;

import com.vaadin.annotations.Theme;
import com.vaadin.server.VaadinRequest;
import com.vaadin.server.VaadinServlet;
import com.vaadin.ui.Button;
import com.vaadin.ui.Button.ClickEvent;
import com.vaadin.ui.Calendar;
import com.vaadin.ui.HorizontalLayout;
import com.vaadin.ui.UI;
import com.vaadin.ui.VerticalLayout;
import com.vaadin.ui.components.calendar.event.BasicEvent;

@SuppressWarnings("serial")
@Theme("vaadincalendar")
public class VaadincalendarUI extends UI {

	public static class Servlet extends VaadinServlet {
	}

	@Override
	protected void init(VaadinRequest request) {
		this.setLocale(Locale.US);
		final VerticalLayout layout = new VerticalLayout();
		layout.setMargin(true);
		setContent(layout);

		HorizontalLayout btLayout = new HorizontalLayout();
		layout.addComponent(btLayout);

		Calendar cal = new Calendar("My Calendar");
		cal.setWidth("800px");
		cal.setHeight("600px");
		cal.setStartDate(new GregorianCalendar(2016, 1, 16, 13, 00, 00).getTime());
		cal.setEndDate(new GregorianCalendar(2016, 2, 16, 13, 00, 00).getTime());

        GregorianCalendar eStaOne = new GregorianCalendar(2016, 1, 17, 13, 00, 00);
        GregorianCalendar eEndOne = new GregorianCalendar(2016, 1, 17, 16, 00, 00);
        BasicEvent beOne= new BasicEvent("Event One", "Event One", eStaOne.getTime(), eEndOne.getTime());
        cal.addEvent(beOne);

        GregorianCalendar eStaTwo = new GregorianCalendar(2016, 1, 21, 0, 00, 00);
        GregorianCalendar eEndTwo = new GregorianCalendar(2016, 1, 27, 0, 00, 00);
        BasicEvent beTwo = new BasicEvent("Event Two", "Event Two", eStaTwo.getTime(), eEndTwo.getTime());
        beTwo.setAllDay(true);
        cal.addEvent(beTwo);

		layout.addComponent(cal);

		Button buttonDay = new Button("Day view");
		buttonDay.addClickListener(new Button.ClickListener() {
			public void buttonClick(ClickEvent event) {
				cal.setStartDate(new GregorianCalendar(2016, 1, 16, 13, 00, 00).getTime());
				cal.setEndDate(new GregorianCalendar(2016, 1, 16, 13, 00, 00).getTime());
			}
		});

		btLayout.addComponent(buttonDay);
		Button buttonWeek = new Button("Week view");
		buttonWeek.addClickListener(new Button.ClickListener() {
			public void buttonClick(ClickEvent event) {
				cal.setStartDate(new GregorianCalendar(2016, 1, 16, 13, 00, 00).getTime());
				cal.setEndDate(new GregorianCalendar(2016, 1, 23, 13, 00, 00).getTime());
			}
		});
		btLayout.addComponent(buttonDay);
		Button buttonMonth = new Button("Month view");
		buttonMonth.addClickListener(new Button.ClickListener() {
			public void buttonClick(ClickEvent event) {
				cal.setStartDate(new GregorianCalendar(2016, 1, 16, 13, 00, 00).getTime());
				cal.setEndDate(new GregorianCalendar(2016, 2, 16, 13, 00, 00).getTime());
			}
		});
		btLayout.addComponent(buttonDay);
		btLayout.addComponent(buttonWeek);
		btLayout.addComponent(buttonMonth);
	}

}
11. Running the example
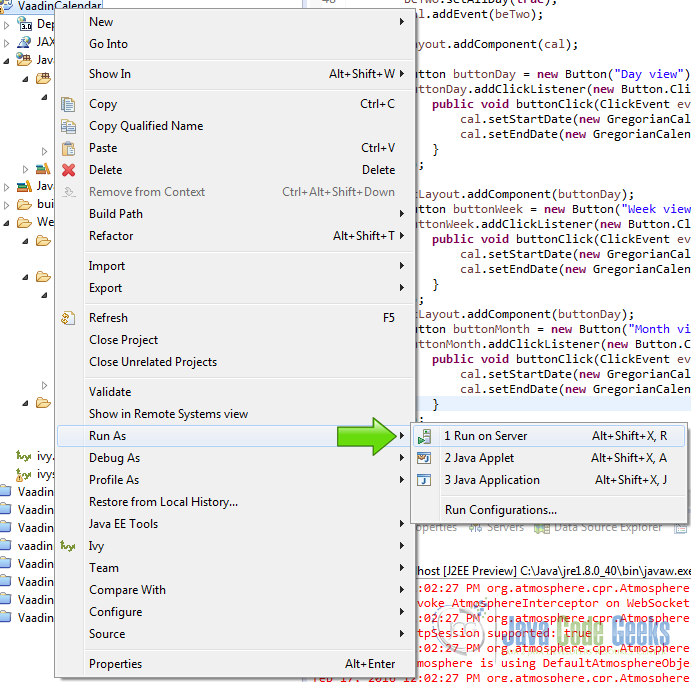
Right click on the project folder and choose Run as -> Run on server
Choose your preferred server and hit finish.
12. The results
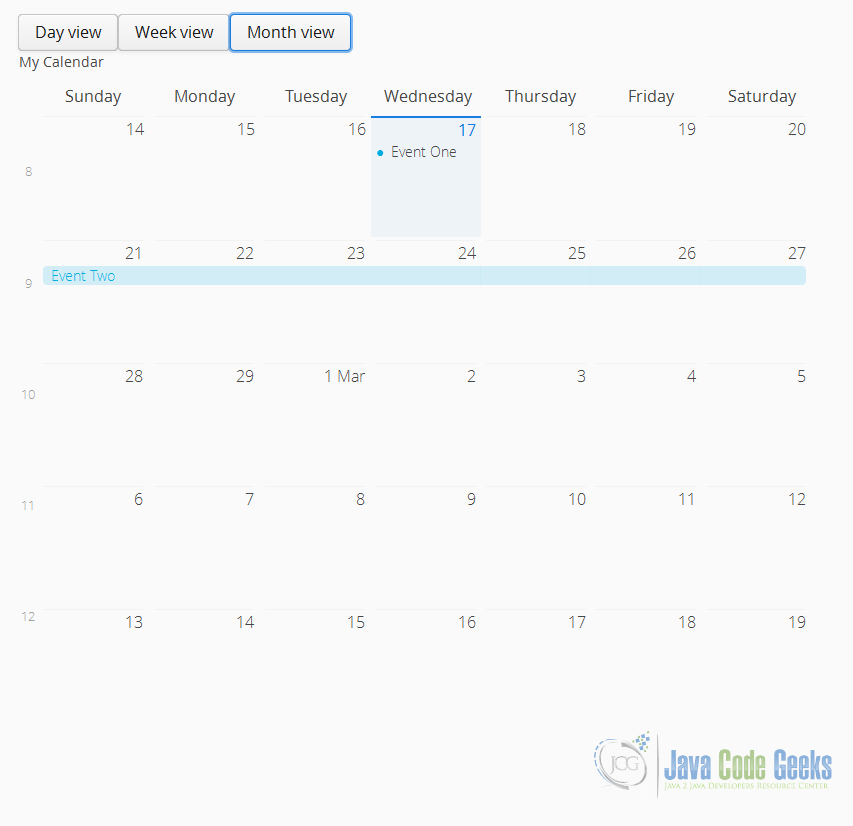
You got your new shini calendar ready to hack and use it in your web application.
13. Download the source code
This was an example about Vaadin Calendar.
You can download the Eclipse project here: Vaadin Calendar

