Android: How to send Email
In Android you can use the built in Email client Application in order to send Emails from inside your own Application. You can do that by calling the built in Application using an Intent. You can create a new Intent with the Intent.ACTION_SEND argument to specify that you want to send an email with the new Activity that will be launced.
In this tutorial we will create a simple UI that will allow the user to specify the recipient address as well as the subject and the body of the Email message. When the user finishes the editing hw can click the “Send” button in order to select an email provider an after that the built in Email Client will be launched. Unfortunately the emulator does not have the built in Email Application that you normally find in a real Android device.
For this tutorial, we will use the following tools in a Windows 64-bit platform:
- JDK 1.7
- Eclipse 4.2 Juno
- Android SKD 4.2
1. Create a new Android Project
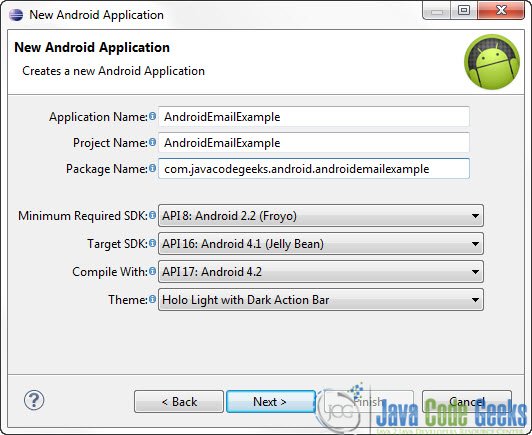
Open Eclipse IDE and go to File -> New -> Project -> Android -> Android Application Project. You have to specify the Application Name, the Project Name and the Package name in the appropriate text fields and then click Next.
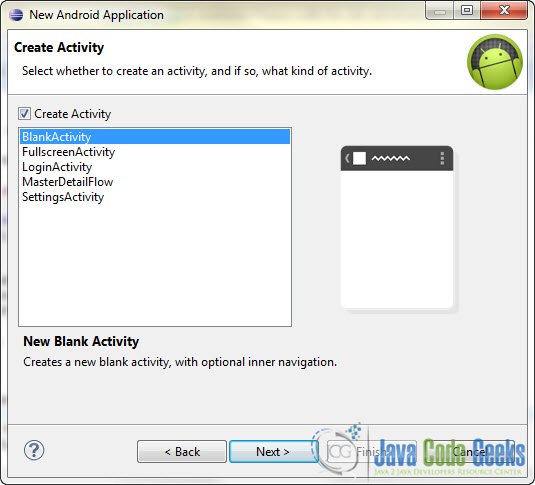
In the next window make sure the “Create activity” option is selected in order to create a new activity for your project, and click Next. This is optional as you can create a new activity after creating the project, but you can do it all in one step.
Select “BlankActivity” and click Next.
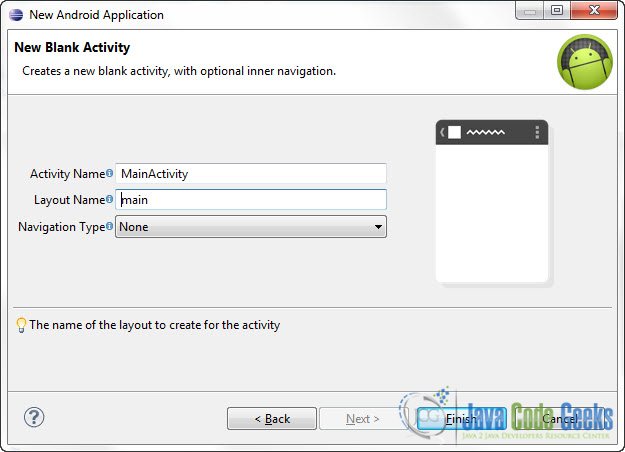
You will be asked to specify some information about the new activity. In the Layout Name text field you have to specify the name of the file that will contain the layout description of your app. In our case the file res/layout/main.xml will be created. Then, click Finish.
2. Create the main layout of the Application
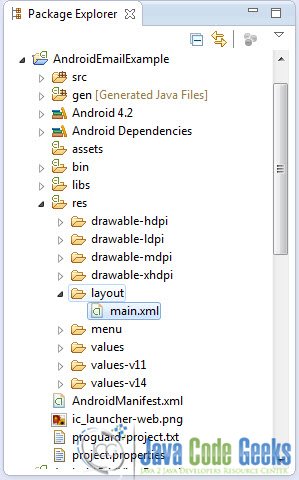
Open res/layout/main.xml file :
And paste the following code :
<?xml version="1.0" encoding="utf-8"?>
<LinearLayout xmlns:android="http://schemas.android.com/apk/res/android"
    android:id="@+id/linearLayout1"
    android:layout_width="fill_parent"
    android:layout_height="fill_parent"
    android:orientation="vertical" >

    <TextView
        android:id="@+id/destinationLable"
        android:layout_width="wrap_content"
        android:layout_height="wrap_content"
        android:text="To : "
        android:textAppearance="?android:attr/textAppearanceLarge" />

    <EditText
        android:id="@+id/destinationAddress"
        android:layout_width="fill_parent"
        android:layout_height="wrap_content"
        android:inputType="textEmailAddress" >

        <requestFocus />

    </EditText>

    <TextView
        android:id="@+id/subjectLabel"
        android:layout_width="wrap_content"
        android:layout_height="wrap_content"
        android:text="Subject : "
        android:textAppearance="?android:attr/textAppearanceLarge" />

    <EditText
        android:id="@+id/subject"
        android:layout_width="fill_parent"
        android:layout_height="wrap_content"
         >
    </EditText>

    <TextView
        android:id="@+id/message_body_label"
        android:layout_width="wrap_content"
        android:layout_height="wrap_content"
        android:text="Message : "
        android:textAppearance="?android:attr/textAppearanceLarge" />

    <EditText
        android:id="@+id/messageBody"
        android:layout_width="fill_parent"
        android:layout_height="wrap_content"
        android:gravity="top"
        android:inputType="textMultiLine"
        android:lines="5" />

    <Button
        android:id="@+id/button"
        android:layout_width="fill_parent"
        android:layout_height="wrap_content"
        android:text="Send" />

</LinearLayout>
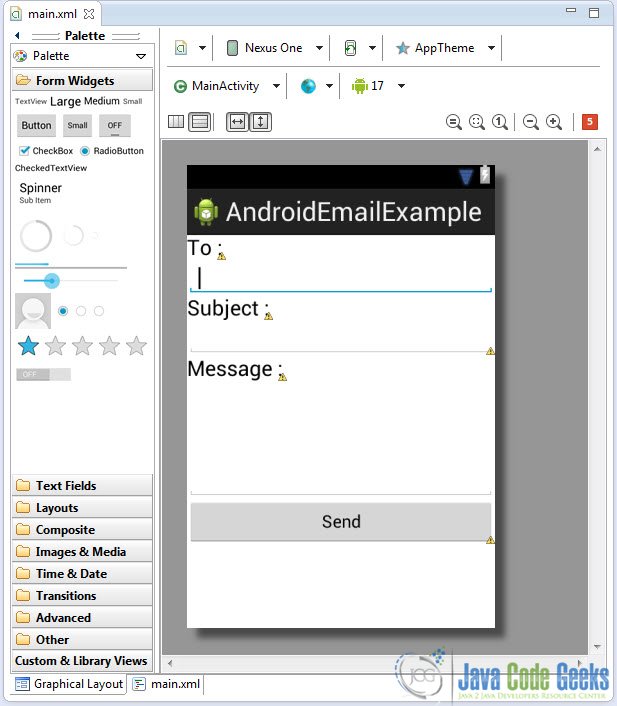
Now you may open the Graphical layout editor to preview the User Interface you created:
4. Code
Go to the java file that contains the code of the activity you’ve just created:
And paste the following code:
package com.javacodegeeks.android.androidemailexample;

import android.app.Activity;
import android.content.Intent;
import android.os.Bundle;
import android.view.View;
import android.view.View.OnClickListener;
import android.widget.Button;
import android.widget.EditText;

public class MainActivity extends Activity {

	Button button;
	EditText destinationAddress;
	EditText sbj;
	EditText messageBody;

	@Override
	public void onCreate(Bundle savedInstanceState) {

		super.onCreate(savedInstanceState);
		setContentView(R.layout.main);

		sbj = (EditText) findViewById(R.id.subject);
		messageBody = (EditText) findViewById(R.id.messageBody);
		button = (Button) findViewById(R.id.button);
		destinationAddress = (EditText) findViewById(R.id.destinationAddress);

		button.setOnClickListener(new OnClickListener() {

			@Override
			public void onClick(View view) {

				String subject = sbj.getText().toString();
				String message = messageBody.getText().toString();
				String to = destinationAddress.getText().toString();

				Intent emailActivity = new Intent(Intent.ACTION_SEND);

				//set up the recipient address
				emailActivity.putExtra(Intent.EXTRA_EMAIL, new String[] { to });

				//set up the email subject
				emailActivity.putExtra(Intent.EXTRA_SUBJECT, subject);

				//you can specify cc addresses as well
				// email.putExtra(Intent.EXTRA_CC, new String[]{ ...});
				// email.putExtra(Intent.EXTRA_BCC, new String[]{ ... });

				//set up the message body
				emailActivity.putExtra(Intent.EXTRA_TEXT, message);

				emailActivity.setType("message/rfc822");

				startActivity(Intent.createChooser(emailActivity, "Select your Email Provider :"));

			}
		});
	}
}
5. Run the application
This is the main screen of our Application:
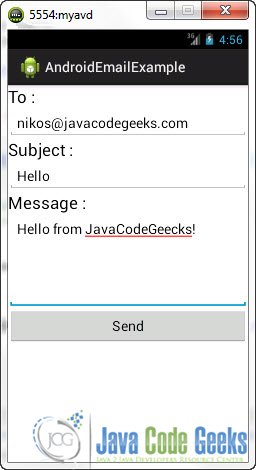
You can now write the recipient email address, the subject and the body of the message:
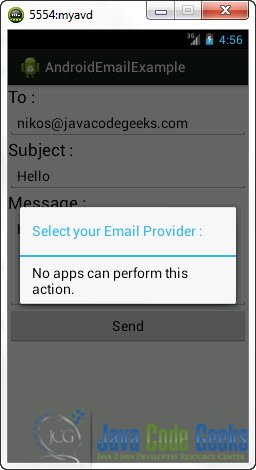
Now when you press “Send” in an emulator:
Unfortunately the emulator does not have the built in Email Application that you find in a real Android Device. So, if you try this Application on a real device when you press “Send” you will be asked to choose your email provider and then the built in Email Application will be launched. Remember that Android does not provide an API to send Emails. The only way to do it is by using its built in application.
Download Eclipse Project
This was an Android Email Example. Download the Eclipse Project of this tutorial: AndroidEmailExample.zip

