Amazon S3 (Simple Storage Service) is a scalable object storage service offered by Amazon Web Services. It allows users to store and retrieve any amount of data from anywhere on the web. Updating an existing object in S3 using Java involves accepting the file as input and replacing the existing key.
1. Introduction
Amazon Web Services (AWS) is a leading cloud computing platform provided by Amazon. It offers a wide range of services, including computing power, storage, databases, machine learning, analytics, and more, enabling businesses to build and deploy scalable and secure applications.
Amazon S3, or Simple Storage Service, is an object storage service that offers scalable storage for a variety of data types. It allows users to store and retrieve any amount of data from anywhere on the web.
1.1 Key Features of Amazon S3
- Scalability: S3 can handle an infinite amount of data and traffic, making it suitable for businesses of any size.
- Durability and Reliability: S3 ensures 99.999999999% (11 9’s) durability of objects over a given year.
- Security: S3 offers robust data security features, including encryption, access control, and multi-factor authentication.
- Versioning: Users can preserve, retrieve, and restore every version of every object in their bucket.
- Flexible Storage Classes: S3 offers various storage classes, including Standard, Intelligent-Tiering, Glacier, and Deep Archive, allowing cost optimization based on usage.
- Highly Available: S3 replicates data across multiple geographically dispersed data centers, ensuring high availability and fault tolerance.
- Easy Management: S3 provides a user-friendly management console and APIs for easy organization, retrieval, and manipulation of data.
1.2 Benefits of Amazon S3
Amazon S3 revolutionizes data storage and retrieval, providing businesses with unparalleled flexibility, security, and cost-efficiency. Its seamless integration with other AWS services makes it an ideal choice for developers, startups, and enterprises seeking reliable and scalable storage solutions.
2. Working Example
To work with S3 programmatically, let’s begin by understanding the prerequisites. First and foremost, you’ll need an AWS account, which can be set up by registering through this link. Once your account is active, create an IAM user with full S3 access privileges and enable CLI credentials. Additionally, prepare two S3 buckets to proceed with the example.
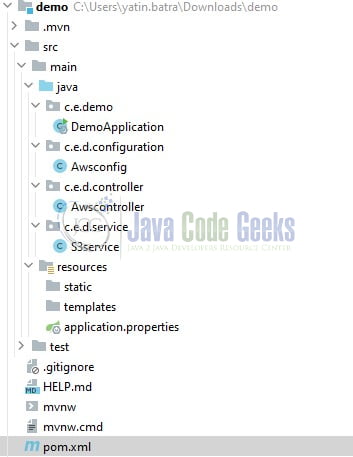
Let’s now explore some practical aspects. For those interested in examining the project structure, please refer to the image below.
2.1 Updating dependencies in pom.xml file
Set up a new Spring Boot project or use an existing one. Include the necessary dependencies in your project’s pom.xml file.
pom.xml
<?xml version="1.0" encoding="UTF-8"?>
<project xmlns:xsi="http://www.w3.org/2001/XMLSchema-instance" xmlns="http://maven.apache.org/POM/4.0.0"
         xsi:schemaLocation="http://maven.apache.org/POM/4.0.0 https://maven.apache.org/xsd/maven-4.0.0.xsd">
    <modelVersion>4.0.0</modelVersion>
    <parent>
        <groupId>org.springframework.boot</groupId>
        <artifactId>spring-boot-starter-parent</artifactId>
        <version>3.1.5</version>
        <relativePath/> <!-- lookup parent from repository -->
    </parent>
    <groupId>com.example</groupId>
    <artifactId>demo</artifactId>
    <version>0.0.1-SNAPSHOT</version>
    <name>demo</name>
    <description>demo</description>
    <properties>
        <java.version>17</java.version>
    </properties>
    <dependencies>
        <dependency>
            <groupId>org.springframework.boot</groupId>
            <artifactId>spring-boot-starter-web</artifactId>
        </dependency>

        <dependency>
            <groupId>com.amazonaws</groupId>
            <artifactId>aws-java-sdk</artifactId>
            <version>1.12.571</version>
        </dependency>

        <dependency>
            <groupId>org.springframework.boot</groupId>
            <artifactId>spring-boot-starter-test</artifactId>
            <scope>test</scope>
        </dependency>
    </dependencies>

    <build>
        <plugins>
            <plugin>
                <groupId>org.springframework.boot</groupId>
                <artifactId>spring-boot-maven-plugin</artifactId>
            </plugin>
        </plugins>
    </build>

</project>
2.2 Configure Application Properties File
Specify the following properties in the application.properties file –
server.port=9030:Specifies that the application will run on port 9030.spring.application.name=springboot-aws-s3:Sets the name of the Spring Boot application as “springboot-aws-s3.”cloud.aws.region.static=YOUR_AWS_BUCKET_REGION:Specifies the AWS region where your S3 bucket is located.cloud.aws.region.credentials.access-key=YOUR_AWS_ACCESS_KEY:Specifies the AWS access key for authentication.cloud.aws.region.credentials.secret-key=YOUR_AWS_SECRET_KEY:Specifies the corresponding secret key associated with the access key.source.bucket-name=YOUR_AWS_SOURCE_BUCKET:Specifies the name of the source S3 bucket that the application will interact with.
application.properties
### spring configuration
server.port=9030
spring.application.name=springboot-aws-s3

### aws configuration
# iam
cloud.aws.region.static=YOUR_AWS_BUCKET_REGION
cloud.aws.region.credentials.access-key=YOUR_AWS_ACCESS_KEY
cloud.aws.region.credentials.secret-key=YOUR_AWS_SECRET_KEY
# s3
source.bucket-name=YOUR_AWS_SOURCE_BUCKET
2.3 Create a AWS Configuration Class
The given class is a Spring configuration class named Awsconfig. It is annotated with @Configuration, indicating that it contains bean definitions and should be processed by the Spring container during component scanning. Inside this class, the AWS access key, secret key, and region are obtained from the application.properties file using the @Value annotation.
The @Bean annotation marks the s3() method, designating it as a bean to be managed by the Spring container. Within this method, an instance of AWSCredentials is created using the retrieved access key and secret key. Then, an AWSStaticCredentialsProvider is initialized with these credentials.
The method further configures an AmazonS3 client using AmazonS3ClientBuilder. It sets the credentials provider to the one created earlier, and the AWS region is specified. The resulting AmazonS3 client is then built and returned as a managed bean. This configuration is essential for establishing a connection with AWS S3 services, allowing the application to interact with the specified S3 bucket securely.
Awsconfig.java
package com.example.demo.config;

import com.amazonaws.auth.AWSCredentials;
import com.amazonaws.auth.AWSStaticCredentialsProvider;
import com.amazonaws.auth.BasicAWSCredentials;
import com.amazonaws.services.s3.AmazonS3;
import com.amazonaws.services.s3.AmazonS3ClientBuilder;
import org.springframework.beans.factory.annotation.Value;
import org.springframework.context.annotation.Bean;
import org.springframework.context.annotation.Configuration;

@Configuration
public class Awsconfig {

    @Value("${cloud.aws.region.credentials.access-key}")
    private String key;

    @Value("${cloud.aws.region.credentials.secret-key}")
    private String secret;

    @Value("${cloud.aws.region.static}")
    private String region;

    @Bean
    public AmazonS3 s3() {
        AWSCredentials credentials = new BasicAWSCredentials(key, secret);

        AWSStaticCredentialsProvider provider = new AWSStaticCredentialsProvider(credentials);

        return AmazonS3ClientBuilder.standard()
                .withCredentials(provider)
                .withRegion(region)
                .build();
    }
}
2.4 Create a Service Class
The S3service class is annotated with @Service, indicating that it’s a Spring service component. It provides methods for managing files within Amazon S3 buckets. The class encapsulates interactions with Amazon S3, utilizing the AmazonS3 client provided by the AWS SDK. Below are the key components of the class explained in detail.
- The
s3field is an instance of the Amazon S3 client injected via the constructor. It represents the connection to the Amazon S3 service. - The
bucketfield is annotated with@Valueand is used to store the name of the S3 bucket. The bucket name is retrieved from the application properties file (source.bucket-nameproperty). uploadObject(String key, MultipartFile file): Validates the specified key using thevalidateKeymethod. If the key exists, it creates custom metadata, constructs aPutObjectRequestwith the file input stream and metadata, and uploads the object to S3 using theputObjectmethod.validateKey(String key): Retrieves a list of keys from the S3 bucket usinglistObjectsV2, then uses Java 8 Stream API to extract the keys and store them in thekeyslist. It checks if the specifiedkeyexists in thekeyslist. If the key is not found, it throws an exception indicating that the key does not exist in the S3 bucket.
S3service.java
package com.example.demo.service;

import com.amazonaws.services.s3.AmazonS3;
import com.amazonaws.services.s3.model.ObjectMetadata;
import com.amazonaws.services.s3.model.PutObjectRequest;
import com.amazonaws.services.s3.model.S3ObjectSummary;
import org.springframework.beans.factory.annotation.Autowired;
import org.springframework.beans.factory.annotation.Value;
import org.springframework.stereotype.Service;
import org.springframework.web.multipart.MultipartFile;

import java.util.List;

@Service
public class S3service {

    private final AmazonS3 s3;

    @Value("${source.bucket-name}")
    private String bucket;

    @Autowired
    public S3service(AmazonS3 amazonS3) {
        this.s3 = amazonS3;
    }

    public String uploadObject(String key, MultipartFile file) throws Exception {
        validateKey(key);

        // create custom metadata
        ObjectMetadata metadata = new ObjectMetadata();
        metadata.addUserMetadata("key1", "value1");
        metadata.addUserMetadata("key2", "value2");

        // create a PutObjectRequest with custom metadata
        PutObjectRequest request = new PutObjectRequest(bucket, key, file.getInputStream(), metadata);

        // Upload the object to S3 with custom metadata
        s3.putObject(request);
        return "done";
    }


    private void validateKey(String key) throws Exception {
        List<String> keys = s3.listObjectsV2(bucket).getObjectSummaries()
                .stream()
                .map(S3ObjectSummary::getKey)
                .toList();

        if (!keys.contains(key)) {
            throw new Exception(key + "_DOES_NOT_EXISTS");
        }
    }
}
2.5 Create a Controller Class
The Awscontroller class is annotated with @RestController, indicating that it’s a Spring REST controller. It exposes several endpoints for performing operations on Amazon S3 buckets. The class relies on the S3service for actual S3 interactions.
- The class has a constructor that injects an instance of
serviceusing Spring’s dependency injection. - The
Awscontrollerclass defines a PUT endpoint (/api/upload) to operate. This endpoint updates the existing object in the S3 bucket. If the file is empty we will simply return.
Awscontroller.java
package com.example.demo.controller;

import com.example.demo.service.S3service;
import org.springframework.beans.factory.annotation.Autowired;
import org.springframework.web.bind.annotation.PutMapping;
import org.springframework.web.bind.annotation.RequestMapping;
import org.springframework.web.bind.annotation.RequestParam;
import org.springframework.web.bind.annotation.RestController;
import org.springframework.web.multipart.MultipartFile;

@RestController
@RequestMapping(value = "/api")
public class Awscontroller {

    private final S3service service;

    @Autowired
    public Awscontroller(S3service s3service) {
        this.service = s3service;
    }

    // curl 'http://localhost:9030/api/upload?key=some-key-name&file=some-file'

    @PutMapping(value = "/upload")
    public String upload(@RequestParam(name = "key") String key, @RequestParam("file") MultipartFile file)
            throws Exception {
        if (file.isEmpty()) {
            return "nothing to upload";
        }

        return service.uploadObject(key, file);
    }
}
2.6 Create Main Class
In this main class, the @SpringBootApplication annotation is used to indicate that this is the main entry point for a Spring Boot application. It enables auto-configuration and component scanning.
The main() method starts the Spring Boot application by calling SpringApplication.run() and passing the main class DemoApplication.class along with any command-line arguments args.
DemoApplication.java
package com.example.demo;

import org.springframework.boot.SpringApplication;
import org.springframework.boot.autoconfigure.SpringBootApplication;

@SpringBootApplication
public class DemoApplication {

    public static void main(String[] args) {
        SpringApplication.run(DemoApplication.class, args);
    }
}
3. Output
Start the Spring boot application by running the DemoApplication.java class from the IDE and open the Postman tool to import the cURL requests. When a cURL request like this is sent to a Spring Boot application endpoint, the Spring controller mapped to the specified URL will handle the incoming request.
cURL requests
curl -X PUT 'https://localhost:9030/upload?key=some_key_name' -F 'file=@"/path/to/file"'
Note – The application will operate on port 9030. Feel free to modify the port number by adjusting the server.port property in the application.properties file.
4. Conclusion
In conclusion, updating an existing Amazon S3 object using Java involves several key steps that developers need to be familiar with. By leveraging the AWS SDK for Java and the AmazonS3 client, developers can connect to their S3 storage, access existing objects, and modify their contents as needed. The process typically includes initializing the S3 client, specifying the bucket name and object key, retrieving the existing object, updating its content, and uploading the updated object back to S3.
Java provides various features and libraries that simplify the interaction with Amazon S3, such as the AmazonS3 client, ObjectMetadata for managing object metadata, and MultipartFile for handling file uploads in web applications. Additionally, Java 8 introduced powerful features like the Stream API, which can be utilized to streamline the code and enhance readability, making it easier to work with collections of S3 objects.
Developers should also pay attention to error handling and exception management while working with S3 operations to ensure the robustness of their applications. Proper exception handling is crucial for identifying and resolving issues related to S3 interactions, ensuring that the application behaves gracefully even in the face of unexpected errors.
5. Download the Project
This tutorial served as a guide to exploring Amazon S3 functionality within a Spring Boot application.
You can download the full source code of this example here: Update an Existing Amazon S3 Object Using Java
