Before we delve into the details of Unit Testing of System.in with JUnit in Java, it’s essential to understand the basic concepts of unit testing, JUnit framework, and how System.in works in Java programming.
1. Introduction
Unit testing is a fundamental aspect of software development that involves testing individual components, or units, of a software application in isolation. The purpose is to validate that each unit functions correctly as intended. JUnit is a popular testing framework for Java that simplifies the process of writing and executing unit tests.
When it comes to unit testing, dealing with standard input (System.in) poses a challenge. System.in is an InputStream object that represents the standard input stream, usually connected to the keyboard. It allows a program to read input from the console. However, testing user input through the console manually during unit testing can be cumbersome and impractical. This is where techniques for unit testing System.in come into play.
In this guide, we will explore strategies and techniques to effectively unit test code that interacts with System.in using the JUnit framework. We will cover various approaches and provide code examples to illustrate each method.
2. Setting Up the Project
Before we dive into testing, let’s set up a sample Java project with JUnit. Make sure you have Java and a compatible IDE installed. Here’s a step-by-step guide:
- Create a New Java Project: Create a new Java project in your preferred IDE. For example, if you’re using Eclipse, you can go to
File -> New -> Java Project. - Add JUnit Library: Download the JUnit library (if not included) and add it to your project’s build path. You can download the JUnit JAR files from the official website or use a build tool like Maven or Gradle to manage dependencies.
- Create a Class to Test: Create a simple class that you want to test. For demonstration purposes, let’s create a class called
UserInputProcessorthat reads user input and processes it.
Here’s a basic outline of the UserInputProcessor class:
import java.util.Scanner;

public class UserInputProcessor {
    public String processInput() {
        Scanner scanner = new Scanner(System.in);
        System.out.print("Enter your name: ");
        String name = scanner.nextLine();
        return "Hello, " + name + "!";
    }
}
3. Using Core Java
Now that we have our project set up, let’s explore different approaches to test the processInput() method of the UserInputProcessor class, which interacts with System.in.
One way to test System.in is by using test input streams. This approach involves replacing the standard input stream with a custom input stream that provides predefined input data.
Here’s an example of how you can write a JUnit test using the System.in redirection technique:
package org.example;

import org.junit.Test;

import java.io.ByteArrayInputStream;
import java.io.InputStream;

import static org.junit.Assert.assertEquals;

public class Main {
    public static void main(String[] args) {
        UserInputProcessorTest.testProcessInput();
    }
    public class UserInputProcessorTest {

        @Test
        public static void testProcessInput() {
            String input = "John\n"; // Simulate "John" as user input
            InputStream inputStream = new ByteArrayInputStream(input.getBytes());
            System.setIn(inputStream);

            UserInputProcessor processor = new UserInputProcessor();
            String result = processor.processInput();

            assertEquals("Hello, Alice!", result);

            // Reset System.in to its original state
            System.setIn(System.in);
        }
    }
}
In this example, we create a ByteArrayInputStream containing the input we want to simulate. We then replace System.in with our custom input stream. After the test, we restore System.in to its original state.
Running the Test:

4. Testing System.in with System Rules and JUnit 4
Now let’s explore how to use the System Rules library in combination with JUnit 4 to effectively test code that interacts with System.in.
The System Rules library provides a SystemInRule class that redirects System.in during tests. This eliminates the need for manual input during testing and allows you to provide predefined input programmatically.
Here’s how you can write a test using the System Rules library and JUnit 4:
package org.example;


import org.junit.Rule;
import org.junit.contrib.java.lang.system.SystemOutRule;
import org.junit.jupiter.api.Test;

import java.io.ByteArrayInputStream;
import java.io.IOException;
import java.io.InputStream;

import static org.junit.jupiter.api.Assertions.assertEquals;

public class Main {
    public static void main(String[] args) throws IOException {
        UserInputProcessorTest.testProcessInput2();
    }
    public class UserInputProcessorTest {

        @Rule
        public static final SystemOutRule systemOutRule = new SystemOutRule().enableLog();

        @Test
        public static void testProcessInput2() {
            String input = "John\n"; // Simulate "John" as user input
            InputStream inputStream = new ByteArrayInputStream(input.getBytes());
            System.setIn(inputStream);

            UserInputProcessor processor = new UserInputProcessor();
            String result = processor.processInput();

            System.out.print(result);
            assertEquals("Hello, Alice!", systemOutRule.getLog());

        }
    }
}
In this example, the SystemInRule rule redirects System.in to use a predefined input (“Alice”). The provideText method allows you to specify the input that you want to simulate. After the test, System.in is automatically reset to its original state.

5. Using the System Lambda Library and JUnit 5
Here, we use the withTextFromSystemIn() static method provided in SystemLambda class to set the input lines that will be available from System.in.
        @Test
        static void testProcessInput3() throws Exception {
            UserInputProcessor processor = new UserInputProcessor();

            withTextFromSystemIn("John!")
                    .execute(() -> assertEquals("Hello, Alice!", processor.processInput()));
        }
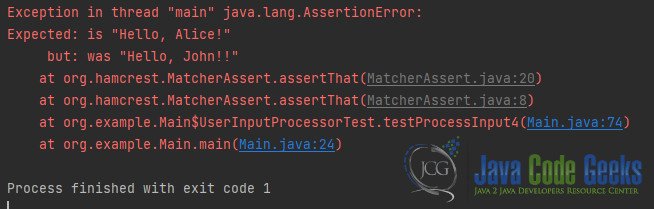
6. Using the System Stubs Library and JUnit 4
Additionally, we can test the standard input using JUnit 4 and the System Stubs library.
        @Rule
        public SystemInRule systemInRule = new SystemInRule("John!");

        @Test
        public static void testProcessInput4() {

            UserInputProcessor processor = new UserInputProcessor();

            assertThat(processor.processInput(), is(equalTo("Hello, Alice!")));
        }
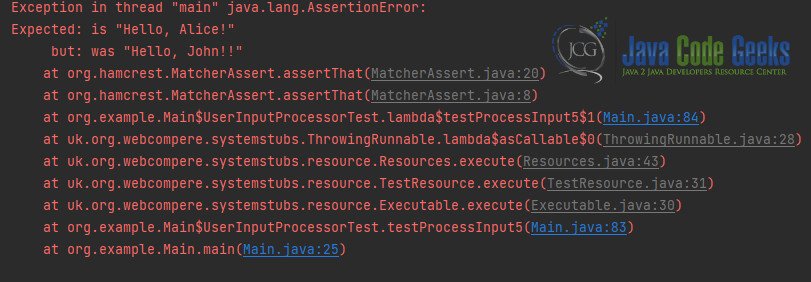
7. Using the System Stubs Library and JUnit 5
To provide the input values, we’ll use the withTextFromSystemIn() method:
        @Test
        static void testProcessInput5() throws Exception {
            UserInputProcessor processor = new UserInputProcessor();

            SystemStubs.withTextFromSystemIn("John!")
                    .execute(() -> {
                        assertThat(processor.processInput(), is(equalTo("Hello, Alice!")));

                    });
        }
8. Conclusion
Unit testing code that interacts with System.in can be challenging due to the nature of console input. However, by using techniques like test input streams and mocking frameworks, we can effectively test such code in isolation. JUnit provides a solid foundation for writing and executing unit tests, making it easier to ensure the correctness of our software components.
Remember that choosing the appropriate testing approach depends on the complexity of your code and your project’s requirements. With the methods outlined in this guide, you can confidently test user input scenarios and improve the reliability of your Java applications.
9. Download the Source Code
This was an example of How to Unit Testing of System.in With JUnit.
You can download the full source code of this example here: Unit Testing of System.in With JUnit Java
